Category: Kitchen

  • 14 Kitschy Kitchen Inspo Ideas That’ll Make Your Kitchen the Most Fun Room in the House

    14 Kitschy Kitchen Inspo Ideas That’ll Make Your Kitchen the Most Fun Room in the House

    I’ve spent way too many hours scrolling through kitchen photos, and I think I’ve finally cracked the code on what makes kitschy kitchen decor actually work instead of looking like a garage sale exploded. This guide on 14 Kitschy Kitchen Inspo ideas is going to walk you through exactly what to do, room by room, detail by detail, so you don’t waste money on stuff that ends up feeling cluttered instead of charming.

    Kitschy kitchen decor is a design style that mixes vintage items, bold colors, playful patterns, and quirky collectibles to create a cheerful, personality-packed cooking space. It leans on nostalgia, humor, and maximalism rather than minimalism or neutral tones.

    Stick around, because I’m about to show you the exact pieces, colors, and layout tricks that turn a boring kitchen into one people actually want to hang out in.

    What Even Is a Kitschy Kitchen, Anyway?

    Okay so let’s talk about this for a sec. Kitschy doesn’t mean messy or cheap looking. It means fun on purpose. Think cherry-print wallpaper, a chunky vintage toaster in mint green, or a wall of mismatched plates that somehow look intentional together. The whole point is that your kitchen feels like it has a personality, not like it came straight out of a catalog. I like to think of kitschy style as the opposite of “safe.” You’re allowed to love something weird and put it on your counter. Nobody’s stopping you.

    1. Hang a Wall of Mismatched Vintage Plates

    How to Style a Plate Wall Like a Designer
    Credit: Housebeautiful

    Grab plates from thrift stores, flea markets, or your grandma’s cabinet and hang them in a cluster on one wall. Mix patterns, colors, and eras. The trick is variety on purpose, not matching sets.

    Pick a focal wall near your dining table or above open shelving so the display gets noticed. Use plate hangers (the little wire kind) so you don’t damage the china.

    Actionable tip: Start with an odd number of plates, like 7 or 9, since odd groupings look more balanced on a wall than even ones.

    This idea works in cottage kitchens, farmhouse spaces, and even modern kitchens if you keep the plates in one tight color family. Once your walls are covered in personality, it’s time to bring that same energy down to your countertops.

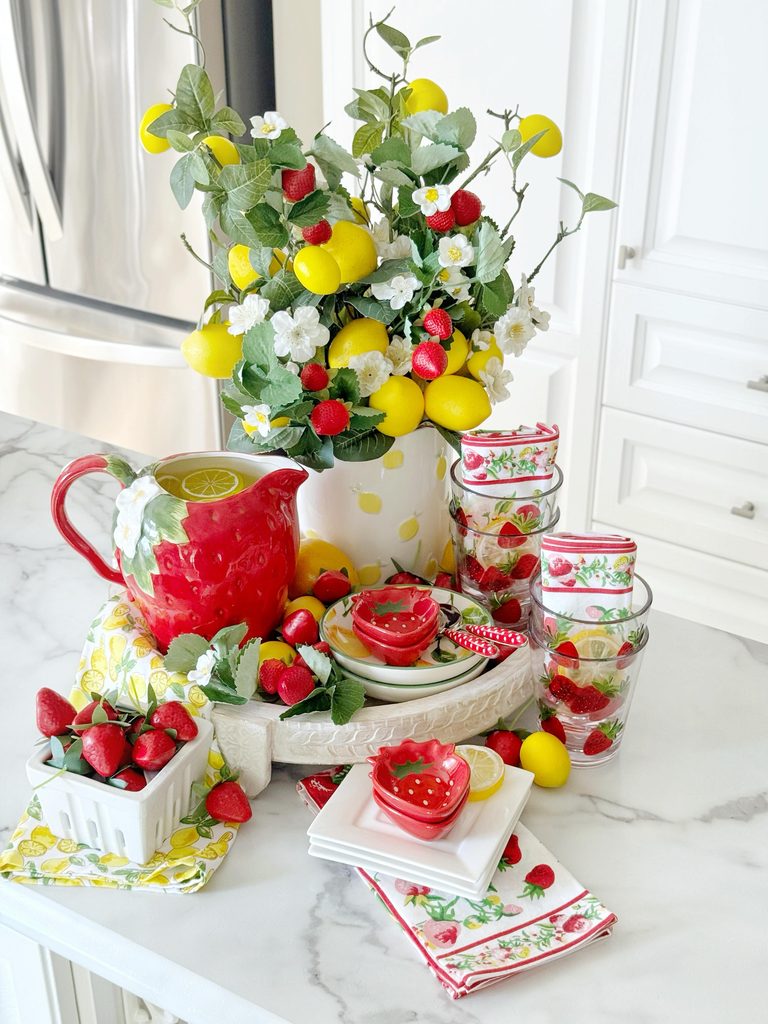
    2. Bring In a Cherry or Strawberry Print Everywhere
    Credit: dining_delight

    Fruit prints are having a huge moment, and cherries especially scream kitschy. Put them on dish towels, curtains, an accent rug, or even a small bistro tablecloth.

    Keep the rest of your kitchen fairly simple, white cabinets or light wood, so the fruit print pops instead of competing with other patterns.

    Actionable tip: Buy one statement piece first, like curtains, and build the rest of the kitchen around that print so it doesn’t feel random.

    Coastal kitchens can lean into citrus prints instead, while farmhouse kitchens do well with apple or strawberry motifs.

    Speaking of building a look around one piece, appliances are another great place to start your color story.

    3. Go Bold With a Colorful Retro Fridge or Stove

    25 Ideas To Give Your Kitchen A Retro Feel - DigsDigs
    Credit: Digsdigs

    A pastel pink refrigerator or a mint green stove instantly makes a kitchen feel kitschy without you doing anything else. These retro-style appliances are made new but styled old, so you get modern function with vintage looks.

    Choose one big appliance in a bold color and keep the rest of your appliances neutral (stainless or white) so the room doesn’t feel too busy.

    Actionable tip: If a full retro appliance is out of budget, look for appliance decals or magnetic covers that mimic the look for way less money.

    Modern farmhouse kitchens love a colorful range as the centerpiece, while mid-century kitchens often go with a retro-colored fridge instead.

    Retro Appliance Color Guide

    ColorBest Paired WithStyle Vibe
    Mint GreenWhite cabinets, black trim1950s diner
    Pastel PinkCream cabinets, gold hardwareSweet vintage
    Cherry RedBlack and white checkered floorClassic Americana
    Butter YellowSage green wallsCheerful farmhouse
    Sky BlueWhite subway tileSoft retro coastal

    Now that your big appliances are setting the tone, let’s talk about what goes on your walls next.

    4. Add Novelty Wallpaper in a Small Dose

    10 kitchen wallpaper decor ideas to spruce up your space | Ideal Home
    Credit: Ideal Home

    Full-room novelty wallpaper (think rooster prints, banana patterns, or vintage diner scenes) can be a lot. Instead, wallpaper just one wall, the inside of open shelves, or even the back of your pantry door.

    This lets you commit to a fun print without feeling like you’re trapped inside it. Peel-and-stick wallpaper makes this super low-risk too, since you can swap it out later.

    Actionable tip: Wallpaper the inside back panel of a glass-front cabinet for a surprise pop of pattern every time you open the door.

    Traditional kitchens do well with toile or floral novelty prints, while eclectic kitchens can go wild with pop art or cartoon-style paper.

    Once your walls have some personality, your open shelves are the next spot begging for some kitschy flair.

    5. Style Open Shelves With Collectible Kitchenware

    30 Best Open Shelving Kitchen Ideas for Your Home
    Credit Thepioneerwoman

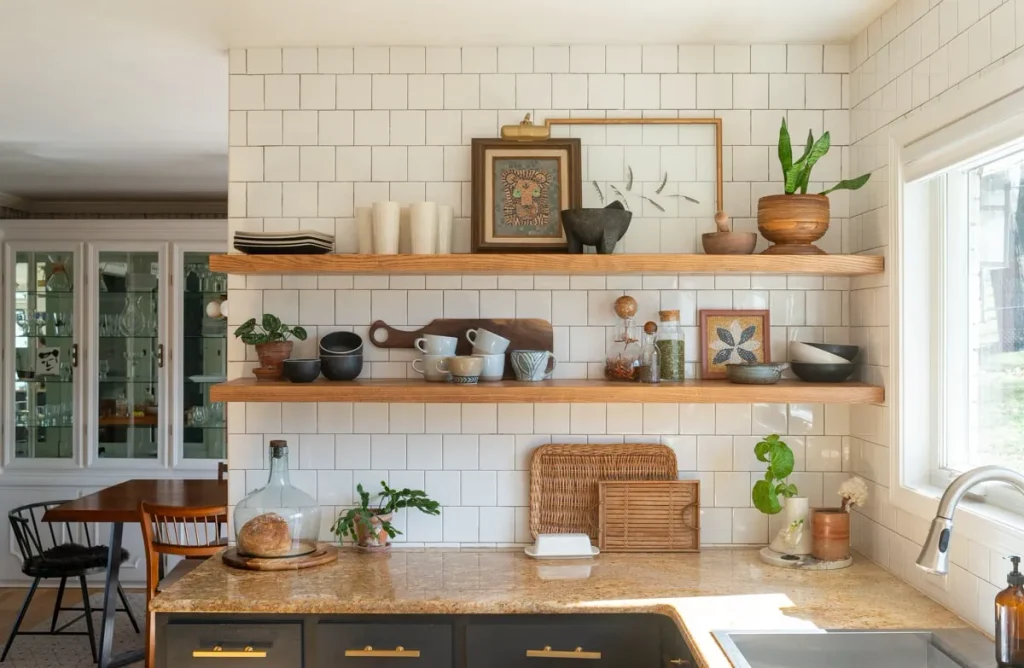
    Open shelving is basically a free gallery wall for your dishes. Fill it with colorful Pyrex, vintage cookie jars, or a collection of quirky salt and pepper shakers.

    Group items by color instead of by type. This makes even a random mix of stuff look curated and planned.

    Actionable tip: Leave a little breathing room between groupings so the shelf doesn’t look overstuffed. Odd numbers again work best here too.

    This idea flexes easily. Boho kitchens can add plants and woven baskets between items, while grandmillennial kitchens can add fine china and teacups instead.

    Shelving sets the stage, but lighting is what makes your collectibles actually shine at night.

    6. Swap Boring Light Fixtures for Statement Pendants

    26 Kitchen Lighting Ideas That Make a Statement
    Credit: Bhg

    A single quirky pendant light, think a colored glass globe or a fringed shade, can change the whole mood of your kitchen. Lighting is one of the cheapest ways to add personality because you’re only replacing one fixture, not redoing a whole wall.

    Hang pendants over your island or sink at about 30 to 36 inches above the counter for the best mix of light and style.

    Actionable tip: Buy a pendant in a saturated color like amber or teal rather than clear glass, since color reads more kitschy from across the room.

    Mid-century kitchens love a starburst-style pendant, while cottage kitchens do better with a ruffled fabric shade.

    Lighting handles the mood, but your table linens handle the everyday charm.

    7. Layer On Vintage-Inspired Tablecloths and Runners

    Patterned Table Linens | ALLORA
    Credit: allorashop

    A checkered or floral vintage tablecloth on your kitchen table adds instant charm and it’s one of the easiest swaps you can make. Rotate them seasonally so your kitchen always feels a little fresh.

    Pick tablecloths in cotton or linen since they hold color better and feel more “old-school” than synthetic blends.

    Actionable tip: Layer a solid-colored runner over a printed tablecloth for extra texture without adding a third competing pattern.

    Farmhouse kitchens love gingham, cottagecore kitchens love floral, and mid-century kitchens do best with geometric prints.

    Your table is set, so now let’s talk about the small stuff that lives on your counters every single day.

    8. Collect Quirky Salt and Pepper Shakers as Decor

    I Didn't Even Know I *Had* A Salt & Pepper Collection - The Art of Doing Stuff
    Credit: Theartofdoingstuff

    This one’s a classic kitschy move. Little ceramic shakers shaped like mushrooms, fruit, or cartoon characters aren’t just functional, they’re conversation starters. Cluster a few sets on your counter, windowsill, or open shelf.

    Actionable tip: Thrift stores are goldmines for these. Check estate sales too, since a lot of vintage sets show up there for a few bucks a pair.

    This works in literally every kitchen style because the shakers are small enough to not overwhelm the room, whether your base style is modern, farmhouse, or traditional.

    Small collectibles are fun, but sometimes you want one big, unmissable piece too.

    Budget Breakdown for Kitschy Kitchen Decor

    Budget TierWhat You Can GetExample Items
    Under $50Small accentsSalt and pepper shakers, dish towels, magnets
    $50 to $200Mid-size upgradesPendant light, wallpaper for one wall, curtains
    $200 to $600Statement piecesVintage-style small appliance, plate wall set
    $600 and upBig transformationsRetro fridge or stove, custom cabinet color

    With your budget mapped out, let’s move on to one of the boldest choices you’ll make: your cabinet color.

    9. Paint Cabinets in an Unexpected Color

    15 Best Painted Kitchen Cabinets - Ideas for Transforming Your Kitchen with Color
    Credit; Elle Decor

    White and gray cabinets are safe, but kitschy kitchens go for color. Think butter yellow, dusty rose, or sage green. A painted cabinet color is one of the biggest style decisions in the whole room, so it’s worth taking time to pick right.

    Actionable tip: Paint just your lower cabinets a bold color and keep uppers white or a lighter shade. This keeps the room from feeling too heavy or dark.

    Cottage and cottagecore kitchens love pastel colors, while eclectic kitchens can go for something punchier like a deep teal or burnt orange.

    Cabinets set your color base, and hardware is the detail that ties it all together.

    10. Use Quirky, Mismatched Cabinet Hardware

    How to Get Your Kitchen Cabinet Hardware Right | Houzz
    Credit; Houzz

    Instead of one uniform knob style, mix things up. Use different shaped pulls, colors, or even vintage glass knobs collected over time. This tiny detail adds a surprising amount of personality for very little money.

    Actionable tip: If mixing feels risky, stick to one metal finish (like brass) but vary the shapes so there’s still a common thread holding it together.

    Modern kitchens can do this subtly with just two alternating knob styles, while maximalist kitchens can go fully random with five or six different styles.

    Now that your cabinets are dressed up, let’s give your floor a little kitschy love too.

    11. Install a Checkered or Patterned Floor

    30 Kitchens With Checkered Floors
    Credit: Houzz

    A black and white checkered floor is basically the unofficial uniform of kitschy kitchens. If full flooring replacement isn’t in the budget, peel-and-stick floor tiles or a patterned area rug can fake the look pretty convincingly.

    Actionable tip: If you’re renting, a large vinyl floor mat with a checkered or retro print gives you the look without any permanent changes.

    Diner-style and mid-century kitchens go all in on black and white checks, while cottage kitchens often prefer a soft floral or trellis pattern instead.

    Once your floor has some pattern, curtains are the next easy win.

    12. Hang Ruffled or Café-Style Curtains

    Cafe Curtains Are Back! Here's How to Get Them Right
    Credit: Countryliving

    Curtains with ruffled edges or a short café-style cut (covering just the bottom half of the window) bring instant vintage charm. Pick a fun print, gingham, cherries, polka dots, whatever fits your color scheme.

    Actionable tip: Café curtains are great for kitchens because they let light in up top while still giving you privacy and pattern down low.

    Farmhouse kitchens love simple gingham cafe curtains, while grandmillennial kitchens go for floral ruffles with a scalloped edge.

    With your windows dressed, let’s talk about the walls one more time, but from a totally different angle.

    13. Display a Collection of Vintage Tins and Advertising Signs

    11 Vintage Christmas Kitchen Decor Ideas Full of Holiday Charm
    Credit: Countryliving

    Old cookie tins, spice tins, or reproduction advertising signs (soda brands, bakery logos, that kind of thing) add instant nostalgic charm. Line them up on top of your cabinets or group a few on an open shelf.

    Actionable tip: Stick to one color family across your tins so the collection reads as intentional instead of cluttered.

    This idea suits almost every kitschy style, though mid-century kitchens tend to favor soda and diner branding while farmhouse kitchens lean toward flour and sugar tin designs.

    Last but definitely not least, let’s talk about the small appliance that can single-handedly make your counter feel kitschy.

    14. Bring In a Colorful Small Appliance as a Counter Star

    How to style colorful kitchen appliances | Real Homes
    Credit: Real Home

    A stand mixer, toaster, or kettle in a bold retro color (think cherry red or robin’s egg blue) becomes an instant focal point on your counter. You don’t need to redo your whole kitchen. One great appliance does a lot of heavy lifting.

    Actionable tip: Match your appliance color to one accent already in the room, like your curtains or a cluster of dishware, so it feels connected instead of random.

    Every style can pull this off, from modern to farmhouse, since a single colorful appliance reads as a deliberate accent no matter what’s around it.

    Tips for Success

    • Pick one main color palette first, then build your kitschy pieces around it so the room doesn’t feel chaotic.
    • Start small with items like dish towels or shakers before committing to big purchases like appliances or wallpaper.
    • Shop secondhand first. Thrift stores, flea markets, and estate sales have way better prices than reproduction pieces.
    • Leave some blank space on walls and counters so the eye has somewhere to rest between busy spots.
    • Repeat at least one color or pattern in three different spots in the room to tie everything together visually.
    • Take a photo of your kitchen before buying more decor. It’s easier to spot clutter in a photo than in person.
    • Rotate smaller decor items seasonally so the space feels fresh without needing new big purchases.

    Common Mistakes and How to Avoid Them

    Too many patterns at once
    : Pick one dominant print and let everything else be a supporting solid color instead of competing patterns.

    Matching everything perfectly
    : Kitschy style thrives on a curated mismatch. Aim for a shared color thread instead of exact matching sets.

    Ignoring your kitchen’s existing bones
    : Work with your current cabinet layout and counter color instead of fighting against it with clashing choices.

    Overcrowding every surface
    : Group collectibles together and leave breathing room elsewhere so the space feels playful, not chaotic.

    Skipping a color plan
    : Choose two or three main colors before shopping so your kitschy pieces feel connected instead of random.

    Going too trendy too fast
    : Base pieces (appliances, cabinets) should feel timeless-ish since these are the priciest to change later.

    Similar Variations

    • Cottagecore Kitchen: Soft florals, gingham, and a cozy, homemade feel with lots of natural wood.
    • Mid-Century Kitschy Kitchen: Bold geometric patterns, starburst lighting, and pastel appliances from the 50s and 60s era.
    • Farmhouse Kitschy Kitchen: Rustic wood tones mixed with playful vintage tins and gingham textiles.
    • Grandmillennial Kitchen: Traditional florals and fine china paired with a modern, youthful color twist.
    • Diner-Style Kitchen: Black and white checkered floors, chrome accents, and bold red or teal color pops.
    • Maximalist Boho Kitchen: Layered patterns, plants, and a mix of global and vintage collectibles displayed together.

    Putting together a kitschy kitchen really just comes down to picking pieces that make you smile and giving them a little bit of structure so the room still feels put together. Start small, thrift when you can, and don’t be afraid to let your personality take over one shelf at a time. That’s really the heart of these 14 Kitschy Kitchen Inspo ideas: a kitchen that feels like you, not like a showroom.
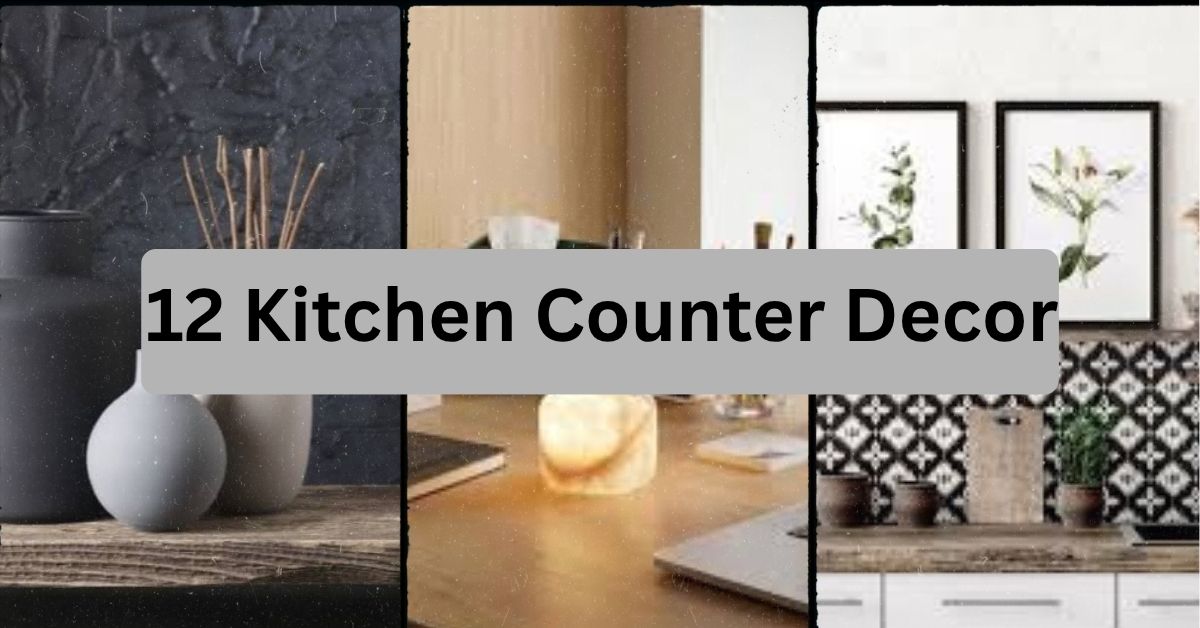
  • 12 Kitchen Counter Decor Ideas That Actually Work in Real Homes

    12 Kitchen Counter Decor Ideas That Actually Work in Real Homes

    I’ve tested more kitchen counter decor ideas than I can count, and this list is the one I wish someone had handed me years ago. Every idea here is something I’ve either tried myself or seen work in real, lived-in kitchens, not just staged photos. So if you’re staring at your counters right now feeling stuck, you’re in the right spot.

    Kitchen counter decor refers to the small decorative and functional items placed on countertops, such as bowls, trays, plants, and canisters, arranged to add style without blocking daily cooking tasks. The goal is balance between form and function.

    Stick around, because I’m going to walk you through a dozen ways to make your counters look pulled-together, plus a few mistakes that trip up almost everyone.

    What Kitchen Counter Decor Really Means

    Okay, real talk. Kitchen counter decor isn’t about turning your kitchen into a magazine spread. It’s about picking a few good-looking, useful things and giving them a spot to live. That’s it. Your counters get used every single day, so whatever you put there needs to earn its place. I think of it like accessorizing an outfit. You don’t wear every piece of jewelry you own at once. You pick a few pieces that work together. Same idea here. A cutting board leaning against the backsplash, a bowl of lemons, a little plant. Small stuff, big impact.

    1. Anchor One Zone With a Wooden Cutting Board Display

    Cutting Board With Anchor Anchor Name Medium 15-inch Wood Cutting Board
    Credit: Prestige

    Lean a couple of wooden cutting boards against your backsplash or a wall near the stove. Pick boards in different sizes but similar wood tones so they look like a set even if they’re not. This works because it’s decor that’s also a tool you use weekly.

    Practical tip: choose one large board and one small board, then stagger them so the smaller one sits slightly in front.

    This idea flexes easily. Farmhouse kitchens love a thick, rustic board. Modern kitchens look great with a slim, dark walnut one. Coastal spaces do well with lighter, bleached wood.

    Once you’ve got your board display anchored, it’s time to bring in something with a little life to it.

    2. Add a Low-Maintenance Plant for Instant Warmth

    Easy Low-Maintenance Houseplants | Yard and Garden
    credit: Yard & Garden

    A plant on the counter softens all the hard edges of tile, stone, and metal. I always tell people to skip anything fussy. Pick something that survives kitchen humidity and occasional neglect, like a pothos, snake plant, or a small herb pot of basil.

    Actionable tip: keep the plant away from the stove so heat and grease don’t shorten its life.

    Plants adapt to any style. A trailing pothos in a woven basket feels boho. The same plant in a matte black pot feels modern. Traditional kitchens do well with a classic terracotta pot.

    Now that you’ve got some greenery going, let’s talk about giving your fruit a proper stage instead of just tossing it in a bag on the counter.

    3. Style a Fruit Bowl That Doubles as Color Pop

    We are LOVING how colorful this bowl turned out! 🌈🍓🥝🫐, The best part about building your bowl is creating the perfect fruit combo! 😍 What’s your go-to fruit combination and favorite colors to add to ...
    Credit: instagram

    A bowl of fruit is one of the oldest decor tricks in the book, and it still works because it’s real, it’s useful, and it adds color without trying too hard. Go for a bowl with some texture or shape interest, like a wide ceramic bowl or a woven basket. Skip anything too shallow or your fruit rolls everywhere.

    Practical tip: rotate what fruit you use with the seasons, oranges and pomegranates in fall, lemons and limes in summer.

    Modern kitchens look sharp with a stark white or black bowl. Traditional spaces love a patterned ceramic piece. Coastal kitchens go for a light rattan basket.

    Speaking of texture, let’s move into something that brings height and structure to a flat counter.

    4. Use a Cake Stand or Tiered Tray for Height Variation

    Creative Uses for Your Cake Stand – ellementry
    Credit: Ellementry

    Flat counters get boring fast. A cake stand, even without cake on it, adds height and breaks up the visual line. Use it to hold fruit, small plants, or even folded kitchen towels. Tiered trays work the same way but give you more surface area in a smaller footprint.

    Actionable tip: place taller decor items like a cake stand near the back of the counter, not the front edge, so they don’t feel like they’re in your way while cooking.

    Farmhouse kitchens love a distressed white cake stand. Modern kitchens do better with a sleek marble one. Traditional homes might go for brass or glass.

    Counter Decor Height Guide by Item Type

    Item TypeTypical HeightBest Placement
    Cutting board display8-14 inchesAgainst backsplash
    Small potted plant4-8 inchesCorner zones
    Fruit bowl5-7 inchesCenter of counter
    Cake stand6-12 inchesBack edge, away from workspace
    Canister set8-12 inchesNear stove or coffee station
    Vase with stems10-18 inchesAway from cooking zone

    Once your height variation is sorted, you’ll want to think about grouping smaller items so they don’t look scattered.

    5. Group Canisters in Odd Numbers for a Curated Look

    Why Grouping In Odd Numbers Works So Well In Home Decor
    Credit: Organise My House

    Canisters for flour, sugar, coffee, or pasta are functional, but they can also look really pulled together if you group them right. The trick is odd numbers, three canisters look more intentional than two or four.

    Practical tip: match the lids even if the canister bodies differ slightly in shape, it creates visual unity without needing a matched set.

    Modern kitchens lean toward glass canisters with black lids. Farmhouse styles love ceramic crocks with wood lids. Coastal kitchens might pick woven or light-colored options.

    Now let’s bring in something that smells as good as it looks.

    6. Add a Small Vase With Fresh or Dried Stems

    8 Crafty Ideas To Make The Most Of Dried Flowers
    Credit: Country Living Magazine

    A little vase with eucalyptus, dried wheat, or even fresh flowers from the grocery store adds softness to all the hard surfaces in a kitchen. It doesn’t need to be big. A bud vase with one or two stems does the job.

    Actionable tip: dried stems last for months and need zero maintenance, which makes them perfect for busy kitchens.

    Traditional kitchens look great with a classic glass vase and fresh florals. Modern spaces do well with a single stem in a sculptural ceramic vase. Boho kitchens love dried pampas grass.

    With some greenery and color handled, let’s talk about how lighting on your counter can change everything.

    7. Bring in a Small Table Lamp for Warm Ambient Light

    How to Choose a Small Table Lamp That Makes Your Space Feel Warmer
    Credit: Auge Light

    This one surprises people, but a small lamp on your counter, especially near a coffee station, adds warmth that overhead lighting just can’t match. It’s especially nice at night when you don’t want the harsh glare of ceiling lights.

    Practical tip: choose a lamp with a warm bulb, around 2700K, so it feels cozy instead of clinical.

    Farmhouse kitchens love a rustic ceramic lamp base. Modern kitchens do well with a simple black or brass minimalist design. Coastal spaces might choose a rattan-based lamp.

    Lighting sets a mood, but trays help keep everything organized so the mood doesn’t turn into clutter.

    8. Corral Small Items With a Decorative Tray

    The Pioneer Woman by Corelle 4-Piece Appetizer Plate Set, Evie, Blue - Walmart.com
    Credit: Wallmart

    A tray might be the single most underrated decor tool for kitchen counters. It takes a scattered mess of salt, pepper, olive oil, and hand soap and turns it into a styled little vignette. The tray creates a visual boundary so your eye reads it as one grouped item instead of five random things.

    Actionable tip: pick a tray with a lip or edge so items don’t slide off when you wipe the counter.

    Modern kitchens do well with a matte black or marble tray. Traditional kitchens love a wood tray with brass handles. Coastal kitchens might use a woven seagrass tray.

    Budget Tiers for Kitchen Counter Decor

    Budget LevelWhat You GetExample Items
    Under $50Basic essentialsFruit bowl, small plant, tray
    $50-150Mid-range upgradesCeramic canister set, table lamp, cutting boards
    $150-300Statement piecesMarble cake stand, designer vase, brass accents
    $300+High-end curated lookCustom canister sets, artisan trays, imported ceramics

    With your small items corralled, let’s zoom out and talk about the wall space right above your counter.

    9. Lean Art or a Small Print Against the Backsplash

    Art for Kitchen Walls: Styles, Tips & Ideas
    Credit: About Wall Art

    Nobody thinks about art on kitchen counters, but leaning a small framed print against the backsplash adds personality fast. It doesn’t need nails or hooks. Just prop it up like you would on a bookshelf.

    Practical tip: pick a print with kitchen-friendly themes, like botanical illustrations or simple line art, so it feels intentional and not random.

    Modern kitchens look sharp with black and white photography. Farmhouse spaces love vintage-style prints. Traditional kitchens might choose classic still-life paintings.

    Once your wall space has a little personality, it’s time to think about scent.

    10. Style a Simple Soap and Lotion Station

    Soap & Lotion 2-Piece Soap Dish Set | Elegant and Functional Bathroom Arrangement – Berthe
    Credit: Berthe London

    Since you’re washing your hands constantly in the kitchen, why not make that spot look nice too? A matching soap dispenser and hand lotion in glass bottles looks so much better than the plastic bottles they came in.

    Actionable tip: buy a refillable glass pump dispenser and just top it off from the big plastic bottle under the sink. Cheap trick, big visual upgrade.

    Coastal kitchens love a blue glass dispenser. Modern kitchens go for matte black or white. Farmhouse spaces might pick amber glass with a wood pump top.

    Now, let’s talk about something a little more personal, like a cookbook display.

    11. Prop Up a Cookbook or Two as Functional Decor

    These 23 Kitchen Cookbook Display Ideas Will Make Your Kitchen Feel Twice as Organized This Season
    Credit: The Coolist

    A stack of two or three cookbooks, or a single one propped open on a stand, tells a little story about who you are. It’s decor that actually gets used, which is my favorite kind.

    Practical tip: pick cookbooks with pretty spines or covers since they’ll be on display, not just tucked in a drawer.

    Traditional kitchens love a stack of classic cookbooks tied with twine. Modern kitchens might prop just one sleek cookbook on a stand. Farmhouse spaces do well with well-worn, vintage-looking books.

    Last but not least, let’s finish with something that ties every single idea together.

    12. Use a Consistent Color Thread to Tie Everything Together

    Marie Flanigan on how to weave a thread through your kitchen | Homes and Gardens
    Credit: Homes & gardens

    This is the idea that makes all the others actually work. Pick two or three colors and repeat them across your canisters, tray, vase, and bowl. Without this thread, even great individual pieces can look like a jumbled mess.

    Actionable tip: choose one neutral (white, black, or wood tone) and one accent color, then repeat that accent in at least two more items on the counter.

    Coastal kitchens might repeat blues and whites. Modern kitchens stick to black, white, and one metal tone. Farmhouse kitchens often repeat cream, wood, and a touch of sage green.

    Tips for Success

    • Always leave at least one clear counter zone for actual food prep, decor should never fully take over your workspace.
    • Dust and wipe decor items weekly since kitchen grease travels farther than you think.
    • Swap seasonal items like fruit or florals every few weeks to keep things looking fresh instead of stale.
    • Measure your counter depth before buying trays or cutting boards so nothing hangs over the edge.
    • Stick to a max of five to seven decor items per zone so it doesn’t feel cluttered.
    • Choose decor that can survive splashes and heat, since kitchens are rarely gentle environments.
    • Repeat materials, like wood or ceramic, across at least two items to keep things looking cohesive.

    Common Mistakes and How to Avoid Them

    Overcrowding the counter
    : Fix this by picking a hero item per zone and removing anything that doesn’t serve a visual or functional purpose.

    Ignoring scale
    : Fix this by mixing item heights, tall vase, medium bowl, short tray, so nothing feels flat or uniform.

    Using purely decorative items with zero function
    : Fix this by choosing pieces that double as tools, like a pretty soap dispenser or a usable cutting board.

    Mismatched materials with no unifying thread
    : Fix this by picking one consistent material or color family and repeating it across at least three items.

    Placing decor in the actual work triangle
    : Fix this by keeping stove, sink, and prep zones completely clear and reserving decor for corners and dead space.

    Forgetting maintenance
    : Fix this by choosing low-upkeep plants and wipeable materials instead of anything delicate or hard to clean.

    Similar Variations

    • Coastal Kitchen Counter Styling: Light woods, woven textures, and blue and white accents for a beachy feel.
    • Farmhouse Counter Decor: Distressed wood, ceramic crocks, and vintage-inspired accessories.
    • Minimalist Counter Styling: Just two or three sleek items in neutral tones with lots of open space.
    • Boho Kitchen Counter Decor: Woven baskets, dried florals, and warm earthy tones layered together.
    • Industrial Counter Styling: Black metal accents, exposed wood, and matte finishes for an edgy look.
    • Traditional Counter Decor: Classic ceramic pieces, brass details, and a more formal, symmetrical arrangement.

    Getting your counters right isn’t about buying a ton of stuff. It’s about picking a handful of pieces that actually work for your life and arranging them with a little intention. Start small, maybe just a bowl and a plant, then build from there as you figure out what you actually use and love. That’s really the whole secret behind good 12 Kitchen Counter Decor styling.

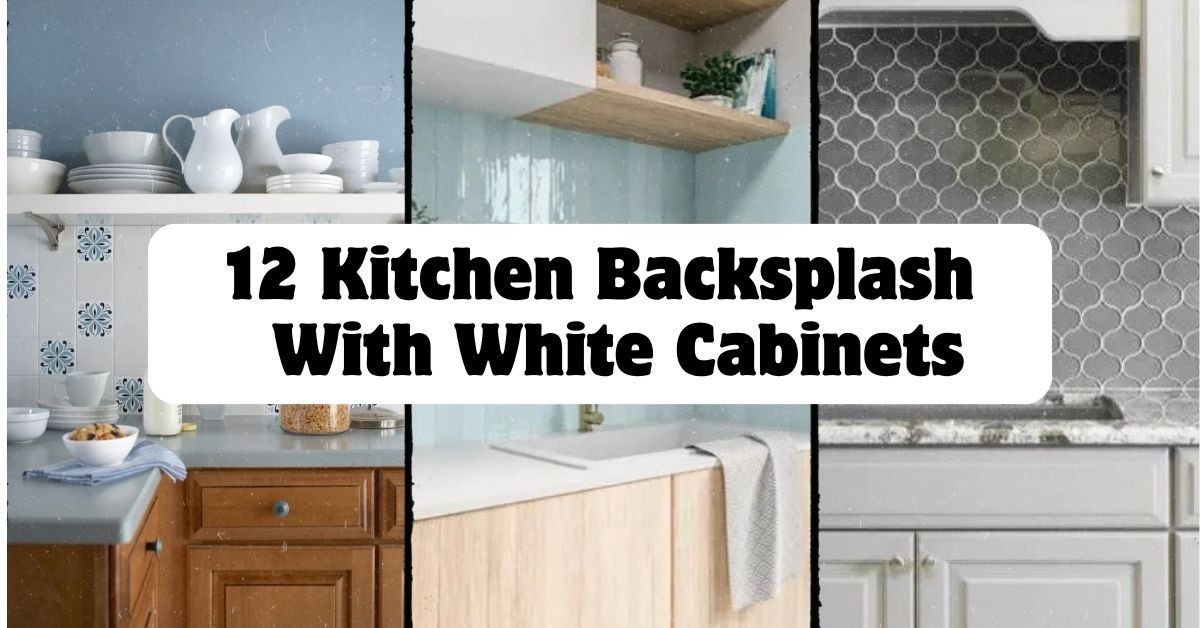
  • 12 Kitchen Backsplash With White Cabinets

    12 Kitchen Backsplash With White Cabinets

    If you’re hunting for the best 12 kitchen backsplash with white cabinets ideas, you’ve landed in the right spot. I’ve put together a list that covers every style, budget, and taste so you don’t have to scroll through a hundred confusing sites to find what actually works.

    A kitchen backsplash with white cabinets is a tile or material application installed behind countertops and sinks, chosen to pair with white cabinetry for contrast, texture, or color. Popular options include subway tile, marble, colorful mosaics, and natural stone, each creating a different mood in the kitchen.

    Stick around because I’m about to walk you through twelve ideas, a few handy tables, and some real talk about mistakes people make way too often.

    Why White Cabinets and Backsplashes Go Together So Well

    Here’s the thing about white cabinets. They’re like a blank canvas. You can throw almost any backsplash at them and it works. I’ve seen white kitchens with black backsplashes that look moody and cool. I’ve seen the same white cabinets paired with soft blue tile that feels like a beach cottage. That’s the magic of white. It doesn’t fight with your other choices, it just makes them pop harder.

    White cabinets also bounce light around the room, so your backsplash choice can either boost that brightness or add a little contrast and depth. Either way, you’re not stuck. That’s why this combo is so popular in kitchens across the country, from tiny apartment galleys to big farmhouse layouts.

    1. Classic White Subway Tile for a Timeless Look

    Credit: Backsplash

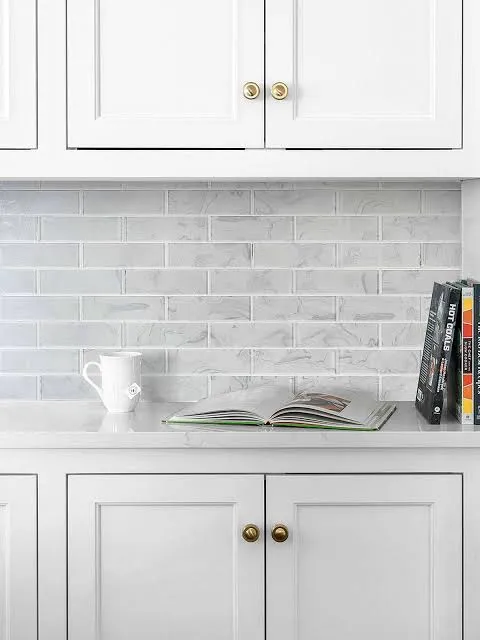
    Subway tile is the safe bet that never actually feels boring. The rectangular shape and the slight sheen on ceramic versions add texture without shouting for attention. Pair it with white cabinets and you get a clean, bright kitchen that photographs well and sells well too, if resale is on your mind.

    Go with a 3×6 inch tile in a classic running bond pattern for that timeless subway look. Want something a little different? Try a herringbone layout instead of straight rows.

    Practical tip: use a light gray grout instead of stark white. It hides dirt better and still keeps things bright.

    This style adapts beautifully to farmhouse, coastal, and even minimalist modern kitchens. Next up, let’s talk about a backsplash that brings in some drama.

    2. Bold Black Backsplash for High Contrast

    Credit: Backsplash

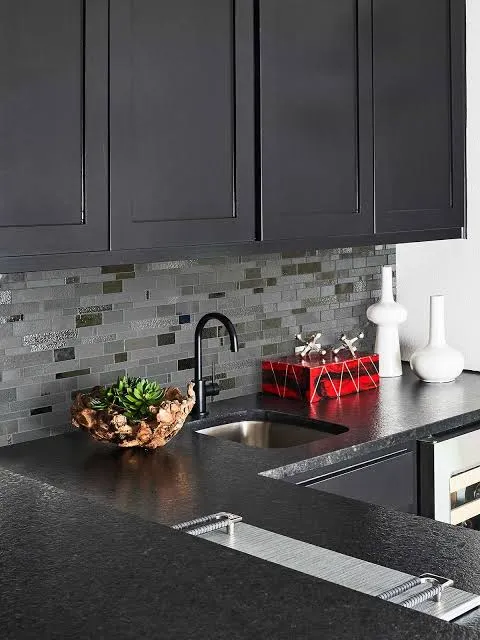
    If you want your kitchen to feel a little edgier, a black backsplash against white cabinets creates serious visual punch. Think matte black subway tile, or even a textured black stone mosaic. The contrast draws the eye and makes your cabinets look even crisper and whiter by comparison.

    This works great in kitchens with black hardware, black light fixtures, or a black kitchen island. It ties the whole room together instead of feeling like a random accent.

    Practical tip: balance the darkness with plenty of natural light or bright under-cabinet lighting so the space doesn’t feel too heavy.

    This pairing shines in modern, industrial, and even transitional kitchens. Now let’s soften things up with a natural material.

    3. Warm Wood-Look Tile for a Cozy Feel

    Credit: Countryfloors

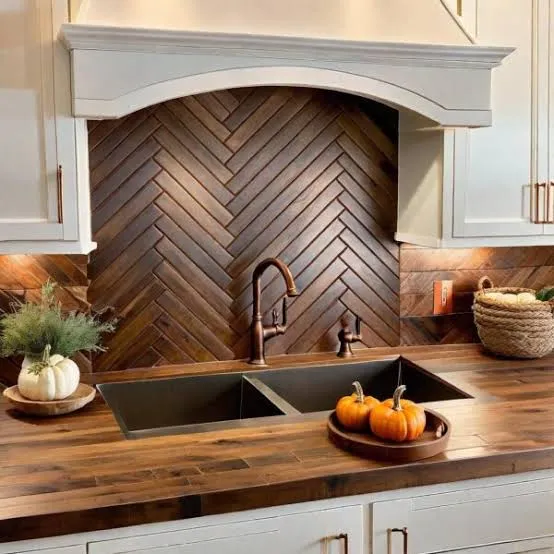
    Wood-look porcelain tile behind white cabinets brings warmth into a space that might otherwise feel a little cold or sterile. It mimics real wood grain but resists water and heat way better, which matters a lot right behind your stove.

    I like this option for kitchens that want a farmhouse or Scandinavian vibe without going full-on rustic. The tile comes in planks, so you can run it horizontally for a subtle, calming effect.

    Practical tip: choose a matte finish wood-look tile to avoid glare near windows or pendant lights.

    This idea fits farmhouse, Scandinavian, and even some coastal kitchens really well. Speaking of coastal, let’s dive into a color that feels like the ocean.

    4. Soft Blue Mosaic for a Coastal Vibe

    Credit: Arizonatile

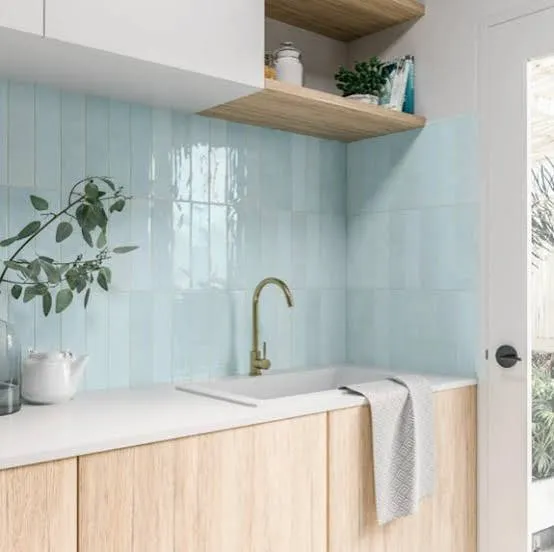
    A soft blue or seafoam green mosaic tile against white cabinets instantly says “beach house,” even if you live nowhere near water. The small mosaic pieces catch light differently than large tiles, giving the wall some movement and life.

    Pair this with brushed nickel or brass fixtures and maybe some woven baskets or light wood accents. The overall feel should be airy, not overwhelming.

    Practical tip: keep the rest of your color palette neutral so the blue backsplash stays the star of the show.

    This idea works wonders in coastal, cottage, and Hamptons-style kitchens. Let’s move from color to texture with a natural stone option.

    Backsplash Material Comparison

    MaterialAverage Cost per Sq FtMaintenance LevelBest For
    Ceramic Subway Tile$5 to $15LowBudget-friendly classic looks
    Natural Stone (Marble)$20 to $50HighLuxury, traditional kitchens
    Porcelain Wood-Look$8 to $20LowFarmhouse, Scandinavian styles
    Glass Mosaic$15 to $30MediumCoastal, modern accents
    Peel and Stick Tile$3 to $8LowRenters, quick updates

    5. Elegant Marble Slab for a Luxury Statement

    Credit: Elledecor

    Nothing says upscale quite like a big slab of marble running up your backsplash wall. Instead of grout lines breaking up the visual, you get one continuous sweep of veining that feels expensive and dramatic. Pair it with white cabinets and gold or brass hardware for a real showstopper kitchen.

    This option costs more upfront, but it delivers a wow factor that tile just can’t match. Many homeowners extend the marble from the countertop straight up the wall for a seamless look.

    Practical tip: seal marble regularly since it’s porous and can stain from acidic spills like lemon juice or wine.

    This idea is perfect for traditional, transitional, and glam kitchens. Now let’s look at something a bit more playful.

    6. Colorful Moroccan Tile for Personality

    Credit: Interiorcompany

    If you want your kitchen to feel like it has a story, Moroccan-style tile is the way to go. These tiles come in bold patterns, often with blues, terracottas, and greens mixed together. Against white cabinets, the pattern really gets to shine since there’s nothing else competing for attention.

    I’d recommend using this tile as an accent strip rather than covering the whole wall, unless you really love pattern. A little goes a long way here.

    Practical tip: order extra tiles upfront since patterned tile often has more waste during cutting and installation.

    This style fits bohemian, eclectic, and Mediterranean kitchens especially well. Let’s swing back toward something simpler and sleeker.

    7. Sleek Glass Panel Backsplash for Modern Kitchens

    Credit: Backsplash

    A single sheet of tempered glass behind your stove and counters gives a super clean, seamless look. No grout lines, no busy patterns, just a smooth surface that’s easy to wipe down. Pair this with white cabinets and stainless steel appliances for a modern kitchen that feels almost commercial-grade in its cleanliness.

    Glass backsplashes come in tons of colors, but a soft white, gray, or even a pale blush tone works beautifully with white cabinetry.

    Practical tip: go with back-painted glass instead of printed glass, since back-painted holds color better over time.

    This idea is a natural fit for modern, minimalist, and urban loft-style kitchens. Next, let’s talk about a pattern that’s having a real moment right now.

    8. Geometric Hexagon Tile for a Trendy Touch

    Credit: Backsplash

    Hexagon tile has been popping up everywhere, and for good reason. The six-sided shape creates a honeycomb pattern that feels fresh and a little unexpected compared to standard square or rectangular tile. Against white cabinets, a white or light gray hexagon tile keeps things subtle, while a colored hexagon adds punch.

    I like small hexagon tiles, around 1 to 2 inches, for backsplashes since the pattern reads clearly at that size.

    Practical tip: use a contrasting grout color to really highlight the hexagon shape instead of letting it blend into the wall.

    This works in modern, mid-century, and eclectic kitchens alike. Now onto a texture-forward option for those who love a tactile kitchen.

    9. Textured Zellige Tile for Handmade Charm

    Credit: Ardaogan

    Zellige tile is handmade in Morocco, and every piece has slight variations in color and texture. That imperfection is actually the whole point. Against crisp white cabinets, zellige tile in soft blues, greens, or even white tones adds a handcrafted feel that mass-produced tile just can’t replicate.

    The slight sheen and uneven surface catch light in a way that makes the whole wall feel alive rather than flat.

    Practical tip: order samples before committing since zellige colors can vary a lot between batches.

    This style pairs beautifully with Mediterranean, boho, and modern farmhouse kitchens. Let’s shift gears to something budget-conscious next.

    10. Budget-Friendly Peel and Stick Tile for Renters

    Credit: bhg

    Not everyone can rip out tile and start fresh, especially if you’re renting. Peel and stick backsplash tile has come a long way and now mimics ceramic, marble, and even metal finishes pretty convincingly. Against white cabinets, a peel and stick subway or marble-look tile gives you a big style upgrade without a big commitment.

    This is also a smart option if you like to change your kitchen look every few years without a full renovation.

    Practical tip: clean and prime the wall surface thoroughly before applying, or the tiles may peel prematurely.

    This idea works for basically any kitchen style since the designs mimic pricier materials so closely. Now let’s look at a metallic option for extra shine.

    Budget Tiers for Backsplash Projects

    Budget LevelTotal Cost Range (Average Kitchen)Typical Materials
    Low Budget$150 to $400Peel and stick, basic ceramic
    Mid Range$500 to $1,200Standard subway tile, glass mosaic
    High End$1,500 to $4,000Marble slab, zellige, hand-painted tile

    11. Metallic Accent Tile for a Glam Touch

    Credit: Arizonatile

    A little shine goes a long way in a white kitchen. Metallic tile, whether it’s brushed copper, brass, or silver, adds glam without overwhelming the space. Against white cabinets, metallic accents catch the light and give the kitchen a warm glow, especially under pendant lighting.

    I like using metallic tile as a border or accent strip rather than the full backsplash, since too much shine can feel a bit much in a small kitchen.

    Practical tip: match the metallic tone to your faucet and cabinet hardware for a cohesive look.

    This style fits glam, art deco, and modern transitional kitchens really well. Let’s finish strong with a bold pattern choice.

    12. Bold Encaustic Tile for a Statement Floor-to-Backsplash Match

    Credit: Studiocementtile

    Encaustic tile, with its inlaid patterns and rich colors, isn’t just for floors anymore. Using it on your backsplash, especially if you carry the same pattern up from the floor, creates a really striking visual connection in the kitchen. Against white cabinets, the pattern gets to be the main character without any competition.

    This works best in kitchens with plenty of open wall space, since busy patterns can feel cramped in tight areas.

    Practical tip: keep your countertop material simple and solid colored so the encaustic pattern doesn’t compete with veining or speckles.

    This idea suits Mediterranean, Spanish colonial, and bold eclectic kitchens especially well. Now that we’ve covered all twelve ideas, let’s get into some practical advice to help you pull this off successfully.

    Tips for Success

    • Always order 10 to 15 percent extra tile to cover cuts, breaks, and future repairs.
    • Test tile samples under your actual kitchen lighting before buying in bulk, since store lighting can be misleading.
    • Choose grout color intentionally. It changes the whole look more than people expect.
    • Keep your backsplash height consistent, usually ending at the bottom of your upper cabinets, for a clean finish.
    • If you’re unsure, start small with a sample wall or a single accent strip before committing to a full installation.
    • Match your backsplash sheen to your cabinet finish. Glossy cabinets pair well with glossy tile, matte with matte.
    • Don’t forget the outlets. Plan your tile layout around switches and outlets so cuts look intentional, not sloppy.

    Common Mistakes and How to Avoid Them

    Choosing tile before finalizing countertops
    : Pick your countertop material first, then find a backsplash that complements it, not the other way around.

    Ignoring grout maintenance
    : Use sealed grout or epoxy grout in high-splash areas like behind the stove to prevent staining and mold.

    Going too matchy with cabinets and backsplash
    : Add at least some contrast in color or texture so the wall doesn’t disappear into the cabinetry.

    Skipping the sample stage
    : Always test a physical sample in your kitchen before ordering the full amount, since lighting changes everything.

    Overcomplicating small kitchens
    : In tighter spaces, stick to one bold element, either a pattern or a color, not both at once.

    Forgetting about long-term cleaning
    : Textured tiles look great but can trap grease and grime, so consider your cleaning habits before choosing heavily textured options.

    Similar Variations

    • Farmhouse Backsplash Styling – leans on shiplap, wood tones, and simple subway tile for a cozy, lived-in feel.
    • Modern Minimalist Backsplash – focuses on large-format tile or glass panels with almost no visible grout lines.
    • Coastal Cottage Backsplash – uses soft blues, whites, and natural textures like rope or driftwood accents.
    • Mediterranean Tile Backsplash – brings in bold patterns, warm colors, and handmade tile like zellige or encaustic.
    • Industrial Loft Backsplash – pairs exposed brick or metal panels with white cabinets for an urban edge.
    • Transitional Glam Backsplash – mixes marble or metallic tile with classic cabinet shapes for a polished, updated traditional look.

    Picking the right backsplash really comes down to your own taste, your budget, and how much maintenance you’re willing to deal with long term. White cabinets give you so much freedom to experiment, whether you want something loud and colorful or calm and classic. I hope this list of 12 kitchen backsplash with white cabinets ideas gave you a clearer picture of what could work in your own space.

  • 11 Mud Kitchen Ideas That’ll Get Your Kids Outside (and Off the Couch)

    11 Mud Kitchen Ideas That’ll Get Your Kids Outside (and Off the Couch)

    I’ll be honest with you. When I first went looking for 11 mud kitchen ideas, I felt like every article gave me the same three suggestions and called it a day. This one’s different. I dug deeper, thought harder, and pulled together a real list you can actually use.

    A mud kitchen is an outdoor play space where kids “cook” using dirt, water, and found materials instead of real food. It usually includes a work surface, some storage, and access to water or mud for open-ended pretend play.

    Stick around, because I’m about to show you setups ranging from five-dollar pallet builds to fancy backyard stations that’ll make your neighbors jealous.

    What Exactly Is a Mud Kitchen, Anyway?

    Okay, so here’s the deal. A mud kitchen isn’t some fancy new trend. It’s basically a play kitchen, but instead of plastic food, your kid uses dirt, leaves, water, and whatever else they find in the yard. Think of it as a science lab, sensory bin, and imagination station all rolled into one muddy package.

    Kids stir “soup,” bake “cakes,” and serve “tea” using real cooking tools. No batteries, no screens, just hands-on mess and creativity. Parents love it because it gets kids outside. Kids love it because, well, mud is awesome. Once you build one, you’ll wonder why you waited so long.

    1. Repurpose an Old Pallet Into a Rustic Work Bench

    How to make a portable bench or kitchen island
    Credit: Resene

    Wooden pallets are basically free mud kitchen kits waiting to happen. Grab one from a hardware store or garden center (most give them away), stand it up, and you’ve got a built-in shelving system for pots, pans, and buckets. Add a flat board on top for a work surface, and you’re done.

    This works because pallets already have slats and gaps perfect for hanging utensils or tucking in small containers. Sand down rough edges so nobody gets a splinter, then leave the wood natural or paint it a soft sage green for a cottage-garden feel.

    Quick tip: seal the wood with an outdoor-safe finish so it survives rain and mud splashes for more than one season.

    This rustic look fits farmhouse and cottagecore yards perfectly, but you can dress it up with metallic knobs for a more modern touch. Next, let’s talk about giving that pallet kitchen some real plumbing.

    2. Add a Working Water Pump for Next-Level Play

    How to Add a Water Pump to a Mud Kitchen — Married & a House | A Catholic Blog for Homemaking and DIY
    Credit: Marriedandahouse

    Nothing makes a mud kitchen feel “real” like actual running water. A small hand-crank pump, the kind sold for garden or camping use, connects to a bucket reservoir and lets kids pump their own water without you refilling cups all day.

    Mount the pump on the side of the kitchen structure and place a bucket or repurposed sink basin underneath to catch the flow. Kids go wild over the mechanical action of pumping. It’s satisfying, noisy, and endlessly repeatable.

    Actionable tip: use a clear tube for the water line so kids can watch the water travel, which adds a bonus science lesson.

    This idea works in any style yard, from minimalist modern to wild cottage garden, since the pump itself can be painted or left industrial-looking to match.

    3. Build a Chalkboard Menu Board for Pretend Restaurant Play

    DIY Chalkboard Menu for Meal Planning - Domestically Creative
    Credit: Domesticallycreative

    Kids love playing restaurant, and a chalkboard menu takes that pretend play up a notch. Attach a thin chalkboard panel to the side or back of the mud kitchen frame. Kids write out their “specials,” draw pictures of muddy pies, or take orders from stuffed animal customers.

    This small addition costs very little but adds huge imaginative value. Paint the frame around the board in a fun color like mustard yellow or dusty blue to make it pop against the greenery.

    Practical tip: use liquid chalk markers instead of dusty chalk so writing shows up better outdoors and doesn’t wash away in light rain.

    Whether your yard leans coastal with whites and blues or boho with warm earth tones, a chalkboard fits right in. Now let’s give those muddy dishes somewhere to dry.

    4. Install a Drying Rack for Pots, Pans, and “Dishes”

    6 Clever Designs to Get Your Drying Rack Off the Counters | Livingetc
    Credit: livingetc

    After all that mud cooking, dishes need to dry, right? A small wire or wooden drying rack teaches kids a mini life skill while keeping the play kitchen tidy. Attach a rack to the side of the structure or hang one from a nearby fence post.

    This is a small detail, but it makes the whole setup feel more like a real kitchen. Kids naturally start sorting, stacking, and organizing, which is great for fine motor skills.

    Tip: use a metal dish rack meant for indoor kitchens. They’re cheap, rust-resistant if coated, and already have the right slots for pans and lids.

    For modern yards, choose a sleek black wire rack. For farmhouse vibes, go with a rustic wood rack instead.

    Mud Kitchen Material Comparison

    MaterialCost RangeDurabilityBest For
    Reclaimed Pallets$0–$20Medium (2-4 years)Budget builds, rustic look
    Pressure-Treated Wood$50–$150High (5-8 years)Long-term outdoor use
    Old Kitchen Cabinets$0–$40Medium (3-5 years)Quick setups with storage
    Metal Shelving Units$60–$120High (6-10 years)Modern, sleek styles
    PVC Pipe Frames$30–$70Low-Medium (2-3 years)Lightweight, portable kitchens

    5. Repaint an Old Kitchen Cabinet for Instant Storage

    101 Kitchen Design Ideas for Every Style, Budget, and Size
    Credit: Countryliving

    Before you toss that old kitchen cabinet during your next remodel, stop. It makes a fantastic mud kitchen base. The drawers and cupboards already exist, so you skip a ton of building work. Just weatherproof it and set it outside.

    Give it a fresh coat of exterior paint in a cheerful color like coral or teal. Add a stainless steel bowl into a cutout hole on top to act as a sink, and you’ve basically built a full mud kitchen in an afternoon.

    Tip: drill small drainage holes in the bottom of any drawers kids will use for “cooking,” so rainwater doesn’t pool and rot the wood.

    This upcycled option suits eclectic or vintage-inspired yards especially well, since the cabinet often already has charming hardware and molding.

    Speaking of charm, let’s talk about adding natural elements that make the whole space feel alive.

    6. Create a Herb and Flower Picking Station Nearby

    12 Indoor Herb Garden Bar Ideas for Cocktails and Mocktails
    Credit: Botanicalblueprint

    A mud kitchen becomes way more interesting when kids can “harvest” their own ingredients. Plant a small patch of hardy herbs like mint, rosemary, or chamomile right next to the kitchen setup. Kids pick leaves and petals to mix into their mud creations.

    This adds a sensory layer, smell, texture, and color, that plain dirt alone can’t offer. It also sneaks in a little nature education without feeling like a lesson.

    Tip: stick to non-toxic, sturdy plants that can handle little hands pulling at them constantly. Mint is nearly indestructible and smells amazing when crushed.

    This works beautifully in cottage gardens and coastal-style yards where natural greenery is already the star of the show.

    7. Use a Tire Swing Frame as a Multi-Station Kitchen Hub

    RW032DC Kitchen Rolling Cart, Vintage Wooden Storage Trolley with Metal Structure, 3 Tire Serving Trolley with Metal Shelf Lockable Wheels for Home Dining Room Bar Restaurant 📍Visit us at Serena Home! See
    Credit: serena_home.lb

    If you’ve already got an old tire swing frame sitting unused, repurpose the sturdy A-frame structure as the backbone for a two-sided mud kitchen. One side can hold the cooking station, the other a washing station, doubling your play space without doubling your materials cost.

    This setup works great for siblings or friend groups since two kids can play at once without bumping elbows. Hang pots and pans from the crossbeam using S-hooks for easy access.

    Tip: check the frame for rust or rot before repurposing, since it likely sat outside for years already.

    A-frame structures fit rustic and farmhouse styles naturally, but a coat of white paint gives it a coastal cottage feel instead.

    Now, let’s talk about a detail most people skip: shade.

    8. Add a Simple Shade Cover for All-Day Play

    11 Cool Shade Ideas for Summer
    Credit: Houzz

    Kids will play at a mud kitchen for hours if you let them, but direct sun makes that miserable fast. A basic shade sail or umbrella clipped above the kitchen keeps things comfortable and protects wooden surfaces from sun damage too.

    You don’t need anything fancy. A canvas tarp strung between two posts works just as well as a store-bought shade sail. The goal is just blocking the harshest afternoon rays.

    Tip: choose a light, breathable fabric rather than plastic sheeting, which traps heat underneath instead of blocking it.

    Neutral canvas tones fit almost every yard style, while striped fabric adds a fun coastal or vintage carnival feel.

    Mud Kitchen Budget Tiers

    TierTotal CostWhat’s Included
    Starter$0–$40Pallet frame, thrifted pots, no water feature
    Mid-Range$75–$150Built frame, sink basin, shade cover, storage
    Full Setup$200–$400Custom build, water pump, chalkboard, drying rack, planting station

    9. Hang a Pot and Pan Rack for Easy Access

    Hang 'Em or Hide 'Em: 10 Stylish Ways to Store Pots and Pans
    Credit: Houzz

    Instead of digging through bins, let kids grab tools right off a wall-mounted rack. A pegboard or simple row of hooks keeps pots, spoons, sieves, and spatulas visible and within reach. This cuts down on the “I can’t find it” meltdowns.

    Organize by size or type so younger kids can start learning simple sorting skills. Bright-colored utensils against a neutral pegboard also make the whole station look more inviting.

    Tip: repurpose an old pegboard from a garage for this. It’s sturdy, weatherproof if painted, and already has the hole pattern ready for hooks.

    Modern yards look great with a black pegboard and metal hooks, while cottage yards do better with a wood-toned board and rope hangers.

    10. Build a Sensory Mixing Station With Multiple Textures

    20 Home Mixer Stations That Make Cooking Comfier - DigsDigs
    Credit: Digsdigs

    Take the mud kitchen up a notch by adding small bins of different textures nearby, sand, gravel, wood chips, dried leaves. Kids mix these into their mud recipes for extra sensory input and more variety in their pretend cooking.

    This turns a simple mud kitchen into more of a sensory play hub. It’s especially great for younger toddlers who benefit from touching lots of different textures during play.

    Tip: use old muffin tins or ice cube trays as the containers for each texture. They’re the perfect size for little hands to scoop from.

    This idea fits any style since the textures themselves, not the containers, do the heavy lifting here.

    11. Set Up a Mini Weighing and Measuring Station

    Small kitchen ideas: The best small kitchen ideas from experts
    Credit: Goodhousekeeping

    Add a kitchen scale, some measuring cups, and small bowls to introduce a bit of math into the play. Kids weigh out “flour” (dirt) or measure “water” for their mud recipes, which sneaks in early numeracy skills without feeling like homework.

    An old bathroom or kitchen scale works fine here. Just make sure it’s not something you need indoors anymore, since it’ll get muddy fast.

    Tip: laminate a simple picture recipe card, like “2 cups mud, 1 cup water, 3 leaves,” so kids can follow along even before they can read well.

    This works in literally every style yard because the tools themselves are neutral in appearance and easy to blend in anywhere.

    Tips for Success

    • Place the mud kitchen near a water source, even if it’s just a garden hose, so refilling doesn’t become a chore.
    • Choose a spot with partial shade to avoid overheating both kids and materials.
    • Rotate in new “ingredients” like flower petals or pinecones every few weeks to keep play fresh.
    • Use old kitchen tools instead of buying new ones. Thrift stores are goldmines for this.
    • Keep a small trowel and bucket nearby so kids can gather their own dirt and mud independently.
    • Check wood surfaces monthly for splinters or rot, especially after heavy rain.
    • Let kids help design or decorate their own kitchen. Ownership boosts how much they actually use it.

    Common Mistakes and How to Avoid Them

    Skipping drainage
    : Standing water rots wood fast and breeds mosquitoes. Always drill small holes in basins or drawers that hold water.

    Using indoor-only materials
    : Cardboard or particle board furniture falls apart outside within weeks. Stick to sealed wood, metal, or plastic.

    Placing it too far from supervision
    : Parents lose interest in checking on far-off play areas. Keep the mud kitchen within eyesight of a window or patio.

    Overbuilding right away
    : Starting with a huge, expensive setup before knowing if your kid will actually use it wastes money. Start small and add features over time.

    Ignoring sun exposure
    : A metal or dark-colored kitchen frame can get scorching hot in direct sun. Add shade or choose lighter colors for surfaces kids touch often.

    Similar Variations

    • Sand Kitchen: Same concept as a mud kitchen, but built around a sandbox instead of dirt and water.
    • Nature Play Kitchen: Focuses more on foraged natural items like pinecones and bark instead of mud specifically.
    • Water Play Station: Skips the dirt entirely and centers around pouring, splashing, and water tables.
    • Forest School Kitchen: A more structured, educational version often used in outdoor learning programs.
    • Tea Party Garden Nook: A smaller, decor-focused setup meant more for pretend tea parties than full “cooking.”

    I hope this gave you way more to work with than the usual short lists floating around out there. Whether you go all out with a water pump and chalkboard menu or just toss some pots by a dirt patch, the goal is the same: get kids outside, hands dirty, and imaginations running. That’s really what these 11 Mud Kitchen Ideas are all about.

  • 11 Warm Neutral Kitchen Ideas That Feel Like a Hug Every Time You Walk In

    11 Warm Neutral Kitchen Ideas That Feel Like a Hug Every Time You Walk In

    I’ve spent way too many hours scrolling through kitchen photos, and I can tell you this list of 11 warm neutral kitchen ideas is the most useful roundup you’ll find on the topic. I’ve tested what actually works, what looks good in photos but falls flat in real life, and what gives you that cozy, expensive feel without a huge budget.

    A warm neutral kitchen uses colors like cream, tan, soft brown, and warm white instead of stark white or cool gray. This palette makes the space feel inviting and timeless while still looking clean and put together.

    Stick around, because I’m breaking down 11 specific ways to bring this look into your own kitchen, plus a few mistakes that can wreck the vibe if you’re not careful.

    What Makes a Kitchen “Warm Neutral” Anyway

    Okay, so let’s get on the same page first. A warm neutral kitchen isn’t beige for the sake of beige. It’s about picking colors that have a hint of yellow, orange, or red undertone instead of blue or gray. Think oatmeal, caramel, terracotta-adjacent tan, and soft ivory.

    The whole point is that the space feels calm but not cold. It’s the difference between a kitchen that looks like a hospital and one that looks like a place you’d want to drink coffee in on a Sunday morning. I’ve noticed warm neutrals also age better than trendy colors. They don’t scream “2020s kitchen” the way a certain shade of sage green does.

    Now let’s get into the actual ideas.

    1. Start With Creamy White Cabinets Instead of Stark White

    Creamy White Kitchen Cabinet Colors | A Blissful Nest
    Credit: A Blissful Nest

    Stark white cabinets can feel sterile, almost clinical. Swap them for a creamy white or warm off-white instead. Colors like Benjamin Moore’s Swiss Coffee or Sherwin Williams’ Alabaster give you that clean cabinet look without the cold edge.

    The trick is checking the undertone before you buy paint. Hold the swatch next to a pure white sheet of paper. If it looks yellowish or beige-ish next to that white, you’ve got a warm neutral.

    This works in almost any style. Farmhouse kitchens love it. Modern kitchens can use it too, paired with black hardware for contrast. Coastal kitchens might lean slightly cooler, but a warm cream still reads fresh next to natural wood tones.

    Once your cabinets are set, the countertops need to play nice with that warmth too.

    2. Choose Countertops With Warm Veining or Speckling

    Stone Veining - Answers and Examples — Natural Stone City
    Credit: Natural Stone City

    Bright white quartz with gray veins can fight against a warm neutral cabinet color. Instead, look for countertops with warm veining, like soft gold, tan, or brown streaks running through cream or white stone.

    Materials like butcher block, honed limestone, or quartz designed to mimic Calacatta Gold work really well here. These surfaces bring texture and warmth without adding a strong color.

    Practical tip: bring a cabinet paint chip with you to the stone yard. Hold it against slabs in real daylight before deciding. Store lighting can trick you.

    Traditional kitchens often go with marble-look quartz. Modern kitchens might choose a simpler warm quartz with subtle movement. Either way, the goal is countertops that feel like an extension of the walls, not a competing element.

    Next, let’s talk about what goes above those counters.

    3. Add Warm Wood Open Shelving

    Warm wood, open shelves, and a little corners that make daily routines feel special #kitcheninspo #openshelving #warmminimalism #homedetails #cleanaesthetic
    Credit: instagram.com

    Open shelving in a natural wood tone instantly adds warmth. Oak, walnut, or even reclaimed barn wood shelves break up a sea of cabinetry and give your eyes something textured to land on.

    I like this idea because it’s cheap to try. You don’t need to rip out cabinets. Just add a shelf or two where you’d normally have upper cabinets, especially near a sink or stove area.

    Style it with a mix of ceramic bowls, a few cookbooks, and one or two plants. Don’t overload it. Three to five items per shelf usually looks best.

    This idea shines in farmhouse and modern rustic kitchens. Coastal kitchens can use whitewashed wood instead of deep walnut for a lighter feel.

    Once your shelves are warm and wood-toned, your lighting needs to match that energy.

    4. Swap Cool LED Bulbs for Warm-Toned Lighting

    Soft White vs. Daylight Bulbs: Where to Use Both in Your Home
    Credit: House Beutiful

    This one’s sneaky important. A lot of kitchens look cold not because of the paint, but because of the light bulbs. Cool white LEDs (anything above 3000K) cast a blue-ish tint that fights against warm neutral colors.

    Switch to bulbs rated around 2700K to 3000K. These give off a soft, golden glow that makes cream cabinets and wood tones look richer.

    Practical tip: check the bulb packaging for the Kelvin number, not just “warm white” or “soft white” labels, since those terms aren’t standardized.

    This matters in every style of kitchen. Even a sleek modern space benefits from warmer bulbs, especially over islands and under cabinets.

    Speaking of islands, let’s talk about making that piece the star of your warm neutral scheme.

    5. Make Your Island a Warm Wood or Tan Statement Piece

    30 Kitchen Island Ideas No One Shares Because Most Homes Stop at Basic Function
    Credit: Homeedit

    If your cabinets are painted cream or white, your island can be the one spot where you introduce a deeper warm tone. Think honey oak, walnut, or a tan-painted finish.

    This creates contrast without breaking the neutral palette. It also makes the island feel like furniture instead of just more cabinetry.

    I’d suggest pairing it with woven or leather counter stools. That combo of wood, leather, and cream cabinetry is basically the poster child for warm neutral kitchens.

    Modern farmhouse kitchens do this constantly. Transitional and traditional kitchens can use a slightly more refined wood tone, like cherry or mahogany-stained oak.

    Now let’s bring in some color palette specifics, because picking the right combo matters a lot here.

    Warm Neutral Color Palette Combinations

    Palette NameCabinet ColorWall ColorAccent ColorBest For
    Cream & CaramelWarm whiteSoft beigeCaramel wood tonesFarmhouse, cottage
    Sand & StoneGreige (gray-beige)Warm taupeCharcoal hardwareModern, transitional
    Terracotta TouchIvoryCreamMuted terracotta accentsMediterranean, boho
    Golden OakAlmond whiteLight tanGolden oak woodTraditional, rustic
    Soft LatteMushroom beigePale mochaBronze fixturesContemporary, minimal

    Now that you’ve got a palette picked, let’s look at how backsplash choices can either support or clash with it.

    6. Pick a Backsplash That Echoes Your Countertop, Not Fights It

    The Perfect Pair: How to Pick Backsplash to Match Countertop - The JC Huffman Cabinetry Company
    Credit: jchuffman

    A busy, patterned backsplash can throw off an otherwise calm warm neutral kitchen. Instead, go with a simple subway tile in cream or warm white, or a natural stone mosaic with tan and brown flecks.

    Zellige tile is a great option too. Its handmade look adds texture and slight color variation, which keeps things interesting without adding visual noise.

    Practical tip: match your grout color close to the tile color instead of using stark white grout. This keeps the backsplash looking soft and cohesive rather than gridded and busy.

    Coastal kitchens might use a warm white subway tile with a slight sheen. Modern kitchens often go for large-format tile in the same warm neutral tone as the walls.

    Once your backsplash is settled, it’s time to think about the floor beneath your feet.

    7. Ground the Room With Warm-Toned Wood or Tile Flooring

    Warm Toned Wood Floors for 2025 | Flooring America
    Credit: Flooring America

    Cool gray flooring is everywhere right now, but it can undercut a warm neutral kitchen fast. Swap it for warm oak, hickory, or terracotta-look tile instead.

    Wood flooring in a honey or medium brown tone adds instant coziness. If you need something more durable for a busy kitchen, look for porcelain tile that mimics warm wood grain or has a soft, sandy tone.

    Practical tip: if you’re not ready to redo your floors, a jute or wool area rug in a warm tan can fake the effect for way less money.

    Traditional and farmhouse kitchens lean into deeper wood tones. Modern kitchens often choose a lighter, more matte wood look to keep things feeling airy.

    With the floor handled, let’s talk about a detail people skip: hardware.

    8. Use Warm Metal Hardware Like Brass or Bronze

    Mixed Metals Done Right: Brass, Chrome & Matte Black + Frame Matching
    Credit: rossettiart

    Chrome and stainless steel hardware can feel a little cold and clinical against warm neutral cabinetry. Swapping to brushed brass, warm bronze, or matte gold hardware ties everything together.

    This is one of the cheapest updates you can make. A set of new cabinet pulls can transform a kitchen for under a couple hundred dollars in most cases.

    Practical tip: stick to one metal finish throughout the kitchen, including faucet, cabinet pulls, and light fixtures. Mixing too many metals can make the space feel unplanned.

    Traditional kitchens often go with warm brass. Modern kitchens might choose a matte black instead, which still works with warm neutrals since black reads as a neutral too.

    Now let’s move to something people forget entirely: the ceiling.

    9. Don’t Ignore the Ceiling, Warm It Up Too

    Your ceiling is the most underrated surface in your home. I am officially begging you to stop leaving it plain white and start treating it like the design opportunity it is! ✨, Painting your ceiling ...
    Credit: instagram

    Most people paint their ceiling stark white and call it done. But a bright white ceiling next to warm neutral walls and cabinets can look mismatched, almost like an afterthought.

    Try painting the ceiling the same warm white as your trim, or go a shade lighter than your wall color. This creates a soft, enveloping feel instead of a jarring line where the wall meets the ceiling.

    Practical tip: if you have exposed wood beams, leave them natural or whitewash them lightly instead of painting them white. They add texture that pure white paint erases.

    This idea works especially well in farmhouse and coastal kitchens with vaulted or beamed ceilings. Modern kitchens can use a warm white flat ceiling for a subtle, cohesive look.

    Let’s talk textiles next, because fabric choices matter more than people think.

    10. Layer in Warm Textiles Like Linen Curtains and Woven Runners

    How to Style Natural Linen Curtains for a Cozy and Elegant Living Room – ForestlandLinen
    Credit: ForestlandLinen

    Hard surfaces dominate kitchens, so soft textiles make a big difference in warmth. Linen café curtains in oatmeal or tan, a woven table runner, or cushioned seat pads on stools all add texture and coziness.

    I like linen because it has a slightly imperfect, relaxed look that fits the warm neutral vibe perfectly. Avoid anything too crisp or shiny, since that can feel more formal and cold.

    Practical tip: layer at least two textures, like a woven runner plus a linen curtain, rather than just one fabric element. This keeps the kitchen from feeling flat.

    Boho and coastal kitchens go heavy on texture here. Modern kitchens might use just one simple linen element to keep things minimal but still warm.

    Budget Tiers for a Warm Neutral Kitchen Refresh

    Budget TierWhat You Can DoEstimated Cost Range
    Small ($50-$300)New hardware, warm bulbs, textiles, rug$50-$300
    Medium ($500-$3,000)Paint cabinets, new backsplash, open shelving$500-$3,000
    Large ($5,000-$15,000)New countertops, flooring, island rebuild$5,000-$15,000
    Full Remodel ($20,000+)Cabinets, layout change, all finishes replaced$20,000-$60,000+

    Once your textiles and budget plan are sorted, let’s talk about a detail that pulls the whole room together: your wall color choice near the windows.

    11. Use Warm White Trim and Window Frames

    Should your Trim Colour match your White Vinyl Windows? -
    Credit: Maria Kilam

    Bright white trim can create a stark contrast against warm walls and cabinets. Swap it for a warm white trim color instead, something with a slight cream or ivory tint.

    This small shift keeps your eye moving smoothly through the room instead of catching on jarring white lines. It’s a subtle change, but it makes a real difference in photos and in person.

    Practical tip: use the same warm white for trim, window frames, and ceiling to create one cohesive envelope of color around your warm neutral cabinets and walls.

    Traditional and cottage kitchens benefit most from this softer trim approach. Modern kitchens can keep a slightly cooler white trim if they want just a touch of contrast, but keeping everything warm usually reads more intentional.

    With all eleven ideas in place, your kitchen should already feel warmer, cozier, and more put together. But a few quick tips can help you avoid common slip-ups.

    Tips for Success

    • Test paint colors on your actual wall, not just a swatch card, since lighting changes everything.
    • Buy one extra tile or paint sample and live with it for a week before committing.
    • Keep at least 60% of your surfaces in the lightest neutral tone to avoid a cave-like feel.
    • Add one plant or greenery element, since warm neutrals can look flat without some living color.
    • Photograph your kitchen in daylight and evening light before finalizing choices, since warm tones shift a lot under artificial light.
    • Don’t rush the hardware and lighting choices. These small details make or break the whole warm neutral look.

    Common Mistakes and How to Avoid Them

    Choosing a “greige” that’s actually cool-toned
    : Check the paint undertone in natural daylight before buying. If it looks purple or blue-ish in shade, skip it.

    Mixing too many wood tones
    : Stick to two wood tones max in one kitchen, like a lighter floor and a darker island.

    Using stark white grout with warm tile
    : Match grout closer to the tile’s base color to avoid a gridded, cold look.

    Forgetting the ceiling and trim
    : Treat these as part of your color plan, not an afterthought painted a different white by default.

    Overloading open shelves
    : Keep shelves at 60% full max so the warmth doesn’t turn into visual clutter.

    Ignoring lighting temperature
    : Always check the Kelvin rating on bulbs, since the wrong temperature can undo all your color work.

    Similar Variations

    • Japandi Kitchen – Blends warm neutral tones with minimalist Japanese and Scandinavian design lines.
    • Mediterranean Warm Kitchen – Adds terracotta, warm blues, and wrought iron to the warm neutral base.
    • Modern Farmhouse Neutral – Combines warm whites with black accents and shiplap detailing.
    • Coastal Warm Neutral – Lightens the palette with sandy tones and whitewashed wood for a beachy feel.
    • Desert Warm Kitchen – Uses clay, rust, and warm tan tones inspired by desert landscapes.
    • Rustic Warm Neutral – Leans into reclaimed wood, stone, and deeper caramel tones for a cabin-like feel.

    Getting a warm neutral kitchen right isn’t about picking one perfect paint color and calling it done. It’s about layering warm tones across your cabinets, counters, floors, lighting, and textiles so everything works together instead of fighting for attention.

    I hope these ideas give you a clear starting point, whether you’re doing a full remodel or just swapping out hardware this weekend. Any one of these changes on its own helps, but combining a few is really what makes an 11 Warm Neutral Kitchen feel finished, cozy, and like a space you actually want to spend time in.

  • 14 Kitchen Cabinet Color Ideas That’ll Change How You See Your Kitchen

    14 Kitchen Cabinet Color Ideas That’ll Change How You See Your Kitchen

    I’ve spent way too many hours staring at paint swatches, so let me save you the trouble with these 14 kitchen cabinet color ideas that actually work in real homes, not just magazine spreads.

    What are the best kitchen cabinet colors? The best kitchen cabinet colors depend on your kitchen’s light, size, and style. Popular choices include navy blue, sage green, warm white, charcoal gray, and two-tone combos. Darker colors add drama in larger spaces, while lighter shades open up small kitchens.

    Stick around, because I’m about to walk you through ideas you probably haven’t thought of, plus a few mistakes that could cost you a repaint.

    Why Cabinet Color Matters So Much

    Here’s the thing. Your cabinets take up more visual space than almost anything else in your kitchen. Counters get covered in stuff. Walls get hidden behind cabinets. But cabinet doors? They’re always on display.

    I learned this the hard way when I painted my first kitchen a trendy gray that looked amazing online and depressing in my actual house. Lighting changes everything. So does the size of your room and even the direction your windows face.

    Cabinet color sets the whole mood. It can make a kitchen feel like a cozy cabin or a bright, airy escape. Let’s get into the ideas.

    1. Go Bold With Navy Blue Lower Cabinets

    Credit: Countryliving

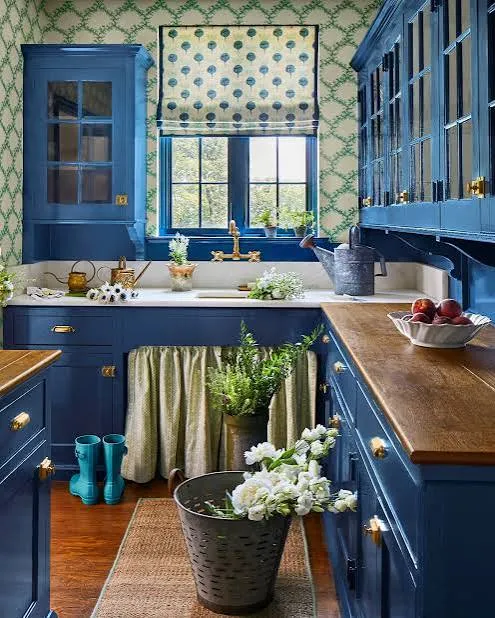
    Navy blue is having a real moment, and I get why. It’s dramatic without being scary. Pair navy lower cabinets with white or cream uppers, and you get contrast that feels intentional, not accidental.

    I’d recommend brass or gold hardware here. It warms up the blue and keeps things from feeling too cold or corporate.

    Practical tip: Test navy on the side of your island first. Islands get less direct light than wall cabinets, so you’ll see the true depth of the color before committing to the whole kitchen.

    This look works beautifully in traditional kitchens, but it also slides right into modern farmhouse style if you swap the hardware for matte black.

    Speaking of contrast, let’s talk about a color combo that never seems to go out of style.

    2. Try Classic White Uppers With Wood Lower Cabinets

    Credit: Rollcallpainting

    This combo has stuck around for a reason. White cabinets up top keep things bright. Natural wood on the bottom adds warmth and texture. It’s the best of both worlds.

    Choose a wood tone that matches your flooring, or at least doesn’t clash with it. Oak, walnut, and maple all work depending on how warm or cool you want the space to feel.

    Practical tip: If your kitchen doesn’t get much natural light, lean toward lighter wood tones like white oak instead of dark walnut. Dark wood can eat up light fast.

    Coastal kitchens love this look, and so do modern farmhouse and Scandinavian-style spaces. It’s flexible enough to fit almost anywhere.

    Now let’s move to a color that’s basically the new neutral.

    3. Warm Up Your Space With Sage Green

    Credit: countryliving

    Sage green is soft, earthy, and way more forgiving than people expect. It’s not as loud as emerald or forest green, but it still adds personality.

    This color pairs really well with brushed nickel or unlacquered brass hardware. Butcher block counters and open wooden shelving also look amazing next to sage.

    Practical tip: Sage green can look muddy under yellow-toned lighting. Test your paint swatch under your actual kitchen bulbs before buying gallons.

    In cottage-style kitchens, sage feels right at home. It also works surprisingly well in mid-century modern spaces when paired with clean lines and simple hardware.

    If green feels like too big a leap, there’s a safer cousin waiting in idea number four.

    4. Keep It Timeless With Warm White or Cream

    Credit: Oppeinhome

    Warm white is not the same as stark white. Warm white has a hint of yellow or beige mixed in, which keeps things from feeling clinical or cold.

    This shade works with literally every countertop material and backsplash color. That’s part of why it’s so popular.

    Practical tip: Ask for a sample pot before committing. Warm whites can shift dramatically depending on your wall color and lighting, so don’t trust the paint chip alone.

    Traditional kitchens practically live on warm white. Modern farmhouse kitchens use it constantly too, especially paired with black hardware and open shelving.

    Let’s compare a few popular cabinet color families so you can see how they stack up.

    Kitchen Cabinet Color Comparison Table

    ColorBest ForLight RequirementMaintenance Level
    Navy BlueBold statement kitchensBright natural light preferredMedium (shows dust)
    Warm WhiteAny kitchen sizeWorks in low or bright lightHigh (shows smudges)
    Sage GreenCottage, farmhouse stylesModerate to bright lightLow to medium
    Charcoal GrayModern, industrial kitchensBright light recommendedMedium
    Natural WoodCoastal, Scandinavian stylesAny lightingLow

    5. Add Drama With Charcoal Gray Cabinets

    Credit: Pahome

    Charcoal gray sits right between black and gray, giving you drama without the commitment of full black. It’s moody but still livable.

    I like pairing charcoal with white countertops to keep the whole kitchen from feeling like a cave. Gold or brushed brass hardware adds a nice pop against the dark background.

    Practical tip: Add under-cabinet lighting if you go charcoal. Dark cabinets can make small kitchens feel closed in without extra light sources.

    This color shines in modern and industrial kitchens, but a softer charcoal with brass accents can also work in transitional spaces.

    Now, if you want two colors working together instead of one, keep reading.

    6. Mix Two Tones for a Custom Look

    Credit: hgtv

    Two-tone kitchens are everywhere right now, and it’s not just a trend. Splitting your colors, usually a darker shade on the island or lower cabinets and a lighter shade up top, adds depth without overwhelming the room.
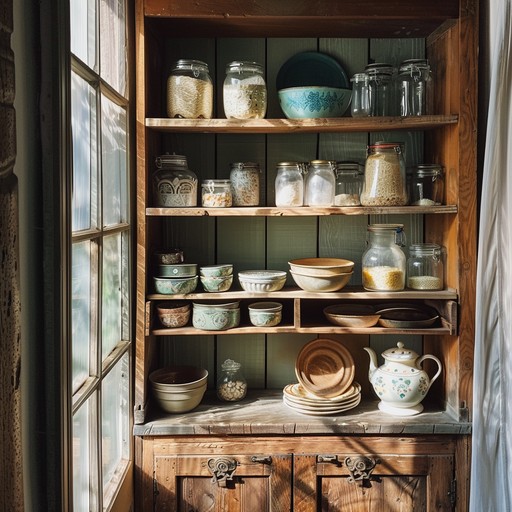
    Popular combos include navy and white, black and wood, or sage and cream. The key is picking colors that don’t fight each other in tone or saturation.

    Practical tip: Keep your darker color on the lower half of the kitchen. This grounds the room and feels more balanced than a top-heavy dark color scheme.

    Two-tone works in almost any style, from farmhouse to contemporary, because you control the exact color pairing to match your vibe.

    Let’s talk about a color that feels fresh precisely because it’s a little unexpected.

    7. Go Unexpected With Terracotta or Burnt Orange

    Credit: Hgtv

    I know this sounds bold, but terracotta cabinets are showing up in more kitchens, and they bring instant warmth. Think sun-baked clay, not neon orange.

    This works best as an accent, maybe on an island, rather than covering every cabinet in the kitchen. Pair it with cream walls and brass or black hardware.

    Practical tip: Balance terracotta with plenty of neutral counter and floor space. This color needs breathing room to look intentional instead of overwhelming.

    Mediterranean and boho kitchens practically beg for this shade. It also works surprisingly well in modern kitchens that want a warm, earthy contrast.

    If earthy tones speak to you, there’s a deeper, richer option coming up next.

    8. Deepen the Mood With Forest Green

    Credit: elledecor

    Forest green is sage green’s bolder sibling. It’s rich, a little formal, and instantly makes a kitchen feel more finished and intentional.

    Pair forest green with brass hardware and marble or quartz counters for a look that feels expensive without the expensive price tag.

    Practical tip: Use forest green only on lower cabinets if your kitchen is small. Full forest green walls of cabinets can shrink a room visually.

    Traditional and transitional kitchens love this shade. It also fits nicely into moody, English-cottage-inspired spaces.

    Let’s lighten things up again with a color that’s basically a kitchen chameleon.

    9. Stay Flexible With Soft Gray-Greige

    Credit: jk-cabinetry

    Greige, that in-between shade of gray and beige, is the ultimate compromise color. It’s warmer than gray but more grounded than beige.

    This color plays nice with almost any countertop, from white quartz to darker granite. It’s a safe bet if you’re worried about resale value or just can’t commit to something bolder.

    Practical tip: Look for greige with warm undertones if your kitchen faces north, since north-facing rooms tend to get cooler light.

    Greige works in transitional, modern, and even traditional kitchens. It’s basically the little black dress of cabinet colors.

    Now let’s talk about going all in on black.

    10. Make a Statement With Matte Black Cabinets

    Credit: architecturaldigest

    Matte black isn’t for everyone, but when it works, it really works. It photographs beautifully and gives kitchens a sleek, high-end feel.

    I always recommend matte over glossy black. Glossy shows every fingerprint and smudge, while matte hides small imperfections much better.

    Practical tip: Balance black cabinets with a light-colored backsplash and countertop. Otherwise, the kitchen can feel dark and heavy.

    Modern and industrial kitchens are the natural home for black cabinets, though a softer black with wood accents can work in transitional spaces too.

    Let’s shift toward something a little more playful.

    11. Add Personality With Dusty Blue

    credit: countryliving

    Dusty blue sits between navy and powder blue, giving you color without the intensity of a true navy. It’s calm, a little vintage-feeling, and works in kitchens big and small.

    This shade pairs really well with white subway tile and natural wood floors. It doesn’t compete with other elements in the room.
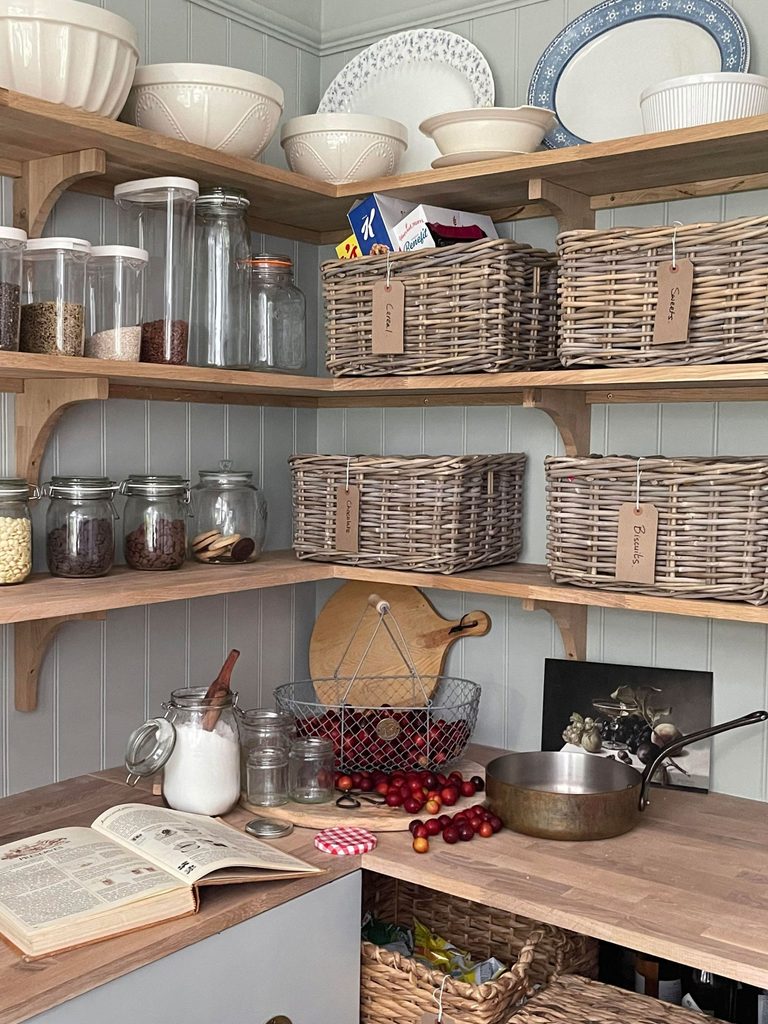
    Practical tip: Test dusty blue next to your existing floor and counter samples. This color can lean either gray or purple depending on the light, so double-check before painting.

    Cottage kitchens and coastal kitchens both love dusty blue. It even fits into vintage-inspired retro kitchens with the right hardware.

    Speaking of vintage vibes, let’s talk about a color combo that feels like it walked out of an old farmhouse.

    12. Bring Character With Cream and Black Combos

    Credit: interiorcompany

    Cream cabinets paired with black accents, whether that’s a black island, black hardware, or a black range hood, create instant character. It’s a classic combo that never really goes out of style.

    The cream keeps things soft and warm, while the black adds sharp definition and a little edge.

    Practical tip: Use black sparingly at first, maybe just hardware and light fixtures, then add more black elements if you want a bolder look later.

    Farmhouse kitchens are basically built around this combo. Traditional and transitional kitchens use it constantly too.

    Let’s check out a quick budget breakdown before moving to the last two ideas.

    Cabinet Painting Budget Guide

    Project ScopeDIY Cost RangeProfessional Cost RangeTime Estimate
    Small kitchen (10-15 cabinets)$200-$400$1,500-$3,0002-4 days
    Medium kitchen (16-25 cabinets)$400-$700$3,000-$5,5004-6 days
    Large kitchen (26+ cabinets)$700-$1,200$5,500-$9,0006-10 days
    Two-tone custom job$500-$900$4,000-$7,0005-8 days

    13. Try a Muted Blush or Dusty Rose

    Credit: interiorcompany

    This one surprises people, but muted blush cabinets can look sophisticated instead of childish when done right. The key word is muted. Skip anything bright or cotton-candy toned.

    Pair blush with warm wood floors and brass hardware for a look that feels soft but grown-up.

    Practical tip: Use blush on an island or a small bank of cabinets rather than the whole kitchen. It’s a strong color that works best in smaller doses.

    This idea fits beautifully in modern glam kitchens and soft, feminine cottage-style spaces.

    Last but not least, let’s talk about a trend that’s all about texture over color.

    14. Layer Different Wood Tones Instead of Paint

    Credit: houzz

    Sometimes the best cabinet color idea isn’t a paint color at all. Mixing two different wood tones, like a walnut island with white oak upper cabinets, gives you warmth and contrast without touching a paint can.

    This works especially well if you love the look of natural materials and want your kitchen to feel grounded and organic.

    Practical tip: Stick to two wood tones max. Three or more starts to look busy and unplanned.

    Scandinavian, coastal, and modern organic kitchens all lean heavily on this approach.

    Tips for Success

    • Always test paint samples on your actual cabinets, not just a wall, since cabinet material affects how color reads
    • Consider your countertop and backsplash before locking in a cabinet color
    • Choose semi-gloss or satin finishes for easier cleaning, especially with darker colors
    • Don’t skip primer if you’re switching from a dark color to a light one
    • Live with a sample for at least three days to see it in morning, afternoon, and evening light
    • Factor in hardware finish early since it changes how a color feels
    • Ask your painter about durability ratings if you have kids or pets in the house

    Common Mistakes and How to Avoid Them

    Choosing a color based only on online photos
    Lighting and screens distort color constantly. Always get a physical sample before committing.

    Ignoring your kitchen’s natural light direction
    North-facing kitchens need warmer tones. South-facing kitchens can handle cooler shades without looking cold.

    Going too dark in a small, low-light kitchen
    Dark colors can work anywhere, but small dark kitchens need extra lighting to avoid feeling cramped.

    Skipping proper prep work
    Cabinets need cleaning, sanding, and priming. Skipping steps leads to peeling and chipping within months.

    Matching cabinet color to current trends instead of your style
    Trends fade fast. Pick a color you’ll still like in five years, not just this season.

    Forgetting about hardware and lighting
    The wrong hardware finish can make an otherwise great color choice feel off balance.

    Similar Variations

    • Coastal Blue Kitchens – Lighter, breezier blues paired with white and natural rope or wood accents
    • Modern Farmhouse Neutrals – Warm whites and soft grays paired with black hardware and shiplap
    • Moody Traditional Kitchens – Deep greens or navy paired with brass and marble for a formal feel
    • Scandinavian Minimalist Kitchens – Light wood tones and white cabinets with almost no ornamentation
    • Industrial Loft Kitchens – Matte black or charcoal cabinets paired with exposed brick and metal accents
    • Vintage Cottage Kitchens – Soft pastels like dusty rose or sage paired with brass and glass-front cabinets

    Picking a cabinet color doesn’t have to feel overwhelming once you break it down into real options instead of vague trends. Whether you go bold with navy, safe with warm white, or something totally unexpected like terracotta, the right choice comes down to your light, your style, and honestly, what makes you happy every time you walk into your kitchen. I hope these 14 Kitchen Cabinet Color Ideas gave you a clearer picture of what will actually work in your own home.

  • 10 Blue Kitchen Cabinets That Will Change How You See Your Kitchen

    10 Blue Kitchen Cabinets That Will Change How You See Your Kitchen

    I’ve spent way too many hours scrolling through kitchen photos, and I can honestly say these 10 blue kitchen cabinets ideas are some of the smartest, most livable looks I’ve found. If you’re on the fence about going blue, stick with me. I’m going to break down exactly what works and why.

    Blue kitchen cabinets are cabinetry painted or stained in shades ranging from soft powder blue to deep navy, used as the main color for lower cabinets, upper cabinets, or both. They pair well with white, wood, brass, and black accents, and they work in kitchens of almost any size or style.

    Ready to see how blue can totally transform your kitchen without making it feel cold or trendy in a bad way? Let’s get into it.

    Why Blue Kitchen Cabinets Just Work

    Here’s the thing about blue. It’s not white, but it’s not scary either. That’s why it’s become such a go-to color for kitchens. It feels fresh, it hides fingerprints better than white, and it plays nice with almost any metal finish you throw at it.

    I think people love blue because it feels calm but still has personality. You’re not stuck with boring beige, but you’re also not committing to something wild like hot pink. Blue sits in this sweet spot. It works in old farmhouses, sleek modern builds, and cozy cottage kitchens alike. That flexibility is honestly the whole reason this color trend has stuck around instead of fading out like some others.

    1. Navy Lower Cabinets With White Uppers

    20 Blue Kitchen Cabinet Ideas to Inspire Your Remodel
    Credit: Mydomaine

    This combo is a classic for a reason. You get the drama of navy blue down low, grounding the whole room, while white upper cabinets keep things feeling light and open. It’s a great trick if your kitchen doesn’t get tons of natural light, because the white up top bounces brightness around.

    Pair this with brass or gold hardware for a warm contrast, or go with matte black if you want something more modern and moody. A practical tip: keep your countertops light (think white quartz or marble-look) so the navy doesn’t swallow the room.
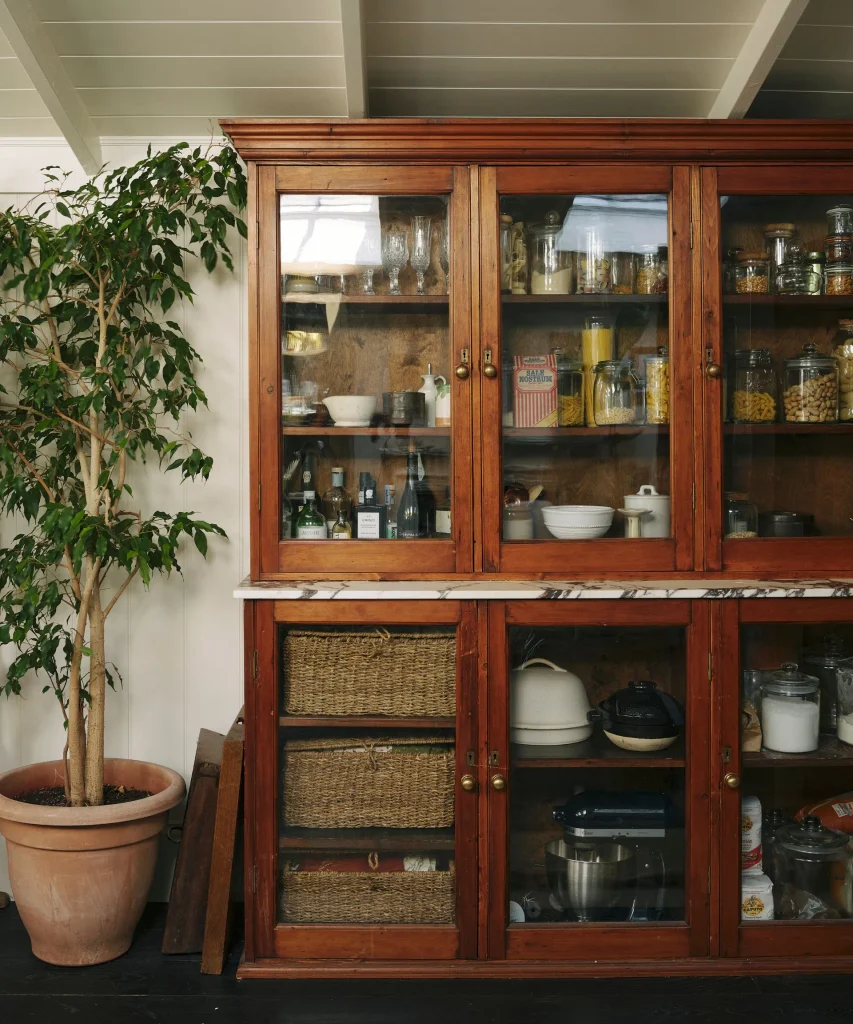
    This look adapts beautifully to traditional kitchens with shaker-style doors, but it also works in modern spaces with flat-panel cabinets. Once you’ve nailed the two-tone base, you might want to think about how the walls play into the mix, which brings us to the next idea.

    2. Soft Sky Blue Walls With Deeper Blue Cabinets

    31 Best Blue Kitchen Cabinet Ideas for a Classic Look
    Credit: Countryliving

    Going monochromatic with blue sounds risky, but it actually creates this really soothing, cohesive look. Use a lighter blue on the walls and a richer, deeper blue on the cabinets so there’s still contrast and depth. It keeps the kitchen from feeling flat or one-note.

    The tip here is to use the 60-30-10 rule: 60% lighter blue, 30% darker cabinet blue, and 10% accent color like white trim or wood shelving. This keeps the balance right so it doesn’t feel like you’re standing inside a paint swatch.

    Coastal and cottage-style kitchens love this look, but you can make it feel more modern by keeping the hardware simple and skipping ornate trim. Once the walls and cabinets are settled, the countertop choice becomes the next big decision.
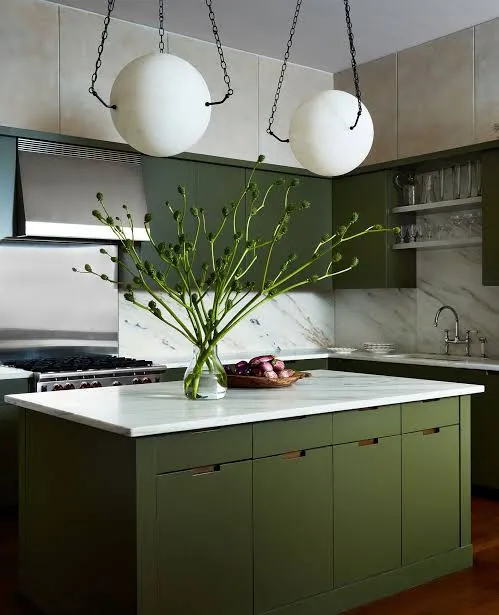
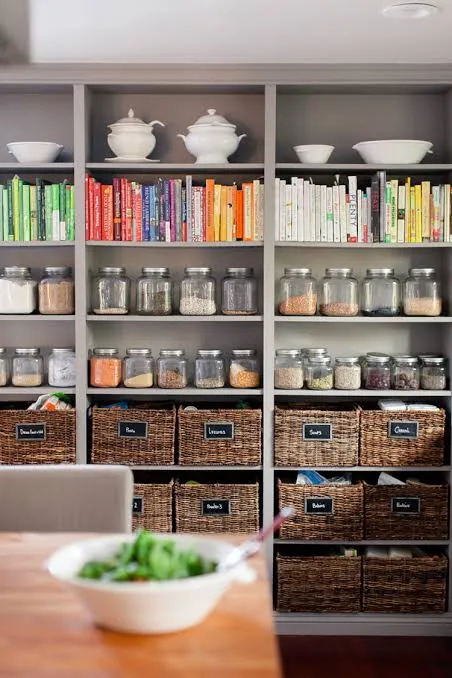
    3. Butcher Block Countertops Over Blue Cabinets

    20 Wood and Butcher Block Kitchen Countertop Ideas | HGTV
    Credit: Hgtv

    Wood and blue are basically best friends. Butcher block countertops add warmth and texture that stone counters just can’t match. The wood grain softens the boldness of the blue, making the whole kitchen feel more relaxed and lived-in.

    If you go this route, seal the butcher block well and reseal it every six months to a year, especially near the sink. That’s the practical part people skip and regret later.

    This pairing is perfect for farmhouse and rustic kitchens, but it also shows up in Scandinavian-style spaces where wood and clean lines rule. Speaking of texture, let’s talk about what happens when you bring metal into the mix.

    Blue Cabinet Color and Hardware Pairing Guide

    Blue ShadeBest Hardware FinishStyle Vibe
    NavyBrass or GoldTraditional, Moody
    Powder BlueBrushed NickelCoastal, Soft Modern
    Slate BlueMatte BlackModern, Industrial
    Teal-BlueCopperEclectic, Bohemian
    Denim BlueChromeTransitional, Clean

    4. Brass Hardware for a Warm Contrast

    Designers' Favorite Ways to Use Brass in a Kitchen
    Credit: Houzz

    Brass hardware against blue cabinets is one of those combos that just glows. It adds a little shine and warmth that keeps the blue from feeling too cool or sterile. Even a small detail like cabinet knobs can change the whole personality of a kitchen.

    My tip: mix your brass hardware with a brass or gold faucet too, so the metals feel intentional instead of random. Nothing looks more off than mismatched metal finishes scattered around a kitchen.

    This works great in traditional and transitional kitchens, but a slightly aged or unlacquered brass finish can push the look into more of a vintage or eclectic direction. Once your hardware is locked in, backsplash tile is the next spot to think about.

    5. Classic Subway Tile Backsplash

    33 Subway Tile Backsplashes - Stylish Subway-Tile Ideas for Kitchens
    Credit: Elle Decor

    Subway tile is the reliable friend of kitchen design. It never overwhelms the blue cabinets, and it gives your eyes a little visual break between the counter and upper cabinets. White subway tile is the safest choice, but a pale blue-gray tile can tie things together even more.

    A quick tip: lay your subway tile in a herringbone pattern instead of the standard brick pattern if you want a little extra interest without adding more color.

    This backsplash style is basically universal. It fits farmhouse, modern, coastal, and transitional kitchens without missing a beat. Now that the walls are covered, let’s talk about what sits on top of your counters.

    6. Open Shelving to Break Up Cabinet Boxes

    35 Open Storage Ideas for Every Room of Your Home
    Credit: Bhg

    Full walls of blue cabinets can feel heavy if you’re not careful. Swapping in a section of open shelving lightens things up visually and gives you a spot to show off dishes, glassware, or a few plants. It also makes a small kitchen feel less boxed in.

    Practical tip: paint the inside back panel of your open shelving a slightly different shade, like white or a warm cream, so your dishes pop against it instead of blending into the blue.

    Open shelving fits cottage and farmhouse kitchens especially well, but floating shelves in a darker wood tone can make it feel modern too. Speaking of lightening things up, let’s talk about how a kitchen island can carry a totally different color.

    7. A Contrasting Island Color

    23 Contrasting Kitchen Island Ideas
    Credit: Bhg

    If your perimeter cabinets are blue, try making your island a different color entirely, like white, black, or even a warm wood tone. This creates a natural focal point in the kitchen and keeps the whole room from feeling too matchy.

    A helpful tip here is to use the island color as your “third color” in the kitchen, tying it back to something small elsewhere, like a rug or a few bar stools.

    This idea works in almost every style. Modern kitchens might use black islands, farmhouse kitchens lean toward wood, and coastal kitchens often go with crisp white. Once your island stands out, your lighting fixtures need to keep up.

    8. Statement Pendant Lights Above the Island

    26 Kitchen Lighting Ideas That Make a Statement
    Credit: Bhg

    Blue cabinets set a calm tone, so this is your chance to have a little fun with lighting. Bold pendant lights in brass, black, or even glass with colored accents can add personality without messing with your color scheme.

    Tip: hang pendants 30 to 36 inches above the island countertop for the best mix of function and style. Too high and they lose impact, too low and they block your view across the kitchen.

    Modern kitchens can go sleek and geometric with their pendant choice, while traditional kitchens might lean toward lantern-style fixtures. Lighting sets the mood, but flooring grounds the whole room, so let’s go there next.

    Budget Tiers for Painting Kitchen Cabinets Blue

    Budget TierApprox. Cost RangeWhat’s Included
    DIY Basic$200 to $400Paint, primer, brushes, basic hardware swap
    DIY Pro$500 to $900Higher-quality paint, sprayer rental, new hardware
    Professional Paint Job$1,500 to $3,500Labor, premium paint, prep work, minor repairs
    Full Cabinet Replacement$8,000 to $20,000+New blue cabinet boxes, doors, installation

    9. Warm Wood Flooring Underfoot

    30 Kitchen Flooring Options and Design Ideas | HGTV
    Credit: Hgtv

    Blue cabinets can feel a little cool on their own, so warm wood flooring balances things out nicely. Medium or honey-toned wood works especially well because it doesn’t compete with the blue, it just supports it.

    Tip: if you’re not ready to commit to real hardwood, luxury vinyl plank in a warm wood tone gives you the same effect for a lot less money and much easier upkeep.

    This pairing shows up in farmhouse, traditional, and transitional kitchens most often, though a darker wood floor can push things toward a more modern, moody feel. With the floor sorted, let’s talk about how green touches can round things out.

    10. Greenery and Plants for Natural Contrast

    Green Kitchens - 33 Inspiring Green Kitchen Ideas
    Credit: House Beautiful

    Blue and green are neighbors on the color wheel, which is exactly why plants look so good against blue cabinets. A few potted herbs on the counter or a hanging plant near the window adds life and softens all those hard surfaces.

    Practical tip: stick with low-maintenance plants like pothos, snake plants, or fresh herbs if you don’t have a great track record keeping plants alive. Kitchens can be tricky with temperature swings.

    This works in every kitchen style honestly. Coastal kitchens might use dried greenery, while modern kitchens often prefer a single sculptural plant. Let’s round things out with two more ideas that tie the whole look together.

    Tips for Success

    • Test paint samples on your actual cabinets, not just a wall, since lighting changes how the color looks
    • Stick to one dominant blue shade throughout the kitchen to avoid a mismatched look
    • Use satin or semi-gloss finish on cabinets since they’re easier to wipe down than matte
    • Balance bold blue with at least one neutral surface, like counters or floors
    • Don’t skip the primer step if you’re painting existing cabinets, or the color won’t hold up
    • Bring home hardware samples before buying in bulk, since finishes look different under kitchen lighting
    • Keep your blue consistent with your home’s overall color palette so the kitchen doesn’t feel disconnected from other rooms

    Common Mistakes and How to Avoid Them

    Choosing too dark a blue in a small, low-light kitchen
    : Stick with lighter or mid-tone blues if your kitchen doesn’t get much natural light, so it doesn’t feel like a cave.

    Mixing too many metal finishes
    : Pick one or two metal tones max for hardware, faucets, and lighting so things feel intentional.

    Skipping the primer before painting
    : Always prime cabinets first, especially if they’re laminate or previously glossy, so the paint actually sticks.

    Ignoring the finish sheen
    : Flat paint scratches and stains easily in kitchens, so go with satin or semi-gloss instead.

    Forgetting to sample the color in your actual kitchen lighting
    : Paint colors shift dramatically between natural light and warm bulbs, so always test in your space first.

    Overdoing matching decor
    : Not every towel, rug, and accessory needs to match the cabinets exactly, or the kitchen starts feeling like a themed room instead of a real home.

    Similar Variations

    • Coastal Blue Kitchen: Lighter, breezier blues paired with white and natural textures like rope or rattan
    • Navy Farmhouse Kitchen: Deep navy cabinets mixed with wood beams and vintage-style hardware
    • Modern Slate Blue Kitchen: Cool-toned blues paired with matte black fixtures and minimal decor
    • Two-Tone Blue and White Kitchen: Blue on lower cabinets only, kept crisp and classic with white uppers
    • Bohemian Teal Kitchen: Teal-blue cabinets mixed with warm metals, patterned tile, and lots of plants
    • Vintage Powder Blue Kitchen: Soft, muted blue cabinets paired with retro appliances and simple hardware

    At the end of the day, blue cabinets give you way more flexibility than people expect. You can go moody and dramatic, soft and coastal, or clean and modern, all using the same base color. The trick is picking the right shade for your light, balancing it with the right materials, and not overthinking the small details. Whether you’re repainting an old kitchen or planning a full renovation, these 10 blue kitchen cabinets ideas give you a solid, practical starting point that actually works in real homes.

  • 12 Kitchen Lighting Ideas That’ll Make Your Cooking Space Actually Shine

    12 Kitchen Lighting Ideas That’ll Make Your Cooking Space Actually Shine

    If you’ve been searching for 12 kitchen lighting ideas that actually work in real homes (not just fancy magazine shoots), you’re in the right spot. I’ve spent way too many hours staring at kitchen ceilings, comparing fixtures, and asking myself “will this look good in five years?” So let me save you the trouble.

    Kitchen lighting design refers to the layered use of ambient, task, and accent light sources to make a kitchen both functional and visually appealing. A well-lit kitchen typically combines overhead fixtures, under-cabinet strips, and pendant lights to cover cooking, prepping, and gathering needs.

    Stick around, because I’m about to walk you through everything from budget-friendly fixes to statement pieces that’ll make guests ask where you got them.

    Why Kitchen Lighting Matters More Than You Think

    Here’s the thing nobody tells you: your kitchen probably has the worst lighting setup in your whole house. One overhead light. Maybe two. That’s it.

    But kitchens do a lot of jobs. You chop vegetables. You read recipes. You host people for wine and snacks. Each of those needs different light. That’s why designers talk about “layering” light instead of just slapping one fixture in the middle of the ceiling and calling it done.

    Once you start thinking in layers, everything gets easier. You stop asking “what light should I buy” and start asking “what job does this corner of my kitchen need light for.” That mindset shift changes everything.

    1. Install Under-Cabinet Lighting for Real Task Lighting

    How To Install Under-Cabinet Lighting: Steps, Tips & Costs - Taskrabbit Blog
    Credit: Taskrabbit

    This one’s non-negotiable in my book. Under-cabinet lights sit right above your countertop, shining down exactly where you chop, mix, and prep. No more shadows from your own head blocking the cutting board.

    LED strip lights work great here. They’re thin, they run cool, and they last forever. Go with a warm white (around 2700K to 3000K) if your kitchen has wood tones, or a cooler white (3500K to 4000K) for stainless steel and white cabinets.

    Practical tip: Buy dimmable strips. You’ll want full brightness while cooking and a softer glow for late-night snack runs.

    This idea works in literally every kitchen style, from farmhouse to ultra-modern, because it’s hidden until it’s turned on. Once your counters are covered, let’s talk about what’s happening above your island.

    2. Hang Pendant Lights Over Your Kitchen Island

    20 Dining Rooms With Chic Chandeliers and Pendant Lights
    Credit: Houzz

    Pendants are the statement earrings of kitchen lighting. They hang low, they draw the eye, and they instantly make a kitchen feel finished. The trick is getting the size and spacing right.

    For a standard island, hang two or three pendants spaced about 24 to 30 inches apart. Keep the bottom of the fixture 30 to 36 inches above the counter surface. Too high and they look lost. Too low and you’ll bonk your head reaching for the salt.

    Practical tip: Measure your island length, divide by three, and space your pendants at those points for even coverage.

    Coastal kitchens love glass or rattan pendants. Modern kitchens go for matte black or brass geometric shapes. Traditional spaces often choose bell-shaped glass with bronze finishes. Once your island is glowing, it’s time to think bigger picture with the ceiling.

    3. Add a Statement Chandelier for Dining Areas

    26 Kitchen Lighting Ideas That Make a Statement
    Credit: Better Homes & Gardens

    If your kitchen has a breakfast nook or an eat-in table, a small chandelier changes the whole vibe. It’s not just light, it’s decor. It says “this spot matters.”

    You don’t need anything huge. A mini chandelier, maybe 18 to 24 inches wide, works perfectly over a table for four. Go bigger only if your table seats six or more.

    Practical tip: Hang the chandelier so the bottom sits about 30 inches above the tabletop, giving clear sightlines across the table.

    Farmhouse kitchens tend to like wood and iron mixes. Glam kitchens go for crystal or beaded styles. Minimalist spaces choose simple linear fixtures with exposed bulbs. Speaking of exposed bulbs, let’s talk about a trend that’s stuck around for a reason.

    Fixture Type Comparison Table

    Fixture TypeBest ForAverage Cost RangeLight Output
    Pendant LightsIslands, peninsulas$50 to $300 eachMedium, focused
    ChandeliersDining nooks, breakfast tables$150 to $600Medium, ambient
    Under-Cabinet LEDsCountertops, task areas$30 to $150 per runHigh, directional
    Recessed CansGeneral ambient light$20 to $80 per fixtureHigh, spread out
    Track LightingAccent walls, open shelving$40 to $200Adjustable, focused

    4. Use Recessed Lighting for Even, Ambient Coverage

    Top Recessed Lighting Ideas to Transform Your Home
    Credit: Visual Comfort

    Recessed lights, also called can lights, sit flush in the ceiling and spread light evenly across the whole room. They’re the quiet workhorses of kitchen lighting. Nobody notices them, but everybody notices when a kitchen is missing them.

    The general rule is one recessed light for every 4 to 6 square feet of ceiling space, though this shifts based on ceiling height and bulb wattage. Space them evenly in a grid pattern for the most consistent light.

    Practical tip: Use warm LED bulbs (around 2700K) in recessed cans so your kitchen doesn’t feel like a hospital hallway.

    This works in almost any style since the fixtures themselves disappear into the ceiling. Modern farmhouse, transitional, contemporary, it all works. Now let’s brighten up a spot people often forget.

    5. Light Up Open Shelving With Small Puck Lights

    Shelf lighting ideas: how to light up shelves for a chic look | Dako Furniture
    Credit: Dako Furniture

    Open shelves look great until they’re sitting in shadow. Small puck lights, either battery-powered or wired, tucked under each shelf, make your dishes and glassware glow like a little display case.

    These lights are cheap and easy to install yourself. Stick-on LED pucks cost as little as $15 for a pack of six. No electrician needed.

    Practical tip: Angle the pucks slightly forward so light hits the items on the shelf below instead of just the shelf surface itself.

    Coastal and bohemian kitchens with open shelving benefit the most here, since they usually display baskets, plants, or ceramics that deserve to be seen. Speaking of showing things off, let’s talk about glass-front cabinets.

    6. Add Interior Cabinet Lighting to Glass-Front Cabinets

    8 ways to style glass fronted kitchen cabinets | Homes and Gardens
    Credit: Homes and gardens

    If you’ve got glass-front cabinets showing off your good dishes or glassware, adding a small light inside changes everything. It turns a simple cabinet into a lit display case, almost like a museum exhibit for your kitchenware.

    Small LED strip lights or battery-operated tap lights fit easily inside cabinet interiors. Many run on batteries so you skip the wiring hassle completely.

    Practical tip: Choose lights with a warm tone to make white dishware and glass pieces look inviting rather than clinical.

    Traditional and transitional kitchens use this trick most often, especially with glass-front upper cabinets near a dining space. Now let’s move to something that solves a problem almost every kitchen has.

    7. Fix Dark Corners With Toe-Kick Lighting

    Quick Fix: Easy Toe-Kick Lighting
    Credit: Houzz

    Toe-kick lighting sits at the base of your cabinets, right near the floor. It’s subtle, but it does two things really well: it adds a soft nightlight glow, and it makes your kitchen feel bigger by lighting up the floor level.

    This is especially handy in kitchens with dark flooring or lower light at night. It also helps you avoid stubbing your toe during a midnight fridge raid.

    Practical tip: Use a motion sensor so the toe-kick lights turn on automatically when you walk into the kitchen at night.

    Modern and minimalist kitchens use this a lot since it keeps the look clean while still being functional. Now, let’s talk about a lighting trick that adds drama without adding clutter.

    8. Install a Skylight or Solar Tube for Natural Light

    Sun Tunnels: Find Some Light In Every Room - This Old House
    Credit: This Old House

    Nothing beats real daylight. If your kitchen has roof access, a skylight or solar tube can flood the space with natural light during the day, cutting down on your electric bill and making the whole room feel brighter and happier.

    Solar tubes are smaller and cheaper than full skylights, often costing $500 to $900 installed, compared to $1,500 to $3,000 for a full skylight.

    Practical tip: Place skylights over the sink or prep area, since that’s usually where you need the most visual clarity during the day.

    This works especially well in Mediterranean, farmhouse, and coastal kitchens, where natural light is part of the whole design philosophy. Now let’s cover something a lot of people skip: dimmer switches.

    9. Put Everything on Dimmer Switches

    Customizing the Home with Designer Light Switches and Wall Plates - Cozy Stylish Chic
    Credit: Cozy Stylish Chic

    This might be the cheapest, easiest upgrade on this whole list. Dimmer switches let you control the mood instantly. Bright for cooking, soft for dinner parties, dim for a midnight snack.

    Most dimmer switches cost between $15 and $40 and take less than an hour to install if you’re comfortable with basic electrical work. If not, an electrician can usually knock it out in one visit for a small fee.

    Practical tip: Install separate dimmers for your overhead lights and your under-cabinet lights so you can control each layer independently.

    Every kitchen style benefits from this one. There’s no downside. Now let’s talk about a design trend that adds warmth in an unexpected way.

    10. Use Warm-Toned Bulbs to Create a Cozy Glow

    What is a Warm Light? And How it Can Make Your Home Cozier – Cozy Cottage
    Credit: Cozy Cottage

    The color temperature of your bulbs changes the entire feeling of your kitchen. Cool white bulbs (4000K and up) feel clinical and bright, great for task areas. Warm white bulbs (2700K to 3000K) feel cozy and inviting, perfect for evening gatherings.

    Mixing both is smart. Use cooler tones under cabinets for task work, and warmer tones in pendants and chandeliers for ambiance.

    Practical tip: Buy one bulb of each temperature before committing to a whole set, and test them in your kitchen at night to see which feels right.

    Color Temperature Guide

    Kelvin RangeFeelBest Used For
    2200K to 2700KVery warm, cozyDining nooks, ambiance
    2700K to 3000KWarm whiteGeneral kitchen lighting
    3500K to 4100KNeutral whiteTask areas, prep zones
    5000K and upCool, brightRarely recommended for kitchens

    Farmhouse and traditional kitchens usually lean warm across the board. Modern and industrial kitchens sometimes mix warm and cool for contrast. Let’s move on to a lighting idea that’s often overlooked entirely: the window itself.

    11. Maximize Natural Light With Sheer or No Window Coverings

    Maximize Natural Light: 10 Easy Ways to Brighten Your Home
    Credit: DecorMatters

    Sometimes the best lighting idea costs nothing. If your kitchen window gets good sun, skip heavy curtains. Use sheer panels or leave the window bare to let natural light pour in during the day.

    This pairs well with light-colored countertops and walls, which bounce daylight around the room instead of absorbing it.

    Practical tip: If privacy’s a concern, try frosted window film instead of curtains. It still lets light through while blocking the view inside.

    Coastal, Scandinavian, and modern farmhouse kitchens all lean into this idea heavily, since natural light is a core part of those styles. Last but not least, let’s talk about a fixture type that’s making a serious comeback.

    12. Bring Back Track Lighting for Flexible Accent Light

    What is Track Lighting? Types, Costs, Ideas and More - LEDYi Lighting
    Credit: LEDYi Lighting

    Track lighting got a bad reputation in the 90s, but the newer versions look nothing like those old brass fixtures. Today’s track lighting comes in sleek black or white finishes with adjustable heads you can point exactly where you need light.

    It’s great for kitchens with open shelving, art on the walls, or awkward layouts where recessed lighting just won’t reach every corner.

    Practical tip: Point one or two heads toward your backsplash or a piece of wall art to add a focal point without extra fixtures.

    Industrial and modern kitchens use this style most successfully, especially in open-concept layouts with exposed ceilings or ductwork. Now that you’ve got all twelve ideas, let’s talk about how to actually pull this off without making costly mistakes.

    Tips for Success

    • Layer at least three light sources (ambient, task, and accent) in every kitchen, no matter the size.
    • Test bulb color temperatures in your actual kitchen before buying a whole case of them.
    • Keep pendant lights centered over the island, not centered on the room, since these are rarely the same spot.
    • Budget 10 to 15 percent extra for electrical work if you’re adding new wiring instead of using existing fixtures.
    • Choose dimmable fixtures whenever possible, even if you don’t install the dimmer switch right away.
    • Match metal finishes across your fixtures (all matte black, or all brass) to keep the kitchen feeling pulled together.

    Common Mistakes and How to Avoid Them

    Relying on one overhead light for the whole kitchen
    : Add at least two more layers, like under-cabinet task lighting and a pendant or accent fixture, to cover different needs.

    Hanging pendants too high or too low
    : Keep pendant bottoms 30 to 36 inches above the counter or island surface for the right balance.

    Mixing too many metal finishes
    : Stick to one or two finishes across all fixtures, like matte black paired with brushed brass, to avoid a cluttered look.

    Skipping dimmers entirely
    : Install dimmer switches on at least your main overhead and island lights so you can adjust brightness for different activities.

    Using the wrong bulb temperature everywhere
    : Use warmer bulbs for ambiance areas and cooler or neutral bulbs for task zones like counters and stovetops.

    Forgetting to light dark corners and cabinet interiors
    : Add small puck lights or LED strips inside cabinets and under shelving to eliminate shadows in overlooked spots.

    Similar Variations

    • Farmhouse Kitchen Lighting: Wood and iron fixtures paired with warm bulbs and exposed filament styles.
    • Industrial Kitchen Lighting: Black metal track lighting, exposed bulbs, and factory-style pendants.
    • Coastal Kitchen Lighting: Rattan or glass pendants, lots of natural light, and light, airy finishes.
    • Modern Minimalist Kitchen Lighting: Recessed cans, hidden LED strips, and simple geometric pendants.
    • Traditional Kitchen Lighting: Bronze or brass chandeliers, glass-front cabinet lighting, and warm ambient tones.
    • Scandinavian Kitchen Lighting: Simple pendant shapes, lots of natural window light, and soft warm bulbs throughout.

    At the end of the day, good kitchen lighting isn’t about buying the fanciest fixture in the store. It’s about layering light so every corner of your kitchen actually works for you, whether you’re chopping onions or hosting friends for wine. Small changes, like adding a dimmer switch or under-cabinet strip, can make a bigger difference than you’d expect.

    I hope this walkthrough gave you a clearer picture of what your kitchen actually needs. Pick two or three ideas from this list to start, see how they feel, and build from there. That’s really all these 12 Kitchen Lighting Ideas are meant to do: help you find the right glow for the way you actually live in your kitchen.

  • 12 Top Of Kitchen Cabinet Decor

    12 Top Of Kitchen Cabinet Decor

    If you’ve ever stared at that awkward empty space above your kitchen cabinets and wondered what to do with it, I’ve got you covered. This guide walks through 12 top of kitchen cabinet decor ideas that actually work in real homes, not just magazine spreads. I’ve tested a bunch of these myself, and I’m sharing what actually holds up over time.

    Top of kitchen cabinet decor refers to styling the gap between your upper cabinets and the ceiling using items like baskets, plants, jars, or artwork. The goal is to fill dead space with pieces that add color, texture, or personality without looking cluttered or collecting dust unnecessarily.

    Stick around, because I’m also going to show you the mistakes people make with this space, plus some style variations you probably haven’t thought of yet.

    What Is Top-of-Cabinet Decor, Really?

    Okay so here’s the deal. Most kitchens have this weird gap above the cabinets. Builders leave it there because running cabinets to the ceiling costs more. That gap can look sad and empty, or it can become one of the coolest parts of your kitchen. I think of it like the top shelf of a bookcase. You wouldn’t leave it bare, right? Same idea here. The trick is picking things that fit your kitchen’s personality without turning into a dust trap you dread cleaning every few months. Let’s get into the good stuff.

    1. Group Vintage Pottery in Odd Numbers

    Credit: Stockcake

    Vintage pottery instantly makes cabinet tops feel curated instead of random. I like grouping pieces in threes or fives because odd numbers just look more natural to the eye than even ones. Mix heights and shapes but keep the color family similar, like earthy browns, creams, or muted blues.

    Actionable tip: place your tallest piece slightly off-center, not dead in the middle, to avoid a stiff, symmetrical look.

    This works great in farmhouse or traditional kitchens. For modern spaces, swap pottery for sleek ceramic vessels in matte black or white instead.

    Once you’ve got your pottery grouped up, you might want something that adds a bit of natural texture nearby, which brings me to baskets.

    2. Add a Row of Woven Baskets

    Credit: Thebasketcompany

    Woven baskets are a classic for a reason. They add warmth and texture without screaming for attention. I love lining up two or three baskets of slightly different sizes across the cabinet top. They also double as sneaky storage if you flip them upside down or tuck small items inside.

    Actionable tip: choose baskets with flat bottoms so they sit stable and don’t wobble every time you open a cabinet door underneath.

    Coastal and boho kitchens practically demand this look, but even a modern farmhouse kitchen can pull it off with lighter-toned rattan.

    Baskets bring texture, but if you want something with a little more visual weight, large jars or jugs are your next move.

    3. Display Large Decorative Jugs or Jars

    Credit: Homesandgardens

    Big glass or ceramic jugs fill vertical space fast, which is great if your cabinet gap is on the taller side. I’ve seen these look amazing in amber glass, matte stoneware, or even old milk jug styles picked up from flea markets.

    Actionable tip: stick to one or two large jugs rather than five small ones. Fewer, bigger pieces read as intentional instead of cluttered.

    Traditional and farmhouse kitchens love this look. In a modern kitchen, try a single oversized glass vessel with clean lines instead of anything rustic.

    Now that we’ve covered a few decor styles, let’s compare materials so you can pick what actually fits your space and budget.

    Material Comparison for Cabinet-Top Decor

    MaterialAverage CostDurabilityBest Style Match
    Ceramic pottery$15-$60 per pieceHigh, but chips if droppedFarmhouse, traditional
    Woven rattan/seagrass$10-$40 per basketModerate, fades in direct sunCoastal, boho
    Glass jars/jugs$8-$50 per pieceHigh, but breakableModern, farmhouse
    Metal/copper$20-$80 per pieceVery high, tarnishes over timeIndustrial, traditional
    Wood crates$10-$35 per pieceHigh, may warp with humidityRustic, farmhouse

    4. Bring in Greenery with Trailing Vines

    Credit: Elledecor

    Plants make everything feel alive, and cabinet tops are perfect for trailing varieties like pothos or ivy. The vines cascade down naturally and soften all those hard lines from your cabinets. Fake plants work fine here too if you don’t want to deal with watering something you can barely reach.

    Actionable tip: use a small stool or step ladder monthly to dust and check real plants for pests, since this spot gets forgotten easily.

    This idea flexes across almost every style. Boho kitchens love lush greenery, while modern kitchens might prefer one simple trailing plant in a minimalist pot.

    Greenery softens a space, but if you want more personality on display, your book collection might be the answer.

    5. Line Up Vintage Cookbooks

    Credit: Thecottagemarket

    Old cookbooks add color, texture, and a little storytelling to your kitchen. I like stacking some flat and standing others upright with a small bookend or decorative object leaning against them. It feels lived-in without looking messy.

    Actionable tip: choose books with spines in colors that complement your kitchen palette, not just random ones from a thrift store bin.

    This works beautifully in traditional and cottage-style kitchens. Modern kitchens can still pull it off with a few carefully chosen design books instead of grandma’s recipe collection.

    Speaking of collections, few things say “kitchen charm” quite like a display of copper cookware.

    6. Showcase a Collection of Copper Pots

    Credit: Hunker

    Copper pots and pans have that warm, glowing look that instantly makes a kitchen feel cozy. Even if you never cook with them, hanging or displaying a few on top of your cabinets adds shine and warmth to an otherwise flat space.

    Actionable tip: use a light polish every few months to keep that copper glow from turning dull and greenish.

    This is a natural fit for traditional and French country kitchens. In modern spaces, stick to one or two pieces for contrast rather than a full collection.

    If your cabinets don’t reach that high or you want more flexibility, floating shelves might solve your whole layout problem.

    7. Install Floating Shelves Instead of Blank Space

    Credit: Biggerthanthethreeofus

    Sometimes the smartest move isn’t decorating the gap, it’s changing it. Adding a thin floating shelf just below the ceiling gives you a real surface to work with instead of balancing everything on cabinet edges. This also makes cleaning way easier.

    Actionable tip: keep the shelf depth under 10 inches so it doesn’t compete visually with your cabinets below.

    Floating shelves fit almost any style since you control the finish, from raw wood for rustic kitchens to painted white for modern ones.

    Once you’ve got a shelf or flat surface, lighting can take the whole display to another level.

    8. Add String Lights or Warm Lighting

    Credit: Digsdigs

    A little hidden lighting above your cabinets creates a soft glow that makes your whole kitchen feel warmer at night. I’ve used simple LED strip lights tucked behind decor items, and it completely changes the mood without any major renovation.

    Actionable tip: choose warm white bulbs, around 2700K to 3000K, instead of bright white, so the light feels cozy instead of clinical.

    Modern kitchens look great with clean LED strips, while farmhouse and traditional spaces can use small string lights with exposed bulbs for extra charm.

    Lighting sets the mood, but nothing personalizes a space faster than art or signage.

    9. Mix in Framed Art or Wooden Signs

    Credit: bhg

    Small framed prints or wooden signs leaned against the wall above cabinets add personality fast. I like mixing a piece of art with a small plant or jar so it doesn’t look like a random picture frame just sitting there awkwardly.

    Actionable tip: lean pieces at a slight angle using a small stand or easel instead of laying them completely flat, so they catch the eye.

    Coastal kitchens love beachy signs, farmhouse kitchens go for “gather” or “eat” style wood signs, and modern kitchens do best with abstract art in simple frames.

    Now let’s talk budget, because not every idea here costs the same amount to pull off.

    Budget Tiers for Cabinet-Top Decor

    Budget TierPrice RangeWhat You Get
    LowUnder $50Thrifted jars, a few plants, basic baskets
    Mid$50-$150New pottery, quality baskets, small art prints
    High$150-$400Floating shelves, copper collection, curated vintage pieces
    Splurge$400+Custom shelving, professional lighting, designer decor pieces

    10. Use Matching Glass Jars for a Uniform Look

    Credit: Nakpunar

    If you want a cleaner, more organized look, matching glass jars are the way to go. I fill mine with pasta, dried flowers, or even just leave a few empty for visual variety. The uniformity makes the whole cabinet top feel put together instead of thrown up there.

    Actionable tip: buy jars from the same set or brand so lids and shapes actually match, since mismatched jars ruin the clean effect.

    This idea is perfect for modern and minimalist kitchens. Farmhouse kitchens can still use it by choosing jars with a slightly frosted or vintage glass finish.

    If you’re someone who loves to entertain, a small bar display might be more your style than jars.

    11. Add a Wine or Bar Display

    Credit: Soinspalliatifspaca

    Turning your cabinet top into a mini bar area is a fun twist most people don’t think about. A few wine bottles, some stemware, or a small decorative tray with bar tools can make that space feel intentional and useful, not just decorative.

    Actionable tip: use a small tray underneath bottles and glasses so everything looks grouped instead of scattered across the surface.

    This works especially well in modern and industrial kitchens. Traditional kitchens can soften it with a wooden tray and warmer glass tones.

    Whatever style you choose, remember that decor doesn’t have to stay the same all year, which brings me to my last big idea.

    12. Layer with Seasonal Decor Rotations

    Credit: bhg

    Swapping a few pieces every season keeps your kitchen feeling fresh without a full redo. I keep a small bin of seasonal items, pumpkins in fall, greenery in winter, light florals in spring, and rotate them in with my permanent pieces like baskets or pottery.

    Actionable tip: keep your “base” decor neutral year-round and only rotate two or three small accent pieces, so the swap takes five minutes, not an hour.

    This flexes beautifully across every style since you’re just changing accents, not the whole setup. Coastal kitchens might rotate shells and driftwood, while traditional kitchens rotate seasonal florals or wreaths.

    13. Use Decorative Trays to Anchor Groupings

    Credit: letsfoodie

    A decorative tray placed under a cluster of jars, plants, or pottery instantly makes the whole display look organized. Without a tray, items can look like they’re just randomly sitting up there. With one, it looks styled on purpose, even if you didn’t spend much time on it.

    Actionable tip: choose a tray slightly wider than your grouping so there’s a small visible border around the items, not edges hanging off.

    Modern kitchens do well with metal or lacquered trays, while farmhouse and cottage kitchens look great with a distressed wood tray instead.

    Tips for Success

    • Measure your cabinet gap before buying anything, since even two inches of extra clearance changes what fits.
    • Keep a step stool nearby so dusting actually happens instead of getting ignored for months.
    • Stick to a consistent color palette across all your pieces so the display feels planned, not random.
    • Leave some negative space between groupings instead of filling every inch of the surface.
    • Choose lightweight items if your cabinets are older or not built for heavy weight up top.
    • Repaint or refinish thrifted pieces to match your kitchen instead of leaving them mismatched.
    • Take a photo of your finished display and live with it for a week before making final tweaks.

    Common Mistakes and How to Avoid Them

    Overcrowding the space
    : Fewer, larger items look more intentional than a dozen small trinkets crammed together.

    Ignoring scale
    : Tiny decor items get lost above tall cabinets. Choose pieces sized to match the height of the gap.

    Skipping dust maintenance
    : This spot collects grease and dust fast in kitchens. Clean it monthly, not yearly.

    Mismatched color palettes
    : Random colors make the space look chaotic. Stick to two or three complementary tones.

    Using heavy, unstable items
    : Top-heavy decor near the ceiling is a safety risk, especially in homes with kids. Choose stable, lightweight pieces.

    Forgetting your kitchen’s style
    : Rustic crates in a sleek modern kitchen look out of place. Match decor to your existing design language.

    Similar Variations

    • Farmhouse Cabinet Topper: Wood crates, cookbooks, and warm pottery for a cozy, lived-in feel.
    • Coastal Cabinet Display: Woven baskets, driftwood, and glass jars in soft blues and sandy neutrals.
    • Modern Minimalist Topper: A few sleek vessels and one plant, nothing more, in a tight neutral palette.
    • Industrial Loft Style: Metal containers, copper accents, and exposed bulb lighting for an urban edge.
    • Traditional French Country: Copper pots, vintage jugs, and framed botanical prints for old-world charm.
    • Boho Eclectic Mix: Layered plants, textured baskets, and mismatched pottery in warm earthy tones.

    Filling that empty space above your cabinets doesn’t need to be complicated or expensive. A few well-chosen pieces, some greenery, or a simple floating shelf can completely change how your kitchen feels. Whether you go rustic, modern, or somewhere in between, these 12 top of kitchen cabinet decor ideas give you a real starting point to make that awkward gap actually work for you.

  • 15 Black Kitchen Cabinets That Will Change How You See Your Kitchen

    15 Black Kitchen Cabinets That Will Change How You See Your Kitchen

    I’ve spent hours digging through kitchen design trends, and I can tell you 15 black kitchen cabinets ideas are having a real moment right now. If you’ve ever wondered whether dark cabinets could work in your own home, you’re in the right spot. This article breaks down exactly what makes black cabinetry work, why it’s not just a fad, and how to pull it off without making your kitchen feel like a cave.

    Black kitchen cabinets are cabinet designs finished in matte, satin, or glossy black paint or stain, used as the main storage and visual anchor of a kitchen. They pair with light countertops, brass or gold hardware, and natural wood accents to balance the darker tone and prevent the space from feeling too heavy.

    Stick around, because I’m about to walk you through 15 specific ways to use black cabinets, plus a few mistakes that trip people up every single time.

    Why Black Cabinets Are Taking Over Kitchens

    I remember when white kitchens were the only “safe” choice. Everyone wanted bright, clean, and airy. Then black cabinets started showing up in magazines and Pinterest boards, and honestly, they changed the game.

    Black cabinets give a kitchen instant personality. They look sleek in a modern home and surprisingly cozy in a farmhouse-style one. The trick is balance. Black soaks up light, so you need to pair it with the right countertops, backsplash, and lighting to keep things from feeling dark or small. Once you nail that balance, black cabinets look expensive, timeless, and way more interesting than another white kitchen.

    1. Pair Black Lower Cabinets With White Uppers

    25 Stunning Two Tone Painted Kitchen Cabinet Ideas for 2025
    Credit: Rollcallpainting

    This is the easiest way to dip your toes into black cabinetry without going all in. Keep your upper cabinets white or cream, and let the black lowers ground the room. This two-tone look feels balanced because the eye travels naturally from light to dark.

    Choose a warm white for the uppers, not stark white, so the contrast doesn’t feel too harsh. Add brushed nickel or matte black pulls to tie both tones together.

    Practical tip: Test paint samples on your actual cabinet doors before committing, since lighting changes how black reads throughout the day.

    This works beautifully in transitional and farmhouse kitchens especially. Once you’ve got the two-tone base down, you can start layering in texture, which brings us to the next idea.

    2. Add a Textured Wood Island for Contrast

    80 Modern Kitchen Island Ideas to Transform Your Home in 2026
    Credit: Elle Decor

    A black kitchen needs warmth somewhere, and a wood island does that job perfectly. Think butcher block, reclaimed oak, or a walnut stain. The wood breaks up all that black and adds a natural, lived-in feel.

    Keep the island a slightly different wood tone than your flooring so it stands out as a feature, not just a match. A waterfall edge countertop on the island can also add a modern touch if that’s your style.

    Quick tip: Stick with a matte or satin finish on the wood so it doesn’t compete with glossy black cabinets nearby.

    Coastal kitchens love this combo with lighter driftwood tones, while industrial kitchens lean toward darker, distressed wood. Next, let’s talk about what goes above those black cabinets.

    3. Use a Marble or Quartz Backsplash for Brightness

    41+ Backsplash for White Quartz Countertops ( TRENDIEST ) - Tile Ideas
    Credit: Backsplash

    Black cabinets can feel heavy without something reflective nearby. A marble or quartz backsplash with light veining bounces light back into the room and keeps things from feeling closed in.

    Go floor-to-ceiling if your budget allows, especially behind the stove. It creates a dramatic focal point that photographs beautifully and never goes out of style.

    Actionable tip: Choose a backsplash with subtle gray or gold veining to complement both black cabinets and metal hardware.

    Modern farmhouse kitchens do well with softer marble patterns, while contemporary kitchens can handle bolder, more dramatic veining.

    Countertop and Backsplash Pairings for Black Cabinets

    Countertop/Backsplash MaterialBest Paired WithApproximate Cost per Sq. Ft.Style Fit
    Carrara MarbleBrass hardware, white oak floors$75–$150Traditional, French Country
    White QuartzMatte black fixtures, gray grout$50–$100Modern, Transitional
    Butcher Block WoodCopper accents, exposed brick$35–$70Farmhouse, Industrial
    TerrazzoColorful glass tile, brass pulls$60–$120Eclectic, Retro
    ConcreteSteel appliances, minimal decor$65–$135Industrial, Modern

    Now that your surfaces are sorted, let’s look at how lighting changes everything.

    4. Install Warm Under-Cabinet Lighting

    How to Choose and Install the Best Under Cabinet Lighting for your Kitchen - The Palette Muse
    Credit: Thepalettemuse

    Black cabinets absorb light instead of reflecting it, so under-cabinet lighting isn’t optional here, it’s essential. Warm LED strips tucked under the upper cabinets light up your countertop workspace and add a soft glow that makes black cabinetry look intentional rather than dim.

    Choose LED strips with a warm white temperature, around 2700K to 3000K, to avoid a cold, clinical feel.

    Practical tip: Install lighting on a separate switch so you can control ambiance during evening meals versus daytime cooking.

    This idea works in every kitchen style because good lighting is universal. Once your cabinets are lit properly, it’s time to think about what’s holding them together, literally.

    5. Choose Brass or Gold Hardware for Warmth

    brass-cabinet-hardware
    Credit: Modern-matter

    Black cabinets paired with cool silver hardware can feel a little sterile. Switch to brass, gold, or even aged bronze pulls and knobs, and suddenly the whole kitchen feels warmer and richer.

    I always tell people this is the cheapest, fastest upgrade you can make. Swapping hardware costs way less than repainting cabinets but changes the entire mood of the room.

    Actionable tip: Mix hardware finishes sparingly, like brass pulls with matte black faucets, for a curated, collected look rather than matchy-matchy.

    Traditional kitchens shine with ornate brass details, while modern spaces prefer sleek, unlacquered brass with simple lines. Speaking of faucets, let’s talk fixtures next.

    6. Go Bold With a Black Faucet and Sink Combo

    A brown kitchen with cabinets and a sink.
    Credit: lovechicliving

    If you’re already committing to black cabinets, why not extend that into your fixtures? A matte black faucet paired with a black or dark granite composite sink creates a cohesive, moody look that feels custom-designed.

    This works especially well in kitchens with white or light stone countertops, since the contrast makes the black pop even more.

    Quick tip: Look for faucets with a matte, not glossy, finish so it doesn’t clash with cabinet sheen.

    Industrial and modern farmhouse kitchens both love this look. Coastal kitchens can pull it off too, as long as the rest of the palette stays light and airy. Next, let’s talk wall color, because it matters more than people think.

    7. Paint Walls a Soft, Warm Neutral

    Credit: Hgtv

    Black cabinets need a wall color that supports them without fighting for attention. Soft neutrals like warm white, greige, or pale sage work wonders here. Avoid stark white walls, since the contrast can feel too stark and clinical against black cabinetry.

    I like recommending a warm off-white with a hint of yellow or beige undertone. It softens the whole room instantly.

    Practical tip: Test your wall color next to your cabinet sample in both natural and artificial light before painting the whole room.

    Traditional kitchens do well with warm cream tones, while modern kitchens can handle cooler grays. Once your walls are sorted, open shelving is worth considering too.

    8. Add Open Wood Shelving for Balance

    24 Ideas for Kitchens With Open Shelving
    Credit: Thespruce

    Full black cabinetry can feel like a lot if every wall is covered. Swap one section for open wood shelves instead. This breaks up the visual weight and gives you a spot to display dishes, plants, or cookbooks.

    Choose a wood tone that matches or complements your island or flooring for a cohesive look.

    Actionable tip: Style shelves in odd numbers, like groups of three items, for a more natural, less staged appearance.

    Farmhouse and coastal kitchens especially benefit from this softer, more relaxed touch. Now let’s zoom into cabinet finish itself, because matte versus glossy makes a real difference.

    Black Cabinet Finish Comparison

    Finish TypeLook and FeelMaintenance LevelBest For
    Matte BlackSoft, modern, hides smudges wellLowContemporary, Scandinavian
    Satin BlackSlight sheen, versatileMediumTransitional, Farmhouse
    High-Gloss BlackReflective, dramatic, shows fingerprintsHighModern, Glam
    Black Stain (Wood Grain Visible)Natural texture, rustic warmthMediumTraditional, Rustic

    9. Use Black Cabinets Only on One Wall

    One-Wall Kitchen Layouts: 17+ Design Ideas and Tips
    Credit: Kitchencabinetkings

    Not ready to commit your whole kitchen to black? Try it on one wall only, like a pantry wall or the wall housing your range. This lets you experiment with the trend without a full renovation commitment.

    Keep the rest of your cabinetry in a lighter wood tone or white to create intentional contrast rather than a mismatched look.

    Practical tip: Use the black wall as your kitchen’s focal point by adding statement lighting or open shelving right above it.

    This approach fits small kitchens especially well, since it adds drama without shrinking the space visually. Next, let’s talk about floors, because they need to hold their own against black cabinets.

    10. Choose Wide-Plank Wood Flooring

    Wide Plank Wood Flooring In The Kitchen | Hull Blog
    Credit: Hullforest

    Black cabinets look incredible against warm, wide-plank wood floors. The wood grain adds texture and warmth that balances out all that dark cabinetry above.

    Go for a medium to light wood tone rather than dark flooring, since dark floors paired with dark cabinets can make a kitchen feel like a shadow box.

    Actionable tip: Choose flooring with some texture or graining, not a perfectly smooth finish, to add visual interest underfoot.

    Modern farmhouse and traditional kitchens both lean heavily on this combo. Coastal kitchens do a lighter, whitewashed version of the same idea. Now, let’s talk about a design choice that’s a bit bolder: black cabinets with black walls.

    11. Try a Moody All-Black Kitchen

    45 Black Kitchens That Are Both Timeless and Bold
    Credit: bhg

    If you’re feeling brave, go full moody and pair black cabinets with black or deep charcoal walls. This creates a dramatic, restaurant-like feel that’s become popular in loft-style homes and city apartments.

    The key here is lighting. You need multiple light sources, pendant lights, under-cabinet lighting, and recessed ceiling lights, to keep the space from feeling like a cave.

    Practical tip: Add a few metallic or glass accents to bounce light around the room and prevent visual flatness.

    This look is best suited for modern, industrial, or glam kitchens with high ceilings and big windows. Smaller kitchens should approach this idea carefully. Speaking of smaller spaces, let’s cover how to make black cabinets work in a compact kitchen.

    12. Use Glass-Front Cabinets to Add Depth

    8 ways to style glass fronted kitchen cabinets | Homes and Gardens
    Credit: Homesandgardens

    Solid black cabinets everywhere can feel visually heavy in a smaller kitchen. Swap a few upper cabinet doors for glass fronts instead. This adds depth, breaks up the solid black, and gives you a spot to show off pretty dishware.

    Choose frosted or seeded glass if you want a softer, more diffused look rather than a fully see-through display.

    Actionable tip: Keep the inside of glass-front cabinets tidy and color-coordinated, since everything inside becomes part of your decor.

    Traditional and coastal kitchens both use this trick often. Modern kitchens tend to skip the frosted glass in favor of clear, minimalist panels. Next, let’s talk about how greenery changes a black kitchen completely.

    13. Bring in Greenery to Soften the Look

    Before & After an Eat-In Kitchen Makeover in Green | Houzz AU
    Credit: Houzz

    Black cabinets can feel cold without something living in the room. Adding potted herbs, a small tree, or hanging plants softens the whole space instantly and adds a pop of natural color.

    I always suggest low-maintenance plants like pothos, snake plants, or fresh herbs on a windowsill, since kitchens can be tricky environments for finicky plants.

    Practical tip: Group plants in varying heights on open shelves or windowsills for a more layered, natural look.

    This works in literally every kitchen style, from modern to farmhouse to coastal. Now let’s talk about a finishing touch that ties everything together: your ceiling.

    14. Add a Statement Ceiling or Beams

    25 Best Coffered Ceiling Ideas
    Credit: bhg

    Don’t forget to look up. Black cabinets pair beautifully with exposed wood beams, shiplap ceilings, or even a painted ceiling in a complementary tone. This draws the eye upward and keeps the black cabinetry from being the only interesting feature in the room.

    Choose a natural wood beam finish if your island or flooring already has warm wood tones, for a cohesive design story.

    Actionable tip: If a full ceiling redo isn’t in the budget, even a simple crown molding painted a contrasting color can add architectural interest.

    Farmhouse and traditional kitchens use exposed beams often, while modern kitchens might opt for a sleek painted ceiling instead. Finally, let’s talk about the small details that pull the whole look together.

    15. Layer in Black and Gold Accessories

    25 Black and Gold Kitchen Ideas: 2026 Modern & Moody Trends - Hackrea
    Credit: Hackrea

    Once your cabinets, counters, and floors are set, it’s the little details that finish the look. Black and gold accessories, think cabinet knobs, light fixtures, bar stools, or even a black-framed mirror, tie the whole kitchen together without requiring another big renovation step.

    Choose one or two accent colors, like gold and a soft sage green, to avoid a cluttered or mismatched feel.

    Practical tip: Rotate smaller decor items seasonally, like swapping out a fruit bowl or dish towels, to keep the space feeling fresh without spending much money.

    This layering trick works across every style I’ve mentioned so far. It’s the easiest, cheapest way to make a black kitchen feel finished and personal.

    Tips for Success

    • Always test paint or stain samples on actual cabinet doors, not just paper swatches, before committing to a full kitchen repaint.
    • Balance black cabinets with at least one light element, whether that’s countertops, walls, or flooring, so the room doesn’t feel too dark.
    • Invest in good lighting first. Black cabinets show poor lighting more than any other color choice.
    • Choose a mix of textures, like matte cabinets with glossy countertops, to keep the kitchen visually interesting.
    • Don’t skip hardware. Cheap or mismatched hardware can make even expensive cabinets look unfinished.
    • Keep countertop clutter minimal since black cabinets already draw a lot of visual attention.
    • Consider your home’s natural light before committing to black, since north-facing kitchens may need extra light sources to balance the darker tone.

    Common Mistakes and How to Avoid Them

    Going too dark everywhere
    : Pair black cabinets with light countertops, walls, or flooring so the kitchen doesn’t feel cramped or cave-like.

    Skipping proper lighting
    : Install a mix of under-cabinet, recessed, and pendant lighting since black absorbs light instead of reflecting it.

    Choosing the wrong hardware finish
    : Warm metals like brass or gold soften black cabinets, while cool chrome can feel harsh and sterile.

    Ignoring maintenance needs
    : Glossy black shows fingerprints and smudges quickly, so choose matte or satin finishes for high-traffic kitchens.

    Forgetting about ventilation and airflow
    : Dark, enclosed kitchens need good ventilation to avoid feeling stuffy, especially in smaller spaces without much natural light.

    Overdoing matching accessories
    : Too much matchy black and gold everywhere can feel staged rather than lived-in, so mix in some texture and variety.

    Similar Variations

    • Navy Blue Cabinets: A softer alternative to black that still feels dramatic but slightly warmer and less stark.
    • Charcoal Gray Cabinets: Offers a similar moody effect with a bit more flexibility for lighter, airier spaces.
    • Two-Tone Black and Wood Cabinets: Combines black lowers or uppers with natural wood tones for a balanced, textured look.
    • Matte Black Industrial Kitchens: Leans into raw materials like steel, concrete, and black cabinetry for a loft-inspired feel.
    • Black and White Checkerboard Kitchens: Pairs black cabinets with bold black-and-white flooring for a retro, high-contrast statement.
    • Black Shaker Farmhouse Kitchens: Uses traditional shaker-style black cabinets with rustic wood accents for a cozy, country feel.

    Black cabinets aren’t just a trend that’s going to disappear next year. They’re a smart, flexible design choice that works in almost any home style, as long as you balance the darkness with the right light, texture, and warmth. Whether you go bold with an all-black kitchen or just dip your toes in with a black island, there’s a version of this look that fits your space and your budget. I hope these 15 black kitchen cabinets ideas gave you enough inspiration to start planning your own kitchen refresh with confidence.