Category: Kitchen

  • 10 Kitchen Tile Floor Ideas That Will Change How You See Your Kitchen

    10 Kitchen Tile Floor Ideas That Will Change How You See Your Kitchen

    I’ve spent way too many hours crawling through flooring showrooms and scrolling design boards, and I’m about to hand you the most complete list of 10 kitchen tile floor ideas you’ll find anywhere. Trust me, I’ve made the mistakes so you don’t have to.

    Kitchen tile flooring refers to hard-surface floor coverings made from materials like ceramic, porcelain, natural stone, or glass, installed in kitchen spaces for durability and style. The right tile choice balances water resistance, slip safety, cost, and visual appeal. Popular options include porcelain wood-look planks, classic subway patterns, and bold geometric designs.

    Stick around, because I’m about to walk you through styles you probably haven’t even considered yet, plus a few mistakes that could save you thousands of dollars.

    What Makes Kitchen Tile Flooring Such a Big Deal

    Here’s the thing about kitchen floors. They take more abuse than almost any other surface in your house. Spilled sauce, dropped pans, muddy dog paws, kids running through with wet socks. It all happens on that floor.

    Tile handles this chaos better than most materials. It’s tough. It resists water. And honestly? It just looks good for years without much fuss. But not all tile is created equal, and picking the wrong style or size can make a small kitchen feel like a shoebox or a big kitchen feel cold and empty.

    That’s why I’m breaking down real, workable ideas below. Each one fits a different vibe, budget, and lifestyle.

    1. Classic Subway Tile Laid on the Diagonal

    Top 10 Subway Tile Design Ideas for Kitchen Backsplash | Adila Ceramic
    Credit: adilaceramic

    Subway tile isn’t just for backsplashes anymore. Laying it on a 45-degree angle on the floor gives it a fresh spin that feels less predictable than a straight grid. It tricks the eye into thinking the room is bigger too.

    Stick with white or soft gray tones if you want a timeless look. Pair it with black or brass hardware for contrast. A butcher block island works great here, and open shelving keeps the whole space feeling airy.

    Actionable tip: Ask your installer to use a smaller grout line (around 1/8 inch) for a cleaner, more modern finish.

    This works beautifully in farmhouse kitchens, but it also holds up in modern minimalist spaces if you keep the color palette neutral.

    Next up, let’s talk about a pattern that’s having a major moment right now.

    2. Moroccan-Inspired Patterned Tile

    5 Moroccan Inspired Tile Ideas for 2026| Quorn Stone
    Credit: Mystonefloor

    If you want your kitchen floor to actually be the star of the room, patterned tile is your answer. Think bold geometric shapes, rich blues, terracotta, or black and white combos. These tiles do the talking so you can keep your cabinets and countertops simple.

    I always tell people to use patterned tile in moderation. Maybe just the kitchen floor, not the backsplash too. Otherwise it gets busy fast. Pair it with plain white or wood cabinets to let the pattern breathe.

    Actionable tip: Order extra tiles (at least 10% more) since pattern matching during installation creates more waste than plain tile.

    This idea shines in bohemian, Mediterranean, and eclectic kitchens especially.

    Now, let’s move to something a little more low-key but still packed with personality.

    3. Wood-Look Porcelain Planks

    Wood-Look Porcelain Wall Tile Elevates Your Interior Decor
    Credit: Msisurfaces

    I get it. You want the warmth of hardwood floors but you’re terrified of water damage in the kitchen. Wood-look porcelain tile solves that problem completely. It looks like real wood grain but shrugs off spills without a second thought.

    Choose wider planks (6 to 8 inches) for a more current, updated feel. Warm honey tones work in traditional kitchens, while gray-washed finishes suit modern farmhouse spaces. Add a woven runner rug for texture without sacrificing durability.

    Actionable tip: Look for a matte or textured finish. Glossy wood-look tile can look fake under kitchen lighting.

    This style adapts to almost any home, from coastal cottages to industrial lofts.

    Speaking of adapting styles, let’s talk budget for a second before we keep going.

    Tile Material Cost Comparison

    MaterialAverage Cost Per Sq Ft (Installed)DurabilityBest For
    Ceramic$5 to $10GoodBudget kitchens, low-moisture areas
    Porcelain$8 to $15ExcellentHigh-traffic, wet kitchens
    Natural Stone$12 to $25Very Good (needs sealing)Upscale, traditional homes
    Glass Tile$15 to $30Fair to GoodAccent areas, small spaces
    Cement Tile$10 to $20GoodPatterned statement floors

    4. Large Format Neutral Tile for Small Kitchens

    Exciting Small Kitchen Tile Ideas | Stone Store
    Credit: Stonesuperstore

    Small kitchen? Bigger tiles actually help. I know it sounds backwards, but fewer grout lines mean fewer visual breaks, which makes the floor feel like one continuous surface. That reads as spacious, even in a tight galley kitchen.

    Go with 12×24 or even 24×24 inch tiles in light gray, beige, or soft white. Keep countertops and backsplashes simple so the floor isn’t competing with too many textures. A single pendant light overhead adds focus without clutter.

    Actionable tip: Lay large tiles in a brick or offset pattern instead of a straight grid. It hides minor size variations better.

    This approach works especially well in modern, Scandinavian, and minimalist kitchens.

    Let’s shift gears and talk about a texture-forward option next.

    5. Terracotta Tile for Warmth and Character

    Warm terracotta hexagon tiles add depth and character to this kitchen backsplash, beautifully complemented by wood tones. The perfect harmony for a stylish kitchen. ✨ Featured Tile: 6" Hex Lacquered Tuscany Terracotta
    Credit: villalagoontile

    Terracotta brings an earthy, sun-baked warmth that most other tile just can’t match. It’s been used in kitchens for centuries, and it’s making a serious comeback right now. The natural color variation means no two tiles look exactly alike.

    Pair terracotta with cream cabinets, brass fixtures, and green plants for a Mediterranean feel. Or go rustic with dark wood beams and wrought iron accents. Either way, it adds instant character.

    Actionable tip: Seal terracotta tile every 1 to 2 years. It’s porous, so unsealed floors stain easily from grease and spills.

    Terracotta suits Mediterranean, Spanish colonial, and rustic farmhouse kitchens the best.

    Now let’s talk about something a little more unexpected: color.

    6. Bold Colored Tile as a Statement Floor

    TILE DESIGNER INSPO: Bold Color & Patterned Floors Step aside, neutral floors! Today's it's all about floors that make an undeniable statement. Bold color and dynamic pattern are the perfect combina for
    Credit: @jac_elan

    Why should walls have all the fun? A bold colored tile floor, think deep green, cobalt blue, or even burnt orange, can completely transform a plain kitchen. It’s a commitment, sure, but it pays off in personality.

    Keep your cabinetry neutral (white, cream, or light wood) so the floor doesn’t fight with everything else. Add matching accents through bar stools or a runner rug to tie the room together without overdoing it.

    Actionable tip: Test a sample tile under your actual kitchen lighting before committing. Colors shift dramatically under warm versus cool bulbs.

    This idea fits modern, eclectic, and maximalist kitchen styles particularly well.

    Let’s cool things down a bit with a classic option that never really goes out of style.

    7. Checkerboard Tile for Retro Charm

    Are Checkered Tiles A Good Idea For Kitchen Floors?
    Credit: Edwardmartin

    Black and white checkerboard flooring has been around forever, and there’s a reason it keeps coming back. It’s playful without being childish, and it works in kitchens of every size. Even a small breakfast nook looks charming with this pattern underfoot.

    Stick to classic black and white for a diner-style vibe, or soften it with cream and gray for something more subtle. Pair with vintage-inspired appliances and simple shaker cabinets for the full effect.

    Actionable tip: Use a 12×12 inch tile size for a traditional look, or scale up to 18×18 for a more modern take on the pattern.

    This works great in retro, farmhouse, and cottage-style kitchens.

    Next, let’s talk about a material that brings serious texture to the table.

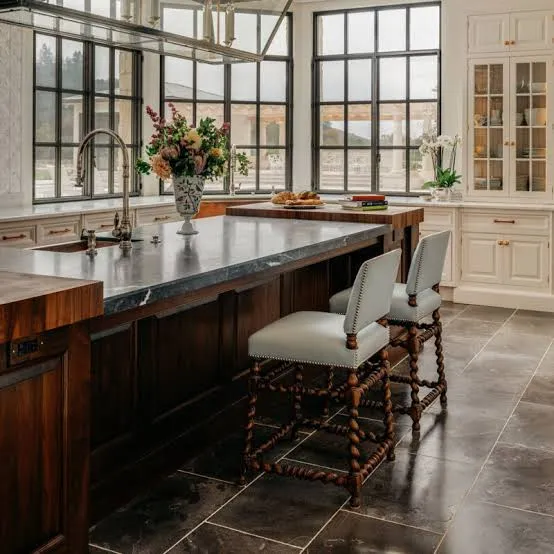
    8. Natural Stone Tile for Timeless Elegance
    Credit: Marblesystems

    Nothing says upscale quite like natural stone. Travertine, slate, and limestone all bring unique texture and subtle color variation that manufactured tile just can’t fake. It’s an investment, but it ages beautifully.

    Lighter stones like travertine brighten a kitchen and pair well with warm wood cabinets. Darker slate creates a moodier, more dramatic feel, especially with matte black fixtures. Either way, stone adds a sense of permanence to the space.

    Actionable tip: Choose a honed (matte) finish rather than polished. It’s less slippery when wet, which matters a lot in kitchens.

    Natural stone fits traditional, transitional, and upscale farmhouse kitchens especially well.

    Let’s move on to a smaller-scale option that’s perfect for adding detail.

    9. Mosaic Tile for a Detailed Focal Point

    Mosaic Tile Kitchen Backsplash Ideas & Design Tips - Tileist by Tilebar
    Credit: Tilebar

    Mosaic tile isn’t just for showers. Using it on a kitchen floor, especially in a smaller space like a butler’s pantry or breakfast nook, creates a jewel-box effect. The tiny tiles catch light differently and add serious texture underfoot.

    Stick with a cohesive color family (all blues, all earth tones) so it doesn’t feel chaotic. Pebble-style mosaics work great near sinks for a spa-like touch, while glass mosaics add shimmer.

    Actionable tip: Use mosaic tile in smaller zones only. Covering an entire large kitchen floor gets expensive fast and can feel overwhelming.

    This idea works well in eclectic, coastal, and glam kitchen styles.

    Now let’s look at a practical option for anyone dealing with an open floor plan.

    10. Consistent Tile Flow Between Kitchen and Living Areas

    17 Open Concept Living Room and Kitchen Ideas | OPPEIN
    Credit: Oppeinhome

    If your kitchen opens into a dining or living space, using the same tile throughout creates a seamless flow. It makes the whole area feel bigger and more connected instead of chopped up into separate zones.

    Choose a neutral tile that can handle both high-traffic kitchen use and comfortable barefoot living room walking. Warm-toned porcelain or textured stone-look tile both work well here. Add area rugs in the living space to soften the transition.

    Actionable tip: Match grout color to tile color for the most seamless look possible across the open floor plan.

    This idea is a favorite in modern open-concept homes, but it also works in traditional homes with connected kitchen and dining rooms.

    Let’s wrap up the design ideas with two more options that are growing in popularity.

    Tile Size Guide by Kitchen Size

    Kitchen SizeRecommended Tile SizeWhy It Works
    Small (under 100 sq ft)12×24 or 18×18 inchFewer grout lines make the space feel bigger
    Medium (100 to 200 sq ft)12×12 or 12×24 inchBalanced proportion, easy to install
    Large (200+ sq ft)24×24 or plank-styleLarge format matches the scale of the room
    Narrow galley kitchenHerringbone or plankDirects eye and creates flow

    Tips for Success

    • Always order 10 to 15% extra tile to account for cuts, breakage, and future repairs.
    • Test tile samples in your actual kitchen lighting, both day and night, before buying in bulk.
    • Choose grout color carefully. Darker grout hides stains but can look heavy in small spaces.
    • Get a professional measurement before ordering. Guessing square footage almost always leads to shortages.
    • Ask about warranty coverage on both the tile material and the installation labor.
    • Consider heated flooring systems under tile if you live in a colder climate. Tile can feel icy underfoot.
    • Don’t skip the underlayment. A good subfloor prep prevents cracking down the road.

    Common Mistakes and How to Avoid Them

    Skipping the slip-resistance check
    : Always check the COF rating, especially near sinks and stoves where water and grease collect.

    Choosing tile based on showroom lighting alone
    : Bring a sample home and view it under your actual kitchen lights before finalizing your order.

    Going too bold without a plan for the rest of the room
    : Balance a statement floor with simple cabinetry and neutral walls so the space doesn’t feel overwhelming.

    Ignoring grout maintenance
    : Seal grout lines yearly to prevent staining and mold growth, especially in high-moisture kitchens.

    Using the wrong tile size for your space
    : Match tile size to room size using a general guide, since oversized tile in tiny kitchens can look awkward and understated tile in large kitchens can feel busy.

    Forgetting about cost of installation labor
    : Factor in labor costs, which often equal or exceed material costs, before setting your budget.

    Similar Variations

    • Coastal Kitchen Tile – Light blues, whites, and sandy tones that mimic beach vibes underfoot.
    • Industrial Loft Tile – Concrete-look porcelain tile paired with exposed brick and metal accents.
    • Farmhouse Chic Tile – Warm wood-look planks or classic checkerboard patterns with vintage touches.
    • Modern Minimalist Tile – Large format, neutral-colored tile with minimal grout lines and clean sightlines.
    • Mediterranean Tile – Terracotta and patterned tile combined with warm cream walls and greenery.
    • Eclectic Bohemian Tile – Mixed patterns, bold colors, and mosaic accents layered together intentionally.

    Picking the right floor for your kitchen isn’t just about looks. It’s about durability, safety, and how the space makes you feel every single day you walk into it. Whether you go bold with patterned tile or keep it simple with large format neutrals, the right choice will serve your kitchen for years to come.

    I hope this rundown gave you everything you need to make a confident decision. From classic subway layouts to family-friendly anti-slip options, these 10 kitchen tile floor ideas cover just about every style, budget, and lifestyle out there.
  • 14 Modern Kitchen Ideas

    14 Modern Kitchen Ideas

    I’ve pulled together 14 modern kitchen ideas that actually work in real homes, not just magazine spreads. If you’ve been scrolling Pinterest for hours and still feel stuck, I get it. That’s exactly why I put this list together.

    A modern kitchen design typically features clean lines, minimal ornamentation, a neutral or monochromatic color palette, and a mix of natural and industrial materials. The style prioritizes function, open space, and hidden storage over decorative detail.

    Stick around, because I’m going to walk you through everything from countertop picks to lighting tricks that make small kitchens feel bigger.

    What Makes a Kitchen Feel “Modern” Anyway?

    Here’s the thing about modern kitchens. People think it means cold and sterile, but that’s not true at all. Modern just means the space feels current, uncluttered, and purposeful. Every item has a job. Nothing is there just to look pretty.

    Think flat-panel cabinets instead of raised ones. Think quartz counters instead of busy granite. Think one or two statement pieces instead of ten small decorations fighting for attention. The color palette usually stays simple too, whites, grays, blacks, and warm woods doing most of the heavy lifting.

    Once you get the hang of the basic rules, mixing in your own personality becomes easy. Let’s get into the actual ideas now.

    1. Go Handleless With Flat-Panel Cabinets

    Handleless Kitchen Cabinets: Sleek Design Ideas | Leicht Queens
    Credit: leichtqueens

    Handleless cabinets are one of the fastest ways to make a kitchen look modern. You lose the hardware and gain a smooth, seamless wall of cabinetry. Most versions use a push-to-open mechanism or a small groove cut into the top edge for your fingers.

    This style works best with high-gloss or matte lacquer finishes. Stick to one or two colors max so the flat surfaces don’t look boring.

    Practical tip: If you’re not ready to commit to fully handleless, try removing hardware from just your upper cabinets and keeping simple bar pulls on the lower ones.

    This look adapts well to minimalist and Scandinavian kitchens, but it can feel out of place in a farmhouse or traditional space. Now let’s talk about what goes on top of those cabinets.

    2. Choose a Waterfall Countertop Island

    Credit: Oppeinhome

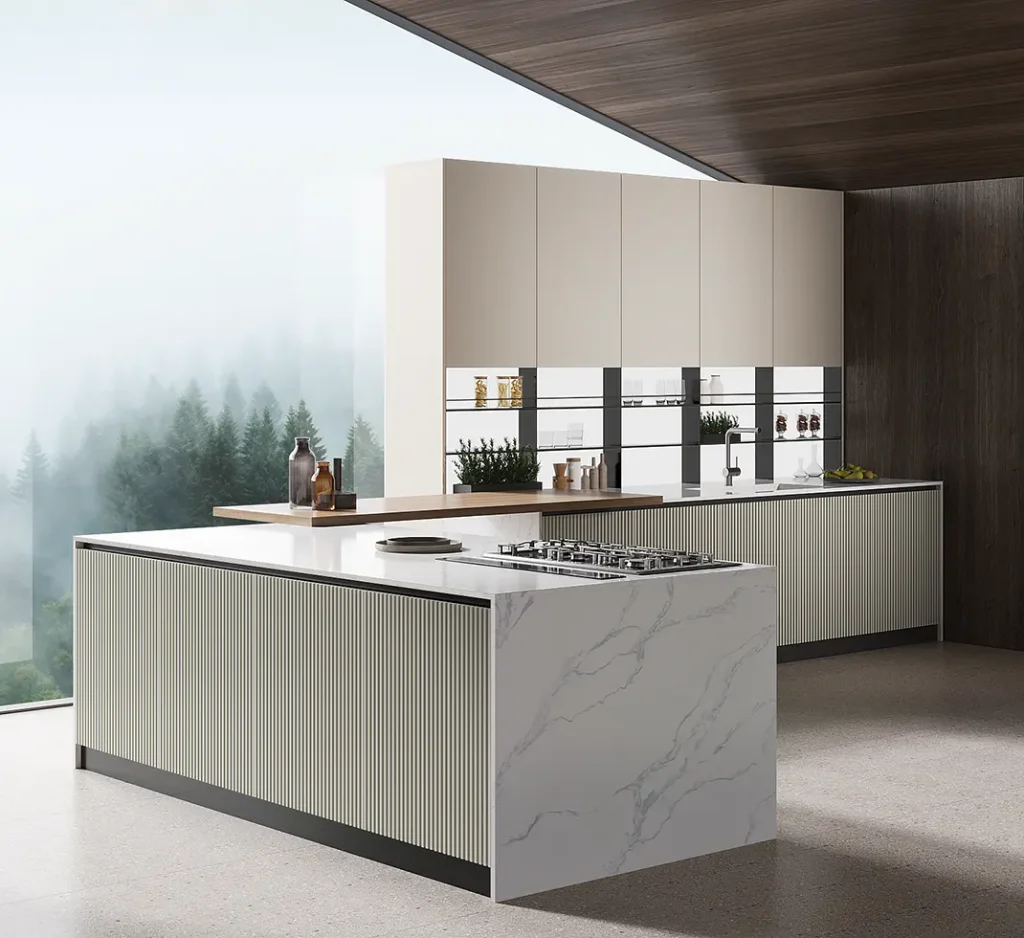
    Waterfall countertops flow down the sides of an island instead of stopping at the edge. It creates one continuous slab look that feels expensive and sculptural. Quartz and porcelain are popular choices because they’re durable and come in large slab sizes.

    The trick is picking a stone pattern that isn’t too busy. Subtle veining looks intentional. Heavy, chaotic veining can look like it’s fighting with the rest of your kitchen.

    Practical tip: Ask your fabricator to match the vein direction across the waterfall edges. It costs a bit more but makes a huge visual difference.

    This idea works in modern, contemporary, and even some transitional kitchens. Next, let’s talk about a material that’s making a huge comeback.

    3. Add Warmth With Natural Wood Accents

    Credit: Rustickitchenandbath

    All-white kitchens can start to feel a little sterile after a while. That’s why so many modern kitchens now mix in natural wood, think open shelving, a wood island base, or wood ceiling beams.

    Wood softens the hard edges of stone and metal. It also adds texture without adding clutter, which fits the modern rule of “less but better.”

    Practical tip: Stick with one wood tone throughout the kitchen. Mixing orange oak with gray-washed walnut can look messy fast.

    Wood accents translate beautifully into coastal, Japandi, and even industrial kitchens. Speaking of industrial, let’s look at how metal fits into a modern space.

    4. Mix In Black Metal Fixtures and Frames

    A Simple Guide to Mixing Metals in the Kitchen – jane at home
    Credit: Jane-athome

    Black hardware, black faucets, black window frames, this stuff shows up everywhere in modern kitchens right now. It gives a strong contrast against white or light-colored cabinets and adds a bit of edge.

    The key is consistency. If your faucet is matte black, your cabinet pulls and light fixtures should probably match or at least share the same finish family.

    Practical tip: Start small. Swap just your faucet and a few cabinet pulls before committing to black windows or black appliances.

    This trend works great in modern farmhouse and industrial kitchens too. Now let’s move to something that changes the whole mood of the room, lighting.

    Popular Modern Kitchen Color Palettes

    Palette NameMain ColorsAccent ColorBest For
    Monochrome MinimalWhite, light grayBlackSmall kitchens
    Warm ContrastCream, walnut woodMatte blackOpen floor plans
    Cool IndustrialCharcoal, concrete grayBrassLoft-style kitchens
    Soft SageSage green, whiteBrushed nickelCottage-modern kitchens
    Deep DramaNavy, whiteGoldStatement islands

    5. Install Statement Pendant Lighting Over the Island

    Pendant lights over kitchen island with flower vase and fruits on it
    Credit: Bhg

    A row of matching pendants over your island can pull the whole room together. Go with two or three lights, spaced evenly, hung about 30 to 34 inches above the counter.

    Glass, matte black, and brushed brass are the most common modern finishes right now. Pick a shape that contrasts with your cabinetry, round pendants over a linear island, for example.

    Practical tip: Measure your island length and divide by three to space your pendants evenly for a balanced look.

    This idea shifts easily into transitional and coastal kitchens just by changing the pendant material. Next, let’s talk about a surface most people forget about, the backsplash.

    6. Use a Slab Backsplash Instead of Tile

    Slab Backsplash Is In - Loudoun Granite and Marble
    Credit: loudoungranite

    Instead of small subway tiles, a lot of modern kitchens now run one large slab of stone or quartz straight up the wall behind the stove. It creates a clean, grout-free surface that’s easy to wipe down and looks incredibly sleek.

    This works especially well when the slab matches your countertop, creating that continuous, monolithic look designers love right now.

    Practical tip: If a full slab backsplash is out of budget, a large-format tile with minimal grout lines gives you a similar effect for less money.

    Slab backsplashes fit modern, contemporary, and luxury kitchen styles best. Now let’s talk cabinet color, because this one trips a lot of people up.

    7. Try Two-Tone Cabinetry

    20 Two-Tone Kitchen Cabinet Ideas | HGTV
    Credit: Hgtv

    Two-tone cabinets mean using one color on your upper cabinets and a different one on your lower cabinets or island. A common combo is white uppers with a dark or wood-toned island.

    This breaks up a big kitchen visually and adds depth without adding clutter. It also lets you experiment with bolder colors on just the island without committing to that color everywhere.

    Practical tip: Keep the darker tone below eye level. Dark upper cabinets can make a kitchen feel heavy and closed in.

    Two-tone cabinetry works in almost every style, modern, farmhouse, coastal, you name it. Let’s move on to appliances now, since these can make or break the modern look.

    8. Choose Panel-Ready or Integrated Appliances

    What Does 'Panel Ready' Mean? A Panel Ready Appliances Guide
    Credit: Rustickitchenandbath

    Panel-ready appliances get covered with a cabinet front that matches the rest of your kitchen. Your fridge and dishwasher basically disappear into the cabinetry instead of standing out as big metal boxes.

    This creates that seamless, uncluttered look that’s central to modern design. It’s pricier than standard appliances, but the visual payoff is huge.

    Practical tip: If panel-ready isn’t in the budget, at least match your visible appliances in one finish, like all stainless or all black stainless.

    This idea suits modern, minimalist, and high-end transitional kitchens equally well. Now, let’s talk about something a lot of people overlook, negative space.

    9. Leave Open Space With Floating Shelves

    Tips for Kitchen Shelves with Floating Shelf Placement Ideas
    Credit:Biggerthanthethreeofus

    Floating shelves replace upper cabinets in certain sections, usually near the sink or stove. They create breathing room and let you display a few curated items instead of hiding everything behind doors.

    The trick is restraint. Three or four nice items per shelf is the sweet spot. Overloading them defeats the whole purpose.

    Practical tip: Use floating shelves for items you actually use often, like everyday mugs or cooking oils, so they double as function and decor.

    This works beautifully in Scandinavian, Japandi, and modern farmhouse kitchens. Next, let’s get into flooring, because it grounds the whole design.

    10. Go With Large-Format Floor Tile

    When Bigger Is Better: The Dramatic Look of Large-Format Tiles
    Credit: Houzz

    Large tiles, usually 24×24 inches or bigger, create fewer grout lines and a cleaner floor overall. Popular modern choices include large-format porcelain that mimics concrete, stone, or even wood grain.

    Fewer grout lines mean less visual noise and easier cleaning, which matters a lot in a high-traffic kitchen.

    Practical tip: Lay tile samples in your actual kitchen lighting before buying. Tile color can look completely different under warm versus cool bulbs.

    Large-format tile fits modern, industrial, and Mediterranean-inspired kitchens. Now let’s talk storage, because modern kitchens hide a lot more than they show.

    Storage Upgrade Cost Comparison

    Storage FeatureAverage Cost RangeDifficulty to InstallBest For
    Pull-out pantry shelves$150–$400 per unitEasyNarrow kitchens
    Corner lazy susan$200–$500ModerateAwkward corners
    Deep drawer organizers$50–$150 per drawerEasyPots and pans storage
    Hidden appliance garage$300–$800ModerateCountertop clutter
    Full pantry cabinet$800–$3,000HardLarger kitchens

    11. Add a Hidden Pantry or Appliance Garage

    25 Ideas for Kitchen Appliance Garages
    Credit:Houzz

    Modern kitchens love the idea of everything having a home, out of sight. A hidden pantry, sometimes tucked behind a matching cabinet door, keeps small appliances and bulk food out of view.

    An appliance garage does the same thing for your toaster, coffee maker, and blender. It’s basically a small cabinet with a roll-up or lift door that hides countertop clutter instantly.

    Practical tip: Place your appliance garage near an outlet so you’re not unplugging and replugging things every single day.

    This concept works in nearly any kitchen style since it’s more about function than looks. Let’s shift gears now and talk about a design choice that affects your whole room’s flow.

    12. Create a Multi-Level Island

    10 split-level kitchen island ideas that are pretty and practical | Ideal Home
    Credit: Idealhome

    Instead of one flat island, a multi-level design raises part of the counter a few inches, usually for a breakfast bar or to hide dirty dishes from the main living area. It’s a smart move for open-concept homes where the kitchen faces the living room.

    This layout also naturally separates cooking space from casual seating, which helps traffic flow during parties or busy mornings.

    Practical tip: Keep the height difference around 4 to 6 inches, enough to hide clutter but not so much it feels like two separate counters.

    Multi-level islands work great in modern, transitional, and open-concept farmhouse kitchens. Now let’s look at a smaller detail that makes a bigger impact than people expect.

    13. Swap in a Statement Faucet

    The Guide to Finding a Unique Kitchen Faucet
    Credit: Usabuildersdepot

    Your faucet gets touched more than almost anything else in the kitchen, so it makes sense to make it count visually too. Modern kitchens are leaning into bold shapes right now, pull-down sprayers with sharp geometric lines, or curved gooseneck styles in unexpected finishes like brushed gold or matte black.

    A great faucet can act like jewelry for your sink area, especially if the rest of your kitchen keeps things simple.

    Practical tip: Match your faucet finish to your cabinet hardware, even if the shapes are different, to keep things feeling cohesive.

    This idea works in nearly every kitchen style, just adjust the shape and finish to match. Last one coming up, and it’s a favorite of mine.

    14. Use a Bold Accent Wall Behind Open Shelving

    31 Kitchen Wallpaper Ideas to Instantly Update Your Space
    Credit: Countryliving

    A painted or wallpapered accent wall behind open shelving adds color and personality without overwhelming the whole room. Deep greens, navy blues, and warm terracottas are popular right now against white or wood cabinetry.

    This gives your eye a place to land and makes open shelving look intentional instead of random.

    Practical tip: Test your accent color on a poster board and tape it to the wall for a few days before committing. Paint colors shift a lot depending on your kitchen’s natural light.

    This idea adapts to almost any style, just change the color intensity and pattern to match your home’s overall vibe.

    Tips for Success

    • Pick one dominant material (wood, stone, or metal) and let the others play a supporting role instead of competing for attention.
    • Test paint and stain colors in your actual kitchen lighting, both day and night, before finalizing anything.
    • Keep countertop clutter to a minimum. Modern kitchens rely on clean surfaces to feel finished.
    • Choose durable materials for high-touch areas like faucets and cabinet pulls since these get used daily.
    • Don’t rush the lighting layer. Task lighting, ambient lighting, and accent lighting all serve different purposes.
    • Measure twice before ordering large-format tile or slab countertops. Mistakes here get expensive fast.
    • Live with cabinet samples for at least a week before ordering a full kitchen’s worth.

    Common Mistakes and How to Avoid Them

    Overcrowding open shelves
    : Stick to three or four items per shelf so the space still feels intentional and airy.

    Mixing too many metal finishes
    : Choose one primary metal finish (black, brass, or nickel) and use it consistently across faucets, hardware, and lighting.

    Ignoring ventilation needs
    : Plan your range hood or downdraft system early since it affects both function and the overall ceiling design.

    Choosing trendy colors without testing them
    : Sample colors on your actual walls under your actual lighting before committing to a full repaint.

    Skipping proper task lighting
    : Add under-cabinet lighting so your countertops aren’t left in shadow while you’re cooking or prepping food.

    Going too minimal
    : A kitchen with zero personality can feel cold. Add at least one warm material or personal touch to balance things out.

    Similar Variations

    • Japandi Kitchen – Blends Japanese minimalism with Scandinavian warmth, using natural wood and muted tones.
    • Industrial Modern Kitchen – Leans into exposed brick, black steel, and concrete for a raw, urban feel.
    • Modern Farmhouse Kitchen – Combines clean modern lines with warm, rustic textures like shiplap and wood beams.
    • Coastal Modern Kitchen – Uses light woods, soft blues, and airy textures for a beachy but streamlined look.
    • Contemporary Luxury Kitchen – Focuses on high-end materials like marble and brass with a sleeker, dressier finish.
    • Mid-Century Modern Kitchen – Brings in warm wood tones, bold color pops, and retro-inspired hardware shapes.

    Putting a modern kitchen together really comes down to picking a few strong materials and letting them do the talking. You don’t need every trend on this list, just the ones that fit how you actually live and cook. Whether you start small with a faucet swap or go all in on a full renovation, these 14 modern kitchen ideas give you a solid, practical starting point for building a space you’ll actually love spending time in.

  • 12 Small Kitchen Ideas That Actually Make Your Space Feel Bigger

    12 Small Kitchen Ideas That Actually Make Your Space Feel Bigger

    If you’ve been searching everywhere for 12 small kitchen ideas that don’t feel like generic filler, you’re in the right spot. I’ve pulled together real, usable design tricks that homeowners and designers actually swear by, not just pretty pictures with no substance.

    A small kitchen is any cooking space under roughly 150 square feet where storage, counter room, and traffic flow are limited by the footprint. The best fixes combine smart storage, light colors, and multi-purpose furniture to make the room feel open and function well.

    Stick around, because I’m about to walk you through a dozen ideas that go way beyond “just add a shelf.” Some of these might completely change how you see your kitchen.

    What Makes Small Kitchen Design Different

    Small kitchen design isn’t just regular kitchen design shrunk down. It’s a whole different game. You’ve got less counter space, less storage, and usually less natural light too. Every inch has to earn its place.

    I think of small kitchens like a good backpack for a trip. You can’t bring everything you own. You pack smart, choose multi-use items, and leave out anything that doesn’t pull its weight. That’s the mindset behind every idea below. It’s not about cramming more stuff in. It’s about making what you have work harder and look better while doing it.

    1. Go Vertical With Floor-to-Ceiling Cabinets

    Floor-to-Ceiling Cabinets: Maximize Vertical Kitchen & Home Storage
    Credit: Bertch

    When floor space runs out, the walls are still wide open. Floor-to-ceiling cabinets use that dead air above your head instead of wasting it. You get way more storage without adding a single inch to your kitchen’s footprint.

    Store items you don’t use daily on the top shelves, like holiday dishes or the waffle maker you break out twice a year. A small step stool tucked in a pantry closet solves the reach problem.

    This works in almost any style. Shaker-style doors feel traditional, flat slab fronts feel modern, and glass-front uppers feel more coastal or farmhouse. Once your storage is sorted vertically, it’s time to think about what’s happening on your counters.

    2. Clear the Counters With a Hanging Pot Rack

    Hang 'Em or Hide 'Em: 10 Stylish Ways to Store Pots and Pans
    Credit: Houzz

    Counter space in a small kitchen is basically gold. Every pot and pan sitting out is space you can’t use for prepping dinner. A hanging rack over your island or stove moves that clutter up and out of the way.

    Pick a rack that matches your cabinet hardware finish so it feels intentional, not random. Hang your most-used pieces, and store the rest.

    • Copper racks work great in traditional or farmhouse kitchens
    • Matte black iron racks suit modern or industrial spaces
    • Wood and rope racks fit coastal or cottage styles

    Practical tip: hang it at least 18 inches above your cooktop to avoid heat damage. Once your pots are off the counter, you’ll notice how much more room you actually have to work with.

    3. Use a Rolling Kitchen Cart as a Flex Island

    How to Use a Kitchen Cart - The Home Depot
    Credit: The Home Depot

    Not every small kitchen has room for a built-in island, but almost every small kitchen has room for a rolling cart. It gives you extra counter space, extra storage, and you can push it out of the way when you need to move around.

    Look for one with at least one drawer, a shelf below, and locking wheels. Butcher block tops add warmth, while stainless steel tops feel more clean and modern.

    Roll it next to your stove for extra prep space during cooking, then tuck it against a wall afterward. This idea works in basically any style since carts come in every finish imaginable. Now let’s talk about what’s happening below your cabinets, because that space matters too.

    4. Add Under-Cabinet Lighting to Open Up the Room

    How to Choose and Install the Best Under Cabinet Lighting for your Kitchen - The Palette Muse
    Credit: The palette Muse

    Small kitchens often deal with shadows, especially under upper cabinets where you actually need to see what you’re chopping. Under-cabinet lighting fixes that instantly and makes the whole room feel brighter and bigger.

    LED strip lights are cheap, easy to install, and use very little electricity. Warm white light (around 2700K to 3000K) feels cozy, while cooler light (4000K) feels crisp and modern.

    Stick-on LED strips are a weekend project, not a renovation. Once you’ve got better light, the next step is thinking about color, because light and color work together to make a room feel open.

    Lighting Comparison for Small Kitchens

    Light TypeCost RangeBrightness (Lumens)Best For
    LED Strip (Under-Cabinet)$15-$40300-500 per footTask lighting, prep areas
    Puck Lights$25-$60200-400 eachAccent lighting, cabinet interiors
    Pendant Lights$50-$300800-1,100 eachOver islands or sinks
    Recessed Ceiling Lights$20-$80 each650-900 eachGeneral ambient light

    5. Paint Cabinets a Light, Reflective Color

    20 Kitchen Paint Colors That Are All the Rage in 2024
    Credit: Elle Decor

    Dark cabinets can feel heavy in a small room. Light colors bounce light around and make walls feel like they’re standing farther apart than they actually are. This is one of the cheapest, highest-impact changes you can make.

    Soft white, pale sage, and light gray are all safe bets that won’t go out of style fast. If you want more personality, a muted blue or warm cream still keeps things airy.

    Practical tip: use a satin or semi-gloss finish on cabinets since it reflects more light than flat paint and it’s easier to wipe down. Coastal and Scandinavian kitchens lean heavily on this trick, but even traditional kitchens benefit from lighter tones. Once your cabinets are lighter, your backsplash choice becomes even more important.

    6. Choose a Light, Reflective Backsplash

    75 Beautiful Kitchen Backsplash Ideas for Every Style and Budget
    Credit: Better Home

    A shiny, pale backsplash acts like a mirror for light bouncing around your kitchen. Glossy subway tile in white or soft pastel is a classic choice that never feels dated. Glass tile takes this even further since it reflects more light than ceramic.

    Skip busy patterns if your kitchen is already tight on space. Busy patterns can make walls feel closer instead of farther away.

    • Glossy white subway tile: classic, works everywhere
    • Glass mosaic tile: modern, extra reflective
    • Light marble-look tile: traditional or transitional kitchens

    This choice pairs naturally with your cabinet color, so pick them together if you can. Speaking of pairing choices, let’s look at how your whole color palette should work together.

    Small Kitchen Color Palette Guide

    Palette NameWall ColorCabinet ColorAccent ColorBest Style Match
    Coastal BreezeSoft whitePale blueNatural woodCoastal, cottage
    Warm MinimalCreamWhiteBrassModern, transitional
    Soft SageOff-whiteSage greenMatte blackFarmhouse, traditional
    Urban GrayLight grayCharcoal lower, white upperCopperIndustrial, modern

    7. Install a Fold-Down Table for Extra Prep Space

    Unveiling the kitchen's secret: a hidden extra table storage! Cleverly tucked away, this space-saving solution adds charm and organization to your kitchen. Practicality meets style, enhancing your ...
    Credit: @mdecors.in

    If there’s no room for a dining table or even a small breakfast nook, a fold-down table attached to the wall solves that problem. It stays flat against the wall when you don’t need it, then folds out for meals or extra prep space.

    Look for one rated to hold at least 50 pounds so it can double as a workspace. Pair it with wall-mounted stools that hang on hooks when not in use, and you’ve saved even more floor space.

    This works especially well in modern and Scandinavian kitchens where clean lines and minimal furniture are already the goal. Once you’ve solved seating, it’s worth looking at your pantry situation next.

    8. Build a Pull-Out Pantry Between Cabinets

    15 Pullout Kitchen Storage Ideas that Maximize Every Inch
    Credit: Better Homes

    Sometimes there’s a slim gap between your fridge and the wall that’s just sitting there empty. A pull-out pantry unit fits into spaces as narrow as 6 inches and gives you rows of storage for spices, canned goods, and snacks.

    Measure twice before ordering since these units come in very specific width ranges. Most models range from 6 to 12 inches wide and slide out smoothly on rails.

    Practical tip: use it for items you grab often, like oils and spices, since everything is visible at a glance instead of buried in a deep cabinet. This idea fits any style since the unit itself is hidden once installed. Now let’s talk about a bigger structural move: open shelving.

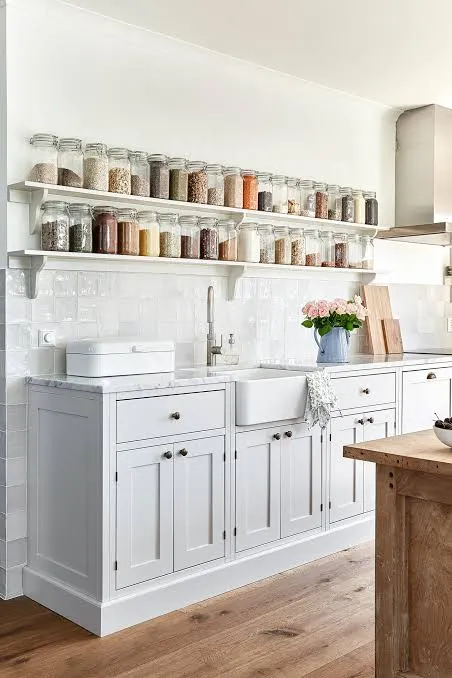
    9. Swap Some Upper Cabinets for Open Shelving

    Credit: americanfarmhousestyle

    Heavy upper cabinets can make a small kitchen feel boxed in, especially in a dark wood finish. Swapping one or two sections for open shelves lightens up the visual weight of the room instantly.

    Style your shelves with a mix of dishes, a plant, and a few cookbooks, but don’t overload them. Too much clutter defeats the whole purpose.

    • Modern kitchens: floating shelves in matte black or white
    • Farmhouse kitchens: wood shelves with visible brackets
    • Coastal kitchens: whitewashed wood with woven baskets

    This is one of the most budget-friendly upgrades on this list since you’re removing cabinets, not adding them. Once your shelves are styled, your appliance choices deserve a second look too.

    10. Choose Slim or Panel-Ready Appliances

    Kitchen Appliance Guide: Paneled vs Stainless Steel — Wood & Co.
    Credit: Woodnco

    Standard-size appliances can eat up a huge chunk of a small kitchen’s visual and physical space. Slim refrigerators, 24-inch dishwashers, and panel-ready appliances that match your cabinets help the whole room feel more unified and less cluttered.

    Panel-ready appliances cost more upfront, usually 20 to 40 percent above standard models, but they make appliances disappear into the cabinetry instead of standing out as bulky boxes.

    If a full appliance swap isn’t in the budget, even a slimmer 24-inch range instead of a standard 30-inch one can free up a surprising amount of counter space. This works in every style since the panels just match whatever cabinet finish you already chose. Next, let’s talk about mirrors, because yes, they work in kitchens too.

    11. Add a Mirrored Backsplash Panel or Accent

    Credit: Houzz

    Mirrors aren’t just for bathrooms and entryways. A mirrored panel behind your stove or as a small backsplash accent bounces light around and visually doubles the depth of the wall it’s on.

    Use it sparingly, maybe just behind open shelving or as a small strip near a window, so it doesn’t feel like a fun house. Antiqued mirror glass gives a softer, more traditional look, while clear mirror feels modern and sharp.

    Practical tip: avoid mirrored surfaces directly behind the stove without proper heat-resistant backing, since grease and heat can damage regular mirror glass over time. This trick shines especially in traditional and glam-style kitchens. Once your walls are working harder, let’s shrink your sink situation.

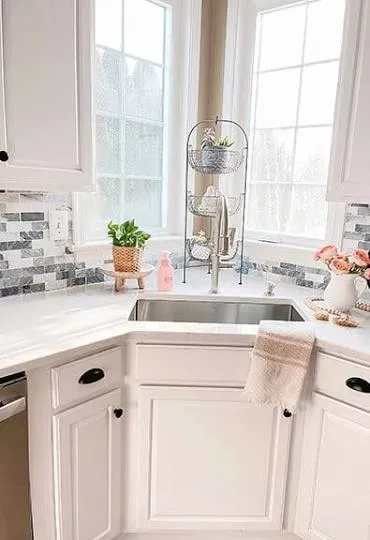
    12. Install a Corner or Compact Sink

    Credit: Kitchencabinetkings

    Standard double-basin sinks eat up a lot of counter length that a small kitchen just doesn’t have. A single-basin compact sink or a corner-mounted sink frees up several inches of usable counter space right where you need it most.

    Corner sinks use an otherwise awkward angle that often goes to waste anyway. Single-basin sinks as narrow as 24 inches still handle full-size pots just fine.

    This swap pairs well with a pull-down faucet to save even more space, since you won’t need a separate sprayer taking up room. It works with nearly every kitchen style, since sink shape is more about function than fashion. With all twelve ideas in place, your small kitchen has room to actually breathe.

    Tips for Success

    • Measure every space twice before buying furniture or fixtures. A few inches off can ruin the fit.
    • Stick to two or three main colors max so the space doesn’t feel busy.
    • Use vertical storage before you ever consider knocking down a wall.
    • Choose multi-use furniture, like a cart or fold-down table, over single-purpose pieces.
    • Keep countertops as clear as possible. Clutter shrinks a room faster than paint color ever will.
    • Add lighting in layers: task lighting under cabinets, ambient lighting overhead, and accent lighting where you want it.
    • Test paint and tile samples in your actual kitchen lighting before committing to a full order.

    Common Mistakes and How to Avoid Them

    Overcrowding open shelves
    : Fix this by keeping only a few items per shelf and rotating decor seasonally instead of piling everything on at once.

    Choosing dark, heavy cabinet colors
    : Fix this by sticking to light, reflective finishes on at least your upper cabinets, even if the lowers are darker.

    Skipping lighting layers
    : Fix this by adding under-cabinet lights even if your overhead lighting seems fine. Shadows on counters make prep work harder.

    Buying appliances sized for a bigger kitchen
    : Fix this by measuring your space first and shopping for slim or compact models built for smaller footprints.

    Ignoring the corners
    : Fix this by using corner sinks, corner pull-out shelves, or lazy Susans to make use of angles that usually go to waste.

    Forgetting about traffic flow
    : Fix this by leaving at least 36 inches of clear walking space between counters, islands, or carts.

    Similar Variations

    • Galley Kitchen Makeover: Focuses on narrow, two-wall kitchens with parallel counters and heavy reliance on vertical storage.
    • Studio Apartment Kitchen: A more extreme version of small kitchen design, often combined with living space and needing fully foldable furniture.
    • Coastal Small Kitchen: Leans on whites, blues, and natural wood tones to keep a tiny space feeling breezy and light.
    • Farmhouse Small Kitchen: Mixes open shelving, wood accents, and vintage-style hardware for a cozy, lived-in feel.
    • Modern Minimalist Kitchen: Strips down decor to the essentials and relies on flat-panel cabinets and hidden appliances.
    • Industrial Loft Kitchen: Uses exposed materials like brick or metal shelving paired with dark accents for a raw, open feel.

    Small kitchens don’t have to feel cramped or frustrating. With the right mix of light colors, smart storage, and furniture that pulls double duty, even a tiny cooking space can feel open and easy to move around in. The trick is picking a handful of changes that actually fit your space and your budget instead of trying to do everything at once.

    I hope this list gave you a real starting point for your own space. Whether you tackle one idea this weekend or work through the whole list over a few months, these 12 small kitchen ideas can turn a cramped cooking space into a room you actually enjoy spending time in.

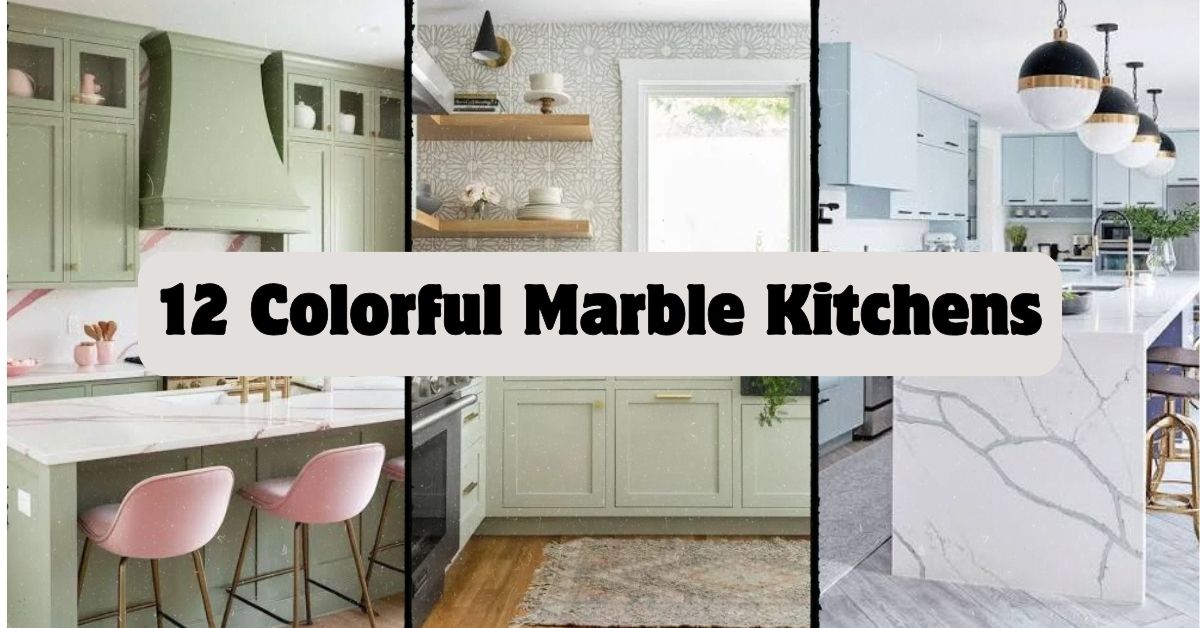
  • 12 Colorful Marble Kitchens That Prove Stone Doesn’t Have to Be Boring

    12 Colorful Marble Kitchens That Prove Stone Doesn’t Have to Be Boring

    I’ve spent way too many hours scrolling through kitchen photos, and I finally put together the best roundup of 12 colorful marble kitchens I could find, so you don’t have to dig through hundreds of boring white-on-white spaces to find something with actual personality. If you’ve ever wondered whether marble can look bold instead of bland, you’re in exactly the right place.

    Colorful marble kitchens use marble slabs and tiles in shades beyond plain white or gray, like green, pink, blue, or black, mixed with painted cabinets or bold accents to create a kitchen that feels vibrant instead of sterile.

    Stick around, because I’m about to show you exactly how homeowners are pulling this off, and I’ll throw in some tips so you can steal the look for your own place.

    What Makes a Marble Kitchen “Colorful” Anyway?

    So here’s the thing. Most people think marble means white countertops with gray veins, like every kitchen in a magazine. But marble actually comes in tons of natural colors. Think green Verde marble, pink Norwegian Rose, or even black marble with gold streaks running through it. When designers pair these colorful stones with bold cabinet colors or bright backsplashes, the whole kitchen wakes up. It stops looking like a hospital and starts looking like a room you actually want to hang out in. That’s the magic here. It’s not about adding color on top of marble. It’s about picking marble that already has color, then building the rest of the kitchen around it.

    1. Emerald Green Island With White Perimeter Cabinets

    Our Gorgeous Green Kitchen Island Transformation + Ideas!<br/>
    Credit: Jennaye

    A green marble island is basically a showstopper. I love how it grounds the whole kitchen without taking over every surface. Pair it with white or cream cabinets around the edges so the green really pops in the center of the room. Add brass or gold hardware to warm things up.

    Practical tip: keep your island marble polished, not honed, so the green veining catches the light and looks even richer.

    This idea works great in traditional kitchens, but it also slides into modern spaces if you keep the surrounding cabinets flat and simple. Next up, let’s talk about a marble choice that brings a totally different mood.

    2. Pink Marble Backsplash With Sage Green Cabinets

    20 Cute Blush Pink and Sage Green Kitchen Ideas to Transform Your Space - Style Zuri
    Credit: Stylezuri

    Pink and green sound like they shouldn’t work together, but trust me, they do. A soft pink marble backsplash next to muted sage cabinets feels calm and pretty without being too sweet. This combo works because both colors are pulled from nature, so your eye just accepts them together.

    Actionable tip: use the pink marble only on the backsplash, not the counters, so it doesn’t compete with itself and overwhelm the room.

    Coastal and cottage-style kitchens love this pairing, but even a modern farmhouse can pull it off with the right lighting. Now let’s flip to something darker and moodier.

    3. Black and Gold Marble With Navy Blue Island

    Chiaroscuro Mastery: Gold and Blue Kitchen Island Countertop with Marble Splashes Stock Illustration - Illustration of accent, renovation: 302291606
    Credit: Dreamstime

    Black marble with gold veining is dramatic on its own, but add a navy island underneath it and you’ve got a kitchen that feels like a fancy hotel bar. This look is bold, so I’d suggest keeping wall colors neutral so the marble and island can shine.

    Tip: use matte black fixtures to avoid too much shine competing with the marble’s natural sparkle.

    This works beautifully in modern and transitional kitchens, and honestly, it can even feel a little glam in an art deco-inspired space. Let’s move to something a little softer and more playful next.

    4. Blue-Gray Marble Counters With Yellow Accents

    20 Kitchen Countertop Ideas to Instantly Elevate Your Space
    Credit: Bhg

    Blue-gray marble has this calm, cloudy look, almost like the sky before a storm. Pairing it with sunny yellow bar stools or a yellow pantry door adds energy without clashing. It’s a fun contrast that feels fresh, not forced.

    Tip: introduce yellow through small items first, like dish towels or a vase, before committing to a big yellow piece of furniture.

    Mid-century modern kitchens especially love this pairing since yellow was such a popular color back then. Ready for something with a warmer, earthier vibe? Let’s go there next.

    5. Terracotta-Toned Marble With Rust Cabinets

    Terracotta Kitchen Ideas to Add Warmth and Charm to a Scheme | Homes and Gardens
    Credit: HG

    Some marble slabs naturally carry warm terracotta and rust tones, almost like sunset colors frozen in stone. Match that with rust-colored lower cabinets and you get a kitchen that feels cozy, warm, and a little bit Mediterranean.

    Tip: balance the warm tones with a few cool metal accents, like brushed nickel, so the kitchen doesn’t feel too heavy.

    This palette is perfect for Mediterranean, Southwestern, or boho kitchens. It also plays nicely in a rustic farmhouse setting. Now, let’s check out a quick comparison table before jumping into more color combos.

    H3: Popular Marble Colors and Their Best Cabinet Pairings

    Marble ColorCommon VeiningBest Cabinet PairingStyle Vibe
    Verde GreenWhite or goldCream or whiteTraditional, luxe
    Pink/RoseGray or whiteSage greenSoft, coastal
    Black/GoldGold, thick veinsNavy or blackGlam, modern
    Blue-GrayWhite, thin veinsYellow or whiteMid-century, fun
    TerracottaRust, brownRust or clayMediterranean, rustic
    LavenderGray, subtleWhite or grayFeminine, soft modern

    6. Lavender Marble Island With Brushed Brass Fixtures

    Kitchens Purple Orchid Design Ideas
    Credit: Decor Pad

    Lavender marble is rare, but when you find it, it’s stunning. It gives off a soft, almost dreamy feeling. Pair it with white cabinets and brushed brass hardware so the warm metal tones balance the cool purple undertones in the stone.

    Tip: pair lavender marble with warm white walls, not stark white, so the whole room feels cohesive instead of clinical.

    This look fits modern farmhouse and transitional kitchens really well. It’s subtle enough to not feel too trendy, but different enough to stand out. Next, let’s look at how orange marble can totally change a kitchen’s personality.

    7. Burnt Orange Marble Countertops With Olive Green Walls

    75 Kitchen Backsplash Ideas That Will Cater to All Aesthetics
    Credit: Elle Decor

    This combo feels like fall all year long. Burnt orange marble countertops next to olive green walls create a warm, earthy kitchen that feels grounded and cozy. It’s not a color pairing you see often, which is exactly why it stands out.

    Tip: keep your flooring neutral, like light wood or beige tile, so the orange and green don’t fight for attention on every surface.

    This pairing works great in boho and eclectic kitchens, and it can also work in a retro-inspired space if you add some vintage light fixtures. Let’s move on to a cooler, calming color combo next.

    8. Icy Blue Marble With White Oak Cabinets

    Icy blue cabinetry and a marble-look island give this kitchen a retro chic look | Style at Home
    Credit: Style At Home

    Icy blue marble looks like frozen water, almost translucent in certain lighting. Paired with white oak cabinets, the whole kitchen feels calm, bright, and a little Scandinavian. It’s a great choice if you want color without going too bold.

    Tip: use this marble on an island top only if your budget is tight, since full countertop coverage in rare blue marble can get pricey fast.

    Scandinavian and coastal kitchens both love this pairing. It also works in minimalist kitchens where you want just a hint of color. Now let’s talk about a bolder red option.

    9. Deep Red Marble Backsplash With Charcoal Cabinets

    Is Red Marble the Bold Kitchen Trend Nobody Saw Coming? You Be the Judge — 33 Trending Designs – Home Stratosphere
    Credit: Homestratosphere

    Deep red marble is intense, so using it as a backsplash instead of full countertops keeps things balanced. Charcoal cabinets underneath make the red look even richer, almost like a wine color glowing against dark stone.

    Tip: add warm wood open shelving to soften the dramatic red and charcoal combo so it doesn’t feel too cold or harsh.

    This bold pairing fits modern and industrial kitchens best. It can also work in a moody, restaurant-style kitchen if that’s the vibe you’re going for. Let’s check out a lighter, breezier option next.

    10. Seafoam Green Marble With Whitewashed Wood

    Credit: Hgtv

    Seafoam green marble has a beachy, relaxed feel. Combine it with whitewashed wood cabinets and you basically get a kitchen that feels like a permanent vacation. Add woven baskets or rattan stools to push the coastal theme even further.

    Tip: choose a honed finish instead of polished for this marble, since it gives a softer, more matte beach house feel.

    This is a coastal kitchen dream combo, but it also works surprisingly well in boho and cottage-style homes. Now let’s talk about a color pairing that feels a little more unexpected.

    H3: Marble Finish Types and What They Cost More For

    Finish TypeLookMaintenance LevelTypical Price Difference
    PolishedShiny, glossyHigher, shows etching easilyStandard baseline
    HonedMatte, softLower, hides scratches betterOften same or slightly less
    LeatheredTextured, subtle shineMedium, hides fingerprints well10-15% more
    BrushedWorn, antique lookMedium15-20% more

    11. Mustard Yellow Marble With Forest Green Island

    50 Bright Green And Yellow Kitchen Designs - DigsDigs
    Credit: Digsdigs

    Mustard yellow marble on the counters, paired with a forest green island, is a bold, retro-leaning combo that feels warm and rich. It’s the kind of kitchen that photographs beautifully and makes a real statement the second you walk in.

    Tip: keep wall art and decor minimal since the marble and island colors already do most of the talking in this room.

    This pairing works in retro kitchens and also in eclectic, maximalist spaces where bold color choices are the whole point. Let’s wrap up the list with one more unique option.

    12. Multi-Colored Marble Mosaic Backsplash With Neutral Everything Else

    19+ Marble Backsplash with White Countertops (TIMELESS)
    Credit: Backsplash

    Sometimes the boldest move is using a marble mosaic backsplash with multiple colors mixed together, like green, pink, and gray tiles in one pattern. Keep the cabinets, counters, and walls totally neutral so the backsplash becomes the star of the whole kitchen.

    Tip: choose a mosaic with at least one repeated neutral color so it ties back into the rest of the room instead of feeling random.

    This idea is perfect for eclectic and maximalist kitchens, though a simplified version can even work in a modern space if the pattern is small and subtle. That wraps up the full list, but let’s talk about how to actually make any of these ideas work in real life.

    Tips for Success

    • Test marble samples in your actual kitchen lighting before buying, since colors shift a lot between store lighting and home lighting.
    • Stick to one bold marble color per kitchen. Mixing two loud marble colors usually backfires.
    • Balance colorful marble with at least one neutral surface, like walls or flooring, so the room doesn’t feel too busy.
    • Ask your fabricator for a sealed sample to see how the color reacts to sealant, since some stones darken slightly once sealed.
    • Choose hardware finishes that complement, not match exactly, your marble’s veining color for a more natural look.
    • Don’t skip the maintenance conversation. Colorful marble still etches and stains like any other marble.
    • Photograph your slab choice next to your cabinet samples in daylight before finalizing anything.

    Common Mistakes and How to Avoid Them

    Choosing marble color before cabinet color
    : Pick your marble slab first since it’s harder to match later, then build your cabinet color around it.

    Ignoring the veining pattern
    : Small samples don’t show the full veining. Always view a full slab or large sample before buying.

    Overdoing bold colors everywhere
    : Let one colorful element lead, like the island or backsplash, and keep everything else calmer.

    Skipping the sealant step
    : Colorful marble needs sealing just like white marble. Skipping this leads to staining and dullness over time.

    Forgetting about lighting changes
    : Marble color can look totally different under warm versus cool lighting, so test both before installing.

    Assuming all marble is expensive
    : Some colorful marbles are actually priced similarly to classic white marble, depending on where they’re quarried.

    Similar Variations

    • Terrazzo Kitchen Countertops: Uses chips of marble and other stone in colorful resin for a speckled, playful look.
    • Quartzite Colorful Kitchens: Similar veining to marble but more scratch-resistant, great for busy kitchens.
    • Painted Cabinet Only Kitchens: Skips colorful marble entirely and relies on bold cabinet paint with plain white counters.
    • Onyx Backlit Kitchens: Uses translucent colorful onyx stone with lighting behind it for a glowing backsplash effect.
    • Soapstone Colorful Kitchens: A softer stone option with muted color variations, popular in farmhouse designs.
    • Granite Colorful Kitchens: Offers bold natural color patterns similar to marble but with better durability for daily use.

    I hope this roundup gave you a clearer picture of just how much personality marble can bring into a kitchen when you move past the usual white and gray options. Whether you go bold with black and gold or keep it soft with lavender and cream, there’s a colorful combo here that can fit almost any home style, and honestly, that’s what makes these 12 colorful marble kitchens so much fun to explore.

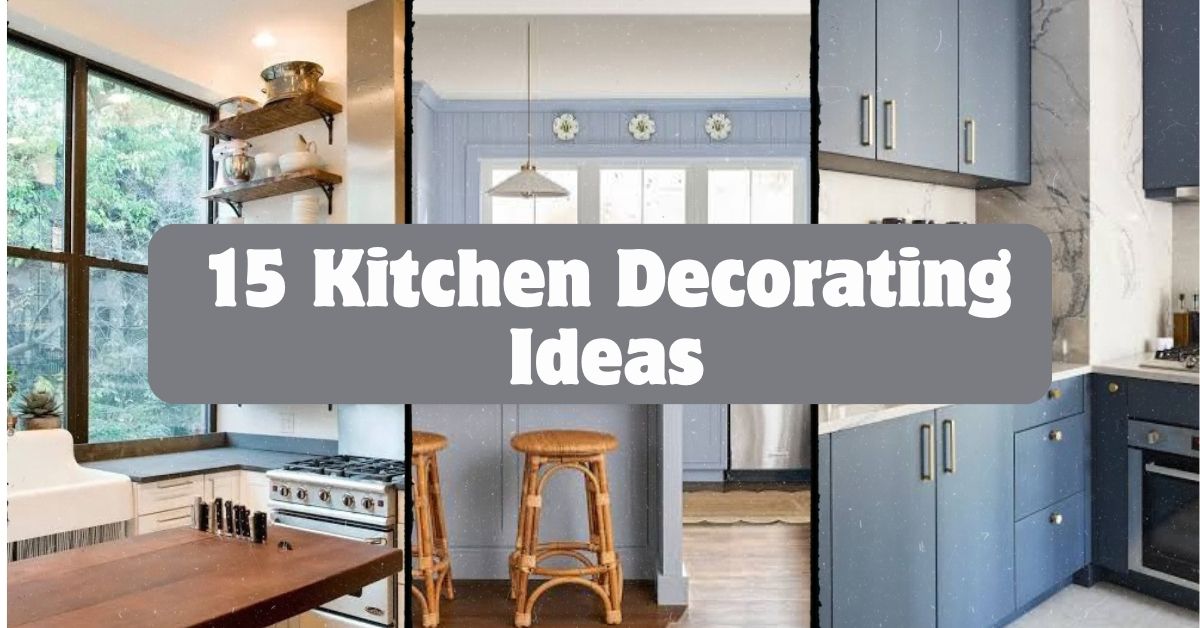
  • 15 Kitchen Decorating Ideas That Actually Make Your Space Feel Like Home

    15 Kitchen Decorating Ideas That Actually Make Your Space Feel Like Home

    I’ve spent way too many hours scrolling through kitchen photos online, wondering why my own kitchen felt so blah, so when I finally cracked the code with these 15 kitchen decorating ideas, I knew I had to share everything I learned.

    A kitchen decorating idea is any design choice, big or small, that makes a kitchen more functional, visually appealing, and reflective of the homeowner’s personal style. This includes color schemes, lighting, storage solutions, wall decor, and furniture placement that work together to create a cohesive, welcoming space.

    Stick around, because I’m about to walk you through everything from cheap weekend fixes to bigger changes that’ll make your kitchen the best room in your house.

    What Makes Kitchen Decorating Different From Other Rooms

    Kitchens are weird to decorate. You can’t just throw a pretty vase on a shelf and call it done. This room has to work hard. It cooks your food, holds your dishes, and somehow still needs to look good enough for guests to hang out in. That’s why kitchen decorating is really about balance. You’re mixing practical stuff like storage and lighting with personal touches like color and art. The best kitchens feel warm and lived in, not like a showroom. Once you get that balance right, everything else falls into place. Now let’s get into the good stuff.

    1. Pick a Color Scheme That Sets the Mood

    41 Kitchen Color Ideas for a Look You'll Love
    Credit: Better Homes

    Your color scheme is the backbone of your whole kitchen. It affects everything from your mood to how big or small the room feels. Light colors like soft white, cream, or pale sage make small kitchens feel open. Darker tones like navy or charcoal add drama and warmth in bigger spaces.

    My tip: pick your color scheme before you buy anything else. Paint chips are cheap. Redoing cabinets because they clash isn’t.

    This idea flexes easily. Modern kitchens lean toward monochrome grays and whites. Farmhouse kitchens love creamy whites and soft blues. Coastal kitchens go for seafoam and sandy neutrals. Once your palette is locked in, it’s time to think about what’s actually on your walls.

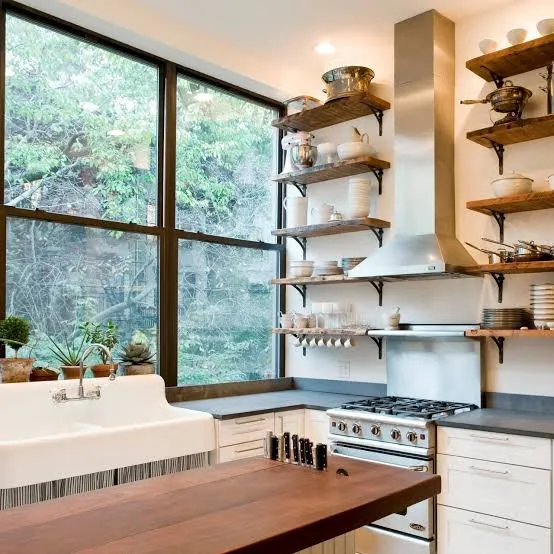
    2. Hang Open Shelving to Show Off Your Dishes

    Credit: Hgtv

    Open shelves turn boring storage into decor. Instead of hiding your plates and mugs behind cabinet doors, you display them. It sounds simple, but it changes the whole vibe of a kitchen.

    Use matching dishware or a curated mix of colors so it doesn’t look cluttered. Wood shelves feel cozy and rustic. Black metal shelves feel modern and sharp. Add a few plants or a stack of cookbooks for texture.

    Quick tip: only put your prettiest, most-used items on open shelves. Save the ugly stuff for closed cabinets.

    Open shelving works in almost any style, from industrial lofts to cottagecore kitchens. Speaking of texture, let’s talk about what’s happening on your floor.

    3. Layer a Rug for Warmth and Color

    10 Stylish Kitchen Rug Ideas for a Trendy Culinary Space – The Rugs
    Credit: The Rugs

    A rug in the kitchen might sound odd, but it makes the space feel finished. It adds color, softens hard tile or wood floors, and gives your feet a break while you cook.

    Go for a washable rug since kitchens get messy fast. Runners work great in front of the sink or stove. Bold patterns hide stains better than solid colors.

    My tip: measure your space before buying. A rug that’s too small looks like an afterthought.

    Traditional kitchens look great with vintage-style rugs. Modern kitchens do better with geometric patterns or solid neutrals. Now that your floor has some personality, let’s brighten things up from above.

    4. Upgrade Your Lighting for Instant Impact

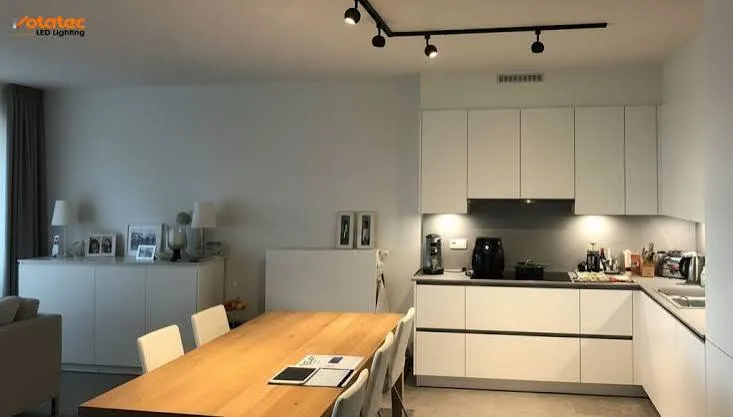
    Credit: Votatec

    Lighting can make or break a kitchen. Bad lighting makes even a beautiful kitchen look flat and tired. Good lighting makes everything pop, from your countertops to your cabinet color.

    Pendant lights over an island add style fast. Under-cabinet lighting helps with actual cooking tasks. Dimmer switches let you go from bright task lighting to cozy dinner mode in seconds.

    Lighting TypeBest ForAverage Cost Range
    Pendant lightsIslands, eating nooks$40 to $300 per fixture
    Under-cabinet LED stripsTask lighting, ambiance$20 to $100 for a full kitchen
    Recessed ceiling lightsGeneral overhead lighting$75 to $250 per light installed
    ChandeliersStatement piece over table$100 to $600

    My tip: layer at least three light sources (ambient, task, and accent) for the best results. Once your lighting is dialed in, your cabinets deserve some attention too.

    5. Swap Cabinet Hardware for a Cheap Refresh

    How to Replace Dated Hardware on Your Cabinets or Furniture
    Credit: Better Homes

    New knobs and pulls are one of the fastest, cheapest ways to change your kitchen’s whole look. It sounds too simple to work, but trust me, it works.

    Brass hardware feels warm and traditional. Matte black feels modern and bold. Brushed nickel sits somewhere in between and matches almost anything.

    Quick tip: bring one cabinet door to the hardware store so you can test different pulls in person before buying a full set.

    This swap works no matter your style, budget, or how much time you have. It’s a weekend project, not a renovation. Now let’s talk about what goes on your counters.

    6. Style Your Countertops Without Cluttering Them

    Kitchen Counter Decor Ideas - How to Decorate Kitchen Counters
    Credit: Maisondecinq

    Empty counters feel cold. Cluttered counters feel chaotic. The trick is styling them just enough to look intentional.

    Group items in odd numbers, like three. A wood cutting board leaning against the backsplash, a small plant, and a ceramic utensil holder can do a lot of visual work. Keep small appliances tucked away unless you use them daily.

    My tip: use a tray to corral items like oils and salt. It keeps things looking neat even when your counter is technically busy.

    Minimalist kitchens want almost nothing on the counter. Farmhouse kitchens can handle a little more charm and clutter. Speaking of charm, let’s put something on those bare walls.

    7. Add Wall Art That Isn’t Just Food-Themed

    43 Creative Kitchen Wall Decor Ideas to Try
    Credit: Thespruce

    I get it, fruit prints and “Live Laugh Love” signs are everywhere in kitchens. But your kitchen walls can hold way more interesting art than that.

    Try botanical prints, abstract pieces, or even black and white photography. A gallery wall near your breakfast nook adds personality fast. Frame sizes should vary slightly so it doesn’t look too matchy.

    My tip: hang art at eye level, roughly 57 to 60 inches from the floor to the center of the piece.

    Traditional kitchens often go for landscape paintings. Modern kitchens like abstract or line art. Once your walls are dressed up, let’s think about your window treatments.

    8. Choose Window Treatments That Balance Light and Privacy

    Kitchen Window Coverings: Best Options & Ideas
    Credit: Timanandco

    Curtains and blinds in the kitchen aren’t just decoration. They control how much light comes in and how private you feel while cooking.

    Café curtains cover just the bottom half of the window, letting light in while blocking street-level views. Roman shades add texture without being bulky. Avoid heavy floor-length curtains near the stove for safety reasons.

    Quick tip: pick washable fabric since kitchen windows deal with grease and steam.

    Farmhouse kitchens love gingham or linen café curtains. Modern kitchens often skip curtains entirely and use simple blinds instead. Now let’s bring some life into the room, literally.

    9. Bring in Greenery With Low-Maintenance Plants

    Indoor plant ideas for adding greenery to your home
    Credit: Resi

    Plants add color and life to a kitchen without much effort. They also help the space feel less sterile, especially if you’ve got a lot of white cabinets or stainless steel appliances.

    Herbs like basil and thyme are useful and pretty. Pothos and snake plants survive almost total neglect. Group a few different pot sizes together on a windowsill for a designed look.

    My tip: keep at least one plant near your prep area. Fresh herbs make cooking more fun and save you money at the grocery store.

    Coastal and bohemian kitchens go heavy on greenery. Modern kitchens usually keep it to one or two clean, simple plants. Now let’s talk about a decor piece people forget about completely.

    10. Use a Statement Backsplash as Your Focal Point

    Elevate Your Kitchen Design: Using Backsplash to Create a Stunning Focal Point | Tempe, AZ | Manufacturers Floor Covering Outlet
    Credit: Mfcoflooring

    Your backsplash covers a lot of visual space, so it’s worth making it interesting. A bold tile pattern, a slab of marble, or even colorful subway tile can become the star of your kitchen.

    Backsplash MaterialStyle FitPrice Per Square Foot
    Subway tileModern, farmhouse$5 to $15
    Marble slabTraditional, luxury$40 to $100
    Patterned ceramic tileBohemian, eclectic$10 to $30
    Peel-and-stick tileBudget, rental-friendly$3 to $10

    My tip: if you’re renting or on a tight budget, peel-and-stick tile looks surprisingly convincing and comes off clean later.

    This idea adapts to any style since backsplash options are basically endless. Once your backsplash is set, think about how your table area ties in.

    11. Create a Cozy Breakfast Nook

    6 Tips for Creating a Cozy Breakfast Nook - Cupcakes & Cashmere
    Credit: Cupcakesandcashmere

    If you’ve got the space, a breakfast nook adds charm and function. It’s a small corner that becomes a favorite spot in the house without much effort.

    A round table fits tight corners better than a square one. Bench seating with cushions adds softness and saves space. Layer in a small pendant light above the table to make it feel intentional.

    Quick tip: add a few throw pillows in a pattern that echoes your kitchen’s main color scheme.

    Coastal kitchens love a nook with woven furniture and light fabrics. Traditional kitchens often go for a wood table with upholstered chairs. Now let’s talk about a detail most people totally ignore.

    12. Don’t Forget the Ceiling

    Why So Many Kitchen Cabinets Don't Reach The Ceiling
    Credit: Tastingtable

    Ceilings are the most overlooked surface in kitchen decorating. A little attention here goes a long way.

    Exposed beams add rustic charm. A fresh coat of paint in a soft color other than white adds unexpected depth. Even a simple statement light fixture draws the eye upward and makes the whole room feel taller.

    My tip: if your kitchen feels boxy, painting the ceiling a shade lighter than your walls creates a subtle sense of height.

    Modern farmhouse kitchens often go for exposed wood beams. Contemporary kitchens might paint the ceiling matte black for drama. Speaking of drama, let’s talk textiles.

    13. Mix in Textiles for Softness

    Textiles - Bring softness and beauty home – PENTIK
    Credit: Pentik

    Kitchens are full of hard surfaces like tile, wood, and metal. Textiles soften all that up and make the room feel warmer.

    Dish towels, oven mitts, and table runners are small items that pack a big decorative punch. Rotate them seasonally for an easy refresh. Stick to two or three coordinating colors so it doesn’t look random.

    Quick tip: hang a patterned towel on your oven handle. It’s such a small thing but it adds instant color.

    Bohemian kitchens go heavy on pattern mixing. Minimalist kitchens keep textiles simple and solid colored. Now let’s look at something that ties your whole kitchen together.

    14. Choose a Cohesive Hardware and Fixture Finish

    How to Choose Beautiful & Cohesive Hardware for Your Home — CKD Remodeling
    Credit: Ckd

    Nothing throws off a kitchen faster than mismatched metals everywhere. Chrome faucet, brass knobs, black light fixtures, it can start to feel messy fast.

    Pick one main metal finish and stick with it for at least 80% of your fixtures. Brushed gold, matte black, and brushed nickel are the most popular choices right now. A small accent in a second metal is fine, just don’t overdo it.

    My tip: start with your faucet since it’s usually the hardest and most expensive thing to change later.

    This rule matters in every style of kitchen, from ultra modern to cozy traditional. Last but not least, let’s talk about the small stuff that ties everything together.

    15. Add Personal Touches That Tell Your Story

    Unique ways to add a personal touch to your home - Andrew Coulson Estate Agents
    Credit: Andrew

    At the end of the day, a kitchen full of perfectly matched decor still feels empty if it doesn’t feel like you. Personal touches make all the difference.

    Display a collection of vintage teacups. Frame a handwritten recipe from your grandma. Hang a chalkboard for grocery lists and doodles. These little things make guests feel like they’re in your home, not a catalog photo.

    Quick tip: rotate personal items seasonally so your kitchen always feels a little fresh without a full redo.

    No matter your style, whether it’s modern, coastal, or farmhouse, personal touches are what make it feel truly finished.

    Tips for Success

    • Start with function first, then layer in style. A pretty kitchen that doesn’t work for cooking will frustrate you daily.
    • Test paint colors on your actual walls at different times of day before committing.
    • Shop secondhand for decor items like bowls, art, and baskets to save money and add character.
    • Keep a “one in, one out” rule for counter decor so things don’t pile up over time.
    • Use samples before buying full amounts of tile, wallpaper, or paint.
    • Take photos of your kitchen before starting. It helps you see the space objectively.
    • Change out small textiles seasonally instead of doing a full redecorate every year.

    Common Mistakes and How to Avoid Them

    Overcrowding open shelves
    : Fix this by only displaying items you actually love or use weekly. Rotate the rest into closed storage.

    Ignoring lighting layers
    : Fix this by adding at least one task light and one accent light beyond your main overhead fixture.

    Mixing too many metal finishes
    : Fix this by choosing one dominant finish and limiting accents to just one other metal tone.

    Choosing trendy colors without testing them
    : Fix this by sampling paint on your wall for at least 48 hours before committing to a full room.

    Skipping textiles because “it’s just a kitchen”
    : Fix this by adding at least one rug, runner, or set of towels to soften the space.

    Forgetting scale when buying decor
    : Fix this by measuring your space and bringing those measurements with you when shopping.

    Similar Variations

    • Farmhouse Kitchen Decor: Warm woods, apron sinks, and vintage-inspired accents for a cozy country feel.
    • Coastal Kitchen Decor: Light blues, whites, and natural textures inspired by beach living.
    • Modern Minimalist Kitchen Decor: Clean lines, monochrome palettes, and almost no visible clutter.
    • Industrial Kitchen Decor: Exposed brick, black metal fixtures, and raw materials for an urban loft feel.
    • Bohemian Kitchen Decor: Bold patterns, mixed textures, and lots of plants for a relaxed, eclectic look.
    • Traditional Kitchen Decor: Classic wood cabinetry, ornate details, and timeless color palettes.

    Decorating a kitchen doesn’t have to feel overwhelming once you break it down piece by piece. Small changes like new hardware or a cozy rug can make just as much impact as bigger projects like lighting or backsplash updates. Pick a few ideas that fit your style and budget, and build from there. I hope this list of 15 Kitchen Decorating Ideas gives you the confidence and inspiration to finally make your kitchen feel like the heart of your home.

  • 15 Kitchen Island Ideas That Will Change How You Cook and Gather

    15 Kitchen Island Ideas That Will Change How You Cook and Gather

    If you’ve been scrolling through photos trying to picture what might work in your own kitchen, this list of 15 kitchen island ideas is going to save you a ton of guesswork. I’ve pulled together the most practical, good-looking options out there, and I’ll walk you through exactly how each one works.

    A kitchen island is a standalone counter or cabinet unit placed in the middle of a kitchen. It adds prep space, storage, and often seating, and it works in almost any kitchen size or style when planned correctly.

    Stick around, because I’m also going to show you the mistakes people make when picking an island, plus some size and budget numbers you’ll actually find useful.

    What Makes a Kitchen Island Work So Well

    I’ll be honest, a kitchen island isn’t just a trend. It’s basically the command center of the whole room. You cook there, you eat there, your kids do homework there, and somehow it becomes the place everyone gathers during a party even when there’s a perfectly good living room ten feet away. That’s the magic of it. A good island mixes function with style, giving you extra counter space and storage while also becoming a visual anchor for the whole kitchen. Once you start looking at island ideas, you’ll notice they range from tiny rolling carts to massive stone slabs with seating for six. There’s a fit for every home, budget, and cooking style, and that’s exactly what we’re getting into.

    1. Waterfall Quartz Countertop Island

    These Gorgeous Waterfall Countertops Redefine Luxury
    Credit: Elledecor

    A waterfall countertop is when the stone slab wraps down the sides of the island instead of stopping at the edge. It gives a smooth, seamless look that instantly feels high-end. Quartz works great here because it resists stains and doesn’t need sealing like natural stone does.

    Pick a light gray or warm white quartz if you want the island to feel bright and open. Darker veined stone gives a bolder, more dramatic statement.

    Tip: Ask your fabricator for a mitered edge so the seam is nearly invisible.

    This style fits modern and contemporary kitchens best, though a soft-veined quartz can also soften a transitional space.

    Next up is a look that plays with contrast instead of seamless flow.

    2. Two-Toned Cabinet Island

    Two-Toned Kitchen Cabinets: Endless Combinations - Bertch Cabinet, LLC
    Credit: Bertch

    Painting your island a different color than your surrounding cabinets makes it pop without a full remodel. Navy blue, forest green, and matte black are popular choices against white or light wood cabinetry.

    This is one of the cheapest ways to update a kitchen. You’re just repainting one section instead of everything.

    Tip: Stick to one accent color max. Two contrasting colors on top of your existing cabinets can look busy fast.

    Coastal kitchens love soft blues here, while farmhouse styles lean toward sage green or black.

    Color contrast is fun, but sometimes the material itself can do all the talking.

    3. Butcher Block Wood Top Island

    50 Wonderful Wood-Topped Kitchen Islands
    Credit: Houzz

    A butcher block top brings warmth into a kitchen that might feel too cold or clinical otherwise. It’s real wood, usually maple or walnut, sealed for durability, and it’s fantastic for actual food prep since you can chop right on it.

    Pair it with white or cream cabinets for a farmhouse feel, or dark cabinets for a more rustic, cabin-style look.

    Tip: Reseal the wood every 6 to 12 months with food-safe mineral oil to keep it from drying out or cracking.

    This works beautifully in farmhouse, cottage, and traditional kitchens.

    Speaking of size and budget, let’s compare a few island types so you can see where your project might land.

    Kitchen Island Size and Budget Comparison

    Island TypeTypical SizeSeating CapacityEstimated Cost Range
    Rolling cart island24″ x 18″None$150 – $600
    Standard fixed island6ft x 3ft2-3 people$2,000 – $6,000
    Waterfall stone island7ft x 4ft3-4 people$5,000 – $12,000
    Multi-level island8ft x 4ft4-6 people$6,500 – $15,000

    4. Island with Built-In Seating Bench

    10 Kitchen Islands That Feature Banquette Seating
    Credit: Houzz

    Instead of stools, some islands have a bench built right into one end. It’s a comfy option for families with little kids who might not sit steady on a stool.

    Add cushions in a durable fabric like performance velvet or outdoor-grade canvas so spills wipe off easy.

    Tip: Keep the bench height a few inches lower than the counter for comfortable knee clearance.

    This idea shines in family-style traditional or cottage kitchens where comfort matters more than sleek lines.

    If built-in seating feels too permanent, a smaller movable option might be the better fit.

    5. Rolling Kitchen Cart as a Mini Island

    DIY Upcycled Beverage Cart Design Inspiration | Reinvented Delaware
    Credit: Reinventeddelaware

    Not every kitchen has room for a full island, and that’s fine. A rolling cart gives you extra counter space and storage that you can push out of the way when you need floor room.

    Look for one with a butcher block or marble top and a lower shelf or drawer for kitchen tools.

    Tip: Measure your walking path before buying. You want at least 36 inches of clearance around it when it’s parked.

    This works in nearly every style, but a metal-frame cart looks especially sharp in industrial or modern farmhouse kitchens.

    Now let’s talk about what hangs above the island, because lighting changes everything.

    6. Pendant Light Trio Above the Island

    3 Pendant Lights Over Island: Perfect Balance of Style and Function
    Credit: Vietshopdesign

    Three matching pendant lights spaced evenly over an island create a clean, intentional look. It’s one of the easiest upgrades that makes a huge visual difference.

    Choose glass globes for a modern feel, woven rattan shades for coastal or boho spaces, or bronze and black metal fixtures for traditional kitchens.

    Tip: Hang pendants 30 to 36 inches above the counter surface for the right proportion.

    Adjust the finish and shape of the pendants to match your kitchen’s overall style, and the whole room ties together instantly.

    Lighting sets the mood, but what’s under those lights matters just as much.

    7. Open Shelving Instead of Lower Cabinets

    Open Shelving vs. Cabinets: Which Is Better? - Laurysen Kitchen Design
    Credit: laurysenkitchens

    Swapping solid cabinet doors for open shelves on one side of the island gives you a spot to display dishes, cookbooks, or woven baskets. It also breaks up a big block of cabinetry so the island feels lighter.

    Keep the shelf styling simple. Stack a few bowls, add a plant, done. Overloading the shelves makes the kitchen look cluttered instead of curated.

    Tip: Paint the inside of the shelving a contrasting color to make displayed items pop.

    This idea fits coastal, farmhouse, and Scandinavian kitchens especially well since those styles love a lived-in, open feel.

    Material Comparison for Island Countertops

    MaterialDurabilityMaintenance LevelPrice per Sq Ft
    QuartzVery highLow$50 – $100
    GraniteHighMedium (needs sealing)$40 – $90
    Butcher block woodMediumHigh (needs oiling)$35 – $70
    MarbleMediumHigh (stains easily)$60 – $120
    LaminateLow-mediumLow$15 – $40

    With materials sorted out, let’s look at a feature that changes how the island functions day to day.

    8. Island with a Prep Sink

    5 Reasons to Love Kitchen Prep Sinks - Native Trails
    Credit: Nativetrailshome

    Adding a second, smaller sink to your island means you can wash veggies or fill a pot without crowding the main sink. It’s a genuinely useful upgrade if more than one person cooks at a time.

    Pick a compact stainless or fireclay sink so it doesn’t eat up too much counter space.

    Tip: Plan plumbing early in your renovation since running new lines to the island can get pricey if it’s an afterthought.

    This feature works in any style kitchen, but it’s especially popular in larger modern and transitional homes where entertaining happens often.

    If plumbing feels like too much of a project, a simpler shape change might scratch that upgrade itch.

    9. Curved or Rounded Island Edge

    Corner Renovation
    Credit: Cornerrenovation

    A curved island softens the whole room. Sharp corners can be tough on hips and toddlers alike, so rounding one or two edges makes the space feel friendlier and more open.

    This works especially well in smaller kitchens since curves help traffic flow around the island more naturally.

    Tip: Curved cabinetry costs more to build, so budget an extra 15 to 20 percent over a standard rectangular island.

    Modern and Mediterranean-style kitchens both lean into curves right now, giving the whole room a softer, sculptural feel.

    Now let’s go back to something a little more rugged and full of character.

    10. Reclaimed Wood Island for Farmhouse Style

    Rustic Kitchen Island with Seating and Storage - Rocky Hedge Farm
    Credit:Rockyhedgefarm

    Reclaimed wood brings texture and history into a kitchen. Every knot and nail hole tells a story, and no two islands look exactly alike.

    Pair it with iron hardware and a soapstone or butcher block top for an authentic farmhouse feel.

    Tip: Buy from a reputable reclaimed lumber supplier who kiln-dries the wood, which kills pests and stabilizes the moisture content.

    This idea is basically made for farmhouse and rustic cabin kitchens, though a single reclaimed wood island can also warm up an otherwise sleek modern space.

    Storage-wise, there’s one more upgrade worth considering if you love wine.

    11. Island with Built-In Wine Storage

    Wine Storage | Designer Kitchens | Harvey Jones
    Credit: Harveyjones

    A wine rack or small wine fridge built into the island side is a great use of otherwise wasted space. It keeps bottles handy for cooking or entertaining without cluttering your counters.

    Go with open horizontal racks for a casual look or a glass-front wine fridge for a more polished, built-in feel.

    Tip: Keep wine storage away from the dishwasher or oven side of the island since heat and vibration can affect the wine over time.

    This feature fits transitional and modern kitchens especially well, since it reads as a subtle luxury touch rather than a flashy one.

    Popular Island Color Palette Combinations

    Cabinet ColorIsland Accent ColorCountertop PairingStyle Vibe
    WhiteNavy blueWhite quartzCoastal, classic
    CreamSage greenButcher blockFarmhouse
    Light grayCharcoal blackGray veined marbleModern
    White oakTerracottaHoned graniteMediterranean
    Warm whiteBlackConcreteIndustrial

    Color pairing is one thing, but the overall shape of the island can also solve real layout problems.

    12. Matching Island and Backsplash Color

    75 Kitchen Backsplash Ideas That Will Cater to All Aesthetics
    Credit: Elle Decor

    Instead of contrasting colors, some kitchens tie the island color directly into the backsplash tile or paint. It creates a cohesive, calm feeling since your eye isn’t jumping between competing tones.

    Try a soft green island with matching green subway tile, or a warm terracotta island echoed in the backsplash grout color.

    Tip: Bring a paint swatch or tile sample to the countertop store so you can match tones under real lighting before committing.

    This works great in Mediterranean, coastal, and Scandinavian kitchens where a calm, unified palette is the whole point.

    Speaking of function, some islands do double duty by changing height across their surface.

    13. Multi-Level Island with Raised Bar Top

    10 split-level kitchen island ideas that are pretty and practical | Ideal  Home
    Credit: Ideal Home

    A multi-level island has a lower prep counter on one side and a raised bar-height counter on the other. It’s a smart way to hide kitchen mess from anyone sitting at the bar while cooking.

    Use a durable, easy-clean material like quartz on the prep side since that’s where the real work happens.

    Tip: Keep at least 24 inches of counter space per bar stool so guests aren’t bumping elbows.

    This layout is popular in modern and transitional kitchens where entertaining and cooking need to happen at the same time.

    The seating itself can also become a design statement on its own.

    14. Statement Barstools for Contrast

    Credit: @lush__interiors

    Sometimes the island stays simple and the stools do all the visual work. Think bold color, an interesting shape, or a mixed-material design like woven rattan seats with black metal legs.

    Choose stools that are slightly different from your dining chairs so the kitchen feels intentional, not matchy.

    Tip: Measure counter height first. Standard counters need 24 to 26 inch stools, while bar height needs 28 to 30 inch stools.

    This idea works in literally every style since stools are easy to swap out later if your taste changes.

    Last but not least, let’s talk about islands for kitchens that don’t have a ton of extra square footage.

    15. Compact Island for Small Kitchens

    35 Small Kitchen Island Ideas to Maximize Space
    Credit: House Beautiful

    You don’t need a huge kitchen to have an island. A slim island, sometimes just 24 inches wide, can still give you extra storage and a small prep zone without blocking traffic flow.

    Stick to lighter colors and open shelving underneath to keep the space feeling airy instead of cramped.

    Tip: Leave at least 42 inches of clearance on all sides so the kitchen still feels walkable.

    This idea is a lifesaver in small modern apartments, cottage kitchens, and older homes with tighter layouts.

    Tips for Success

    • Measure your kitchen’s total walkway space before choosing island size. You need at least 36 inches of clearance on every side.
    • Match your island’s material durability to how you actually cook. Heavy daily use needs quartz or granite, not soft marble.
    • Plan electrical and plumbing needs early if you want outlets, a sink, or a cooktop built into the island.
    • Choose lighting that matches the island’s function. Task lighting for prep zones, softer ambient light for seating areas.
    • Don’t skip storage planning. Deep drawers work better than cabinets for pots, pans, and small appliances.
    • Test stool height and spacing in person before buying, since online measurements can be misleading.
    • Keep the island’s style connected to the rest of the kitchen, even if the color or material contrasts.

    Common Mistakes and How to Avoid Them

    Choosing an island too big for the room
    : Measure your kitchen’s total footprint first, then leave at least 36 inches of clearance on all sides before finalizing island size.

    Ignoring workflow between the sink, stove, and island
    : Keep the classic kitchen work triangle in mind so you’re not walking in circles while cooking.

    Picking a material that doesn’t match your cooking habits
    : Choose durable, low-maintenance materials like quartz if you cook often, and save soft stone or unsealed wood for lighter use kitchens.

    Overcrowding the island with too many features
    : Pick one or two functions, like seating and storage, instead of cramming in a sink, wine fridge, and bar top all at once.

    Skipping proper lighting planning
    : Install pendant lights or overhead fixtures sized and spaced to the island’s length, not just centered without measuring.

    Forgetting outlet access for small appliances
    : Add outlets during the planning stage since retrofitting them later is far more expensive.

    Similar Variations

    • Peninsula Kitchen Layout: A connected counter extension instead of a freestanding island, great for smaller kitchens.
    • Butler’s Pantry Island: A secondary prep island tucked into an adjoining pantry space for extra storage.
    • Outdoor Kitchen Island: A weatherproof version built for patios and outdoor cooking setups.
    • Mobile Kitchen Cart: A lightweight, wheeled alternative that offers flexibility without permanent installation.
    • Farmhouse Harvest Table Island: A long wooden table style island that doubles as informal dining space.
    • Two-Island Kitchen: Larger kitchens sometimes split prep and seating functions across two separate islands.

    Picking the right island really comes down to how you live in your kitchen day to day, not just what looks good in photos. Whether you go bold with a waterfall quartz countertop or keep things simple with a rolling cart, the goal is the same: more function, more style, and a kitchen that actually works for your life. I hope these 15 Kitchen Island Ideas gave you a clear starting point for your own space.

  • 11 White Kitchen Cabinets

    11 White Kitchen Cabinets

    I’ve spent hours scrolling through kitchen photos trying to find real inspiration, and I put together these 11 white kitchen cabinets ideas so you don’t have to do that same digging. This isn’t just another list thrown together for clicks. I checked what actually works in real homes, not just staged photos, so you get ideas you can actually use.

    White kitchen cabinets refer to cabinetry finished in white paint or laminate, ranging from bright cool white to warm creamy tones. They remain the most popular kitchen cabinet choice because they brighten spaces, pair with nearly any countertop or backsplash, and hold resale value better than trendy colors.

    Stick around and I’ll walk you through specific styles, real cost comparisons, and mistakes that trip up almost everyone who tries this look.

    What Makes White Kitchen Cabinets So Popular

    Here’s the thing about white cabinets. They just work. I’ve noticed that no matter what house I walk into, a white kitchen never looks dated the way a lime green one from 2005 does. White bounces light around a room, which matters a ton if your kitchen doesn’t get a lot of natural sun. It also acts like a blank canvas. You can throw in black hardware, gold fixtures, wood floors, or colorful tile, and it all just fits. That flexibility is exactly why white kitchens have stuck around for decades instead of fading out like other trends.

    1. Classic Shaker Style White Cabinets

    White shaker kitchen ideas: 7 classic looks that experts love | Homes and Gardens
    Credit: Homes And Gardens

    Shaker cabinets are the safe bet that never feels boring. They’ve got that simple recessed panel door with clean lines, no fuss, no carving. I like them because they look at home in a farmhouse kitchen just as much as a modern city apartment. Pair them with brushed nickel or matte black pulls depending on how bold you want to go.

    Practical tip: if you’re on a budget, shaker style is usually cheaper than ornate raised-panel doors because they’re simpler to manufacture.

    This style adapts to almost anything, from coastal cottages to minimalist lofts. Next up, let’s look at a style that adds a little more texture to the mix.

    2. Beadboard Cabinet Fronts For Cottage Charm

    63 Rustic Farmhouse Kitchen Ideas to Inspire Your Next Remodel
    Credit: Countryliving

    Beadboard adds these small vertical grooves to cabinet doors, giving a cozy, cottage-like feel. It’s a step up from flat panel doors without going overboard on detail. I think this works really well if your home already has some traditional bones, like crown molding or a farmhouse sink.

    Try pairing beadboard white cabinets with butcher block counters for a warm, lived-in look.

    This style leans traditional and coastal, but skip it if your home is ultra-modern since the texture can feel out of place.

    Now let’s talk about a bolder cabinet shape that’s been trending hard lately.

    3. Arched Cabinet Doors For A Soft Vintage Look

    Arched kitchen cabinets are trending – this is why they're the perfect addition to a transitional kitchen | Homes and Gardens
    Credit :Homes And Gardens

    Arched top cabinet doors bring a curved detail at the top instead of a straight line. It’s subtle, but it changes the whole vibe of a kitchen. I’ve seen this used a lot in kitchens going for a French country or old-world European feel.

    Actionable tip: use arched doors only on upper cabinets to avoid overwhelming the space, and keep lowers simple and flat.

    This works beautifully in traditional and transitional kitchens but can clash with strict modern or industrial designs.

    Speaking of mixing styles, let’s check out how two-tone kitchens use white as the anchor color.

    4. Two-Tone Kitchens With White On Top

    30 Stylish Two-Toned Kitchen Ideas (From an Expert)
    Credit: My Domaine

    A lot of homeowners are pairing white upper cabinets with a darker or bolder color on the bottom, like navy, forest green, or charcoal. This keeps the kitchen bright near eye level while adding depth and personality down low. I really like this because it feels custom without costing custom cabinet prices.

    Tip: keep your island a third color or matching the lowers to tie the whole room together.

    This look adapts across almost every style, from modern farmhouse to contemporary city kitchens.

    Cabinet Color Pairing Ideas

    Upper Cabinet ColorLower Cabinet ColorBest Style Match
    WhiteNavy BlueCoastal, Traditional
    WhiteSage GreenFarmhouse, Cottage
    WhiteCharcoal GrayModern, Industrial
    WhiteWarm Wood ToneScandinavian, Minimalist
    WhiteBlackContemporary, Transitional

    Now that you’ve got some color pairing ideas, let’s look at hardware, because it changes the whole feel of white cabinets.

    5. Brass Or Gold Hardware For Warmth

    35 Beautiful White Kitchen Cabinets with Brass Hardware - Nikki's Plate
    Credit: Nikkisplate

    White cabinets can feel a little cold or clinical if you’re not careful. Adding brass or gold hardware warms things up instantly. It’s a small change but it makes a huge visual difference. I always tell people this is the cheapest upgrade you can make to a white kitchen.

    Practical tip: choose brushed brass over shiny polished brass if you want a more updated, less “builder grade” look.

    This pairing works in almost every design style, but it shines especially in transitional and glam kitchens.

    Let’s move from hardware to something bigger, the backsplash, because that’s where white cabinets really get to show off.

    6. Subway Tile Backsplash For Timeless Contrast

    30 Green Backsplash Ideas for the Most Gorgeous Kitchen Ever
    Credit: Bhg

    White subway tile with white cabinets sounds like it might be too much white, but it actually creates this soft, layered look because of the grout lines and slight texture. If you want more contrast, go with a dark grout line or a colored tile instead.

    Tip: use a herringbone pattern instead of the standard brick layout to add visual interest without adding more colors.

    This idea fits basically any style, though the pattern and grout color you choose will shift it more traditional or more modern.

    7. Open Shelving Mixed With White Cabinets

    Why I Combined Open Shelves and Cabinets in My Kitchen Remodel
    Credit: Houzz

    Open shelves break up a wall of solid white cabinet doors. They also give you a spot to show off dishes, plants, or cookbooks. I like doing this above a stove or next to a window where natural light hits the shelf.

    Actionable tip: paint the inside back wall of open shelving a soft color to make dishes pop instead of blending into the white.

    This works great in farmhouse, coastal, and Scandinavian kitchens, but skip it if you’re not great about keeping things tidy since open shelves show clutter fast.

    Let’s talk countertops next, since they change how “warm” or “cool” your white cabinets feel.

    8. Warm Toned Countertops To Balance Cool White

    59 White Kitchens That Are Anything But Vanilla | HGTV
    Credit: Hgtv

    Bright white cabinets paired with a stark white quartz counter can feel a little sterile. I like balancing that out with a warmer countertop, like a beige quartz, a butcher block, or even a soapstone with warm undertones.

    Tip: bring a cabinet door sample to the countertop store so you can see them side by side in real lighting before deciding.

    This balancing trick works in every design style since warmth is about temperature, not aesthetic.

    Countertop Options With White Cabinets

    Countertop MaterialPrice Range (per sq ft)Best For
    Laminate$20-$50Budget kitchens
    Butcher Block$40-$100Farmhouse, cottage
    Quartz$60-$150Modern, transitional
    Granite$50-$200Traditional, classic
    Marble$100-$250Glam, luxury

    With countertops covered, let’s talk about how flooring choice plays into your white cabinet kitchen.

    9. Wood Flooring To Ground A White Kitchen

    10 wooden kitchen floor ideas that are classic and demure | Ideal Home
    Credit: Ideal home

    All that white can float away visually without something to anchor it. Wood floors, especially medium or warm tones, ground the space and stop it from feeling too clinical. I’ve noticed light gray floors can work too, but wood adds more coziness.

    Practical tip: if you have wood floors already, match your cabinet white to a warm white rather than a stark cool white to avoid clashing undertones.

    This works across farmhouse, traditional, coastal, and even modern kitchens depending on the wood tone you pick.

    Next, let’s talk about a detail people often skip: the toe kick and cabinet base.

    10. Furniture Style Legs Instead Of Standard Toe Kicks

    Toe Kicks by Kitchen Style | Ergonomics in Modern Kitchens
    Credit: Cliqstudios

    Adding decorative furniture legs to your island or lower cabinets makes white cabinetry feel less like a big box store kitchen and more custom. It’s a small detail but it reads as high-end.

    Tip: use this trick specifically on a kitchen island to make it feel more like a furniture piece than built-in storage.

    This detail leans traditional and vintage but can work in transitional kitchens too if kept simple.

    Let’s finish the main ideas with a look at glass front cabinets, a favorite for breaking up all that solid white.

    11. Glass Front Upper Cabinets For Visual Break

    A look into Glass Fronted Cabinets on a Handmade Kitchen - Nicholas Bridger
    Credit; Nicholasbridge

    Swapping a few upper cabinet doors for glass fronts breaks up a long row of white and gives you a spot to display dishes or glassware. It keeps things from feeling like one giant white block.

    Actionable tip: only do this on two or three doors max, otherwise it can look busy or require too much tidying inside the cabinets.

    This works in cottage, coastal, and traditional kitchens especially well, giving a lighter, airier feel.

    Tips for Success

    • Test paint swatches on your actual cabinets under both daytime and nighttime lighting before committing to a shade.
    • Choose a white with warm undertones if your kitchen doesn’t get much natural light.
    • Mix textures like wood, stone, and metal so the kitchen doesn’t feel flat or one-dimensional.
    • Keep hardware finishes consistent throughout the kitchen for a pulled-together look.
    • Don’t skip the backsplash. It’s a small area that makes a big visual impact.
    • Budget extra for maintenance since white shows dirt and grease faster than darker colors.
    • Add at least one contrasting element, like a dark floor or colored island, so the kitchen doesn’t feel washed out.

    Common Mistakes and How to Avoid Them

    Choosing stark white without checking undertones
    : Bring samples home and view them in your actual kitchen lighting, not just under store lights.

    Matching all white finishes exactly
    : Slight variation in white shades between cabinets, walls, and trim actually looks more intentional than a perfect match.

    Skipping ventilation planning
    : White cabinets near the stove show grease splatters fast, so invest in a good range hood to cut down on buildup.

    Ignoring hardware scale
    : Oversized or undersized pulls throw off the whole look, so measure your cabinet doors before ordering hardware.

    Going all white with no contrast
    : Add a colored island, dark floor, or patterned backsplash so the kitchen has depth instead of looking flat.

    Forgetting about resale value trends
    : Stick with classic white shades like off-white or warm white instead of trendy blue-whites that might date quickly.

    Similar Variations

    • Modern Farmhouse White Kitchens – combines white shaker cabinets with black hardware and open shelving for a cozy but current look.
    • Coastal White Kitchens – lighter blues, natural textures, and white cabinets create a beachy, relaxed feel.
    • Scandinavian White Kitchens – minimalist white cabinets paired with light wood and simple hardware for a clean, airy look.
    • Traditional White Kitchens – raised panel or arched white cabinets with ornate hardware and crown molding for a classic feel.
    • Industrial White Kitchens – white cabinets mixed with exposed brick, black metal accents, and concrete countertops.
    • French Country White Kitchens – white cabinets paired with soft blue or sage accents, curved details, and vintage-inspired fixtures.

    White kitchen cabinets aren’t just a passing trend. They’re a smart, flexible choice that works no matter what style you’re going for or how your taste changes down the road. Whether you go bold with two-tone lowers or keep it simple with shaker doors and brass hardware, the right combo of finishes, textures, and small details makes all the difference. I hope these 11 white kitchen cabinets ideas gave you a clear starting point for your own kitchen project.

  • 12 Kitchen Window Ideas That’ll Change How You See Your Sink

    12 Kitchen Window Ideas That’ll Change How You See Your Sink

    I’ve spent way too many hours staring out my kitchen window while washing dishes, and that’s exactly why I put together these 12 kitchen window ideas that actually work in real homes, not just magazine spreads. This isn’t a quick Pinterest scroll list either. I dug into what actually holds up over time, what fits different budgets, and what won’t leave you regretting your choice six months later.

    What are the best kitchen window ideas? The best kitchen window ideas balance natural light, function, and style. Popular options include open shelving instead of curtains, café-style shutters, garden windows for herbs, bold color trim, and swapping standard glass for a bay or picture window to widen your view and brighten the room.

    Stick around though, because I’m going to walk you through specific window treatments, layout swaps, and small tweaks that make a bigger difference than you’d think. Some of these cost almost nothing. Others are weekend projects. A few might make you want to call a contractor.

    Why Your Kitchen Window Matters More Than You Think

    Here’s the thing nobody tells you: your kitchen window is basically the face of the room. It’s where the light comes in, where you probably stand the most (hello, dishwashing duty), and it sets the tone for everything else in the space. A dark, cluttered window makes the whole kitchen feel smaller and gloomier. A well-planned one? It can make a tiny galley kitchen feel twice as open.

    I’ve noticed most people either over-decorate their kitchen window with heavy curtains that block light, or they ignore it completely and slap up some plain blinds. Neither approach does the window justice. The ideas below split the difference between pretty and practical.

    1. Skip Curtains and Go With Café-Style Shutters

    16 Kitchen Curtain Ideas That'll Add Immediate Charm to Your Space
    credit: ELLE Decor

    Café shutters cover just the bottom half of your window. That means you keep privacy where you need it but still get sunlight pouring in through the top. I love these because they don’t collect grease and steam the way fabric curtains do, which is a real problem in kitchens.

    They work with wood, vinyl, or painted finishes, so you can match your cabinet color or go for contrast with a crisp white against darker walls.

    Practical tip: Choose PVC shutters if your window sits close to the stove. They wipe clean in seconds and won’t warp from heat.

    This style fits farmhouse and cottage kitchens best, but a matte black version also works surprisingly well in modern spaces. Now let’s talk about what happens when you ditch window coverings altogether.

    2. Ditch Coverings Entirely for a Clean, Open Look

    How to Ditch the Drapes and Let Your Windows Shine
    Credit: Houzz

    Some windows don’t need anything on them at all. If your kitchen window doesn’t face a street or nosy neighbor, going bare can make the whole room feel airier. No fabric, no shutters, just glass and a view.

    This works especially well over a sink where you want an unobstructed sightline to your backyard or garden. Pair it with a simple wood or stone windowsill to keep the look intentional rather than unfinished.

    Practical tip: Add a thin strip of trim paint in a contrasting color to frame the window nicely even without curtains.

    Coastal and Scandinavian-style kitchens practically demand this bare-window approach, since both styles lean on natural light as a design feature. Speaking of using the space smart, let’s look at turning that windowsill into something useful.

    3. Turn the Windowsill Into a Mini Herb Garden

    Windowsill Herb Garden – The Artful Roost
    Credit: The Artful Roost

    This one’s a favorite of mine because it’s both decorative and genuinely useful. A row of small pots with basil, thyme, or mint sitting right on your windowsill gives you fresh herbs at arm’s reach and adds a pop of green that most kitchens lack.

    Pick pots that match your kitchen’s color palette. Terracotta feels rustic, white ceramic feels modern, and galvanized metal leans industrial.

    Practical tip: Make sure your window gets at least four hours of direct sunlight, or your herbs will struggle no matter how cute the pots are.

    Traditional and farmhouse kitchens especially benefit from this since it reinforces that lived-in, homey feel. If your sill is too narrow for pots, a garden window might solve that problem entirely.

    4. Install a Garden Window for Extra Growing Space

    Installing a Garden Window - Extreme How To
    Credit: Extreme How To

    A garden window bumps out from your wall, creating a mini greenhouse shelf with glass on three sides. It’s a bigger investment, but it solves the “not enough sill space” problem completely and floods your kitchen with light from multiple angles.

    These work great over sinks since you’re already standing there daily and can keep an eye on your plants. You get shelves for pots, extra natural light, and a little architectural interest on the outside of your house too.

    Practical tip: Budget for professional installation. This isn’t a DIY swap since it involves cutting into your existing wall structure.

    Garden windows suit traditional, cottage, and farmhouse homes best, though I’ve seen sleek versions in modern builds too. Next, let’s talk about color, because paint changes everything.

    Window Treatment Comparison by Budget

    Treatment TypeAverage CostLight ControlMaintenanceBest For
    Café shutters$80-200HighLowFarmhouse, cottage
    Bare window$0-50NoneVery lowCoastal, modern
    Roman shades$40-150MediumMediumTraditional, transitional
    Garden window$800-2500HighMediumTraditional, farmhouse
    Bay window$1500-4000HighMediumAny style
    Frosted film$20-60MediumLowModern, minimalist

    5. Paint the Window Trim a Bold Contrasting Color

    The Correct Trim Color Can Totally Transform Your Home. Here's How to Get It Right
    Credit: Elle Decor

    If your walls are white or neutral, painting your window trim a bold color instantly makes the window a focal point. Navy, forest green, or even black trim against white walls looks sharp and intentional.

    This costs almost nothing compared to replacing the window itself, and you can do it in an afternoon.

    Practical tip: Use a semi-gloss or satin finish paint since it holds up better against humidity and grease than flat paint.

    Modern and transitional kitchens look fantastic with this trick, and it also works in traditional spaces if you pick a color that complements existing wood tones. Once your trim looks sharp, you might want to rethink the glass itself.

    6. Use Frosted or Textured Glass for Privacy Without Blocking Light

    Frosted Glass Film for Bathrooms | Privacy Window Film Guide – Creative Windows
    Credit: Creative Windows

    If your kitchen window faces a neighbor’s wall or a busy sidewalk, frosted glass solves the privacy issue without forcing you to hang heavy curtains. You still get natural light streaming through, just diffused a bit.

    This works especially well in city apartments or homes with tight lot lines.

    Practical tip: You can buy frosted window film for under $30 and apply it yourself in about 15 minutes, no permanent glass replacement needed.

    Modern and minimalist kitchens benefit most from this clean, glare-free light. Traditional homes can use frosted glass with a decorative pattern etched in for a more classic look. Now, let’s expand the window itself.

    7. Widen Your View With a Bay Window Over the Sink

    Bay window above sink - yay or nay? | Houzz Forum
    Credit: Houzz

    A bay window juts outward and usually includes three panels instead of one flat pane. This gives you a much wider view and way more natural light than a standard window.

    It also creates a little extra counter or seating space depending on how deep the bump-out is.

    Practical tip: If you’re not ready for a full bay window install, ask a contractor about a smaller “bow window” version, which costs less but gives a similar wide-view effect.

    This idea shines in traditional and farmhouse kitchens, though modern builds sometimes use a flat-paneled version for a more geometric look. Let’s talk about what goes above the window next.

    8. Add a Wood Valance Instead of Curtains

    How to Make Your Own Wood Window Valence with Curtains
    Credit: abbikirstencollections

    A wood valance is basically a decorative header that sits above your window. It adds warmth and texture without blocking any light or requiring fabric maintenance.

    You can stain it to match your cabinets or paint it to match your trim color.

    Practical tip: Keep the valance depth under 6 inches so it doesn’t feel bulky or cast unwanted shadows on your countertop.

    Farmhouse and rustic kitchens love this detail, but a slim, painted valance also works in transitional spaces. Speaking of texture, let’s talk about open shelving near the window.

    9. Build Open Shelves Around the Window Frame

    A Symmetrical Bookshelf Designed To Fill The Wall Around A Window Completes One End Of This Home Office
    Credit: Contemporist

    Instead of cabinets crowding your window, open shelves on either side keep things airy while giving you storage for dishes, glasses, or plants. This works particularly well in smaller kitchens where every inch of wall space matters.

    Wood shelves add warmth, while floating metal or glass shelves feel more modern.

    Practical tip: Keep shelf depth around 8-10 inches so items don’t block window light.

    Coastal and Scandinavian kitchens practically define themselves by this open, breezy shelf-and-window combo. Once you’ve got shelving sorted, think about what’s sitting right below the glass.

    Popular Color Pairings for Window Trim and Walls

    Wall ColorTrim ColorOverall Style Vibe
    WhiteNavy blueCoastal, classic
    Sage greenCream whiteCottage, farmhouse
    Charcoal grayBlackModern, industrial
    Soft beigeForest greenTraditional, cozy
    Pale blueWarm whiteScandinavian, airy

    10. Install a Deep Windowsill for Extra Counter Space

    6 Best Windowsill Shelf Ideas - How to Enlarge a Windowsill | Apartment Therapy
    Credit: apartment Therapy

    If your kitchen is tight on prep room, a deeper windowsill can double as a mini counter. Stone or butcher block sills add durability and a bit of visual weight to an otherwise plain window frame.

    This works great for setting down a cutting board, a coffee mug, or a stack of mail temporarily.

    Practical tip: Seal wood sills with a food-safe finish if you plan to use the space for actual food prep.

    Farmhouse and traditional kitchens use this trick often, though a concrete or quartz sill fits right into a modern design too. Next up, let’s think vertically instead of horizontally.

    11. Hang a Pot Rack Near the Window for Function and Style

    The Pot Storage in This Kitchen Is So Unexpected and Clever | Apartment Therapy
    Credit: Apartment Therapy

    If your window sits above your stove or a prep area, a hanging pot rack nearby keeps cookware within reach without cluttering cabinets. It also draws the eye upward, making the ceiling feel higher.

    Choose matte black or brushed brass depending on your kitchen’s hardware finish.

    Practical tip: Keep the rack at least 12 inches to the side of the window frame so it doesn’t block natural light from hitting your sink area.

    Industrial and farmhouse kitchens use this look most often, though a slim brass version can work in a more polished traditional space too. Last but not least, let’s talk about window seats.

    12. Build a Small Bench Seat Below a Larger Window

    Build a Bay Window Bench With Storage for Your Home | Lowe's
    Credit: Lowe’s

    If your kitchen window is wide enough, a built-in bench seat underneath turns it into a cozy little nook. Add a cushion and a couple of throw pillows, and suddenly you’ve got a spot for morning coffee or quick homework help.

    This works best in eat-in kitchens or breakfast nooks with a bit of extra floor space.

    Practical tip: Build storage into the bench base if you can. Hinged tops give you extra space for linens or pantry overflow.

    Cottage and farmhouse kitchens use this constantly, but a streamlined bench with hidden storage fits modern homes just as well. With all these ideas on the table, here’s how to actually pull off the one that fits your space.

    Tips for Success

    • Measure your window’s sun exposure before committing to plants or fabric treatments, since too much direct light can fade curtains fast
    • Choose easy-to-clean materials near the stove, since grease and steam build up faster than you’d expect
    • Match your window trim color to at least one other element in the room, like your faucet or cabinet hardware
    • Don’t skip the caulking step if you’re adding a garden window or bay window, gaps lead to drafts and higher energy bills
    • Test paint colors on your actual trim before committing, since lighting changes how a color looks throughout the day
    • Keep window treatments at least 4 inches away from any heat source like a stove or oven vent
    • Ask about tempered glass options if your window sits low near a countertop, it’s safer if something ever cracks

    Common Mistakes and How to Avoid Them

    Overcrowding the sill with too many decorative items
    : Keep it to 3-5 objects max so the window still feels open and light can pass through freely.

    Choosing fabric curtains for a window near the stove
    : Swap to shutters, frosted film, or a bare window instead since fabric absorbs grease and odors quickly.

    Ignoring the window’s sun direction before planting herbs
    : Check if your window faces south or west for the most reliable sunlight, then choose plants that match that light level.

    Picking a bay or garden window without checking structural support
    : Always consult a contractor first, since these installs often require adjustments to wall framing.

    Painting trim without priming over old wood or metal
    : Use a bonding primer first so the paint doesn’t peel or chip within the first year.

    Skipping window treatments entirely in a high-privacy-need home
    : Consider frosted film or café shutters as a middle ground that still lets light in.

    Similar Variations

    • Cottage Kitchen Windows – Smaller panes, floral curtains, and lots of greenery on the sill for a soft, homey feel
    • Industrial Kitchen Windows – Black steel frames, exposed brick surrounds, and minimal window coverings
    • Coastal Kitchen Windows – Sheer white curtains, weathered wood sills, and views that lean into natural light
    • Scandinavian Kitchen Windows – Bare glass, pale wood trim, and a focus on maximizing daylight hours
    • Rustic Farmhouse Windows – Wood valances, deep sills, and warm color trim like sage or terracotta

    I’ve walked you through a lot of ground here, from cheap paint swaps to bigger structural changes like garden and bay windows. The truth is, you don’t need to do all twelve at once. Pick one or two that fit your budget and your kitchen’s natural light, and build from there. Whether you’re after a quick weekend refresh or planning a bigger renovation, these 12 kitchen window ideas give you a solid starting point to make that window work as hard as the rest of your kitchen does.

  • 15 Kitchen Gallery Wall Ideas That Turn Blank Space Into Your Favorite Room Feature

    15 Kitchen Gallery Wall Ideas That Turn Blank Space Into Your Favorite Room Feature

    I’ve helped so many friends figure out their kitchen walls that I decided to put everything I know into one place, and this guide on 15 kitchen gallery wall ideas is the most complete breakdown you’ll find. I’m not going to give you vague tips and leave you guessing. You’re getting real layouts, real numbers, and real advice that actually works in a kitchen.

    A kitchen gallery wall is a curated group of framed art, photos, or objects arranged together on one wall in a kitchen space. It typically mixes sizes, frames, and subjects like botanical prints, family photos, or vintage kitchen tools to create a personal, layered look.

    Stick around, because I’m about to walk you through fifteen specific ideas, plus the mistakes that trip up almost everyone who tries this.

    What Exactly Is a Kitchen Gallery Wall, Anyway?

    Okay so here’s the thing. A gallery wall isn’t just “some frames on a wall.” It’s a whole little art collection, hung together like a story. In a kitchen, this usually means smaller pieces, because let’s be honest, kitchen walls are cut up by cabinets, windows, and appliances. You’re working with awkward strips of space, not one giant blank canvas.

    I love kitchen gallery walls because they turn a purely functional room into something that feels like you. Your dining room can have a big statement painting. Your kitchen gets to have personality in small doses, spread across a dozen little frames. That’s the charm of it.

    1. Mix Vintage Cookware With Framed Prints

    Vintage Pyrex Painting - Etsy
    Credit: Etsy

    Grab a few old wooden spoons, a rustic sieve, or a small copper pot and hang them right alongside your framed art. This creates texture and tells a story about how you actually use your kitchen, not just how it looks in photos.

    The trick is balance. Don’t let the cookware overpower the frames. Aim for about 70% art and 30% objects.

    Practical tip: use small nails or picture hooks rated for at least 10 pounds so heavier pans don’t rip out of the drywall later.

    This idea works beautifully in farmhouse and rustic kitchens, but you can tone it down for modern spaces by choosing sleek stainless tools instead of rusty vintage ones.

    Next up, let’s talk about color, because that’s where a lot of gallery walls go wrong.

    2. Stick to a Three-Color Palette

    Three-Colour Combinations for Any Room
    Credit: Birla Opus

    One of the fastest ways to make a gallery wall look messy is using too many colors. I always tell people to pick three colors max and repeat them across every frame, mat, and piece of art.

    This doesn’t mean everything matches perfectly. It means there’s a thread tying it all together, so your eye doesn’t bounce around confused.

    Practical tip: pull your three colors from something already in the kitchen, like your backsplash tile or cabinet hardware.

    Traditional kitchens tend to lean toward warm neutrals and gold accents, while coastal kitchens do well with navy, white, and sandy beige.

    Color Palette Combinations for Kitchen Gallery Walls

    Kitchen StylePrimary ColorSecondary ColorAccent Color
    FarmhouseCreamSage GreenBlack
    CoastalWhiteNavy BlueSandy Tan
    ModernWhiteCharcoal GrayBrass
    TraditionalWarm BeigeDeep RedGold
    ScandinavianOff-WhiteLight GrayMuted Blush

    Once your colors are locked in, the next step is figuring out how big your actual wall space really is.

    3. Measure Your Wall Before You Buy a Single Frame

    Frame Size Guide: How to Choose the Right Size
    Credit: About wall Art

    I know this sounds boring, but skipping this step is the number one reason gallery walls fail. Kitchens have weird wall shapes because of windows, cabinets, and doorways. You need actual measurements before you fall in love with frames online.

    Grab painter’s tape and outline your available space directly on the wall. This gives you a visual “box” to work inside.

    Practical tip: leave at least 3 inches of breathing room between your gallery wall and any cabinet edge or window frame so it doesn’t feel cramped.

    Small galley kitchens might only fit a 2×3 foot cluster, while open-concept kitchens can handle a much bigger spread, sometimes 6 feet wide or more.

    Now that you know your space, let’s talk frames themselves.

    4. Combine Different Frame Finishes on Purpose

    Mix and Match: How to Create a Stunning Gallery Wall with Mismatched Frames
    Credit: Home Knot

    A lot of people think every frame needs to match. Honestly, mismatched frames look more interesting and less like a furniture store display. Mixing black, wood, and brass frames together adds depth.

    The key is consistency in style, not color. If you’re doing thin modern frames, keep them thin throughout. Don’t throw in one chunky ornate frame unless it’s your intentional statement piece.

    Practical tip: buy 2 or 3 frames in each finish so no single color feels random or out of place.

    This mixed-frame approach fits modern farmhouse and eclectic kitchens especially well, while traditional kitchens often look better with matching frame families in gold or dark wood.

    Speaking of layout, let’s get into actual arrangement styles next.

    5. Try the Grid Layout for a Clean, Organized Look

    How To Make Your Home Look Better in 10 Minutes or Less | Apartment Therapy
    Credit: Apartment Therapy

    If you like things neat and orderly, a grid layout is your best friend. This means every frame is the same size, spaced evenly, in perfect rows and columns.

    Grids work really well above a small breakfast nook or beside a pantry door where space is narrow and tall.

    Practical tip: keep spacing between frames consistent at 2 to 3 inches, no more, no less. Uneven spacing ruins the clean grid effect instantly.

    Modern and minimalist kitchens love this layout because it feels intentional and calm. Traditional kitchens can use it too, just with ornate frames instead of simple ones.

    But if grids feel too stiff for your taste, there’s a looser option coming up next.

    6. Go Salon-Style With an Organic Cluster

    bright green walls and organic shapes form 'space age' style hair salon in beijing
    Credit: Designboom

    Salon-style walls are the opposite of grids. Frames of all shapes and sizes get grouped together in a loose, flowing cluster that fills odd-shaped wall space really well.

    This style is forgiving. You don’t need perfect measurements, just a good eye and patience.

    Practical tip: lay your frames out on the floor first, arrange them until it feels balanced, then trace and transfer that layout to the wall using paper templates.

    Coastal, bohemian, and eclectic kitchens shine with this loose style, since it feels relaxed and collected over time rather than store-bought.

    Now let’s talk about what actually goes inside those frames.

    7. Feature Botanical and Herb Prints

    Herb Wall Art - Etsy UK
    Credit: Etsy

    Kitchens are all about food and growth, so botanical prints just make sense here. Think simple line drawings of herbs, fruit illustrations, or pressed leaf art.

    These prints add color without being loud, and they tie into the “kitchen garden” feeling a lot of people want.

    Practical tip: choose prints with white or cream backgrounds so they don’t compete visually with busy tile or wallpaper.

    This idea flexes easily. Farmhouse kitchens like watercolor herb prints, while modern kitchens prefer bold graphic botanical shapes in black and white.

    Let’s move from plants to something even more personal now.

    8. Add Real Family Photos in Black and White

    26 Family Picture Wall Ideas You'll Want to Try at Home
    Credit: The Spruce

    Color photos can clash with your kitchen palette fast. Converting family photos to black and white instantly makes them blend into almost any gallery wall style.

    This adds warmth and personality that printed art alone can’t give you.

    Practical tip: use a consistent frame color for all photos, even if sizes vary, so the photo section reads as one connected group.

    Traditional and farmhouse kitchens especially benefit from this nostalgic touch, though modern kitchens can pull it off too with thin black frames and lots of white matting.

    Next, let’s bring in something with actual dimension.

    9. Hang a Few Woven or Wooden Wall Objects

    What is a Woven Wall Hanging and how is it made? | Revolution Fibers
    Credit: revolutionfibers

    Not everything needs to be flat. Small woven baskets, wooden cutting boards, or a mini wall-mounted plate rack add texture and a three-dimensional feel among your flat frames.

    This breaks up the monotony of “frame, frame, frame” and gives your eye something new to land on.

    Practical tip: hang dimensional objects at eye level or slightly above, since they carry more visual weight than flat art.

    This works great in farmhouse, coastal, and boho kitchens. Modern kitchens can use one sleek wooden object as a minimalist accent instead of several.

    Budget Tiers for a 15-Piece Kitchen Gallery Wall

    Budget LevelFrame SourceArt SourceEstimated Total Cost
    LowDollar store, thrift shopsFree printables, old photos$30–$60
    MidBig box retailer framesEtsy prints, small local art$100–$180
    HighCustom framing shopOriginal art, signed prints$300–$600+

    With your budget in mind, let’s talk about a smart way to save money and still look polished.

    10. Use Matching Mats for a Pulled-Together Look

    Best Ways to Coordinate Two Rugs in One Room - Expert Tips – The Rugs
    Credit: The Rugs

    If your frames are all different sizes and colors, matching mats inside each frame can create instant unity. A white or cream mat around every piece makes the whole wall feel curated, even if the art itself is totally random.

    This trick is a designer secret because it’s cheap and incredibly effective.

    Practical tip: buy pre-cut mats in bulk from a craft store rather than paying for custom cuts at a frame shop.

    Every kitchen style benefits from this one, honestly. It’s basically a universal fix for a messy-looking wall.

    Now let’s think vertically instead of just horizontally.

    11. Build a Narrow Vertical Strip Between Cabinets

    Vertical Panelling: The Coolest Take From Country Kitchens | Houzz AU
    Credit: Houzz

    Kitchens often have those skinny leftover wall strips between the fridge and a cabinet, or beside a window. Instead of ignoring that space, stack 3 to 5 small frames vertically in a single column.

    This turns dead space into a feature instead of an afterthought.

    Practical tip: keep vertical strip frames under 8 inches wide so they don’t feel squeezed into the space.

    Narrow vertical galleries work in literally every kitchen style since they’re more about smart space use than a specific aesthetic.

    Let’s zoom out now and talk about a totally different approach using shelves instead of nails.

    12. Install Floating Ledge Shelves Instead of Hanging Everything

    Modern DIY Floating Shelves
    Credit: Woodshop Diaries

    If you hate committing to nail holes, floating shelves let you lean framed art against the wall instead. You can rearrange whenever you want, which is huge if your taste changes often.

    Shelves also let you layer pieces in front of each other for extra depth.

    Practical tip: install shelves at slightly staggered heights, about 10 to 12 inches apart, rather than one straight line, for a more dynamic display.

    Modern and Scandinavian kitchens especially love this flexible, low-commitment option.

    Let’s talk next about tying your gallery wall into your kitchen’s function, not just its looks.

    13. Include a Small Chalkboard or Cork Board Piece

    24" x 24" Modern Chalkboard | Small Chalkboards For Sale – Corkboard.com
    Credit: Corkboard

    A gallery wall doesn’t have to be 100% decorative. Adding one small chalkboard for grocery lists or a cork board for recipe cards makes the space functional too.

    This little touch keeps the wall from feeling like a museum and more like a living part of your kitchen routine.

    Practical tip: keep the functional piece the same size as your smallest frame so it blends in rather than sticking out.

    Farmhouse and cottage-style kitchens love this practical charm, while modern kitchens might swap the chalkboard for a sleek magnetic memo board instead.

    14. Anchor the Wall With One Larger Statement Piece

    If you've been looking for one piece to anchor a room — this is it. A large-scale wall hanging — built thread by thread. A statement piece, without being loud. Made to
    Credit: Instagram

    Even in a gallery wall full of small frames, one bigger piece in the center or off to one side gives the eye a place to rest. Without it, a wall of all-small frames can start to feel busy and unfocused.

    This anchor piece could be a larger print, a mirror, or even a small piece of furniture like a wall-mounted shelf.

    Practical tip: your anchor piece should be roughly 2 to 3 times larger than your average small frame for the scale to feel right.

    Eclectic and traditional kitchens especially benefit from this focal point trick, since it keeps busier layouts from feeling chaotic.

    15. Leave Room to Grow Your Collection Over Time

    Living Room Decor Ideas: 6 steps for an ideal living space
    Credit: Velux

    The best kitchen gallery walls aren’t finished in one weekend. Leave a little extra blank space when you first hang everything, so you can add pieces as you find them at flea markets, on trips, or as gifts.

    This keeps the wall feeling alive instead of static and store-bought.

    Practical tip: start with about 80% of your planned frames, leaving room for 2 to 3 more pieces to be added later.

    This slow-build approach fits every style, but it feels especially natural in boho, farmhouse, and eclectic kitchens where a collected-over-time look is part of the charm.

    Tips for Success

    • Always dry-fit your layout using paper cutouts taped to the wall before hammering a single nail
    • Use picture hanging strips instead of nails if you’re renting or unsure about final placement
    • Photograph your layout from a distance before committing, since phone photos reveal spacing issues your eyes might miss
    • Keep your largest frame no more than one-third the width of your total wall space
    • Clean glass and frames every few weeks since kitchens collect grease and dust faster than other rooms
    • Light your gallery wall with a small picture light or nearby under-cabinet lighting so it doesn’t disappear at night
    • Step back every few frames while hanging to check balance, rather than hanging everything before evaluating

    Common Mistakes and How to Avoid Them

    Hanging everything too high
    : Kitchen gallery walls should sit lower than living room art, usually with the center around 57 to 60 inches from the floor, since you’re often viewing it while seated or standing close.

    Using frames that aren’t kitchen-safe
    : Regular paper art can warp from grease and humidity. Choose frames with sealed glass or acrylic fronts to protect the art inside.

    Ignoring the surrounding cabinet colors
    : A gallery wall that clashes with cabinet or backsplash tones will always look off. Pull at least one color from your existing kitchen into the wall.

    Overcrowding without any negative space
    : Packing frames edge to edge overwhelms the eye. Leave consistent gaps, generally 2 to 3 inches, so the wall can breathe.

    Forgetting wall material before drilling
    : Tile backsplashes and brick walls need different anchors than drywall. Check your wall type before buying hanging hardware.

    Choosing all one size frame
    : This looks flat and boring fast. Mix at least three different frame sizes for visual interest.

    Similar Variations

    • Hallway Gallery Wall – the same layered frame concept, but stretched down a long, narrow hallway space
    • Staircase Gallery Wall – frames arranged in a rising diagonal line that follows the slope of your stairs
    • Bedroom Headboard Gallery Wall – a softer, more personal version centered above the bed instead of kitchen counters
    • Bookshelf Gallery Wall – frames leaned and layered among books and small objects on open shelving
    • Single-Color Gallery Wall – every frame and mat in one consistent color family for a bold, unified statement

    Building a gallery wall in your kitchen really comes down to planning, patience, and picking pieces that actually mean something to you. Start small, measure twice, and let the wall grow naturally over time instead of forcing it to look perfect on day one. Whatever style you land on, a well planned 15 kitchen gallery wall can turn one of the most overlooked spots in your home into the wall everyone stops to look at.

  • 12 Maple Kitchen Cabinets Ideas That Actually Work in Real Homes

    12 Maple Kitchen Cabinets Ideas That Actually Work in Real Homes

    I’ve spent way too many hours scrolling through kitchen photos, and I can tell you that 12 maple kitchen cabinets ideas can completely change how you think about this classic wood. If you’ve been on the fence about maple, wondering if it’s too plain or too “builder grade,” I get it. That worry is real, and I used to think the same thing.

    Maple kitchen cabinets are cabinets made from maple wood, known for their smooth grain, light color, and durability. They work well with almost any paint color or stain, and they resist dents better than softer woods like pine.

    Stick with me here. I’m about to walk you through a dozen ways to make maple cabinets look like they belong in a magazine, not a rental unit.

    What Makes Maple Cabinets a Big Deal Anyway

    Maple wood has this tight, subtle grain pattern that doesn’t shout for attention. That’s actually its superpower. Unlike oak, which has bold lines running through it, maple gives you a clean canvas. You can paint it, stain it dark, leave it natural, whatever you want.

    It’s also tough. Maple is a hardwood, so it holds up to years of cabinet doors slamming and kids leaning on countertops. I’ve seen maple cabinets from the 90s that still look solid today, just maybe in need of a color refresh.

    The best part? Maple plays nice with almost every kitchen style. That’s why designers keep coming back to it.

    1. Go Natural With a Honey-Toned Maple Finish

    The Complete Guide to Maple Kitchen Cabinets | George Cabinetry
    Credit: Georgecabinetry

    There’s something warm and inviting about letting maple just be maple. A honey or golden stain brings out the wood’s natural glow without hiding the grain completely. This works especially well in kitchens that get a lot of natural light, since the warmth bounces around the room.

    Pair this look with brushed brass hardware and a white or cream backsplash to keep things from feeling too heavy. My tip: ask your cabinet maker for a sample board first, because maple can look totally different depending on the stain’s undertones.

    This style leans traditional or farmhouse, but it also works in a modern rustic kitchen if you keep the lines simple.

    Next up, let’s talk about what happens when you flip the whole look upside down with a darker finish.

    2. Try a Deep Espresso Stain for Drama

    Not a Black Kitchen — Espresso Is the Color Trend for Cabinetry | Livingetc
    Credit: livingetc

    Maple takes dark stains really well because its grain is so tight and even. An espresso or dark walnut stain on maple cabinets gives you that moody, upscale look without the higher price tag of actual walnut wood.

    This works best in kitchens with plenty of light, either from big windows or bright overhead fixtures, since dark cabinets can make a small room feel closed in. Balance the darkness with a light-colored countertop like white quartz or a pale marble look.

    Quick tip: use gold or matte black hardware to really make the dark stain pop.

    This style fits contemporary and transitional kitchens best. It can look a little harsh in a cottage-style space unless you soften it with warm lighting.

    Now let’s shift gears and look at how paint changes the maple game entirely.

    3. Paint Maple Cabinets a Soft Sage Green

    Paint Colors That Go With Maple Wood Cabinets: The 2026 Expert Guide - Hackrea
    Credit: Hackrea

    Maple takes paint beautifully because the surface is so smooth. Sage green has been popping up everywhere lately, and it looks especially good on maple because the wood’s tight grain means you get an ultra-smooth painted finish, almost like furniture.

    I’d suggest a satin or semi-gloss finish for easy cleaning, since kitchens get messy fast. Pair sage cabinets with brass or oil-rubbed bronze hardware and warm wood open shelving for contrast.

    This color works in coastal kitchens, farmhouse kitchens, and even modern ones if you keep the rest of the palette neutral.

    Once you’ve picked a paint color, the next big decision is what you put on top of those cabinets, and that’s where countertops come in.

    Popular Paint Colors for Maple Cabinets

    Paint ColorStyle VibeBest Paired CountertopHardware Match
    Sage GreenCoastal, FarmhouseWhite quartzBrass
    Navy BlueTraditional, NauticalWhite marble lookBrushed nickel
    Warm WhiteModern, MinimalistButcher blockMatte black
    Charcoal GrayContemporaryLight gray quartzChrome
    TerracottaBoho, SouthwesternCream quartzBronze

    4. Match Maple Cabinets With a Warm Quartz Countertop

    Designing a Bright, Modern Kitchen: Pairing Light Maple Cabinets With Quartz Countertops | Caesarstone US
    Credit: Caesarstoneus

    Since maple cabinets often lean warm in tone, quartz countertops with beige or cream veining tend to look the most natural next to them. Cold, blue-gray quartz can sometimes clash with maple’s warmth, making the kitchen feel a bit disjointed.

    If you’re not sure what to pick, bring a cabinet door sample to the stone yard. Seeing them side by side under real light beats guessing from a tiny swatch.

    My actionable tip: always look at countertop samples in your own kitchen lighting before deciding, since store lighting can be misleading.

    This warm pairing works great in traditional and farmhouse kitchens. Modern kitchens might prefer a cooler white quartz for more contrast.

    Countertops matter, but so does what you hang above them, which brings me to lighting.

    5. Add Warm Pendant Lighting to Highlight the Wood Grain

    22 Kitchen Lighting Ideas That Brighten Your Space - Decor with hazel
    Credit: Decorwithhazel

    Maple’s grain is subtle, so the right lighting can either bring it to life or wash it out completely. Warm-toned LED bulbs, around 2700 to 3000 kelvin, make maple glow instead of looking flat and yellow.

    I like pendant lights over an island because they create a focal point while also throwing light down onto the cabinet doors below. Try mixing metal finishes a little, like black pendants with brass cabinet pulls, for a layered look.

    This works in almost every style, though farmhouse and industrial kitchens often lean toward black metal pendants specifically.

    Lighting sets the mood, but hardware is what people actually touch every day, so let’s cover that next.

    6. Swap in Statement Hardware for an Instant Refresh

    Easy Kitchen Updates & Kitchen Refresh Ideas You'll Love
    Credit: Snyderdiamond

    If your maple cabinets feel dated, sometimes the fastest fix isn’t paint or stain at all. It’s the hardware. Old gold or brass pulls from the 90s can make even nice cabinets look tired.

    Switching to matte black bar pulls or brushed nickel knobs can modernize a kitchen in an afternoon. This is one of the cheapest upgrades you can do, and it’s totally reversible if you change your mind later.

    Practical tip: measure your existing hole spacing before ordering new hardware so you don’t end up drilling new holes.

    Traditional kitchens tend to favor oil-rubbed bronze, while modern ones go for matte black or brushed steel.

    Hardware changes the details, but the layout of your cabinets changes the whole feel of the room, which is our next stop.

    7. Mix Open Shelving With Maple Upper Cabinets

    Why I Combined Open Shelves and Cabinets in My Kitchen Remodel
    Credit: Houzz

    Full cabinet coverage can feel heavy, especially in smaller kitchens. Swapping a section of upper cabinets for open shelving breaks things up and gives you a spot to display dishes or plants.

    Maple shelving left natural or lightly stained adds warmth without adding visual bulk. This works particularly well in kitchens where the lower cabinets are painted a bold color, since the open shelves balance things out.

    Tip: keep open shelves a little less than half full so they don’t look cluttered or messy.

    This idea shines in farmhouse, coastal, and Scandinavian-style kitchens. It’s less common in strict traditional kitchens, which usually prefer full cabinet coverage.

    Now, let’s talk about how the cabinet doors themselves, not just the finish, can change the whole vibe.

    8. Choose Shaker-Style Doors for a Timeless Look

    Shaker Style Kitchen Doors: Elevate Your Cabinet Design
    Credit: Oliveandbarr

    Shaker doors have a simple frame with a flat center panel, and they’ve been popular for decades because they just work with everything. On maple, shaker doors let the wood’s clean lines shine without extra fuss.

    This style is a safe bet if you’re worried about trends changing before you’re ready to redo your kitchen again. Shaker doors also make it easy to switch up paint colors down the road since the simple shape works with almost anything.

    My tip: if you’re between shaker and raised panel doors, go shaker for a more timeless resale value.

    Shaker doors fit modern, farmhouse, traditional, and transitional kitchens equally well. That flexibility is honestly rare.

    While door style matters, so does how those cabinets are arranged around your island, so let’s get into that.

    9. Use a Contrasting Island Color to Break Up the Maple

    23 Contrasting Kitchen Island Ideas
    Credit: Bhg

    One trend that isn’t going anywhere is painting the kitchen island a different color than the rest of the cabinets. If your surrounding cabinets are natural or lightly stained maple, a navy or black island creates a nice anchor point in the room.

    This trick works especially well in open-concept kitchens where the island is visible from the living room. It gives the eye something to land on.

    Practical tip: keep the island countertop consistent with your main counters so the kitchen still feels connected, not choppy.

    This works across almost every style, though coastal kitchens often prefer a soft blue island instead of navy or black.

    Budget Tiers for Maple Cabinet Projects

    Budget LevelWhat’s IncludedEstimated Cost Range
    Basic RefreshNew hardware, paint touch-up$200 to $600
    Mid-Range UpdateRepaint or restain all cabinets$1,500 to $4,000
    Full RenovationNew maple cabinets, countertops, lighting$8,000 to $20,000+
    High-End CustomCustom maple cabinetry, premium stone, designer lighting$25,000 and up

    10. Add Glass-Front Panels to a Few Upper Cabinets

    8 Beautiful Ways to Work Glass Into Your Kitchen Cabinets
    Credit: Houzz

    Swapping solid maple doors for a few glass-front ones adds visual interest without a full renovation. It’s a nice middle ground between open shelving and closed cabinets, since you still get some storage privacy.

    I like this for displaying pretty dishware or colored glassware, since the glass creates little moments of interest around the kitchen. Frosted glass is a good option if you want the look without needing everything inside to be perfectly organized.

    Tip: pick two or three cabinets near eye level for glass fronts rather than doing the whole upper row, since it can get visually busy fast.

    This idea fits traditional, cottage, and transitional kitchens especially well.

    Speaking of visual interest, let’s talk backsplashes, because that’s another spot where maple cabinets really get to shine.

    11. Pair Maple Cabinets With a Simple Subway Tile Backsplash

    20 Backsplash and Countertop Pairing Ideas for a Stunning Kitchen
    Credit: Bhg

    Maple cabinets, especially in their natural warm tone, look great against a classic white subway tile backsplash. It’s a combo that never really goes out of style, and it keeps the kitchen feeling bright and clean.

    If you want a little more personality, try a herringbone pattern instead of the standard brick layout. Same tile, different energy.

    My tip: use a light gray grout instead of stark white, since it hides dirt better and still looks clean.

    This backsplash pairing works in farmhouse, coastal, traditional, and even modern kitchens depending on the tile size and layout you choose.

    Last but not least, let’s cover flooring, since it ties the whole room together.

    12. Ground the Kitchen With Warm Wood-Look Flooring

    30 Kitchen Flooring Options and Design Ideas | HGTV
    Credit: Hgtv

    Maple cabinets tend to look best with flooring that either matches their warmth or contrasts with a cooler gray tone, depending on the vibe you’re after. Warm wood-look tile or engineered hardwood in a medium brown tone creates a cohesive, cozy feel.

    If your cabinets are painted a bold color, you have more freedom with flooring since the cabinets already provide contrast. Natural maple cabinets pair beautifully with flooring in a slightly darker tone than the cabinets themselves, so the room doesn’t feel too monochromatic.

    Practical tip: bring a flooring sample home and look at it next to your cabinet door before committing.

    This grounding trick works in nearly every kitchen style, from modern farmhouse to coastal to traditional.

    Tips for Success

    • Always test paint or stain samples on an actual cabinet door, not just a piece of scrap wood, since maple can absorb color differently depending on the batch.
    • Keep hardware finishes consistent throughout the kitchen unless you’re intentionally mixing metals for a layered look.
    • Don’t skip the primer step if you’re painting maple, since skipping it can lead to peeling within a year or two.
    • Live with a paint or stain sample for at least three days before committing, since lighting changes throughout the day.
    • Balance warm maple tones with at least one cool element, like gray countertops or matte black fixtures, so the kitchen doesn’t feel one-note.
    • Ask your cabinet installer about maple’s tendency to show blotching with certain stains, and request a pre-conditioner if needed.
    • Budget an extra 10 percent on any cabinet project for surprises, since older kitchens often have hidden issues behind the cabinets.

    Common Mistakes and How to Avoid Them

    Skipping the sanding step before staining
    : Maple is dense and doesn’t absorb stain evenly without proper sanding first. Always sand with the grain using fine-grit sandpaper before applying any stain.

    Choosing a countertop without checking it under real lighting
    : Store lighting can make a countertop look totally different than it will in your kitchen. Bring a sample home and check it morning and night before deciding.

    Overloading open shelves
    : Too many items on open maple shelving looks cluttered fast. Keep displays simple and leave breathing room between items.

    Ignoring hardware hole spacing when upgrading pulls
    : Buying new hardware without checking existing hole spacing can mean extra drilling and filling. Always measure first and shop with those numbers in hand.

    Painting over dirty or greasy cabinets
    : Kitchen grease builds up fast and prevents paint from sticking properly. Clean cabinets thoroughly with a degreaser before any paint job.

    Using cool white bulbs over warm maple tones
    : Cool lighting can make maple look washed out or slightly green. Stick with warm white bulbs in the 2700 to 3000 kelvin range for the best look.

    Similar Variations

    • Painted Shaker Maple – Maple cabinets in shaker style, fully painted in a solid color for a clean, modern farmhouse feel.
    • Two-Tone Maple Kitchen – Upper cabinets in one finish, lower cabinets in a contrasting color or stain.
    • Rustic Natural Maple – Minimal finish work, letting the wood’s natural warmth and grain lead the design.
    • Modern Slab Maple – Flat, handle-less maple doors for a sleek, minimalist European look.
    • Coastal White-Washed Maple – A light whitewash technique that keeps some grain visible while brightening the wood.
    • Transitional Maple With Glass Accents – A mix of solid and glass-front maple cabinets for a softer, more open feel.

    Maple kitchen cabinets give you way more flexibility than people usually give them credit for. Whether you paint them, stain them dark, or leave them natural and warm, the wood itself is a solid foundation to build almost any kitchen style on top of. I’ve walked you through a dozen ways to make these cabinets feel fresh, personal, and far from boring. At the end of the day, the right combination of finish, hardware, and lighting can turn 12 maple kitchen cabinets ideas into the exact kitchen you’ve been picturing in your head.