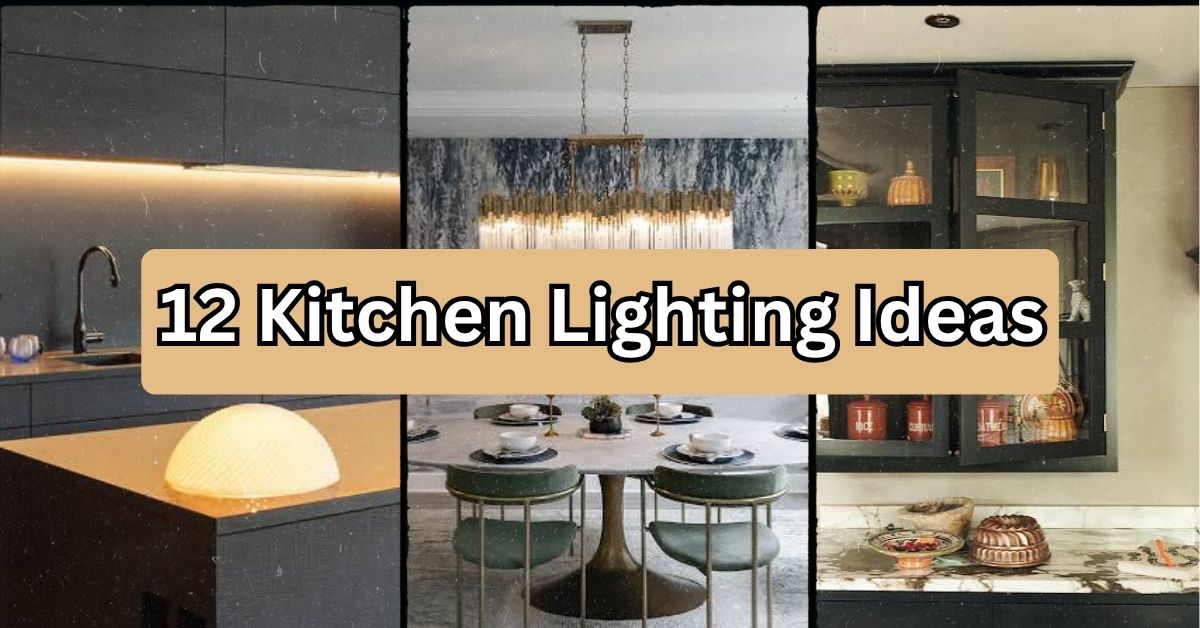
If you’ve been searching for 12 kitchen lighting ideas that actually work in real homes (not just fancy magazine shoots), you’re in the right spot. I’ve spent way too many hours staring at kitchen ceilings, comparing fixtures, and asking myself “will this look good in five years?” So let me save you the trouble.
Kitchen lighting design refers to the layered use of ambient, task, and accent light sources to make a kitchen both functional and visually appealing. A well-lit kitchen typically combines overhead fixtures, under-cabinet strips, and pendant lights to cover cooking, prepping, and gathering needs.
Stick around, because I’m about to walk you through everything from budget-friendly fixes to statement pieces that’ll make guests ask where you got them.
Why Kitchen Lighting Matters More Than You Think
Here’s the thing nobody tells you: your kitchen probably has the worst lighting setup in your whole house. One overhead light. Maybe two. That’s it.
But kitchens do a lot of jobs. You chop vegetables. You read recipes. You host people for wine and snacks. Each of those needs different light. That’s why designers talk about “layering” light instead of just slapping one fixture in the middle of the ceiling and calling it done.
Once you start thinking in layers, everything gets easier. You stop asking “what light should I buy” and start asking “what job does this corner of my kitchen need light for.” That mindset shift changes everything.
1. Install Under-Cabinet Lighting for Real Task Lighting
This one’s non-negotiable in my book. Under-cabinet lights sit right above your countertop, shining down exactly where you chop, mix, and prep. No more shadows from your own head blocking the cutting board.
LED strip lights work great here. They’re thin, they run cool, and they last forever. Go with a warm white (around 2700K to 3000K) if your kitchen has wood tones, or a cooler white (3500K to 4000K) for stainless steel and white cabinets.
Practical tip: Buy dimmable strips. You’ll want full brightness while cooking and a softer glow for late-night snack runs.
This idea works in literally every kitchen style, from farmhouse to ultra-modern, because it’s hidden until it’s turned on. Once your counters are covered, let’s talk about what’s happening above your island.
2. Hang Pendant Lights Over Your Kitchen Island
Pendants are the statement earrings of kitchen lighting. They hang low, they draw the eye, and they instantly make a kitchen feel finished. The trick is getting the size and spacing right.
For a standard island, hang two or three pendants spaced about 24 to 30 inches apart. Keep the bottom of the fixture 30 to 36 inches above the counter surface. Too high and they look lost. Too low and you’ll bonk your head reaching for the salt.
Practical tip: Measure your island length, divide by three, and space your pendants at those points for even coverage.
Coastal kitchens love glass or rattan pendants. Modern kitchens go for matte black or brass geometric shapes. Traditional spaces often choose bell-shaped glass with bronze finishes. Once your island is glowing, it’s time to think bigger picture with the ceiling.
3. Add a Statement Chandelier for Dining Areas
If your kitchen has a breakfast nook or an eat-in table, a small chandelier changes the whole vibe. It’s not just light, it’s decor. It says “this spot matters.”
You don’t need anything huge. A mini chandelier, maybe 18 to 24 inches wide, works perfectly over a table for four. Go bigger only if your table seats six or more.
Practical tip: Hang the chandelier so the bottom sits about 30 inches above the tabletop, giving clear sightlines across the table.
Farmhouse kitchens tend to like wood and iron mixes. Glam kitchens go for crystal or beaded styles. Minimalist spaces choose simple linear fixtures with exposed bulbs. Speaking of exposed bulbs, let’s talk about a trend that’s stuck around for a reason.
Fixture Type Comparison Table
| Fixture Type | Best For | Average Cost Range | Light Output |
|---|---|---|---|
| Pendant Lights | Islands, peninsulas | $50 to $300 each | Medium, focused |
| Chandeliers | Dining nooks, breakfast tables | $150 to $600 | Medium, ambient |
| Under-Cabinet LEDs | Countertops, task areas | $30 to $150 per run | High, directional |
| Recessed Cans | General ambient light | $20 to $80 per fixture | High, spread out |
| Track Lighting | Accent walls, open shelving | $40 to $200 | Adjustable, focused |
4. Use Recessed Lighting for Even, Ambient Coverage
Recessed lights, also called can lights, sit flush in the ceiling and spread light evenly across the whole room. They’re the quiet workhorses of kitchen lighting. Nobody notices them, but everybody notices when a kitchen is missing them.
The general rule is one recessed light for every 4 to 6 square feet of ceiling space, though this shifts based on ceiling height and bulb wattage. Space them evenly in a grid pattern for the most consistent light.
Practical tip: Use warm LED bulbs (around 2700K) in recessed cans so your kitchen doesn’t feel like a hospital hallway.
This works in almost any style since the fixtures themselves disappear into the ceiling. Modern farmhouse, transitional, contemporary, it all works. Now let’s brighten up a spot people often forget.
5. Light Up Open Shelving With Small Puck Lights
Open shelves look great until they’re sitting in shadow. Small puck lights, either battery-powered or wired, tucked under each shelf, make your dishes and glassware glow like a little display case.
These lights are cheap and easy to install yourself. Stick-on LED pucks cost as little as $15 for a pack of six. No electrician needed.
Practical tip: Angle the pucks slightly forward so light hits the items on the shelf below instead of just the shelf surface itself.
Coastal and bohemian kitchens with open shelving benefit the most here, since they usually display baskets, plants, or ceramics that deserve to be seen. Speaking of showing things off, let’s talk about glass-front cabinets.
6. Add Interior Cabinet Lighting to Glass-Front Cabinets
If you’ve got glass-front cabinets showing off your good dishes or glassware, adding a small light inside changes everything. It turns a simple cabinet into a lit display case, almost like a museum exhibit for your kitchenware.
Small LED strip lights or battery-operated tap lights fit easily inside cabinet interiors. Many run on batteries so you skip the wiring hassle completely.
Practical tip: Choose lights with a warm tone to make white dishware and glass pieces look inviting rather than clinical.
Traditional and transitional kitchens use this trick most often, especially with glass-front upper cabinets near a dining space. Now let’s move to something that solves a problem almost every kitchen has.
7. Fix Dark Corners With Toe-Kick Lighting
Toe-kick lighting sits at the base of your cabinets, right near the floor. It’s subtle, but it does two things really well: it adds a soft nightlight glow, and it makes your kitchen feel bigger by lighting up the floor level.
This is especially handy in kitchens with dark flooring or lower light at night. It also helps you avoid stubbing your toe during a midnight fridge raid.
Practical tip: Use a motion sensor so the toe-kick lights turn on automatically when you walk into the kitchen at night.
Modern and minimalist kitchens use this a lot since it keeps the look clean while still being functional. Now, let’s talk about a lighting trick that adds drama without adding clutter.
8. Install a Skylight or Solar Tube for Natural Light
Nothing beats real daylight. If your kitchen has roof access, a skylight or solar tube can flood the space with natural light during the day, cutting down on your electric bill and making the whole room feel brighter and happier.
Solar tubes are smaller and cheaper than full skylights, often costing $500 to $900 installed, compared to $1,500 to $3,000 for a full skylight.
Practical tip: Place skylights over the sink or prep area, since that’s usually where you need the most visual clarity during the day.
This works especially well in Mediterranean, farmhouse, and coastal kitchens, where natural light is part of the whole design philosophy. Now let’s cover something a lot of people skip: dimmer switches.
9. Put Everything on Dimmer Switches
This might be the cheapest, easiest upgrade on this whole list. Dimmer switches let you control the mood instantly. Bright for cooking, soft for dinner parties, dim for a midnight snack.
Most dimmer switches cost between $15 and $40 and take less than an hour to install if you’re comfortable with basic electrical work. If not, an electrician can usually knock it out in one visit for a small fee.
Practical tip: Install separate dimmers for your overhead lights and your under-cabinet lights so you can control each layer independently.
Every kitchen style benefits from this one. There’s no downside. Now let’s talk about a design trend that adds warmth in an unexpected way.
10. Use Warm-Toned Bulbs to Create a Cozy Glow
The color temperature of your bulbs changes the entire feeling of your kitchen. Cool white bulbs (4000K and up) feel clinical and bright, great for task areas. Warm white bulbs (2700K to 3000K) feel cozy and inviting, perfect for evening gatherings.
Mixing both is smart. Use cooler tones under cabinets for task work, and warmer tones in pendants and chandeliers for ambiance.
Practical tip: Buy one bulb of each temperature before committing to a whole set, and test them in your kitchen at night to see which feels right.
Color Temperature Guide
| Kelvin Range | Feel | Best Used For |
|---|---|---|
| 2200K to 2700K | Very warm, cozy | Dining nooks, ambiance |
| 2700K to 3000K | Warm white | General kitchen lighting |
| 3500K to 4100K | Neutral white | Task areas, prep zones |
| 5000K and up | Cool, bright | Rarely recommended for kitchens |
Farmhouse and traditional kitchens usually lean warm across the board. Modern and industrial kitchens sometimes mix warm and cool for contrast. Let’s move on to a lighting idea that’s often overlooked entirely: the window itself.
11. Maximize Natural Light With Sheer or No Window Coverings
Sometimes the best lighting idea costs nothing. If your kitchen window gets good sun, skip heavy curtains. Use sheer panels or leave the window bare to let natural light pour in during the day.
This pairs well with light-colored countertops and walls, which bounce daylight around the room instead of absorbing it.
Practical tip: If privacy’s a concern, try frosted window film instead of curtains. It still lets light through while blocking the view inside.
Coastal, Scandinavian, and modern farmhouse kitchens all lean into this idea heavily, since natural light is a core part of those styles. Last but not least, let’s talk about a fixture type that’s making a serious comeback.
12. Bring Back Track Lighting for Flexible Accent Light
Track lighting got a bad reputation in the 90s, but the newer versions look nothing like those old brass fixtures. Today’s track lighting comes in sleek black or white finishes with adjustable heads you can point exactly where you need light.
It’s great for kitchens with open shelving, art on the walls, or awkward layouts where recessed lighting just won’t reach every corner.
Practical tip: Point one or two heads toward your backsplash or a piece of wall art to add a focal point without extra fixtures.
Industrial and modern kitchens use this style most successfully, especially in open-concept layouts with exposed ceilings or ductwork. Now that you’ve got all twelve ideas, let’s talk about how to actually pull this off without making costly mistakes.
Tips for Success
- Layer at least three light sources (ambient, task, and accent) in every kitchen, no matter the size.
- Test bulb color temperatures in your actual kitchen before buying a whole case of them.
- Keep pendant lights centered over the island, not centered on the room, since these are rarely the same spot.
- Budget 10 to 15 percent extra for electrical work if you’re adding new wiring instead of using existing fixtures.
- Choose dimmable fixtures whenever possible, even if you don’t install the dimmer switch right away.
- Match metal finishes across your fixtures (all matte black, or all brass) to keep the kitchen feeling pulled together.
Common Mistakes and How to Avoid Them
Relying on one overhead light for the whole kitchen
: Add at least two more layers, like under-cabinet task lighting and a pendant or accent fixture, to cover different needs.
Hanging pendants too high or too low
: Keep pendant bottoms 30 to 36 inches above the counter or island surface for the right balance.
Mixing too many metal finishes
: Stick to one or two finishes across all fixtures, like matte black paired with brushed brass, to avoid a cluttered look.
Skipping dimmers entirely
: Install dimmer switches on at least your main overhead and island lights so you can adjust brightness for different activities.
Using the wrong bulb temperature everywhere
: Use warmer bulbs for ambiance areas and cooler or neutral bulbs for task zones like counters and stovetops.
Forgetting to light dark corners and cabinet interiors
: Add small puck lights or LED strips inside cabinets and under shelving to eliminate shadows in overlooked spots.
Similar Variations
- Farmhouse Kitchen Lighting: Wood and iron fixtures paired with warm bulbs and exposed filament styles.
- Industrial Kitchen Lighting: Black metal track lighting, exposed bulbs, and factory-style pendants.
- Coastal Kitchen Lighting: Rattan or glass pendants, lots of natural light, and light, airy finishes.
- Modern Minimalist Kitchen Lighting: Recessed cans, hidden LED strips, and simple geometric pendants.
- Traditional Kitchen Lighting: Bronze or brass chandeliers, glass-front cabinet lighting, and warm ambient tones.
- Scandinavian Kitchen Lighting: Simple pendant shapes, lots of natural window light, and soft warm bulbs throughout.
At the end of the day, good kitchen lighting isn’t about buying the fanciest fixture in the store. It’s about layering light so every corner of your kitchen actually works for you, whether you’re chopping onions or hosting friends for wine. Small changes, like adding a dimmer switch or under-cabinet strip, can make a bigger difference than you’d expect.
I hope this walkthrough gave you a clearer picture of what your kitchen actually needs. Pick two or three ideas from this list to start, see how they feel, and build from there. That’s really all these 12 Kitchen Lighting Ideas are meant to do: help you find the right glow for the way you actually live in your kitchen.
Leave a Reply