Author: Tayef

  • 13 Bathroom Vanity Ideas That’ll Make You Rethink Your Whole Bathroom

    13 Bathroom Vanity Ideas That’ll Make You Rethink Your Whole Bathroom

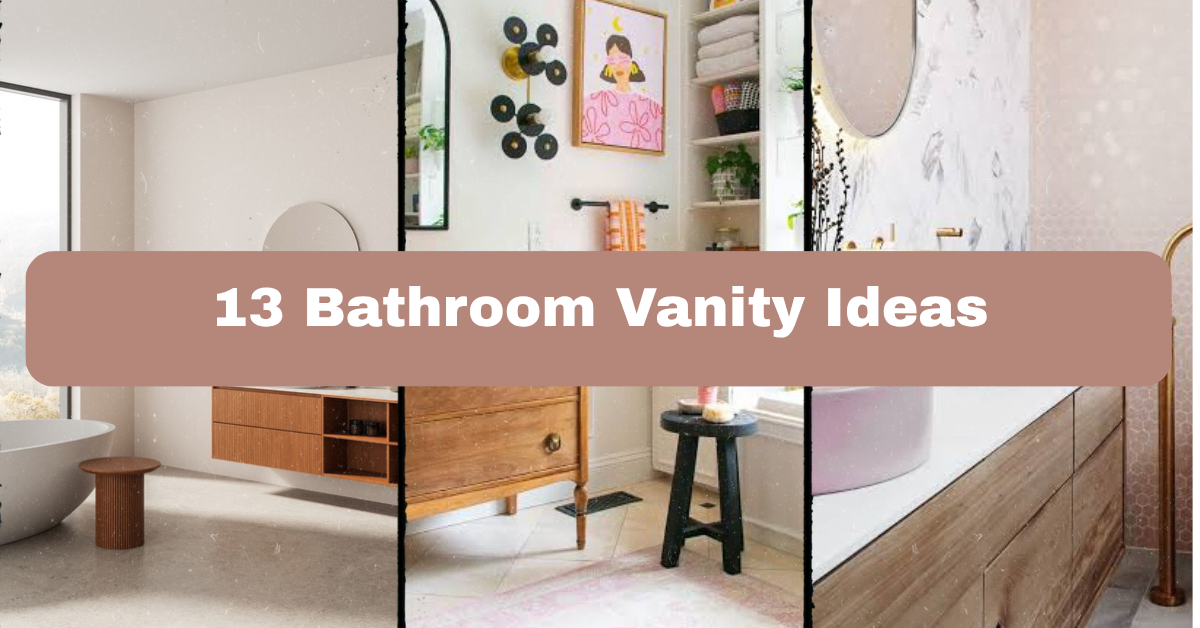
    I’ve spent way too many hours scrolling through bathroom photos, and I finally put together 13 bathroom vanity ideas that actually work in real homes, not just magazine shoots. If you’re standing in your bathroom right now wondering why it feels so blah, your vanity might be the culprit. Let’s fix that together.

    A bathroom vanity is the sink cabinet and countertop combo that anchors your bathroom’s whole look. The best vanity choice depends on your space size, storage needs, and budget, but options range from floating single-sink units to double-sink furniture pieces with stone tops.

    Stick around, because I’m about to show you styles you probably haven’t tried yet, plus some mistakes that trip up almost everyone.

    What Makes a Great Bathroom Vanity Anyway?

    Okay, so before we jump into the fun stuff, let’s talk basics. A vanity isn’t just a sink holder. It’s storage, it’s style, and it’s usually the first thing people notice when they walk into your bathroom. I’ve seen tiny powder rooms transformed just by swapping out a boring builder-grade vanity for something with personality.

    The trick is balancing three things: how much stuff you need to store, how much space you actually have, and what vibe you’re going for. Once you nail those three, everything else falls into place. Now let’s get into the good stuff.

    1. Go Floating for a Modern, Airy Feel

    The 8 Floating Bathroom Vanity Ideas Homeowners Are Loving
    Credit: Northern building Supply

    Floating vanities hang on the wall instead of sitting on the floor. This creates visual space and makes small bathrooms feel bigger instantly. I love these for tight powder rooms where every inch matters.

    The floor stays visible underneath, which tricks your eye into thinking the room is larger than it is. Pair a floating vanity with a light wood or matte white finish for that clean, minimalist look.

    Practical tip: install it at 32 to 34 inches high for comfortable use, and make sure your plumbing can be tucked behind a panel for a seamless look.

    This style fits modern and Scandinavian bathrooms best, though a floating walnut vanity can work in mid-century spaces too. Next up, let’s talk about a totally different approach that brings warmth instead of minimalism.

    2. Repurpose an Antique Dresser Into a Vanity

    How to Turn a Vintage Dresser into a Bathroom Vanity - At Charlotte's House
    Credit: At

    Old dressers make gorgeous vanities. You get unique character that no store-bought cabinet can match. I’ve seen thrifted dressers turned into showstoppers with just a sink cutout and some waterproof sealant.

    Look for solid wood pieces at estate sales or antique shops. Avoid anything with heavy water damage already, since bathrooms are wet environments.

    Actionable tip: seal the wood with a marine-grade varnish to protect against humidity and splashes.

    This idea shines in farmhouse, cottage, or vintage-style bathrooms. It’s trickier to pull off in a strict modern space, but a black-painted antique piece can bridge that gap.

    Speaking of paint, let’s talk color choices next, because this decision changes everything about your vanity’s personality.

    3. Pick a Bold Color Instead of Playing It Safe

    25 bathroom color ideas we love for 2021 | Real Homes
    Credit: Real Homes

    White vanities are fine, but bold colors make a statement. Navy blue, forest green, and deep terracotta are having a moment right now. A colorful vanity becomes the focal point of the whole room without needing much else.

    I always tell people to pair bold vanity colors with simple, neutral walls. That way the vanity gets to shine instead of competing with everything else.

    Popular Vanity Color Pairings

    Vanity ColorWall ColorHardware FinishBest For
    Navy BlueSoft whiteBrushed brassTraditional, coastal
    Forest GreenLight grayMatte blackModern, eclectic
    TerracottaCreamAntique bronzeBoho, Mediterranean
    Charcoal GrayPale blueChromeContemporary
    Sage GreenWhiteBrushed nickelFarmhouse, cottage

    Practical tip: test paint samples under your actual bathroom lighting before committing, since bathroom light can shift colors dramatically.

    Bold color works in nearly every style, from farmhouse to modern, as long as you match the hardware finish to the vibe. Now let’s talk about what happens when two sinks are better than one.

    4. Double Up With a Two-Sink Vanity for Shared Bathrooms

    25 Double Vanity Bathroom Ideas We Love
    Credit: The Spruce

    If you share a bathroom with a partner or your kids, a double vanity saves so much morning drama. Two sinks means two people can brush teeth and wash faces without bumping elbows.

    You’ll need at least 60 inches of width for a comfortable double vanity setup. Anything smaller and the sinks feel cramped together.

    Practical tip: leave at least 6 inches of counter space between the two sink basins so you’re not constantly bumping into each other’s toothbrush cups.

    Double vanities work in almost any style. Traditional homes often go with matching pedestal-style legs, while modern homes prefer one long floating slab. Let’s shift gears now and talk about vessel sinks, because they change the whole vanity silhouette.

    5. Add a Vessel Sink for Sculptural Interest

    The 8 Floating Bathroom Vanity Ideas Homeowners Are Loving
    Credit: Northern

    Vessel sinks sit on top of the counter instead of being built in. They look like decorative bowls, which adds a sculptural, artistic touch to your vanity. Glass, stone, and copper vessel sinks are especially popular right now.

    I think vessel sinks work best on simpler vanity bases, since the sink itself becomes the star. A plain wood or white vanity lets the vessel sink pop.

    Actionable tip: mount your faucet higher than usual, typically 8 to 10 inches above the counter, so water clears the vessel sink rim properly.

    This idea fits modern, industrial, and eclectic bathrooms really well. Traditional spaces can pull it off too with a porcelain vessel sink and vintage-style faucet. Next, let’s talk storage, because a pretty vanity means nothing if it doesn’t hold your stuff.

    6. Maximize Storage With Open Shelving Underneath

    10 Great Built-In Bathroom Storage Ideas To Consider When Building A Luxury  Home - Suzette Gebhardt
    Credit: Suzzett

    Open shelves under your vanity let you store baskets, towels, or decorative jars in plain sight. This works great in bathrooms where closed cabinets feel too heavy or bulky.

    I like this idea because it forces you to be intentional about what you display. Rolled towels and woven baskets look intentional, while random clutter looks messy fast.

    Practical tip: use matching baskets in a natural material like seagrass or rattan to keep the open shelving looking curated, not chaotic.

    Open shelving fits coastal, boho, and farmhouse styles especially well. Modern bathrooms can use it too with sleek metal or glass shelves instead of wood. Now, let’s talk about mixing materials, because contrast is where the magic happens.

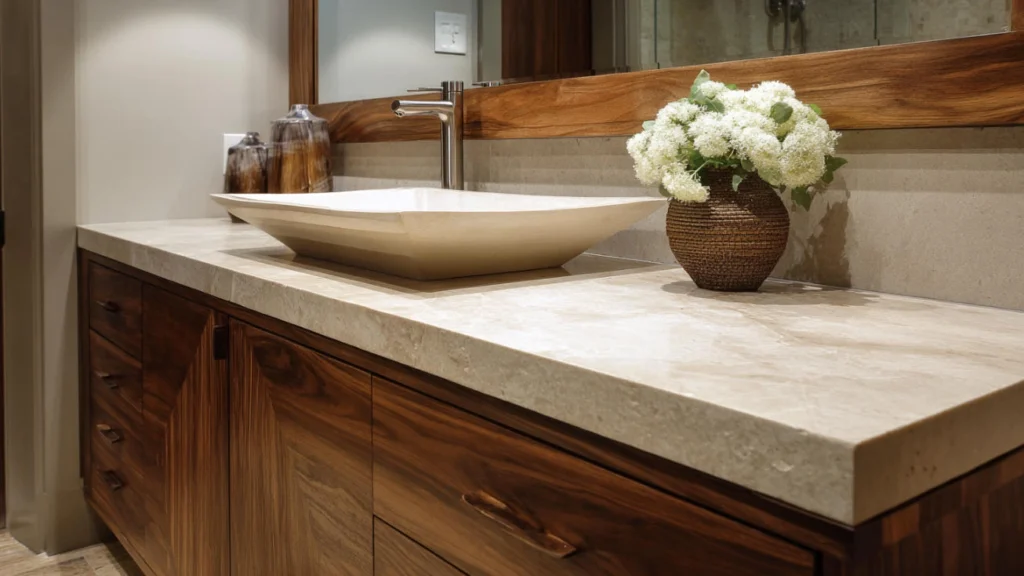
    7. Mix Wood and Stone for Textural Contrast
    20 Modern Bathroom Vanity Design Ideas - PA HOME
    Credit: Ph Home

    Pairing a wood vanity base with a stone countertop creates instant texture and depth. This combo feels warm but still polished, which is why designers use it constantly.

    Quartz and marble are popular stone choices because they resist water damage well. Wood bases bring warmth that stone alone can’t achieve.

    Practical tip: seal natural stone countertops annually to prevent staining from soap, toothpaste, and makeup products.

    Countertop Material Comparison

    MaterialDurabilityMaintenanceAverage Cost per Sq FtBest Style Match
    QuartzHighLow$50-100Modern, transitional
    MarbleMediumHigh$60-150Traditional, luxury
    GraniteHighMedium$40-80Traditional, rustic
    Butcher BlockLowHigh$30-60Farmhouse, cottage
    ConcreteHighMedium$65-135Industrial, modern

    This wood-and-stone combo adapts to almost every style. Coastal homes often use light oak with white quartz, while traditional homes lean toward dark walnut with marble. Speaking of traditional touches, let’s talk about hardware next.

    8. Upgrade Your Hardware for an Instant Style Shift

    5 bathroom hardware ideas to elevate your scheme | Homes and Gardens
    Credit: Homes And Garden

    Sometimes the fastest fix is swapping out old knobs and pulls. New hardware changes the entire feel of a vanity without any major renovation work.

    Brass and gold hardware feels warm and traditional. Matte black feels modern and dramatic. Chrome feels clean and classic.

    Practical tip: measure your existing hardware holes before shopping, since mismatched hole spacing means extra drilling or filling.

    This trick works in literally every bathroom style since hardware is such a small, swappable detail. A single hardware swap can shift a vanity from farmhouse to modern in an afternoon. Now let’s look at lighting, because it works hand in hand with your vanity choice.

    9. Frame Your Vanity With Statement Lighting

    Bathroom Vanity Lighting Ideas That Instantly Upgrade Your Space
    Credit: Edward

    Good lighting makes your vanity look expensive even if it wasn’t. Sconces on either side of the mirror give even, flattering light for getting ready in the morning.

    I always recommend warm white bulbs around 2700K to 3000K for bathroom vanities. Cooler light tends to feel harsh and clinical.

    Practical tip: mount sconces at eye level, roughly 60 to 65 inches from the floor, for the most flattering face lighting.

    Statement lighting adapts easily. Brass sconces suit traditional spaces, while sleek black or glass fixtures suit modern bathrooms. Now let’s talk about a small-space solution that a lot of people overlook.

    10. Choose a Corner Vanity for Awkward Layouts

    What are the best corner vanity designs for small bathrooms? - George Group
    Credit: Group

    Corner vanities solve a real problem: weird, cramped bathroom layouts. If your bathroom has an odd angle or a small footprint, tucking the vanity into a corner frees up walking space.

    These vanities are triangular or curved to fit snugly into the corner. They’re less common, so you might need a custom build or a specialty retailer.

    Practical tip: measure diagonally from wall to wall before shopping, since corner vanities need precise fit to avoid gaps.

    Corner vanities work especially well in small cottage-style or coastal bathrooms where space is tight but character still matters. Now, let’s talk about something a little unexpected: furniture-style legs.

    11. Add Furniture-Style Legs for a Custom Look

    45 Gorgeous Bathroom Vanity Ideas That Fit Every Style
    Credit: Better And Homes

    Vanities with exposed furniture legs look less like plumbing fixtures and more like actual furniture pieces. This small design choice makes a huge visual difference.

    Tapered wood legs feel mid-century, while turned or fluted legs feel more traditional. Metal legs feel industrial or modern.

    Practical tip: choose legs with adjustable feet so you can level the vanity on uneven bathroom floors.

    This idea flexes across nearly every design style depending on the leg shape and material you pick. A little detail like this can completely change how “built-in” or “furniture-like” your vanity feels. Let’s move on to mirrors now, since they’re basically the vanity’s best friend.

    12. Choose an Oversized or Unique-Shaped Mirror

    What's The Best Mirror Shape For A Double Vanity?
    Credit: Edward Marthin

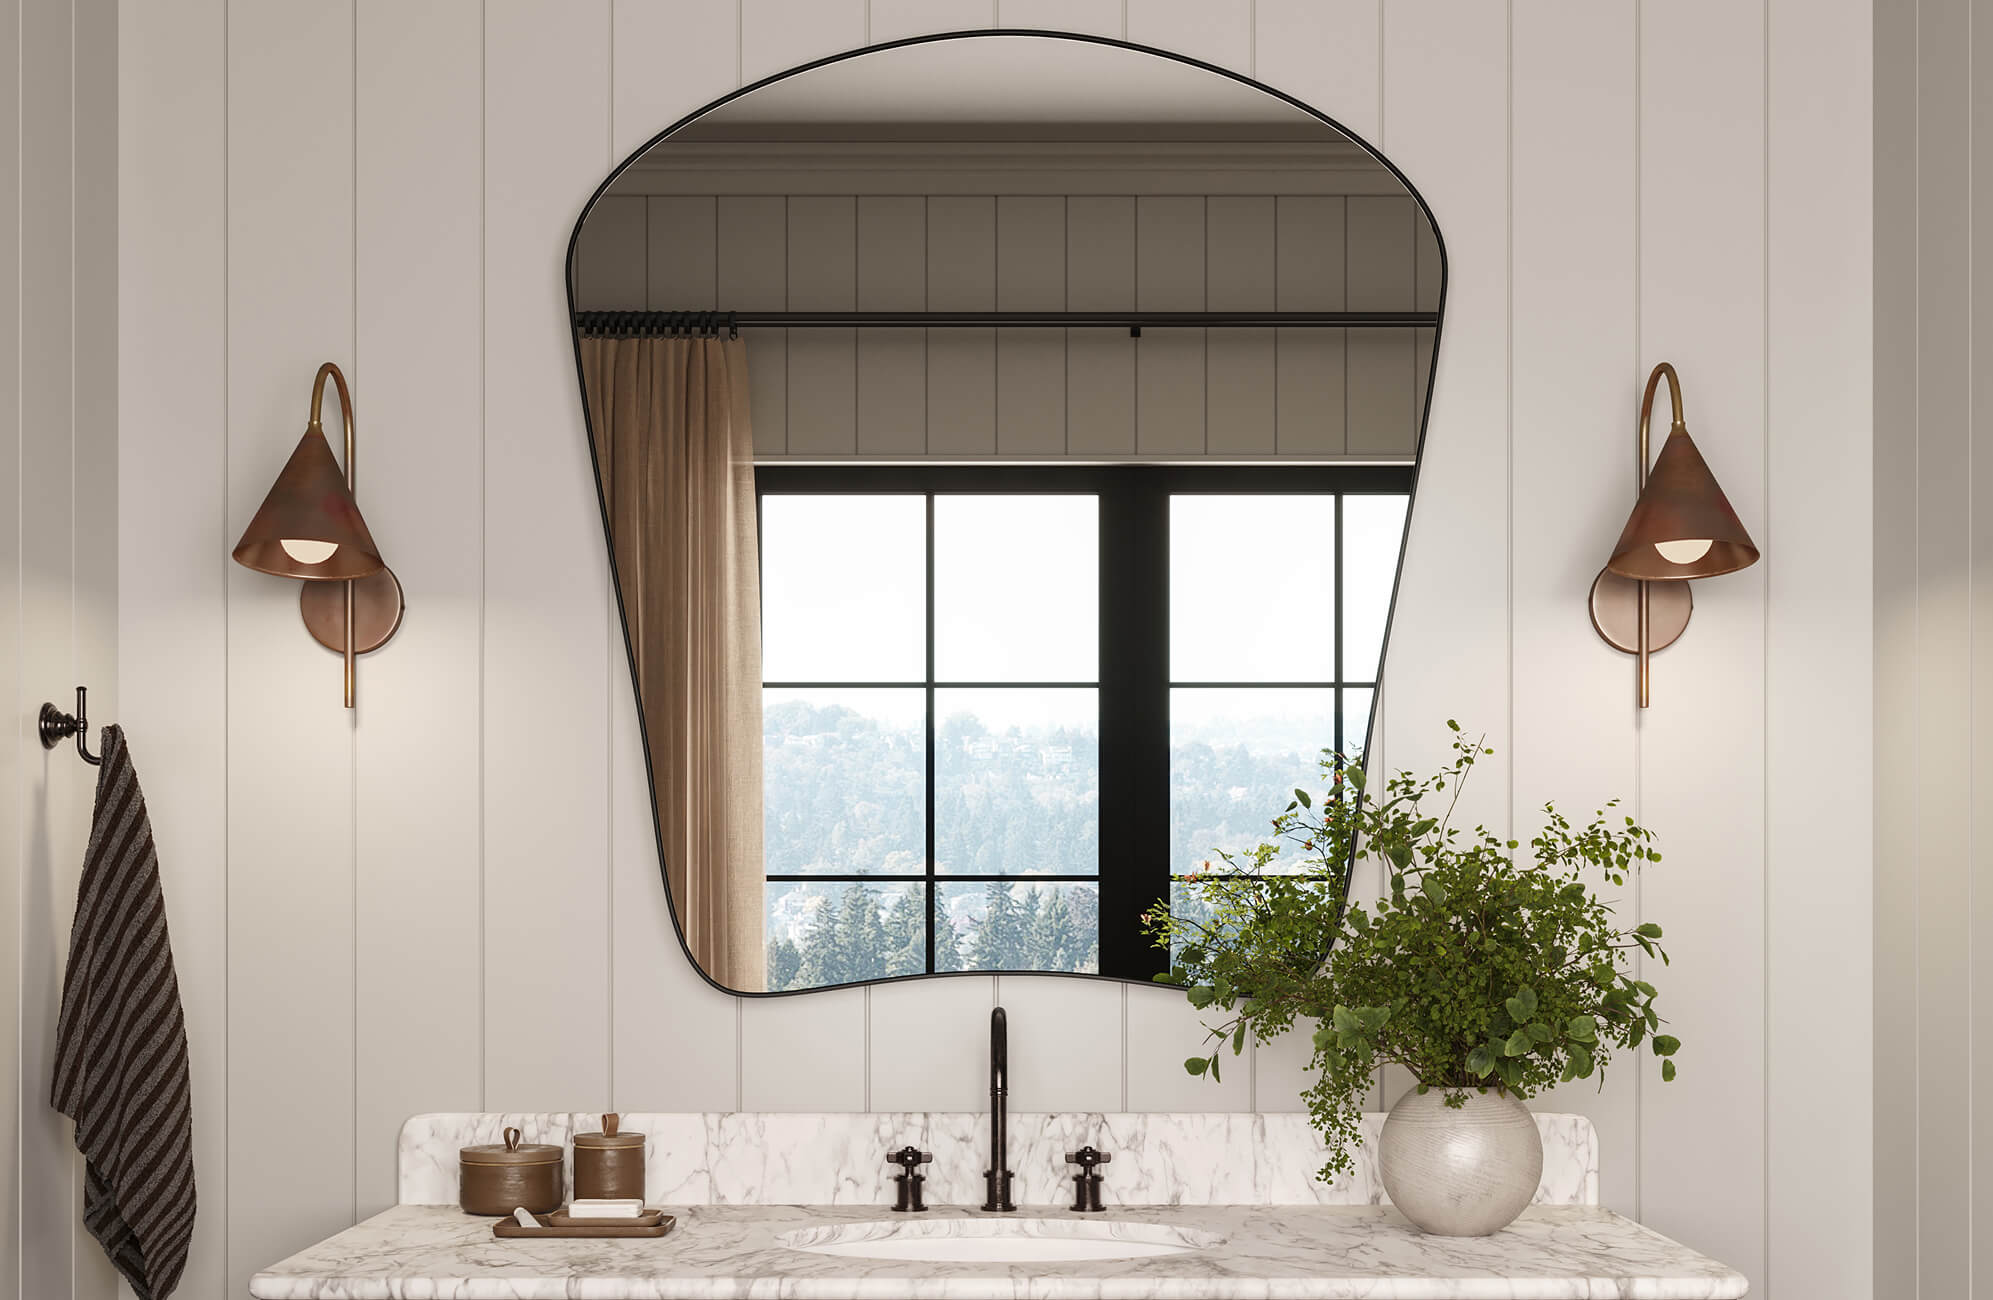
    Your mirror does a lot of visual work above the vanity. A big, bold, or oddly shaped mirror draws the eye up and makes the whole setup feel more designed.

    Arched mirrors feel soft and traditional. Round mirrors feel modern and playful. Full-wall mirrors feel luxurious and make small spaces feel bigger.

    Practical tip: your mirror should be roughly 2 to 4 inches narrower than your vanity on each side for the most balanced look.

    This works across every style since mirror shape alone can shift the whole feeling of a vanity setup. Now for one last idea that ties everything together nicely.

    13. Layer in Greenery for a Fresh, Finished Look

    Green Bathroom Ideas
    Credit: Artisan

    A little plant life near your vanity makes the whole space feel alive. Bathrooms with decent light can support real plants, while low-light bathrooms do better with faux greenery or dried arrangements.

    Small pothos, snake plants, or eucalyptus stems work great on vanity counters without taking up too much room.

    Practical tip: choose plants that tolerate humidity well, since bathroom moisture can rot roots in plants that prefer dry conditions.

    Greenery works in every single style listed here, from modern to farmhouse to coastal. It’s the easiest, cheapest way to finish off any vanity look you choose.

    Tips for Success

    • Measure your bathroom width and depth before falling in love with any vanity style, since size constraints often narrow your options fast.
    • Stick to water-resistant materials for countertops and cabinet finishes, especially in humid climates.
    • Choose a faucet finish that matches your hardware and lighting for a cohesive, put-together look.
    • Test paint or stain samples in your actual bathroom lighting before committing to a full vanity finish.
    • Don’t skip proper ventilation, since trapped moisture damages wood vanities over time.
    • Leave room for a trash can or hamper near your vanity if your bathroom layout allows it.
    • Prioritize storage that matches your daily routine, not just what looks nice in photos.

    Common Mistakes and How to Avoid Them

    Choosing style over function
    : Fix this by listing your storage needs first, then shopping for vanities that check those boxes before worrying about looks.

    Ignoring plumbing rough-in locations
    : Fix this by confirming your existing plumbing placement matches your new vanity’s sink position, or budget for a plumber to move it.

    Picking a vanity too big for the room
    : Fix this by leaving at least 30 inches of clear floor space in front of the vanity for comfortable movement.

    Mismatched hardware and fixture finishes
    : Fix this by choosing one metal finish family, like all brass or all matte black, across faucets, hardware, and lighting.

    Skipping a proper sealant on wood or stone
    : Fix this by sealing porous materials before installation and reapplying sealant yearly to prevent water damage.

    Overlooking mirror and lighting placement
    : Fix this by planning lighting and mirror height alongside your vanity purchase, not as an afterthought.

    Similar Variations

    • Coastal Vanity Style – light wood tones, white countertops, and rope or rattan accents for a beachy feel.
    • Industrial Vanity Style – metal legs, concrete countertops, and exposed pipe fixtures for a raw, urban look.
    • Farmhouse Vanity Style – shiplap paneling, apron-front sinks, and vintage-inspired hardware for cozy charm.
    • Minimalist Vanity Style – floating cabinets, hidden hardware, and monochrome color schemes for clean simplicity.
    • Glam Vanity Style – marble tops, gold hardware, and mirrored cabinet fronts for a luxe, polished vibe.
    • Eclectic Vanity Style – mismatched materials, bold colors, and vintage finds combined for a one-of-a-kind look.

    Picking the right vanity really does change how your whole bathroom feels, from the colors you choose to the storage you actually use every day. I hope these 13 bathroom vanity ideas gave you a clearer picture of what’s possible, whether you’re doing a full renovation or just swapping out hardware this weekend.
  • 14 Bathroom Storage Ideas That Actually Work in Small Spaces

    14 Bathroom Storage Ideas That Actually Work in Small Spaces

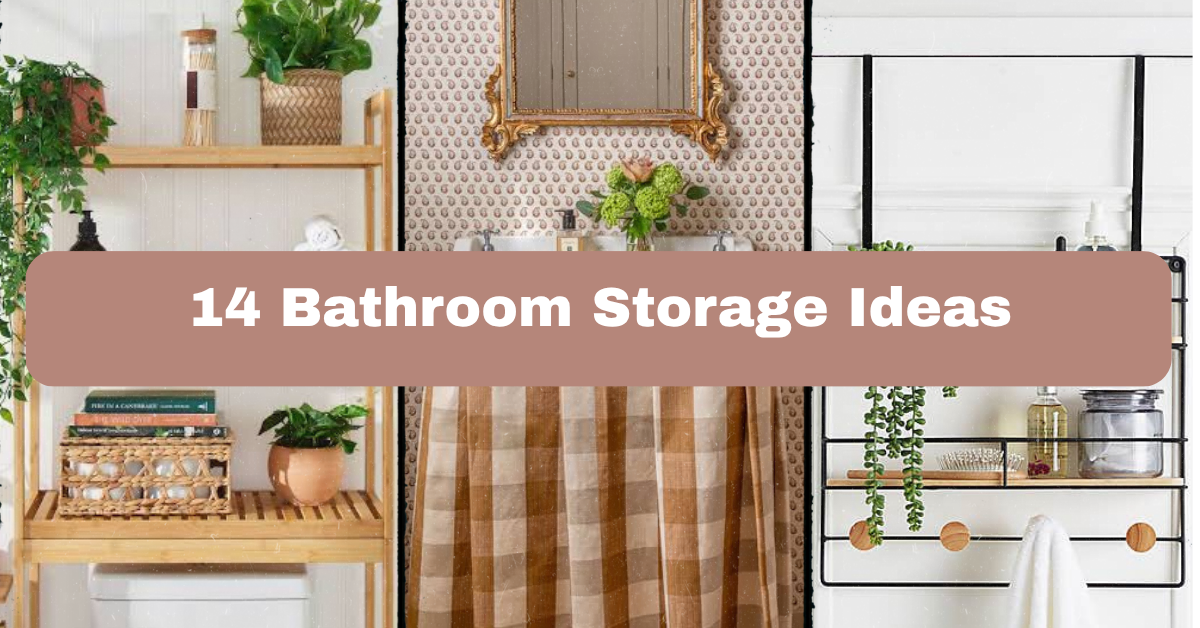
    I’ve tried a lot of bathroom storage hacks over the years, and this list of 14 bathroom storage ideas is the one I wish I had found first. Some of these tricks I learned the hard way, after knocking my elbow on a cabinet door for the tenth time. Others came from friends who somehow keep their bathrooms looking like a magazine spread even with three kids sharing one sink.

    Bathroom storage means finding smart ways to organize toiletries, towels, and cleaning supplies in a room that usually has almost no extra square footage. The best solutions use vertical space, hidden nooks, and multi-purpose furniture instead of relying on floor space alone.

    Stick around, because I’m going to walk you through storage tricks that work whether you’ve got a tiny powder room or a full master bath begging for organization.

    What Makes Bathroom Storage So Tricky

    Bathrooms are weird rooms to organize. You’ve got plumbing running through walls, moisture that warps regular wood furniture, and usually less floor space than a walk-in closet. On top of that, everyone in the house needs access to the same small area every single morning.

    I think that’s why bathroom storage feels harder than storage anywhere else in the house. You can’t just throw a bookshelf in there and call it done. You need pieces that handle humidity, fit weird corners, and still look nice when your mother-in-law visits unannounced. The good news? Once you know the tricks, this room gets a lot easier to tame.

    1. Install Floating Shelves Above the Toilet

    17 Over the Toilet Storage Ideas That Actually Look Amazing
    Credit: The Spruce

    The space above your toilet is basically wasted real estate in most bathrooms. Floating shelves fix that instantly. I put up three small shelves in my old apartment bathroom and suddenly had room for extra towels, candles, and baskets full of stuff I used to shove under the sink.

    Pick shelves made from moisture-resistant wood or treated MDF so they don’t warp over time. Paint them white for a clean look, or match your cabinet finish for consistency.

    Actionable tip: Use a stud finder before drilling. Toilets sit near plumbing lines, and you want to avoid pipes hiding in the wall.

    This idea works in almost any style. Farmhouse bathrooms look great with reclaimed wood shelves, while modern spaces do better with sleek floating acrylic or metal versions. Once your walls are working for you, it’s time to look at what’s happening below the sink.

    2. Add a Pedestal Sink Skirt for Hidden Storage

    Pedestal sink skirts are trending in 2026 | Ideal Home
    Credit: Ideal Home

    Pedestal sinks look pretty, but they leave you with zero storage underneath. A fabric sink skirt solves that problem in about ten minutes. You basically hang a curtain around the pedestal base, and suddenly you’ve got a hidden spot for cleaning supplies, extra toilet paper, or that plunger nobody wants to see.

    Choose a fabric that matches your shower curtain or wall color for a pulled-together look. Waterproof or mildew-resistant fabric works best since bathrooms stay damp.

    Actionable tip: Use tension rod hardware or adhesive hooks so you can remove the skirt easily for washing.

    Coastal and cottage-style bathrooms love this trick, especially with striped or floral fabric. Traditional bathrooms can use a solid neutral skirt for a more polished feel. Speaking of hidden storage, let’s talk about a spot most people totally forget about.

    3. Use the Back of the Bathroom Door

    17 back of door storage ideas to get the most out of your space | Style  Curator
    Credit: Style Curator

    The back of your bathroom door is prime storage space that almost nobody uses. An over-the-door organizer with pockets or hooks can hold hair tools, robes, cleaning sprays, or extra toiletries without taking up a single inch of floor space.

    Look for organizers made from canvas or mesh so moisture doesn’t get trapped and cause mildew. Metal hook versions work great for towels and robes too.

    Actionable tip: Measure your door thickness before buying. Some over-the-door racks don’t fit thicker doors common in older homes.

    This solution fits any style since most organizers hang on the door’s blind side where nobody sees them anyway. Modern homes might prefer a slim metal hook rail, while traditional homes can go with a fabric pocket organizer. Now let’s move from the door to something a little more permanent.

    4. Build a Recessed Wall Niche in the Shower

    How to Build a DIY Recessed Wall Shelf
    Credit: Better Homes

    If you’re renovating or building new, a recessed niche inside your shower wall is one of the smartest storage moves you can make. It tucks shampoo bottles, soap, and razors right into the wall so nothing sits on the shower floor collecting soap scum.

    Tile the niche to match your shower walls, or use a contrasting tile for a little visual pop. Keep the shelf depth around four to six inches so bottles fit without sticking out too far.

    Actionable tip: Plan the niche placement before tiling begins. Retrofitting one after the fact means tearing into finished walls.

    This idea flexes easily across styles. Modern bathrooms often use a single long niche with clean lines, while traditional bathrooms might add a small arched niche for character. Once your shower storage is sorted, your vanity area needs some attention too.

    Storage Solution Comparison by Space and Cost

    Storage IdeaBest ForApprox. CostInstallation Difficulty
    Floating shelvesSmall walls, above toilet$20-$60Easy
    Recessed nicheNew builds, renovations$150-$400Hard (needs contractor)
    Over-the-door organizerRenters, quick fixes$15-$40Easy
    Vanity with drawersAny bathroom size$200-$800Moderate
    Rolling storage cartTight corners, flexible use$40-$100Easy

    5. Choose a Vanity With Built-In Drawer Dividers

    Bathroom Vanity Storage Ideas: Drawers, Shelves & Organization | Kitchen &  Bath World Kitchener, On
    Credit: Kicthen

    A regular vanity gives you storage, but a vanity with built-in drawer dividers gives you organized storage. That’s a huge difference when you’re digging for bobby pins at 7 a.m. Dividers keep makeup, dental care items, and hair accessories separated so drawers don’t turn into junk piles.

    Look for vanities with soft-close drawers so they don’t slam every time. Wood tones like walnut or oak add warmth, while white or gray vanities keep things bright and modern.

    Actionable tip: Measure your current drawer contents before shopping so you know what divider sizes you actually need.

    Farmhouse bathrooms often pair divided drawers with a shiplap backsplash, while contemporary spaces keep it simple with flat-panel cabinet fronts. Speaking of vanities, mirrors can double as storage too.

    6. Swap a Flat Mirror for a Medicine Cabinet Mirror

    Why Designers Hate Most Medicine Cabinets (+ Some Genius Alternative Bathroom  Storage Solutions) - Emily Henderson
    Credit: Emily Henderson

    This one feels like a cheat code once you try it. Swapping your plain mirror for a mirrored medicine cabinet gives you storage space without losing any wall real estate. You still get the mirror function, but now there’s a shelf system hiding behind it.

    Recessed versions sit inside the wall for a flush look, while surface-mounted cabinets are easier to install in existing bathrooms. Either way, you get a spot for daily medications, skincare, and small toiletries out of sight.

    Actionable tip: Recessed cabinets need at least 3.5 inches of wall depth, so check your wall type before committing to that style.

    Modern bathrooms love the flush recessed look, while vintage-inspired bathrooms often go for a surface-mounted cabinet with a decorative wood or metal frame. Now let’s talk about towels, because they take up more room than people realize.

    7. Roll Towels Vertically in an Open Basket

    13 Clever Bathroom Towel Storage Ideas to Try Right Now
    Credit: The Home Pantry

    Folding towels flat wastes space fast. Rolling them and standing them up in an open basket or ladder shelf saves room and actually looks nicer too. I switched to this method years ago and got back almost a full shelf of extra space.

    Pick a basket made from woven seagrass or wire for breathability, since damp towels need airflow to avoid mustiness. Match the basket tone to your existing decor, whether that’s natural wood tones or matte black metal.

    Actionable tip: Roll towels while they’re still slightly damp from the dryer. They hold their shape better than towels rolled after sitting folded for days.

    Boho bathrooms love natural fiber baskets, while industrial-style spaces do well with black wire baskets instead. Once towels are handled, small daily-use items need their own system too.

    8. Use Stackable Clear Bins Under the Sink

    Under the Bathroom Sink Storage - The Turquoise Home
    Credit: The Torquise

    Under-sink cabinets turn into chaos fast because pipes eat up usable space and everything gets shoved in wherever it fits. Stackable clear bins fix this by giving every category its own container. Cleaning supplies go in one bin, extra toiletries in another, and hair tools in a third.

    Clear plastic bins let you see contents at a glance, so you’re not opening every single bin during your morning rush. Choose bins with handles for easy pulling since under-sink spaces are usually dark and cramped.

    Actionable tip: Measure the space around your pipes before buying bins. L-shaped or corner bins fit awkward plumbing better than standard rectangles.

    This system works in literally any style since the bins stay hidden behind cabinet doors. Just pick handle colors or bin shapes that feel right for your space. Now, let’s get vertical again with something a little different.

    9. Install a Ladder Shelf Behind the Door

    DIY Leaning Ladder Shelf for the Bathroom | HGTV
    Credit: HGTV

    Ladder shelves lean against the wall and take up almost no floor space, which makes them perfect for bathrooms with an awkward corner or blank wall behind the door. You get multiple tiers for towels, plants, or baskets, all without drilling a single hole.

    Wood ladder shelves bring warmth to a space, while black metal versions feel more modern and edgy. Either way, this piece adds storage and visual height, which makes small bathrooms feel bigger.

    Actionable tip: Choose a ladder shelf with a slight lean-back angle so it stays stable even in bathrooms with tile floors.

    Coastal and boho bathrooms love a light wood ladder shelf styled with baskets and greenery. Minimalist bathrooms might use a single black metal ladder with just a few folded towels. Next, let’s talk about a storage spot people rarely think to use.

    10. Add a Tension Pole Shelf Between Floor and Ceiling

    7 Genius No-Drill Bathroom Storage Ideas Renters Love
    Credit: Bathroom Insight

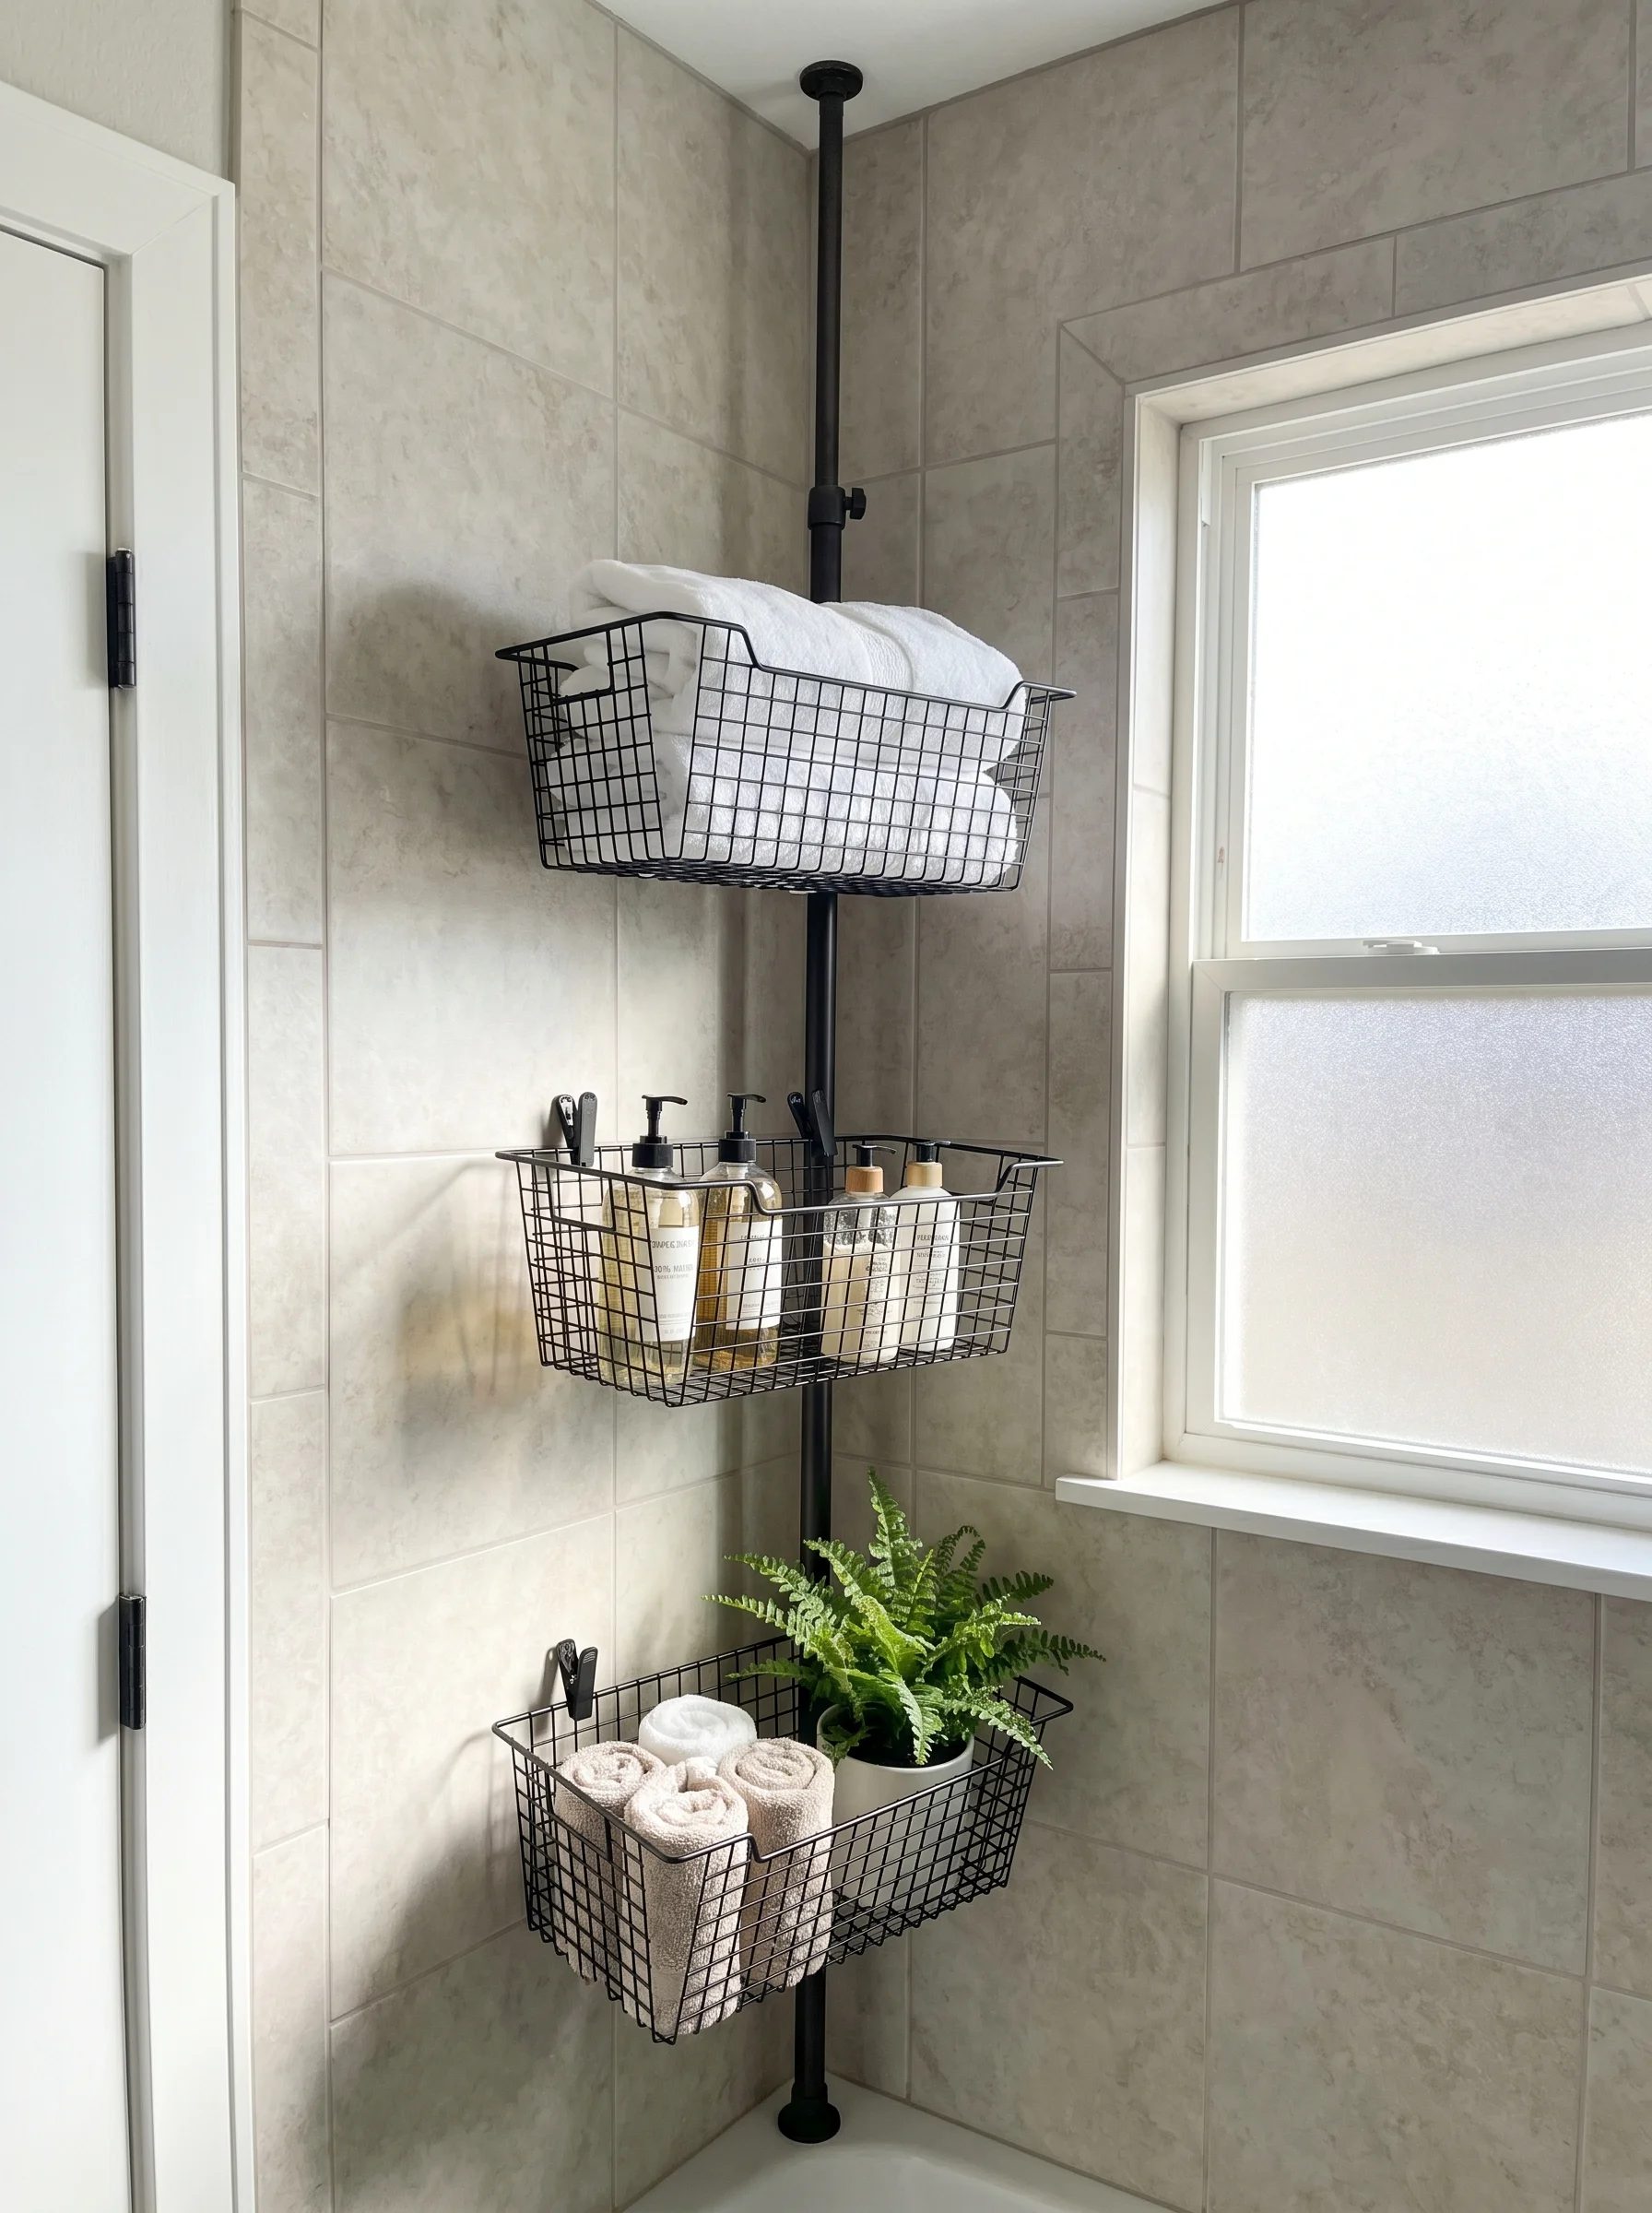
    Tension pole shelves wedge between your floor and ceiling using pressure, no drilling required. They’re a renter’s dream because you can add multiple shelves in a narrow column without touching the walls at all. I’ve used one in a rental bathroom corner that would have otherwise been dead space.

    Look for adjustable shelf heights so you can customize spacing for taller items like lotion bottles or shorter stacks of washcloths. Wood and matte black finishes are the most common options.

    Actionable tip: Check your ceiling height before buying. Most tension poles adjust between 7 and 9 feet, so measure first.

    This idea works great in apartments and rentals across any style, from modern to traditional, since it’s temporary and non-damaging. Once you’ve filled vertical gaps, let’s shrink storage down to the smallest details.

    Bathroom Storage Budget Tiers

    Budget TierPrice RangeWhat You Get
    LowUnder $50Bins, baskets, over-door hooks, small shelves
    Mid$50-$200Ladder shelves, tension poles, medicine cabinets
    High$200-$500Vanities with drawers, custom shelving units
    Premium$500+Recessed niches, custom cabinetry, full remodels

    11. Mount Magnetic Strips Inside Cabinet Doors

    7 Genius No-Drill Bathroom Storage Ideas Renters Love
    Credit: Bathroom Insight

    This one surprises people every time I mention it. A magnetic strip mounted inside a cabinet door holds metal items like tweezers, nail clippers, and bobby pin containers right in place. No more digging through a drawer to find one tiny pair of scissors.

    Use adhesive-backed magnetic strips so you don’t need tools for installation. Keep the strip low enough that it doesn’t interfere with the door closing.

    Actionable tip: Test the strip strength before loading it up. Cheaper magnetic strips sometimes can’t hold heavier metal tools.

    This works in any bathroom style since it’s completely hidden once the cabinet door closes. It’s a quiet upgrade that makes a real difference every single morning.

    12. Use a Rolling Cart for Flexible Storage

    4 Ways Organizers Use Rolling Carts in Guest Bathrooms | Livingetc
    Credit: Living Etc

    Rolling carts are one of my favorite bathroom storage ideas because they move wherever you need them. Stick one next to the tub for bath products, or tuck it into a corner for extra toiletries. When you rearrange your bathroom later, the cart just rolls along with you.

    Metal wire carts with multiple tiers work well for organizing by category, top tier for daily items, bottom tier for backups. Choose a cart with locking wheels so it doesn’t roll away every time you touch it.

    Actionable tip: Add small bins inside each tier so loose items don’t slide around when you move the cart.

    Industrial and modern farmhouse bathrooms both love the exposed metal look of rolling carts. Traditional spaces can soften the look with woven baskets on each tier instead of open bins.

    13. Hang a Hook Rail for Robes and Bags

    Home Storage Hooks | 6 Popular Hanging Hook Ideas to Keep You Spaces  Organised | Hiatt Hardware
    Credit: Hyat

    A simple hook rail mounted on the wall solves the problem of robes, bags, and towels ending up on the floor. Instead of one single hook behind the door, a rail gives you three, four, or five spots so everyone in the house has their own spot.

    Choose matte black or brushed brass hooks to match your existing hardware finishes. Space hooks about six inches apart so bulky items don’t overlap and crowd each other.

    Actionable tip: Mount the rail at a height that works for your shortest household member, kids included, so everyone actually uses it.

    Modern bathrooms look sharp with matte black hooks on a white wall, while traditional bathrooms often prefer brass or bronze tones instead. Last but not least, let’s talk about corners.

    14. Install a Corner Shelf Unit in Unused Space

    Elegant Floating Bathroom Corner Shelves for a Sustainable Space
    Credit: Wood Cylon

    Corners are the most wasted space in almost every bathroom. A corner shelf unit, whether floating or freestanding, turns that dead zone into usable storage without crowding the rest of the room. These work especially well in small bathrooms where every inch matters.

    Freestanding corner units are great for renters since they need no installation, while floating corner shelves give a sleeker built-in look for homeowners.

    Actionable tip: Measure your corner’s exact angle before buying since some corners aren’t a perfect 90 degrees due to older home construction.

    Scandinavian and minimalist bathrooms use simple white corner shelves, while traditional bathrooms might add a wood corner shelf with decorative trim.

    Tips for Success

    • Always measure twice before drilling into bathroom walls since plumbing and electrical lines hide behind them
    • Choose moisture-resistant materials for anything staying in a bathroom long term
    • Group items by how often you use them, daily stuff up front, backups further back
    • Keep a small trash or recycling bin near your storage area so packaging doesn’t pile up
    • Rotate seasonal items like heavy lotions or sunscreen out of prime storage spots
    • Label bins and baskets if more than one person shares the bathroom
    • Leave a little breathing room in every storage spot instead of packing things in tight

    Common Mistakes and How to Avoid Them

    Overfilling under-sink cabinets
    : Use stackable bins so every item has a designated spot instead of piling loose bottles together.

    Ignoring vertical space
    : Add floating shelves or a ladder shelf before assuming your bathroom has no more room.

    Choosing non-waterproof materials
    : Stick to treated wood, metal, or plastic that can handle steam and splashes without warping.

    Skipping measurements before buying storage pieces
    : Always measure wall space, corner angles, and door thickness first to avoid returns.

    Forgetting hidden storage doubles as decor
    : Baskets and bins can look intentional instead of messy if you pick colors that match your palette.

    Placing hooks too high
    : Mount hooks and rails at a height that works for every household member, not just the tallest person.

    Similar Variations

    • Coastal Bathroom Storage – Uses woven baskets, light wood tones, and rope details for a beachy feel
    • Industrial Bathroom Storage – Relies on exposed metal shelving, black hardware, and rolling carts
    • Minimalist Bathroom Storage – Keeps visible storage to a minimum with hidden cabinets and clean lines
    • Farmhouse Bathroom Storage – Combines shiplap, wood ladder shelves, and vintage-style baskets
    • Scandinavian Bathroom Storage – Focuses on white tones, simple corner shelves, and functional simplicity
    • Boho Bathroom Storage – Mixes natural fiber baskets, plants, and mismatched decorative containers

    Honestly, once you start using even a few of these tricks, your bathroom stops feeling like a cluttered afterthought and starts feeling like a space you actually enjoy walking into every morning. It’s not about buying a bunch of new stuff either. It’s about using the space you already have in smarter ways.

    I’ve tested most of these tricks myself in bathrooms that ranged from tiny rental units to bigger family homes, and they hold up no matter the size. That’s really the whole point of these 14 bathroom storage ideas: small changes that make a cramped, messy room feel calm and organized again.

  • 12 Pink Bathtub Ideas

    12 Pink Bathtub Ideas

    I’ve spent way too many nights scrolling through bathroom photos, and if you’re hunting for 12 pink bathtub ideas that actually look good and not like a bubblegum factory exploded, you’re in the right place. I put together this list based on what actually works in real homes, not just Pinterest fantasy land. Let’s get into it.

    A pink bathtub is exactly what it sounds like: a bathtub finished in a pink hue, ranging from soft blush to bold magenta, used as either a subtle accent or the star feature of a bathroom. It can be achieved through original vintage fixtures, modern refinishing, or new tub purchases in pink enamel or acrylic.

    Stick around, because I’m about to show you twelve ways to make pink work in your bathroom without it feeling like a dated dollhouse.

    Why Pink Bathtubs Are Having a Moment Again

    Okay, so pink bathtubs used to scream “1950s grandma house.” I get it. But design trends are cyclical, and pink is back in a big way, just smarter this time. People are pairing it with black hardware, warm wood, and moody tile instead of frilly curtains. It’s giving bathrooms personality in a world full of white-on-white spaces that all look the same. Pink also happens to be super flexible. You can go soft and calming or loud and playful. That range is exactly why I think this color deserves another shot in your home, whether you’re renovating or just refreshing a small space.

    1. Blush Pink Tub With Matte Black Fixtures

    Pink Marble Bathtub Design Ideas - Page 1
    Credit: Decor Pad

    This combo is basically foolproof. Blush pink is soft enough that it doesn’t feel like a costume, and black fixtures add contrast so the room doesn’t feel too sweet. Think matte black faucet, matte black drain, maybe a black-framed mirror nearby. The tub becomes the calm centerpiece while the black details give it an edge.

    Practical tip: stick with matte finishes over shiny chrome. Matte black reads more modern and hides water spots better.

    This look adapts beautifully to modern farmhouse or minimalist spaces. It also works in small apartment bathrooms where you want something interesting but not overwhelming. Once you’ve got the color and hardware sorted, think about what’s going on the walls, because that’s where the next idea comes in.

    2. Pair Pink With Terracotta Tile for a Warm Earthy Look

    13 pink bathroom ideas that are fun yet super stylish | Homebuilding
    Credit: Home Building

    Pink and terracotta together feel like a sunset. It’s warm, grounding, and honestly kind of unexpected in the best way. Use terracotta tile on the floor or lower half of the wall, then let the pink tub sit against it like a soft cloud in a warm room.

    Add wood accents, like a teak stool or rattan basket, to keep the earthy vibe going. Practical tip: keep your grout color warm-toned too, like a sandy beige, so nothing feels too stark or clinical against the terracotta.

    This pairing is perfect for boho or Mediterranean-style homes. It also works surprisingly well in southwestern-inspired spaces. Once your floor and walls are speaking the same warm language, you’ll want lighting that matches, which brings me to the next idea.

    3. Warm Brass Lighting Above a Rosy Pink Tub

    13 pink bathroom ideas that are fun yet super stylish | Homebuilding
    Credit: Home Building

    Brass and pink are a classic pairing for a reason. The warm gold tone makes pink look richer instead of babyish. Hang a brass sconce or pendant light near the tub, and suddenly the whole room feels expensive.

    Go for a dusty rose or rosy pink tub color here rather than a pale pastel, since brass tends to wash out very light shades. Practical tip: use warm white bulbs, not cool white, or the brass and pink will fight each other instead of blending.

    This works great in traditional and art deco bathrooms. It also fits nicely into transitional spaces that mix old and new styles. Once your lighting is set, you might be wondering what other metals could work, so let’s compare a few options.

    Metal Finish Comparison for Pink Bathtub Fixtures

    Metal FinishBest Pink Shade PairingStyle VibeMaintenance Level
    Matte BlackBlush, Dusty RoseModern, MinimalistLow
    Brushed BrassRosy Pink, MauveTraditional, Art DecoMedium
    Polished ChromePale Pink, Baby PinkClassic, RetroMedium-High
    Brushed NickelSoft Pink, SalmonTransitional, CoastalLow
    CopperTerracotta Pink, CoralRustic, BohemianHigh

    4. Deep Mauve Tub for a Moody Statement

    23 Pink Bathroom Ideas That Blend Fun and Function with Style
    Credit: The Collist

    If soft pastel pink feels too sweet for your taste, go moody with a deep mauve tub instead. It’s still technically pink, but it reads more sophisticated and dramatic. Pair it with dark walls, like charcoal or deep green, for maximum drama.

    Practical tip: keep your countertops and floors lighter in tone so the room doesn’t feel like a cave. A pale marble or light wood floor balances out the darker tub color nicely.

    This idea is perfect for moody modern bathrooms or anyone who loves a dark academia aesthetic. It even works in industrial-style spaces with concrete and exposed pipes. Speaking of balance, let’s talk about how pattern can play into this too.

    5. Add Patterned Tile Behind a Solid Pink Tub

    19 Designer Pink Bathrooms — The History of Pink Bathrooms
    Credit: House Beautiful

    A solid colored tub against a busy patterned wall creates instant visual interest. Think Moroccan tile, checkerboard patterns, or even a bold floral wallpaper behind the tub. The pink tub acts as the calm anchor while the pattern does the talking.

    Practical tip: if you’re nervous about pattern overload, only tile the wall directly behind the tub, not the whole room. This keeps the pattern contained and intentional rather than chaotic.

    This works in eclectic, maximalist, or Mediterranean-inspired bathrooms. It’s also a great option for renters who can use peel-and-stick wallpaper temporarily. Now that we’ve covered pattern, let’s look at texture instead.

    6. Layer in Natural Textures Like Rattan and Linen

    1200+ Modern Bathroom Interior Design Ideas,Images & Inspiration in August,  2026- Livspace
    Credit: Livspace

    Pink can feel a little flat without texture around it. Bring in a rattan mirror frame, a linen shower curtain, or a woven basket for towels. These natural materials soften the look and keep things feeling collected instead of matchy.

    Practical tip: mix at least two different textures, like woven rattan plus soft linen, so the room doesn’t feel one-note.

    This textural layering fits coastal, boho, and Scandinavian styles especially well. It also softens a more formal traditional bathroom if that’s your starting point. Once texture is handled, color placement becomes the next big decision.

    7. Two-Tone Walls With Pink on the Bottom Half

    89 Pink Bathroom Ideas: From Hot Pink Walls to Blush Tiles - The Nordroom
    Credit: NordRoom

    Try painting or tiling the lower half of your bathroom wall in a soft pink, then keeping the top half white or a neutral tone. Add a thin wood or brass trim strip where the two colors meet. This creates a classic wainscoting-style look that feels intentional and grown-up.

    Practical tip: keep the pink section no higher than chair-rail height, usually around 32 to 36 inches, so it doesn’t overwhelm a small room.

    This two-tone approach works beautifully in traditional, cottage, and coastal grandmother style bathrooms. It’s also an easy DIY weekend project if you’re renting and can’t do major renovations. Once your walls are sorted, accessories are where you can really have fun.

    8. Gold Hardware With a Pale Pink Clawfoot Tub

    10 Reasons Pink Bathrooms are Something Special
    Credit: Houzz

    There’s something undeniably romantic about a clawfoot tub in pale pink with gold feet and fixtures. It feels vintage but not old-fashioned, elegant but not stuffy. This works especially well as a freestanding centerpiece in a larger bathroom.

    Practical tip: if buying new, look for acrylic clawfoot tubs finished in pink gel coat, since they’re lighter and easier to install than cast iron versions.

    This idea shines in French country, vintage, and romantic farmhouse bathrooms. It also works in glam-style spaces with crystal light fixtures and mirrored accents. Speaking of size and space, let’s talk budget and tub types next.

    Pink Bathtub Options by Budget Tier

    Budget TierPrice RangeTub TypeBest For
    Budget-Friendly$300-$800Acrylic drop-in, pink finishSmall updates, rentals
    Mid-Range$800-$2,500Acrylic freestanding, pink gel coatFull renovations
    High-End$2,500-$6,000Cast iron clawfoot, custom pink enamelStatement bathrooms
    Vintage/Refinished$150-$600Reglazed original fixtureHistoric homes, budget luxury

    9. Salmon Pink Tub With Green Plants Everywhere

    Hippie Boho Style House Architecture | Green witch bathroom ideas, Green  witch bathroom decor, Boho bathroom
    Credit: JustMe

    Salmon pink and green are basically best friends in the color world. They sit opposite each other in a way that just clicks. Fill your bathroom with pothos, ferns, or even fake plants if your bathroom doesn’t get much light, and let them play off the warm salmon tub.

    Practical tip: choose plants that tolerate humidity well, like Boston ferns or snake plants, since bathrooms are naturally more humid than other rooms.

    This pairing feels right at home in jungle boho, coastal, or eclectic bathrooms. It also brightens up windowless bathrooms that need a little life. Now let’s talk about how flooring choices can shift the whole mood.

    10. Pale Pink Tub Over Checkerboard Flooring

    30 Pink Bathroom Ideas Rarely Shared Because They Instantly Expose Who Has  Taste and Who Doesn't
    Credit: Trendit

    Black and white checkerboard flooring under a pale pink tub gives off major retro diner energy, but in a chic way rather than a kitschy one. This combo has been showing up in a lot of boutique hotel bathrooms lately, and for good reason. It’s bold but still timeless.

    Practical tip: use larger checkerboard tiles, around 12×12 inches, for a more modern look, or smaller mosaic tiles for a vintage feel.

    This works in retro, art deco, and modern eclectic bathrooms. It’s also a fun choice for powder rooms where you want something memorable. Once your flooring is set, let’s talk about how mirrors can complete the look.

    11. Curved Arch Mirror Above a Rosy Pink Vanity Tub Setup

    30 Pink Bathroom Ideas Rarely Shared Because They Instantly Expose Who Has  Taste and Who Doesn't
    Credit: Trendit

    If your pink tub is part of a combined vanity and bathing space, add a curved arch mirror above the sink area nearby. The soft curves echo the softness of the pink color and keep sharp lines from making the room feel too clinical.

    Practical tip: choose a mirror with a thin metal frame in brass or black, depending on your other hardware choices, to tie the whole room together.

    This idea suits modern, transitional, and soft minimalist bathrooms equally well. It’s also a smart pick for anyone blending a bathing nook with a getting-ready space. Last but not least, let’s talk about the boldest option on this list.

    12. Go All In With a Fully Pink Tiled Bathroom

    Millennial pink bathrooms that really make a splash
    Credit: Homes To Love

    For the brave ones out there, tile the entire bathroom, walls, floor, and all, in a single pink tone, then let the tub match or sit slightly darker for contrast. This monochromatic approach feels like stepping into a piece of art. It’s dramatic, it’s memorable, and honestly, it photographs incredibly well.

    Practical tip: use two shades of the same pink family, like blush walls with a dusty rose tub, so the room has depth instead of looking flat.

    This all-in approach fits maximalist, glam, and art-inspired bathrooms perfectly. It’s not for everyone, but if you love color, this is the ultimate way to commit to it.

    Tips for Success

    • Test paint and tile samples in your actual bathroom lighting before committing, since pink can look very different under warm versus cool bulbs.
    • Balance pink with at least one neutral surface, like white countertops or light wood, so the room doesn’t feel overwhelming.
    • Choose a pink shade based on your skin tone preference too, since it’ll reflect onto your face in the mirror.
    • Start small with accessories or paint if you’re not ready to commit to a full pink tub purchase.
    • Ventilate your bathroom well, since darker mauve or terracotta pairings can make small spaces feel stuffy without airflow.
    • Keep grout lines clean and light-colored near pink tile to avoid a muddy, dated look over time.

    Common Mistakes and How to Avoid Them

    Choosing a pink that’s too cool-toned
    : Cool pinks can look washed out and cold under bathroom lighting. Stick with warm pinks, like blush or salmon, for a cozier feel.

    Pairing pink with too many other bold colors
    : This creates visual chaos. Pick one or two supporting colors max, like black and white or brass and cream.

    Skipping texture entirely
    : An all-smooth, all-pink room feels flat and one-dimensional. Add wood, woven baskets, or textured tile to break it up.

    Using shiny chrome everywhere
    : Chrome can make pastel pink feel overly retro in a dated way. Matte finishes tend to look more current.

    Ignoring room size when choosing tub style
    : A large clawfoot tub in a tiny bathroom will feel cramped. Measure your space and choose accordingly before falling in love with a style.

    Forgetting about lighting temperature
    : Cool white bulbs can make warm pinks look strange and slightly grayish. Always test with warm white bulbs first.

    Similar Variations

    • Dusty Rose Minimalism – a stripped-down, neutral-heavy bathroom with just one muted pink accent piece.
    • Coastal Pink – pale pink paired with white shiplap, rope details, and sandy tones for a beachy feel.
    • Art Deco Pink and Gold – geometric tile patterns paired with rosy pink and polished gold fixtures.
    • Vintage Reglazed Pink – restoring an original mid-century pink tub instead of replacing it, keeping historic character.
    • Modern Mauve – deep, moody mauve tones paired with matte black and concrete for an edgy bathroom.
    • Boho Terracotta Pink – warm pink mixed with clay tones, plants, and woven textures for an earthy retreat.

    Pink bathtubs aren’t just a throwback trend anymore. They’re a real design choice that can look soft, bold, moody, or playful depending on how you style them. Whether you go for a subtle blush accent or commit fully to a monochromatic pink room, the key is balancing the color with the right materials, lighting, and textures around it. I hope this list of 12 Pink Bathtub Ideas gave you enough inspiration to finally picture what your own bathroom could look like.

  • 14 Bathroom Organization Ideas That Actually Work

    14 Bathroom Organization Ideas That Actually Work

    I’ve tested more storage hacks than I can count, and these 14 bathroom organization ideas are the ones that actually stuck around in my own home. Some looked great on Pinterest but fell apart in real life. These didn’t.

    Bathroom organization means arranging storage, fixtures, and small daily items so a small, moisture-heavy room stays functional and clutter-free. The best systems combine vertical storage, labeled containers, and zones for specific tasks like grooming or skincare.

    Stick with me and I’ll walk you through exactly what to buy, where to put it, and how to keep it looking good longer than a week.

    What Bathroom Organization Really Means

    Okay, let’s get real for a second. Bathroom organization isn’t about buying a bunch of cute baskets and hoping for the best. It’s about making a tiny room work harder than it should have to. Most bathrooms are the smallest room in the house, yet they hold makeup, medicine, towels, cleaning supplies, and hair tools all at once. Good organization means every item has a home, and that home makes sense with how you actually use the space. It’s part function, part style. When you nail both, your bathroom feels calm instead of chaotic, even first thing in the morning when you’re half asleep.

    1. Add Floating Shelves Above the Toilet

    18 Clever Over-the-Toilet Storage Ideas for Small Bathrooms
    Credit: Good Housekepping

    That awkward wall space above your toilet is prime real estate, and most people totally waste it. Floating shelves turn dead space into a display and storage combo. Stack towels, add baskets for extra toilet paper, or display a plant and some candles for a spa vibe.

    Practical tip: install shelves at slightly staggered heights so the wall feels dynamic instead of like a boring grid.

    This idea flexes easily. Go with reclaimed wood for farmhouse style, white lacquer for modern spaces, or rattan-trimmed shelves for coastal bathrooms.

    Once your walls are working for you, it’s time to look at what’s happening inside your cabinets, because that’s usually where the real chaos hides.

    2. Use Drawer Dividers for Small Essentials

    12 Bathroom Drawer Organization Ideas for Better Storage
    Credit: The Spruce

    Bathroom drawers turn into junk drawers fast. One day it’s organized, the next it’s a mess of bobby pins, half-used lotions, and mystery items. Drawer dividers fix this instantly. They create small compartments so every item has its own spot instead of sliding around.

    Buy acrylic or bamboo dividers since both resist moisture better than cardboard organizers.

    This works in literally any style bathroom because dividers are usually hidden inside the drawer. Nobody sees them, but you’ll feel the difference every single morning.

    Now that your drawers are tamed, let’s tackle the chaos that tends to build up on your counter.

    3. Create a Tray System for Countertop Items

    Organizing a bathroom countertop: bathroom counter organization | Homes and  Gardens
    Credit: Homes And Garden

    A tray is basically a boundary for your stuff. Instead of bottles and jars spreading across the whole counter, a tray keeps them contained in one neat zone. It also makes wiping down counters way faster since you just lift the tray and go.

    Pick a tray material based on your style. Marble or stone trays fit modern and traditional bathrooms. Wood or woven trays suit coastal and boho spaces.

    Tip: use two smaller trays instead of one giant tray so you can separate everyday items from occasional-use products.

    Trays handle the surface clutter, but what about everything you keep behind closed doors? That’s next.

    Storage Container Comparison

    Container TypeBest ForMoisture ResistanceAverage Price
    Acrylic binsUnder-sink storageHigh$10-$25
    Woven basketsTowels, decorLow-Medium$15-$40
    Metal binsCleaning suppliesMedium$12-$30
    Bamboo traysCountertop itemsMedium$18-$35
    Glass jarsCotton balls, swabsHigh$5-$15

    4. Install a Pull-Out Cabinet Organizer

    25 Insanely Genius Bathroom Organization Ideas That Instantly Free Up Room
    Credit: the coolist

    Bending down and digging through under-sink cabinets gets old fast. A pull-out organizer solves this by letting you slide the whole unit toward you like a drawer. You can see everything at once instead of playing bottle Tetris.

    Practical tip: measure your cabinet depth before buying so the slide-out mechanism actually fits without hitting pipes.

    This idea works great in any style since it’s mostly hidden. But if your cabinet doors are open-shelf style, choose a woven or wicker pull-out bin for a more finished look.

    Once your cabinets are sorted, your next move is figuring out where your towels actually belong.

    5. Roll and Store Towels in a Ladder Rack

    28 Practical Bathroom Towel Storage Ideas
    Credit: Better And Homes

    Folding towels flat wastes space and honestly, they never stay folded anyway. Rolling them and stacking them in a ladder rack looks intentional and saves shelf space. It also makes towels easier to grab without knocking over the whole stack.

    Choose a wood ladder rack for farmhouse or traditional bathrooms, and a black metal one for modern or industrial spaces.

    Tip: roll towels with the folded edge facing out so the display looks clean and uniform.

    Speaking of things people always struggle to store, let’s talk about hair tools next.

    6. Mount a Hair Tool Organizer Inside a Cabinet Door

    Storage Ideas for Hair Accessories, Tools, and Products
    Credit: Better And Homes

    Flat irons and curling wands are basically fire hazards when they’re tossed in a drawer while still warm. A mounted organizer on the inside of a cabinet door holds these tools upright and heat-safe, and it uses space that’s normally wasted.

    Practical tip: pick a heat-resistant canvas organizer, not plastic, since plastic can warp over time.

    This works in every bathroom style since it’s tucked away and invisible from the outside.

    Now let’s shift from tools to something smaller but just as annoying to organize: your makeup.

    7. Use a Lazy Susan for Skincare and Makeup

    Three Small Space-Friendly Lazy Susans | Apartment Therapy
    Credit: Apartment Therapy

    A lazy Susan isn’t just for kitchen spices. Spin one under your sink or on a shelf and suddenly every bottle is reachable without digging. No more forgetting you own three of the same moisturizer.

    Tip: group items by category on the turntable, like skincare on one half and makeup on the other, so grabbing things stays fast.

    Clear acrylic turntables fit modern bathrooms, while wood ones feel more traditional or farmhouse.

    Once your products are spinning smoothly, let’s talk about the wall space you’re probably still ignoring.

    8. Add a Vertical Ladder Shelf for Extra Storage

    Bathroom Ladder Shelf Storage: The Ultimate Solution for Small and Large  Bathrooms | ACE DECOR – ACE DECOR Bathroom
    Credit: Ace Decor

    If your bathroom is tight on floor space, a ladder shelf leans against the wall and barely takes up any room. It’s perfect for towels, baskets, or plants, and it adds height to a room that often feels cramped.

    Practical tip: anchor it to the wall if you have kids or pets, since these shelves can tip if bumped.

    Ladder shelves come in almost every finish now, from black metal for industrial style to whitewashed wood for coastal looks.

    With your walls working overtime, it’s time to think about smaller categories, like all those hotel toiletries you never throw away.

    9. Sort Travel and Sample Sizes in Clear Bins

    How to organize a bathroom closet | Real Homes
    Credit: Real Homes

    We all have that one drawer full of hotel shampoos and old sample packets. Clear bins let you actually see what you have so you use it instead of hoarding it forever.

    Tip: label bins by category, like “travel,” “samples,” and “backups,” so restocking takes seconds.

    This system fits literally any decor style since the bins are usually hidden in a drawer or cabinet.

    Speaking of hidden storage, let’s talk about a spot most people completely forget about.

    10. Utilize the Back of the Door

    Store More with These Behind-the-Door Storage Ideas
    Credit: Better And Homes

    The back of your bathroom door is wasted space in most homes. Add an over-the-door organizer or hooks and suddenly you’ve got a spot for robes, towels, or even cleaning supplies.

    Practical tip: choose an organizer with clear pockets if you’re storing small items, so you can see what’s inside without unzipping anything.

    Modern homes look great with sleek metal hooks, while traditional or farmhouse bathrooms suit brass or oil-rubbed bronze finishes better.

    Now let’s move to something a lot of people overlook until it becomes a slippery mess: shower storage.

    11. Install a Corner Caddy in the Shower

    Why I Love the Amazon Purdaz Corner Shower Caddy: Tried & Tested |  Apartment Therapy
    Credit: Apartment Therapy

    Bottles lined up on the tub edge are an accident waiting to happen. A corner caddy keeps shampoo, conditioner, and soap organized without taking up floor or ledge space. Look for one with drainage holes so it doesn’t turn into a soap scum trap.

    Tip: choose a caddy with adjustable shelves so you can fit taller bottles without cramming everything sideways.

    Stainless steel caddies fit modern and industrial bathrooms, while a teak wood caddy suits coastal or spa-style spaces.

    Once your shower is sorted, let’s zoom out and think about grouping items by how you actually use them.

    12. Create Zones Based on Daily Routines

    How To Organize A Bathroom With Zones
    Credit: Practically

    Instead of organizing by item type, try organizing by routine. Keep all your morning items, like toothbrush and face wash, in one spot. Keep nighttime items, like retinol and eye cream, in another. This cuts down on decision fatigue when you’re half awake.

    Practical tip: use small labeled trays for each zone so everything stays grouped even after you use it.

    This system works no matter your style since it’s about function, not looks.

    Let’s take this a step further and talk about matching containers for a cleaner overall look.

    13. Match Containers for a Cohesive Look

    20 Bathroom Organization Ideas
    Credit: Martha Stewart

    Random bottles and mismatched boxes make a bathroom look cluttered even when it’s technically organized. Transfer soap, cotton balls, and bath salts into matching containers for an instant upgrade.

    Tip: stick to two or three materials max, like glass and wood, so it doesn’t feel overdone.

    Glass apothecary jars fit traditional and farmhouse spaces, while matte black dispensers suit modern bathrooms.

    Budget Tiers for Bathroom Organization

    Budget LevelWhat You GetEstimated Cost
    LowDrawer dividers, clear bins, labels$20-$50
    MidFloating shelves, ladder rack, caddies$75-$150
    HighCustom cabinet inserts, matching container sets$200-$400+

    Last but not least, let’s talk about a habit that keeps everything working long term.

    14. Do a Monthly Product Purge

    Tips For An Organized Bathroom
    Credit: One Good Things

    Organization systems fail when you never remove anything. Once a month, go through your products and toss anything expired, empty, or unused. This keeps your bins and shelves from overflowing again within weeks.

    Practical tip: set a phone reminder on the first of every month so this becomes automatic instead of forgotten.

    This habit matters in every style of bathroom since clutter looks messy no matter how nice your containers are.

    Tips for Success

    • Measure your space before buying any organizers, since bathroom cabinets vary a lot in depth and width
    • Choose moisture-resistant materials like acrylic, glass, or sealed wood to avoid warping or mold
    • Label everything, even if it seems obvious, since labels save time for everyone in the house
    • Group items by frequency of use, keeping daily items at eye level and rare items up high or low
    • Stick to a simple color palette for containers so the space feels calm, not busy
    • Reassess your system every few months since your products and routines will change over time

    Common Mistakes and How to Avoid Them

    Buying organizers before decluttering
    : Sort and toss expired or unused items first, then buy storage based on what’s left.

    Ignoring vertical space
    : Use wall shelves, ladder racks, and over-door hooks to free up counters and floors.

    Choosing style over function
    : Pick containers that fit your actual routine, not just what looks nice online.

    Overcrowding drawers and bins
    : Leave a little breathing room so items are easy to grab and put back.

    Skipping regular maintenance
    : Set a monthly reminder to purge old products and restock organizers.

    Using non-moisture-resistant materials
    : Stick to acrylic, glass, sealed wood, or metal to avoid warping and mildew.

    Similar Variations

    • Spa-Style Bathroom Organization: Focuses on calming colors, hidden storage, and minimal countertop clutter
    • Farmhouse Bathroom Storage: Uses wood ladder shelves, woven baskets, and vintage-style containers
    • Small Bathroom Organization: Prioritizes vertical storage and multi-use furniture for tight spaces
    • Kids Bathroom Organization: Uses low shelves, labeled bins, and durable plastic containers for easy access
    • Minimalist Bathroom Storage: Sticks to a few matching containers and hides most items behind closed doors
    • Coastal Bathroom Organization: Combines woven textures, light wood tones, and beachy accessories with practical storage

    Getting your bathroom organized doesn’t take a total renovation. It just takes a few smart swaps and a little consistency. Once you try even three or four of these ideas, you’ll notice mornings feel less rushed and cleanup feels way faster. That’s really the whole point.

    I hope these 14 bathroom organization ideas give you a clear starting point, whether you’re working with a tiny powder room or a big master bath that’s just gotten out of hand.

  • 11 Kitchen Dining Room Combo Ideas That Actually Work in Real Homes

    11 Kitchen Dining Room Combo Ideas That Actually Work in Real Homes

    If you’ve been searching for the smartest way to plan an 11 Kitchen Dining Room Combo, I’ve got you covered here with real ideas that work in actual homes, not just showrooms. I’ve spent way too many hours studying floor plans and pinning layouts, so I’m sharing what actually holds up. By the end of this, you’ll know exactly how to make your space work harder without feeling cramped.

    A kitchen dining room combo is a layout where your cooking space and eating space share one open area instead of being closed off into separate rooms. This setup works by using smart furniture placement, consistent flooring, and matching color schemes to make the two zones feel connected but still distinct.

    Stick around, because I’m about to show you 11 layouts that solve the “where does the table even go” problem for good.

    What Makes a Kitchen Dining Combo Actually Work

    Okay, so here’s the thing about combo spaces. They sound easy on paper. Just knock down a wall, right? Wrong. The magic is in how you separate the zones without actually separating them. You want your eyes to know “this is where I cook” and “this is where I eat” without a single door or wall telling you that.

    I think the best combos use rugs, lighting, or even just a change in chair style to draw invisible lines. It’s less about square footage and more about intention. Small kitchens can pull this off just as well as big open-concept lofts, honestly sometimes better because there’s less wasted space to worry about.

    1. Use a Kitchen Island as the Dividing Line

    How to Make Your Kitchen Island Your Favorite Dining Spot
    Credit: Houzz

    An island is probably the easiest way to split a kitchen dining room combo without adding a single wall. It gives you extra counter space, storage, and a visual break between cooking and eating zones. Pick an island with a different finish than your cabinets, like a butcher block top on white cabinets, so it reads as its own feature.

    Practical tip: leave at least 36 inches of walking space around the island so people can pass through during meal prep without bumping elbows.

    This works in almost any style. Farmhouse kitchens love a wood island with a marble top, while modern spaces go for waterfall-edge quartz. Once your island is set, you can start thinking about what goes on the dining side of that line.

    2. Anchor the Dining Area with a Statement Light Fixture

    How To Layer Lighting In A Dining Room For Ambience And Function
    Credit: Edwards

    Lighting does more work than people give it credit for. A pendant light or small chandelier hung right over the dining table tells everyone “this is where you eat” the second they walk in. It also adds personality without taking up floor space, which matters a lot in combo layouts where every square foot counts.

    Go for a fixture that hangs about 30 to 36 inches above the table for the right visual weight. If your ceilings are low, a flush mount with a bold shape still gets the job done.

    Traditional homes look great with brass or wrought iron fixtures, while coastal spaces do well with woven rattan pendants. Once the light is set, the flooring underneath becomes the next thing to think about.

    3. Define Zones with a Rug Under the Dining Table

    Should You Put a Rug Under a Dining Room Table? 7 Rules to Follow
    Credit: TheSpruce

    A rug under your dining table is one of the cheapest ways to separate the eating zone from the kitchen without touching a hammer. It softens the space, adds color, and gives your feet a break from hard flooring.

    Make sure the rug is big enough that chairs stay on it even when pulled out. As a rule, add at least 24 inches of rug space beyond each side of the table.

    Boho and traditional homes can go bold with pattern, while modern and minimalist kitchens do better with a solid neutral rug. Once your rug is down, the table and chairs you pick will either match or clash with that foundation, so let’s talk about that next.

    4. Choose a Table Shape That Matches Your Traffic Flow

    The Best Dining Table Shapes | Castlery US
    Credit: Castlery

    Not every table shape works in every combo space. Round tables are great for tight corners since there are no sharp edges to bump into. Rectangular tables fit long, narrow rooms better and usually seat more people. Square tables work well in smaller combos where you want a cozy, balanced look.

    Actionable tip: measure your walking path first. You need at least 36 inches of clearance around the table for comfortable movement, more if it’s a high-traffic area near the kitchen entrance.

    Farmhouse and traditional homes often go long and rectangular, while modern lofts play with round pedestal tables for a cleaner look. With your table shape locked in, seating comes next.

    Table Shape Guide by Room Size

    Room SizeBest Table ShapeSeats ComfortablyMinimum Clearance Needed
    Under 100 sq ftRound or square430 inches
    100 to 150 sq ftRectangular or round4 to 636 inches
    150 to 250 sq ftRectangular6 to 842 inches
    Over 250 sq ftRectangular or extendable8 plus48 inches

    5. Mix Seating Styles for a Layered Look

    30 Kitchen Dining Room Combo Ideas That'll Make Guests Ask How You Made It  Flow So Well
    Credit: TheCoolist

    I used to think all your dining chairs had to match perfectly. Turns out, mixing it up actually makes a combo space feel more thought out. Try a bench on one side of the table and upholstered chairs on the other. Or keep four matching chairs and add two mismatched ones at the ends for contrast.

    Practical tip: stick to one shared color or material so the mix still feels cohesive instead of random.

    This trick works especially well in eclectic and farmhouse styles, where a little imperfection feels intentional. Modern spaces can mix seating too, just keep the shapes clean and simple. Once seating is sorted, wall color becomes your next big decision.

    6. Use One Wall Color to Unify Both Zones

    14 dining room wall ideas to die for | Real Homes
    Credit: TheHomes

    Painting your kitchen and dining area the same color, or at least close variations, keeps the whole combo feeling like one room instead of two rooms awkwardly stuck together. This matters a lot in open floor plans where there’s no wall to separate the spaces anyway.

    I’d suggest picking a warm neutral like greige or soft white if you want the space to feel calm and put together. Bold colors work too, just carry them through consistently.

    Coastal homes love soft blues and whites, while traditional spaces lean toward warm creams and taupes. Once your walls are settled, the ceiling is the next surface people forget about.

    7. Add a Ceiling Detail to Separate Zones Visually

    Top 10 Ways to Separate Living Room and Kitchen (Glass, Wood & More)
    Credit: Andor Willow

    Ceilings are the most underused design tool in combo spaces. A change in ceiling treatment, like exposed beams over the dining area or a different paint color, creates a subtle line between the kitchen and dining zones without blocking sightlines.

    Try painting the dining area ceiling a shade darker than the kitchen ceiling for a soft visual break. It’s a small move but it changes how the whole room reads.

    Farmhouse and traditional homes look amazing with wood beams, while modern spaces do well with recessed lighting in a grid pattern over the dining zone only. Now let’s talk about what goes on the floor since flooring choices can make or break the whole combo.

    8. Keep Flooring Consistent Across Both Zones

    how to mix & match different flooring types in an open-plan home | tiletoria
    Credit: tiletoria

    This one seems obvious but a lot of people mess it up. Using the same flooring material in the kitchen and dining area makes the whole space feel bigger and more connected. Switching materials mid-room, like tile in the kitchen and hardwood in the dining area, chops up the space visually.

    If you do want a subtle change, stick to the same color family but a different finish, like matte tile in the kitchen and a similar toned wood-look tile in the dining zone.

    Coastal and farmhouse styles often go with light wood or wood-look tile throughout, while modern spaces prefer polished concrete or large-format tile. With flooring handled, let’s move to storage, because combo spaces need smart storage more than most rooms.

    9. Build In Storage That Serves Both Areas

    Dining Room Storage Cabinets | Kountry Kraft
    Credit: Kountry kraft

    Combo spaces need double-duty storage since you’re cramming two rooms’ worth of stuff into one shared footprint. A buffet or sideboard on the dining side can hold table linens and serving dishes while also displaying decor. On the kitchen side, open shelving keeps everyday dishes within reach without cluttering counters.

    Practical tip: measure your buffet depth before buying. Anything over 18 inches deep can eat up walking space fast in a tight combo room.

    Traditional homes love a wood buffet with brass hardware, while modern spaces go for slim console-style storage. Once storage is sorted, it’s time to think about how color palettes tie the whole room together.

    Budget Tiers for Combo Room Furnishing

    Budget TierTable and ChairsRugLighting FixtureTotal Estimated Cost
    Budget$300 to $600$100 to $200$50 to $100$450 to $900
    Mid-range$800 to $1,500$250 to $450$150 to $300$1,200 to $2,250
    High-end$2,000 to $4,000$500 to $900$400 to $800$2,900 to $5,700

    10. Pick a Color Palette That Flows Between Zones

    Choosing Colour for an Open Plan Kitchen
    Credit: A Casa

    Your color palette should feel like one continuous idea, not two separate rooms trying to compete. I like picking three colors max: a neutral base, a secondary color, and one accent. Use the neutral on walls, the secondary on cabinets or furniture, and the accent in smaller doses like pillows or artwork.

    Actionable tip: test paint swatches in both the kitchen and dining zone at different times of day since lighting shifts the color more than you’d expect.

    Coastal combos often use white, soft blue, and driftwood tones. Traditional spaces go cream, sage green, and brass accents. Once your palette is locked, it’s easier to pick artwork and accessories that actually fit.

    11. Layer in Personal Touches Without Cluttering the Space

    30 Kitchen Dining Room Combo Ideas That'll Make Guests Ask How You Made It  Flow So Well
    Credit: TheCoolist

    The last step is making the space feel like yours. Add a piece of art on the dining wall, a plant on the counter, or a stack of cookbooks on open shelving. These small touches keep the room from feeling like a showroom.

    Practical tip: pick three to five decor pieces max for the dining area so the space stays functional, not fussy.

    Bohemian homes can layer in more texture and pattern, while minimalist spaces should stick to one or two intentional pieces. And with that, you’ve got a full plan for building a combo space that actually feels like home.

    Tips for Success

    • Measure your space before buying furniture. A table that looks great online might block your kitchen walkway in real life.
    • Keep at least one sightline open between the cooking and eating zones so the space still feels open, not chopped up.
    • Choose durable fabrics for dining chairs since food and drink spills happen more often in combo rooms.
    • Use dimmer switches on your dining light so you can shift the mood from bright cooking light to soft dinner light.
    • Don’t skip window treatments. Simple curtains or blinds tie the two zones together visually.
    • Test your furniture layout with painter’s tape on the floor before committing to a final arrangement.
    • Leave room to grow. Pick a table that can extend for guests instead of buying the biggest one you can fit right now.

    Common Mistakes and How to Avoid Them

    Buying a table too big for the space
    : Measure clearance paths first, aim for at least 36 inches around the table on all sides before purchasing.

    Ignoring lighting zones
    : Install separate light fixtures or dimmers for the kitchen and dining areas so you can control each mood independently.

    Matching every single element
    : Mixing textures and slight color variations makes the room feel designed, not sterile.

    Skipping a rug because “it’s a kitchen”
    : A washable, low-pile rug works fine near dining tables and adds warmth without much maintenance risk.

    Overcrowding open shelving
    : Limit shelving to everyday items and a few decor pieces, keep the rest in closed storage.

    Forgetting ventilation near the dining zone
    : Make sure range hoods are strong enough that cooking smells don’t linger over your dinner table.

    Similar Variations

    • Open-Concept Great Room Combo – kitchen, dining, and living room all share one large connected space.
    • Galley Kitchen Dining Combo – a narrow kitchen layout with a small dining nook tucked at one end.
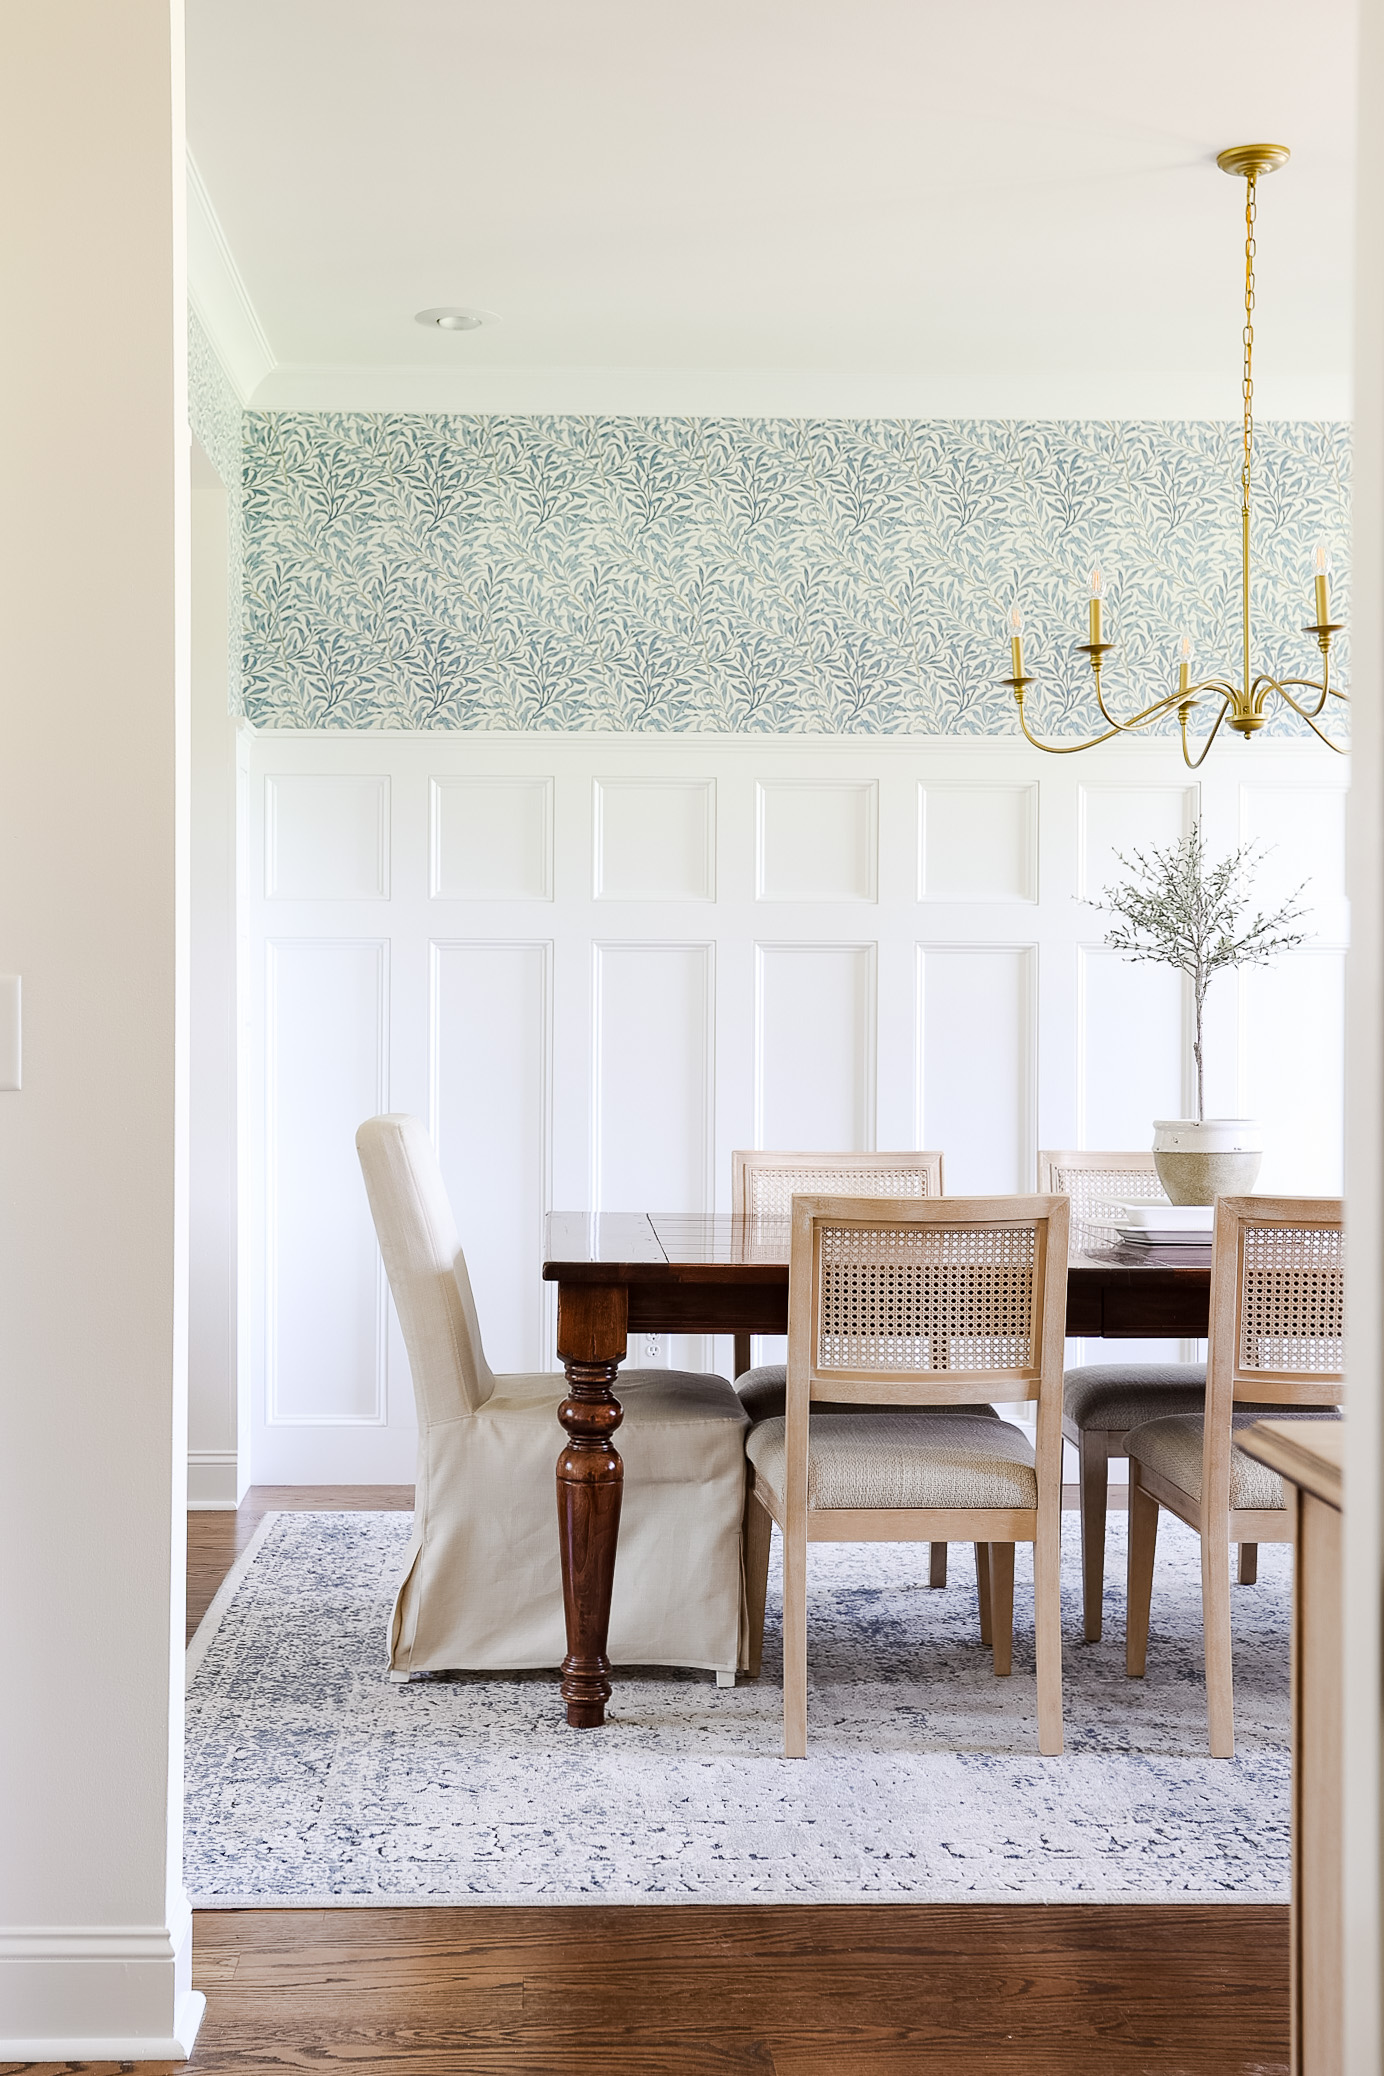
    • L-Shaped Kitchen Dining Combo – cabinets wrap around a corner, leaving an open pocket for the dining table.
    • Farmhouse Kitchen Dining Combo – wood tones, shiplap walls, and a long communal table define this variation.
    • Coastal Kitchen Dining Combo – light woods, white cabinets, and blue accents give this style a beachy feel.
    • Loft-Style Kitchen Dining Combo – exposed brick, industrial lighting, and minimal walls define this urban variation.

    Building a great combo space really comes down to smart zoning, consistent colors, and furniture that fits your actual traffic flow, not just what looks good in a photo. Once you nail those basics, the rest is just personal style layered on top. I hope this rundown gives you the confidence to plan your own 11 Kitchen Dining Room Combo without second-guessing every decision along the way.

  • 11 Rustic Farmhouse Dining Room Ideas That Will Make Your Space Feel Like Home

    11 Rustic Farmhouse Dining Room Ideas That Will Make Your Space Feel Like Home

    If you’ve been scrolling through a hundred different sites trying to figure out how to nail that rustic farmhouse dining room look, I get it. I’ve done the same thing, and honestly, most of those lists just repeat the same tired tips. This article is different. I’m going to walk you through real, specific ideas you can actually use.

    A rustic farmhouse dining room combines natural wood furniture, neutral color palettes, vintage accents, and cozy textiles to create a warm, inviting space for meals and gatherings. The style draws from old barns, country kitchens, and simple craftsmanship.

    Stick around, because I’m about to show you eleven ways to bring that cozy, lived-in charm into your own dining space, plus some mistakes to dodge along the way.

    What Makes a Dining Room “Rustic Farmhouse” Anyway?

    Okay, so before we jump into the list, let’s chat about what this style actually means. Rustic farmhouse is all about looking like your furniture has a story. Think reclaimed wood tables, chairs that don’t all match, and metal light fixtures that look like they came from an old barn. It’s not fancy. It’s not shiny. It’s warm, textured, and a little imperfect on purpose.

    I love this style because it feels lived in from day one. You don’t need brand new furniture that looks pristine. You want pieces with character, dents, and grain patterns that show real wood. It’s cozy without trying too hard, and that’s exactly the point.

    1. Choose a Chunky Reclaimed Wood Table

    Live Edge Dining Table Ideas for Every Home Style (2026)
    Credit: AshDeco

    The dining table is the heart of this whole look. Go for a thick, solid wood table with visible grain and maybe even a few knots or cracks. Reclaimed barn wood is perfect because it already has that weathered charm built in.

    Practical tip: look for tables with a matte or low-sheen finish instead of glossy. Glossy wood reads more traditional or modern, not rustic.

    This idea works across styles too. In a modern farmhouse space, pair the table with sleek black metal legs. In a more traditional home, stick with an all-wood pedestal base.

    Once you’ve got your table sorted, the chairs around it matter just as much, so let’s talk seating next.

    2. Mix and Match Your Dining Chairs

    Dining Table With Mismatched Chairs: A Guide | Grain & Frame
    Credit: Grain

    Here’s a secret: you don’t need matching chairs. Rustic farmhouse dining rooms often use a mix of wooden chairs, maybe a bench on one side, and even a couple of upholstered seats at the ends. This mismatched look actually makes the room feel more collected over time, not staged.

    Try pairing ladder-back wood chairs with a simple bench along one side of the table. Add a cushion to the bench for comfort.

    Practical tip: keep the wood tones similar even if the shapes differ. That way things still feel cohesive.

    Coastal farmhouse spaces might swap in whitewashed chairs, while modern farmhouse leans toward black metal seats mixed with wood.

    Now that your seating is sorted, let’s bring in some color.

    3. Stick to a Neutral, Earthy Color Palette

    30 Farmhouse Kitchen Ideas for a Rustic yet Refined Look
    Credit: Elle Decor

    Rustic farmhouse rooms lean heavy on whites, creams, tans, and soft grays. These colors let the natural wood and textures do the talking. Walls in a warm white or soft greige make the room feel open and calm.

    Add small pops of color through pillows, table runners, or artwork, but keep the base palette neutral.

    Color Palette Options for Rustic Farmhouse Dining Rooms

    Palette NameWall ColorAccent ColorWood Tone
    Warm CreamAntique WhiteTerracottaHoney Oak
    Soft GrayDove GrayNavy BlueWeathered Gray
    Classic WhiteChalk WhiteSage GreenWalnut Brown
    Earthy TanWarm BeigeRust OrangeReclaimed Barn Wood

    Practical tip: paint one accent wall in a deeper tone like clay or forest green if you want a little drama without overwhelming the space.

    This palette adapts easily. Farmhouse coastal style just adds more blue and white, while farmhouse traditional leans into deeper browns and burgundy accents.

    With your colors picked, let’s talk about lighting because that changes everything.

    4. Hang a Wrought Iron or Wood Bead Chandelier

    50 Best Modern Farmhouse Chandeliers (2024) - LightLady Studio
    Credit: LightLadyStudio

    Lighting sets the whole mood in a dining room. For rustic farmhouse, skip the crystal chandeliers. Instead, go for wrought iron fixtures, wood bead chandeliers, or lantern-style pendants with an aged bronze or black finish.

    Practical tip: hang your fixture about 30 to 34 inches above the table for the right proportion.

    These fixtures look great with warm bulb tones, around 2700K, which gives off that soft, golden glow instead of harsh white light.

    Modern farmhouse spaces might choose a simpler black metal fixture with clean lines, while traditional farmhouse leans into more ornate wrought iron designs with scrollwork.

    Once your lighting is set, it’s time to think about what goes on the walls.

    5. Add a Statement Shiplap or Wood Plank Wall

    Affordable Shiplap Dining Room Ideas: Tips for Stylish Spaces
    Credit: Fancy House Design

    One accent wall covered in shiplap or wood planks instantly makes a room feel farmhouse. You can use real wood boards or budget friendly MDF shiplap panels from a hardware store.

    Paint it white for that classic look, or leave it natural wood for more warmth.

    Practical tip: install shiplap horizontally for a classic feel, or try vertical planks if you want the ceiling to feel taller.

    This idea works in almost any style. Coastal homes often whitewash the wood, while industrial farmhouse spaces might leave the wood raw and unfinished.

    Now let’s dress up your table with the right centerpiece.

    6. Style Your Table with a Wood Slab Centerpiece

    Ashdeco Live Edge Dining Table – Handmade Solid Wood Rustic Farmhouse
    Credit: AshDeco

    Skip the fancy vase and go for something simple. A wood slab runner down the middle of the table with a few mason jars, dried wheat stems, or candles creates that effortless farmhouse feel.

    Practical tip: keep your centerpiece low, under 12 inches tall, so people can still see each other across the table during meals.

    Add seasonal touches like small pumpkins in fall or greenery in spring to keep things fresh without buying new decor every season.

    This works beautifully across styles too. Modern farmhouse might use a concrete or metal tray instead of wood for contrast.

    Next, let’s talk about what’s underneath your feet.

    7. Layer a Jute or Wool Area Rug

    Top 5 Jute Rugs for Layering | Designer Buying Guide – Atlanta Designer Rugs
    Credit: Atlanta Designer Rugs

    A natural fiber rug like jute or wool adds texture and warmth under your dining table. These materials feel earthy and durable, perfect for catching crumbs and spills.

    Practical tip: your rug should extend at least 24 inches beyond the table edge on all sides so chairs don’t slide off when pulled out.

    Rug Size Guide by Table Shape

    Table ShapeTable SizeRecommended Rug Size
    Rectangular60″ x 36″8′ x 10′
    Rectangular72″ x 40″9′ x 12′
    Round48″ diameter8′ x 8′ round
    Square42″ x 42″7′ x 7′ square

    A jute rug fits coastal and bohemian farmhouse spaces well too, while a darker wool rug leans more traditional.

    With your floor covered, let’s move up to window treatments.

    8. Dress Windows with Simple Linen Curtains

    Farmhouse Window Treatments I Ideas for Modern & Rustic
    Credit: Spiffy Spools

    Skip heavy drapes. Rustic farmhouse dining rooms usually feature light, airy linen curtains in white, cream, or soft gray. They let natural light pour in while still adding softness to the room.

    Practical tip: hang curtain rods about four to six inches above the window frame to make windows look taller and the ceiling feel higher.

    Avoid patterns here. Solid linen keeps the focus on texture rather than busy prints.

    For a coastal farmhouse twist, add a subtle blue stripe. For a more traditional farmhouse feel, choose curtains with a slight texture like waffle weave.

    Now let’s talk storage, because every dining room needs a spot for dishes and linens.

    9. Bring in a Vintage Farmhouse Hutch or Sideboard

    Vintage Farmhouse Hutch Styling Tips: Classic White Decor Ideas You'll Love
    Credit: Dabbling

    A weathered wood hutch or sideboard gives you storage and serious character at the same time. Look for pieces with distressed paint, visible wood grain, or aged brass hardware.

    Practical tip: if you can’t find an authentic vintage piece, distress a new one yourself with sandpaper and a dry brush technique using white or cream paint.

    Style the top with stacked plates, a few books, and a small plant for that collected-over-years look.

    This piece adapts well too. Paint it a soft sage or navy for a more traditional feel, or keep it raw wood for a modern farmhouse vibe.

    Once your storage is sorted, let’s add some softness with textiles.

    10. Add Texture with Woven Placemats and Table Runners

    Rustic Dining Table with Natural Placemats and Table Runner | Foter
    Credit: Foter

    Instead of shiny placemats, go for woven textures like rattan, jute, or linen. These add that handmade, natural feel that defines rustic farmhouse style.

    Practical tip: mix textures instead of matching everything exactly. Try a linen runner with rattan placemats underneath simple white dishes.

    Layering textures like this makes the table feel styled without looking overly decorated or fussy.

    Modern farmhouse spaces might swap in a solid canvas runner, while traditional spaces lean toward more textured, woven table linens.

    Finally, let’s finish the room with the right wall decor.

    11. Hang Vintage Signs, Mirrors, or Botanical Prints

    Large Pictures for Dining Room Walls: Transform Your Dining Space with
    Credit: Rossetti Arts

    Wall decor ties the whole room together. Rustic farmhouse spaces often feature vintage metal signs, distressed wood frames, botanical prints, or a large round mirror with a black metal frame.

    Practical tip: hang art at eye level, roughly 57 to 60 inches from the floor to the center of the piece, for the most natural look.

    Group a few smaller pieces together in a gallery wall format if you have an empty wall, mixing frame styles and sizes for that collected-over-time feel.

    Coastal farmhouse spaces might add botanical prints of grasses or shells, while traditional farmhouse leans into family portraits in simple wood frames.

    Tips for Success

    • Start with your table and build everything else around its wood tone and shape.
    • Don’t buy everything new. Thrift stores and estate sales often have the best rustic farmhouse pieces for less money.
    • Keep at least 70 percent of your color palette neutral so accent colors actually stand out.
    • Measure your space before buying a rug or table so scale feels right, not cramped or too small.
    • Layer textures on purpose. Wood, wool, linen, and metal should all show up somewhere in the room.
    • Add greenery, even fake, to soften all the hard wood surfaces and bring life into the space.
    • Change small details seasonally, like table runners or centerpieces, to keep the room feeling fresh without a full redesign.

    Common Mistakes and How to Avoid Them

    Buying furniture that’s too polished
    : Rustic farmhouse depends on texture and imperfection. Choose pieces with visible grain, distressing, or matte finishes instead of glossy, perfect surfaces.

    Overloading the room with too many accents
    : Pick a few strong focal points, like a chandelier and a statement wall, rather than covering every surface with decor.

    Ignoring lighting temperature
    : Cool white bulbs clash with warm wood tones. Stick to warm bulbs around 2700K for a cozy glow that matches the style.

    Choosing a rug that’s too small
    : A rug that doesn’t extend past the chairs looks awkward and can bunch up when chairs get pulled out. Always size up.

    Skipping texture variety
    : A room full of only wood can feel flat. Mix in woven baskets, metal fixtures, and soft textiles for balance.

    Matching every piece of furniture perfectly
    : Perfectly matched furniture reads more like a showroom than a home. Let pieces vary slightly in tone and shape.

    Similar Variations

    • Modern Farmhouse Dining Room: Cleaner lines, black metal accents, and a slightly more minimal approach to decor.
    • Coastal Farmhouse Dining Room: Lighter wood tones, blue and white palettes, and beachy textures like rope or rattan.
    • Industrial Farmhouse Dining Room: Raw metal fixtures, exposed brick or concrete, paired with reclaimed wood furniture.
    • Traditional Farmhouse Dining Room: Richer wood tones, more ornate details, and classic patterns like plaid or gingham.
    • Scandinavian Farmhouse Dining Room: Lighter woods, simple shapes, and a heavier focus on white and pale gray tones.
    • Southern Farmhouse Dining Room: Warmer color palettes, vintage floral touches, and cozy, layered textiles.

    Bringing rustic charm into your dining space doesn’t require a total renovation or a huge budget. Small changes like swapping light fixtures, layering the right rug, or mixing your chairs can transform the whole feel of the room. Start with one or two ideas from this list, live with them for a bit, and build from there. That’s really how the best 11 Rustic Farmhouse Dining Room spaces come together over time, one thoughtful piece at a time.

  • 12 Modern Farmhouse Dining Room Ideas That Actually Feel Like Home

    12 Modern Farmhouse Dining Room Ideas That Actually Feel Like Home

    If you’ve been scrolling through hundreds of design boards trying to find real, workable 12 Modern Farmhouse Dining Room ideas, I think you can stop now. I’ve pulled together the most practical, tested-and-true options out there, so you don’t have to sift through fluff to find what actually works in a real house.

    Modern farmhouse dining room design blends rustic wood elements, neutral color palettes, and clean-lined furniture to create a space that feels both cozy and current. The style typically pairs a farmhouse table with mixed seating, black metal accents, and soft textiles for warmth without clutter.

    Stick around, because I’m about to walk you through twelve ideas that go way beyond “just add a shiplap wall.” Some of these might surprise you.

    What Makes a Dining Room “Modern Farmhouse” Anyway?

    Okay, let’s back up for a second. Modern farmhouse isn’t just white walls and barn doors. It’s really about balance. You take something old and worn, like a reclaimed wood table, and you pair it with something sleek, like black metal chairs or a simple pendant light. That contrast is the whole point.

    I like to think of it as your grandma’s farmhouse got a makeover from a minimalist. Warm but not cluttered. Rustic but not messy. It’s comfort food in furniture form, honestly. And the best part? It works in almost any size room, from a tiny apartment nook to a big open-concept space.

    1. Anchor the Room With a Reclaimed Wood Table

    35 Unique Modern Farmhouse Dining Room Ideas for Rustic Charm – CharmyDecor
    Credit: CharmyDecor

    Your dining table is the star of the show, so start there. A reclaimed or distressed wood table brings instant farmhouse character without trying too hard. Look for tables with visible wood grain, knots, or a slightly uneven finish. That imperfection is the charm.

    Pair it with a neutral rug underneath to ground the space. I’d say go for a table with thick, chunky legs. It reads more farmhouse than a table with thin, tapered legs.

    Practical tip: If you can’t find a real reclaimed piece, look for “farmhouse finish” tables at furniture stores. They mimic the worn look without the higher price tag.

    This idea flexes well too. In a coastal home, pick a lighter, whitewashed wood. In a traditional space, go darker and more polished. Once your table is set, the next move is figuring out what goes around it.

    2. Mix Chair Styles Instead of Matching Everything

    Dining Table With Mismatched Chairs: A Guide | Grain & Frame
    Credit: Grain And Frame

    Here’s a secret: matching chair sets can actually make a room feel stiff. Modern farmhouse loves a good mismatch. Try pairing wood chairs on one side with upholstered or metal chairs on the other. Or add a bench along one edge of the table.

    This mix creates visual interest and keeps the room from feeling like a showroom. It also solves a practical problem. Benches let you squeeze in extra guests without buying more chairs.

    Actionable tip: Keep one element consistent, like the wood tone or the color black, so the mismatch still feels intentional instead of random.

    For a more traditional twist, use wingback chairs at the head of the table. For modern spaces, stick with sleek metal frames. Once your seating feels balanced, it’s time to think about what hangs above it.

    3. Hang a Statement Light Fixture

    Modern Dining Room Lighting with a Rustic Farm Table | Most Lovely Things
    Credit: Most Lovely Things

    Lighting sets the mood, and in a modern farmhouse dining room, the fixture usually does double duty as decor. Think black metal chandeliers, wood bead pendants, or lantern-style lights with clear glass. These pieces feel handmade and warm, but still current.

    Size matters here. A fixture that’s too small will look lost over a big table. A good rule of thumb: the fixture should be about one-third the width of your table.

    Quick tip: Hang the light 30 to 36 inches above the table surface for the best proportion and lighting spread.

    If you’re going coastal, swap metal for woven rattan pendants. If you want something more industrial, go with exposed bulbs and black iron. Lighting really is the jewelry of the room, and once it’s in place, the walls behind it need some attention too.

    4. Add Shiplap or Board and Batten (But Just One Wall)

    Board and Batten - Amelia Lawrence Style
    Credit: Amelia

    I know, I know, shiplap gets a lot of eye rolls these days. But used sparingly, it still works. The trick is committing to just one accent wall instead of covering the whole room. Board and batten is another great option if you want more texture without going full farmhouse cliché.

    Paint it white or a soft warm gray to keep things airy. This wall becomes the backdrop for artwork, a mirror, or open shelving.

    Practical tip: Use MDF board and batten kits from home improvement stores. They install fast and cost way less than real wood paneling.

    In a more modern home, skip the wall texture and go with a smooth, painted accent color instead. Once your walls are set, let’s talk about what covers your windows.

    5. Layer Simple, Natural Fabric Curtains

    Farmhouse Window Treatments I Ideas for Modern & Rustic
    Credit: Spiffy

    Curtains often get overlooked, but they really pull a farmhouse dining room together. Go for linen or cotton in soft neutrals like cream, oatmeal, or light gray. Avoid heavy patterns. This style thrives on texture, not print.

    Hang your curtain rods high and wide. This makes windows look bigger and ceilings feel taller. It’s a small trick that makes a big visual difference.

    Actionable tip: Choose curtains that just brush the floor or puddle slightly. Too short makes the whole room look unfinished.

    For a coastal farmhouse feel, add sheer white curtains that let in tons of light. For a moodier traditional look, go with a heavier fabric in deeper tones. With your windows dressed, let’s move to something you can actually touch and feel every day: table textiles.

    Fabric and Material Guide for Farmhouse Dining Rooms

    ElementBest MaterialsColors to TryStyle Pairing
    CurtainsLinen, cottonCream, oatmeal, light grayCoastal, traditional
    Table RunnerWoven cotton, juteNatural tan, whiteModern, rustic
    Chair CushionsPerformance fabric, leatherCharcoal, camel, creamModern, industrial
    RugWool, jute blendBeige, ivory, soft grayAll styles
    NapkinsLinenWhite, sage, dusty blueTraditional, coastal

    6. Bring in a Woven Rug for Warmth

    24 Dining Room Rug Ideas
    Credit: Better Homes

    A dining room can feel cold fast, especially with wood floors and a wood table. A woven jute or wool rug softens things up and adds texture underfoot. Stick to neutral tones so it doesn’t compete with your table or chairs.

    Make sure your rug is big enough. As a rule, it should extend at least 24 inches beyond the table edge on all sides so chairs don’t slide off when pulled out.

    Practical tip: Choose a low-pile rug for dining rooms. High-pile rugs trap crumbs and make chairs harder to scoot in and out.

    Coastal homes do well with a light, sisal-style rug. Traditional spaces can handle a patterned wool rug instead. Once your floor feels grounded, it’s time to think vertical with some open shelving.

    7. Add Open Shelving for Dishware Display

    22 Best Open Shelving Ideas for Your Kitchen
    Credit: Country

    Open shelves near the dining area give you a spot to show off simple stoneware, glass jars, or a stack of linen napkins. It’s practical and pretty at the same time. Choose wood shelves with black metal brackets for that classic modern farmhouse combo.

    Keep the styling simple. Group items in threes, mix heights, and leave some breathing room. Overcrowded shelves lose the calm, airy vibe this style is known for.

    Actionable tip: Rotate your shelf decor seasonally. It keeps the space feeling fresh without buying new furniture.

    In a more modern kitchen-dining combo, floating shelves in a matte black finish look sleek. In a cottage-style home, add small hooks underneath for hanging mugs or towels. Now that your walls have some function, let’s talk about the actual dinnerware sitting on your table.

    8. Choose Stoneware and Matte Ceramic Dishes

    The Top 7 Tableware Trends for 2024 That Will Elevate Your Dining Experience
    Credit: Wilmax

    Your table setting matters more than people think. Skip the shiny porcelain and go for stoneware or matte ceramic dishes instead. They have a handmade, earthy look that fits the farmhouse vibe perfectly.

    Neutral colors work best: white, cream, or soft sage green. Mix in a few wood serving boards or black utensils for contrast.

    Quick tip: Buy dishes in odd numbers, like sets of five instead of six. It feels less matchy and more collected-over-time.

    Coastal tables can add blue-and-white patterns for a beachy twist. Traditional dining rooms might layer in gold-rimmed plates for a touch of formality. Once your table settings feel right, don’t forget the walls need a little art too.

    9. Decorate With Simple, Meaningful Wall Art

    50 Dining Room Wall Art Ideas For Elevated Entertaining
    Credit: southern living

    Farmhouse style doesn’t do “busy.” Choose one or two pieces of wall art with black or wood frames. Botanical prints, black-and-white photography, or simple line art all work great. Avoid anything too glossy or colorful. It should feel calm.

    A large statement piece above a buffet or sideboard can anchor the whole wall. If you prefer a gallery approach, keep the frames matching for a clean, cohesive look.

    Practical tip: Hang art so the center sits at eye level, about 57 to 60 inches from the floor. This is a designer standard that just works.

    Modern spaces can go abstract with black and white shapes. Traditional rooms might prefer framed botanical illustrations. With your walls dressed, let’s think about how to bring some green life into the space.

    10. Add Greenery With Simple, Low-Maintenance Plants

    33 Low-Maintenance Rockery Garden Ideas to Add Alpine Charm to Your  Landscape
    Credit: Gardening Chores

    A little greenery goes a long way in softening all that wood and metal. Think olive branches in a big floor vase, a small potted fiddle leaf fig in the corner, or a simple eucalyptus centerpiece on the table.

    Skip anything too colorful or tropical looking. Keep the greenery muted and simple to match the farmhouse palette.

    Actionable tip: Use faux stems if you don’t have a green thumb. High-quality faux greenery looks just as good and never wilts before guests arrive.

    Coastal dining rooms might swap greenery for dried palm fronds or pampas grass. Traditional rooms can use classic ferns in brass pots instead. Once your plants are placed, let’s zoom out and talk furniture layout and flow.

    11. Add a Farmhouse Sideboard or Buffet for Storage

    How To Style a Farmhouse Buffet and Sideboard Table - The How-To Home
    Credit: thehow

    A sideboard isn’t just storage, it’s also a styling opportunity. Choose one with a distressed wood finish or black metal hardware. Use it to store table linens, extra dishware, or serving pieces, and style the top with a lamp, a stack of books, or a vase.

    This piece also helps balance the room visually, especially if your table sits in the center of an open floor plan.

    Practical tip: Leave at least 36 inches of clearance in front of the sideboard so people can walk by comfortably, even with chairs pulled out.

    In smaller homes, a narrow console works just as well. In larger, more traditional spaces, go for a taller hutch with glass-front doors. With your storage sorted, let’s talk about one final detail that ties everything together.

    12. Use Black Metal Accents to Tie the Room Together

    90 Chic Modern Farmhouse Dining Rooms - DigsDigs
    Credit: DigsDigs

    Black metal is the glue that holds modern farmhouse together. Think chair frames, light fixtures, window frames, or even door hardware. It adds contrast against all that warm wood and soft neutral fabric.

    Don’t overdo it though. A little black metal goes a long way. Too much can make the room feel cold or industrial instead of warm and farmhouse-y.

    Quick tip: Pick two to three black metal pieces max in the room, like your light fixture and chair frames, so it feels intentional and not scattered.

    Modern homes can lean into more black metal for a bold, edgy feel. Traditional spaces should use it sparingly, just as small accents. And with that final touch, your dining room should already feel pulled together and lived in.

    Budget Guide for a Farmhouse Dining Room Makeover

    Budget TierTable & ChairsLightingRug & TextilesTotal Estimate
    Budget-Friendly$400-$700$80-$150$100-$200$600-$1,000
    Mid-Range$900-$1,500$200-$400$250-$400$1,400-$2,300
    High-End$2,000-$4,000$500-$900$500-$800$3,000-$5,700

    Tips for Success

    • Start with your table and lighting first. Everything else builds around these two anchor pieces.
    • Keep your color palette to three tones max: a neutral base, a wood tone, and one accent color.
    • Buy one statement piece and keep the rest simple. A room full of statement pieces competes with itself.
    • Measure your space before buying anything. A table that’s too big kills the open, airy farmhouse feel.
    • Mix textures on purpose. Wood, metal, linen, and ceramic should all show up somewhere in the room.
    • Don’t skip the rug. It’s an easy way to add warmth without much effort.
    • Shop secondhand for character pieces like a sideboard or accent chairs. Farmhouse style loves a little history.

    Common Mistakes and How to Avoid Them

    Too much shiplap
    : One accent wall is plenty. Covering every wall makes the room feel like a theme park instead of a home.

    Matching everything perfectly
    : Mix chair styles, mix textures, and let a few things feel collected instead of purchased as a set.

    Ignoring scale
    : Measure your room and furniture before buying. A too-small table or an oversized light fixture throws off the whole balance.

    Overdoing black metal
    : Stick to two or three black metal elements. More than that and the room loses its warmth.

    Skipping textiles
    : Curtains, rugs, and napkins add softness. Without them, the room can feel stiff and unfinished.

    Choosing shiny, formal dishware
    : Glossy porcelain and gold trim clash with the earthy, handmade farmhouse look. Go matte and simple instead.

    Similar Variations

    • Coastal Farmhouse – Lighter woods, blue and white accents, and airy linen textiles for a beachy twist.
    • Industrial Farmhouse – More exposed metal, Edison bulb lighting, and darker wood tones for an edgier feel.
    • Traditional Farmhouse – Softer curves, floral accents, and a more formal table setting with classic dinnerware.
    • Scandinavian Farmhouse – Lighter color palettes, minimal decor, and a focus on clean lines with cozy textiles.
    • Rustic Farmhouse – Heavier, chunkier wood pieces, exposed beams, and a warmer, more cabin-like feel.
    • Cottage Farmhouse – Soft pastel accents, floral prints, and a more feminine, vintage-inspired vibe.

    At the end of the day, a great dining room isn’t about following every rule perfectly. It’s about picking a few ideas that feel like you and running with them. Mix the wood tones, add a little black metal, layer in some soft textiles, and don’t be afraid to let a few things feel a little imperfect. That’s really what farmhouse style is all about anyway.

    I hope this gave you a clearer picture of what’s possible and made the whole process feel a lot less overwhelming. Whether you go big with a full room makeover or just swap out a few small details, these 12 Modern Farmhouse Dining Room ideas should give you everything you need to create a space that feels warm, current, and totally your own.

  • 12 Luxury Living Room Ideas That Actually Feel Like a Five-Star Hotel

    12 Luxury Living Room Ideas That Actually Feel Like a Five-Star Hotel

    I’ve spent way too many hours scrolling design sites looking for a 12 luxury living room roundup that doesn’t just show pretty pictures without telling you how to actually pull the look off, so I put together the guide I wish I’d found first. This one covers real furniture picks, real color combos, and real budget numbers so you’re not left guessing.

    A luxury living room is a space designed with high-end materials, layered lighting, and curated furniture to create a hotel-like, upscale atmosphere. It focuses on quality over quantity, using rich textures, tailored furniture, and intentional color palettes.

    Stick around, because I’m about to walk you through twelve specific ways to get there, plus the mistakes that quietly wreck the whole vibe.

    What Makes a Living Room Feel “Luxury” Anyway?

    Here’s the thing nobody tells you: luxury isn’t about spending the most money. It’s about intention. A luxury living room feels calm, put-together, and a little bit indulgent, like someone thought hard about every choice in the room. It usually means fewer pieces, but better ones. Think a single gorgeous sofa instead of three mismatched ones. Think soft lighting instead of one harsh overhead bulb. It’s rich fabrics, clean lines, and colors that feel expensive even if they weren’t. Once you get the formula, you can recreate it in a tiny apartment or a huge house. Let’s get into the specifics.

    1. Start With a Neutral Base and Let Texture Do the Talking

    Decorating with neutrals: 17 design and decor ideas | Homes and Gardens
    Credit: Homes And Gardens

    Luxury rooms almost never scream with color. They whisper with texture instead. Think creamy whites, warm greiges, soft taupes, and deep charcoals. The magic happens when you layer different materials on top of that quiet base: a bouclé chair, a velvet throw pillow, a linen sofa, a leather ottoman.

    My tip: pick one neutral as your wall color, then bring in three or four textures through furniture and soft goods. Don’t rely on paint alone to create interest.

    This works in every style. Modern spaces keep textures sleek and simple, while traditional rooms pile on more layers like tassels and brocade. Once your neutral canvas is set, you’re ready to bring in a furniture piece that anchors the whole room.

    2. Invest in One Statement Sofa Instead of Several Average Ones

    The End of the 'Statement Sofa'? Why Designers Say…
    Credit: inkl

    If there’s one place to spend real money, it’s the sofa. A high-quality sofa with a solid wood frame, down-blend cushions, and a tailored silhouette instantly makes a room feel expensive. Skip the boxy, mass-produced look. Go for curved arms, channel tufting, or a low-profile design instead.

    Actionable tip: measure your room and buy a sofa that fits the scale. Oversized furniture in a small room kills the luxury feel fast.

    For coastal homes, pick a slipcovered linen sofa in ivory. For modern spaces, try a sleek leather sectional. Traditional rooms do well with rolled arms and nailhead trim. Once your sofa is set, the coffee table becomes your next big decision.

    3. Choose a Coffee Table That Doubles as Art

    Coffee Tables 2026 | Modern & Stylish Coffee Tables for Your Living Room – ET Woodcrafts
    Credit: Et Woodcrafts

    A luxury coffee table isn’t just a surface for your remote control. It’s a sculptural piece. Marble tops, brass bases, and organic wood slabs all read as high-end. The key is picking one material that contrasts nicely with your sofa fabric.

    Practical tip: if your sofa is soft and textured, balance it with a hard, reflective coffee table like glass or polished stone.

    Modern homes lean toward smoked glass and matte black metal. Traditional spaces often use carved wood with a rich, dark finish. Coastal rooms prefer bleached wood or rattan. With your table chosen, let’s talk about the floor beneath it.

    4. Layer a Plush Area Rug for Instant Warmth

    The Best Rugs for Cozy Winter Nights – Floorspace
    Credit: Rugs

    Nothing kills a luxury vibe faster than a bare floor or a thin, scratchy rug. A dense, plush area rug grounds the whole room and adds that “sink your feet in” comfort factor. Wool and wool-blend rugs are the gold standard because they hold their shape and feel soft for years.

    Tip: size your rug so all four legs of your sofa sit on it. A too-small rug is one of the fastest ways to make a room look cheap.

    Modern spaces like abstract or solid-color rugs. Traditional rooms go for oriental or medallion patterns. Coastal homes often choose jute or a soft blue and white weave. Once the rug is down, lighting is next on the list.

    5. Layer Your Lighting Instead of Relying on One Fixture

    Home lighting design: A guide to layering light
    Credit: Pooky lighting

    Hotels never light a room with a single overhead light, and neither should you. Luxury rooms use at least three light sources: ambient (a chandelier or flush mount), task (a floor lamp by the reading chair), and accent (small table lamps or picture lights).

    Actionable tip: put every light source on a dimmer. Being able to lower the brightness instantly makes a room feel more upscale in the evening.

    Modern homes like sculptural, metal fixtures. Traditional spaces often use crystal chandeliers. Coastal rooms prefer woven pendant shades. Lighting sets the mood, but window treatments finish the frame around it.

    6. Hang Floor-to-Ceiling Drapes, Even If Your Windows Are Small

    5 Ways Floor-To-Ceiling Curtains WILL Make Your Room Look Bigger | Barn & Willow
    Credit: Barn & Willow

    This is one of the cheapest tricks that makes the biggest difference. Hanging curtains from near the ceiling down to the floor, rather than just above the window frame, tricks the eye into thinking the ceiling is taller. Use a heavier fabric like velvet or a lined linen for a rich drape.

    Tip: mount your curtain rod six to eight inches above the window frame and let the panels just kiss the floor or puddle slightly.

    Modern rooms like simple, solid panels in neutral tones. Traditional spaces add trim or a valance. Coastal homes prefer sheer, breezy linen. Once your windows are dressed, it’s time to think about color and how the whole palette works together.

    Luxury Color Palette Combinations by Style

    StyleWall ColorAccent ColorMetal FinishBest Fabric Pairing
    ModernWarm WhiteCharcoalMatte BlackLeather + Bouclé
    TraditionalSoft CreamDeep EmeraldAntique BrassVelvet + Silk
    CoastalSandy BeigeOcean BlueBrushed NickelLinen + Jute
    GlamBlush GreyGoldPolished BrassVelvet + Satin
    TransitionalGreigeTerracottaWarm BronzeWool + Linen

    7. Add a Gallery of Art With Matching Frame Finishes

    How to Mix and Match Picture Frames — Creating a Cohesive Gallery Wall – Olive et Oriel
    Credit: Olive et Oriel

    Bare walls read as unfinished, but mismatched art frames can look cluttered fast. Luxury rooms usually stick to one or two frame finishes across a whole gallery wall, like all matte black or all warm wood tones. This keeps things looking curated instead of thrown together.

    Tip: pick artwork with a similar color story, even if the subjects differ, so the wall reads as one cohesive collection.

    Modern spaces like abstract prints in thin metal frames. Traditional rooms go for oil-style paintings in ornate gold frames. Coastal homes lean toward framed botanical prints or beach photography. With your walls dressed, let’s bring in some greenery.

    8. Bring in Large-Scale Greenery, Not Tiny Desk Plants

    10 best small plants for your office desk | - Times of India
    Credit: The Times Of India

    Little plants scattered around actually make a room feel busier and less put-together. Luxury spaces use one or two large statement plants, like a fiddle leaf fig or an olive tree, in a simple ceramic or woven planter.

    Actionable tip: place your large plant in an empty corner that feels awkward. It fills the space without adding clutter.

    Modern rooms like sculptural plants in geometric planters. Traditional spaces prefer classic ferns or palms in brass urns. Coastal homes often use potted palms in woven baskets. Once your greenery is in place, think about how your furniture is arranged.

    9. Arrange Furniture to Create a Cozy Conversation Zone

    Expert Eye: 7 Ways to Arrange a Living Room for Conversation | Houzz AU
    Credit: Houzz

    A common mistake is pushing all the furniture against the walls. Luxury living rooms pull seating inward to create an intimate cluster, even in a big room. Two chairs facing the sofa with a coffee table in the middle feels far more upscale than everything lined up against the perimeter.

    Tip: leave about 30 to 36 inches of walking space between furniture pieces so the room still feels open, not cramped.

    Modern spaces like symmetrical, minimal arrangements. Traditional rooms often add a loveseat plus two chairs for a fuller conversational circle. Coastal homes keep it breezy with fewer, lighter pieces. Now let’s talk about the small details that pull it all together.

    10. Style Your Shelves and Surfaces Like a Boutique Hotel Lobby

    Styling Open Shelving Beautifully - Home interior design expert
    Credit: Known Design

    Cluttered shelves are a dead giveaway that a room isn’t fully considered. Luxury spaces style shelves and side tables in odd-numbered groupings, usually three items, mixing height, texture, and one meaningful object like a small sculpture or a stack of coffee table books.

    Practical tip: use the rule of three. One tall item, one medium, one small, grouped close together on any surface.

    Modern rooms keep styling minimal, maybe just one object per shelf. Traditional spaces layer in more collected pieces like framed photos and small antiques. Coastal homes add shells, coral, or glass objects. Once your surfaces are styled, don’t forget the ceiling above you.

    11. Add Architectural Detail With Molding or a Coffered Ceiling

    Coffered Ceilings: Modern Designs, Benefits, Costs & DIY Guide | Nero Tapware
    Credit: Nero Tapware

    This one takes more effort, but it’s a total game-changer. Adding crown molding, wainscoting, or a coffered ceiling gives a room instant architectural weight. It’s the kind of detail that makes people ask, “Wait, is this a new build or an old one?”

    Tip: if a full renovation isn’t in the budget, peel-and-stick molding panels or a simple picture-frame wall treatment can fake the look for a fraction of the price.

    Modern homes keep molding simple and thin. Traditional spaces go bold with deep coffered ceilings. Coastal rooms often use shiplap instead of formal molding. With the architecture handled, let’s talk about scent and sound, two details people forget.

    12. Layer in Scent and Sound for a Full Sensory Experience

    Sensory design: how to transform spaces into experiences - ALMA de LUCE
    Credit: alma De Luce

    Luxury isn’t just visual. Hotels use signature scents and soft background music for a reason: it makes a space feel finished and intentional. A quality candle or reed diffuser near the seating area, plus a small speaker for soft music, rounds out the whole experience.

    Actionable tip: pick one signature scent for your living room and stick with it. Consistency is part of what makes luxury spaces feel memorable.

    Modern homes prefer woody, smoky scents. Traditional spaces like warm vanilla or amber. Coastal rooms lean toward sea salt or citrus. And that wraps up the twelve ideas, but let’s make sure you avoid the traps that undo all this good work.

    Budget Tiers for a Luxury Living Room Refresh

    Budget TierTotal RangeWhat You Can Prioritize
    Starter$800 – $2,000Rug, lighting, throw pillows, curtains
    Mid-Range$2,000 – $6,000Add a statement sofa and coffee table
    High-End$6,000 – $15,000Custom upholstery, molding, art collection
    Full Renovation$15,000+Coffered ceiling, built-ins, whole-room redesign

    Tips for Success

    • Buy fewer, better pieces instead of filling every corner with something.
    • Stick to a maximum of three main colors in the whole room.
    • Always dim your lights in the evening, even if you think the room looks fine as is.
    • Clean and press your throw pillows and blankets weekly. Wrinkled fabric ruins a polished look fast.
    • Swap seasonal accents like pillow covers or a smaller rug layer to keep the room feeling fresh.
    • Keep cords and remotes hidden in a small basket or drawer near the seating area.
    • Step back and photograph your room. Cameras catch clutter your eyes get used to.

    Common Mistakes and How to Avoid Them

    Too Many Accent Colors
    : Stick to a core neutral plus one or two accent colors max. More than that starts to look chaotic instead of curated.

    Undersized Rug
    : Always size up. A rug that only fits the coffee table makes the whole room look smaller and cheaper than it is.

    Skipping Window Treatments
    : Bare windows feel unfinished. Even simple linen panels hung high add instant polish.

    Overhead Lighting Only
    : One bright bulb in the ceiling flattens a room. Add lamps and dimmers for depth and warmth.

    Mismatched Metal Finishes
    : Pick one or two metal tones, like brass and black, and repeat them throughout the room in hardware and fixtures.

    Ignoring Furniture Scale
    : A sofa that’s too big or too small for the room throws off the whole balance. Measure before you buy.

    Similar Variations

    • Modern Glam Living Room – Mixes clean modern lines with glossy metallics and plush velvet for extra sparkle.
    • Old Money Living Room – Leans into heirloom-style furniture, deep wood tones, and understated traditional pieces.
    • Coastal Luxury Living Room – Keeps the airy, beachy palette but swaps in higher-end linen and natural stone accents.
    • Dark Academia Living Room – Uses deep greens, browns, and leather with lots of books and moody lighting.
    • Minimalist Luxury Living Room – Strips things back to just a few high-quality pieces with almost no clutter at all.
    • Art Deco Revival Living Room – Brings back bold geometric patterns, brass details, and jewel-tone velvet seating.

    Getting a true 12 luxury living room look really comes down to a few habits: choosing quality over quantity, layering your lighting and textures, and keeping your color palette tight and intentional. Do those three things well, and the rest of the details fall into place a lot easier than you’d expect. Start with just one or two ideas from this list, live with them a while, and you’ll be amazed how quickly the rest of your 12 luxury living room vision comes together.

  • 11 Cottagecore Bathroom Ideas That Turn Your Space Into a Storybook Retreat

    11 Cottagecore Bathroom Ideas That Turn Your Space Into a Storybook Retreat

    If you’ve been scrolling through home decor inspo and keep landing on soft florals, dried herbs, and vintage claw-foot tubs, I promise this guide on 11 cottagecore bathroom ideas will give you everything you need to actually pull off the look yourself. I’ve spent way too many hours studying this style, and I’m going to break it down so you don’t have to guess what works.

    Cottagecore bathroom design blends rustic charm, vintage fixtures, and natural materials to create a cozy, old-world retreat inside a modern home. The style relies on soft color palettes, botanical touches, and handmade or antique-style decor to feel warm and lived-in rather than sterile.

    But there’s a lot more to this style than throwing in a few dried flowers and calling it done. Stick with me and I’ll walk you through the small details that make a cottagecore bathroom feel real instead of like a cheap knockoff.

    What Exactly Is Cottagecore, Anyway?

    Okay, so before we jump into the ideas, let’s talk about what cottagecore actually means. It’s basically a design style inspired by countryside living, old farmhouses, and that “grandma’s cottage in the woods” vibe. Think soft linens, wildflowers in mismatched jars, and furniture that looks like it has a story behind it.

    For bathrooms specifically, cottagecore leans into natural textures like wood, wicker, and stone. It avoids anything too shiny or high-tech. The goal is comfort, not luxury for luxury’s sake. It should feel like a space where you’d want to take a long bath with a book and a cup of tea, not rush in and out.

    Now let’s get into the good stuff.

    1. Choose a Soft, Muted Color Palette

    The Ultimate Guide to Cottagecore Colors: Create Your Perfect Pastoral  Palette - Melanie Jade Design
    Credit: Melanie

    Cottagecore bathrooms almost never use bright, bold colors. Instead, think sage green, buttery yellow, dusty rose, and creamy white. These shades feel calm and a little nostalgic, like an old photograph.

    Paint your walls in a muted tone, then let your fixtures and textiles do the rest of the color storytelling. A sage green wall paired with white subway tile and brass fixtures looks straight out of a countryside cottage.

    Practical tip: Test paint swatches at different times of day. Cottagecore colors should look soft in both morning light and evening lamp light, not harsh under either.

    This palette adapts well to farmhouse and traditional homes, but even modern spaces can borrow the muted tones for a softer contrast against sleek lines.

    Once your color base is set, it’s time to think about what’s holding your soap and towels.

    2. Add a Vintage or Vintage-Style Vanity

    5 Ways to Achieve the Cottagecore Aesthetic in Your Bathroom – Better  Living Products Canada
    Credit: Better Living

    Nothing says cottagecore louder than an old wooden vanity with a little wear and character. Look for pieces with turned legs, brass or ceramic knobs, and a slightly weathered finish.

    If you can’t find an actual antique, plenty of furniture brands now make “vintage-inspired” vanities that mimic the look without the flea market hunting. A white or soft pastel vanity with a marble or butcher block top fits the aesthetic perfectly.

    Practical tip: Check secondhand shops and estate sales before buying new. You’ll often find real vintage pieces for less money, and they add authentic charm you can’t fake.

    This idea works beautifully in farmhouse and traditional bathrooms, and even coastal cottage spaces can use a whitewashed version for a beachy twist.

    Next, let’s talk about what goes above that vanity.

    3. Hang a Round or Oval Mirror With an Ornate Frame

    Does The Shape Of A Bathroom Mirror Affect Style And Function?
    Credit: Edward Marthin

    Skip the plain rectangular mirror. Cottagecore bathrooms usually feature round or oval mirrors with decorative frames, sometimes gold, sometimes carved wood.

    The shape softens the whole room. Sharp corners feel modern and cold, while curves feel warm and old-fashioned. Look for frames with a slightly distressed or antique finish to match the vanity.

    Practical tip: Hang the mirror a few inches lower than standard height. It creates a cozier, more intimate feel instead of a sterile hotel-bathroom look.

    This detail works in almost any style, but pairs especially well with farmhouse, traditional, and even boho bathrooms looking for a softer edge.

    Now let’s bring in some greenery, because no cottagecore space is complete without plants.

    4. Fill Empty Corners With Potted Herbs and Dried Florals

    15 Breathtaking Dark Cottagecore Bathroom Ideas for a Moody Romantic Look -  Homilash – Home Decoration Ideas & Inspiration
    Credit: Homilesh

    Fresh herbs like lavender, rosemary, or eucalyptus bring life and a light scent to the room. If you don’t trust yourself with live plants (no judgment, I’ve killed my share), dried florals in a simple ceramic vase work just as well.

    Place them on open shelves, windowsills, or even hanging from a small hook near the mirror. The goal is a slightly wild, gathered-from-the-garden feel, not a perfectly arranged bouquet.

    Practical tip: Eucalyptus holds up well in humid bathrooms and dries out gracefully over time, so it’s a low-maintenance choice.

    This works across farmhouse, boho, and traditional styles. Modern homes can even use one clean glass vase with dried stems for a minimalist cottagecore nod.

    Speaking of shelves, let’s talk storage next.

    5. Use Open Wooden Shelving Instead of Closed Cabinets

    Open Shelving vs. Cabinets in Bathrooms: Which Is Better? | Ranney Blair  Weidmann
    Credit: Renny

    Closed cabinets hide everything, but cottagecore is about showing off pretty things. Open wooden shelves let you display folded towels, glass jars, and small trinkets.

    Choose raw or lightly stained wood for the shelves. Avoid anything glossy or painted in a modern color. Stack towels in soft, neutral tones and add a small woven basket for extra storage.

    Practical tip: Roll your towels instead of folding them flat. It adds texture and looks more like a boutique inn than a linen closet.

    Open shelving fits cottagecore, farmhouse, and rustic coastal bathrooms especially well, giving a lived-in, homey touch.

    Now, let’s move to the floor, because rugs matter more than people think.

    6. Layer a Braided or Woven Rug for Texture

    20x32 Woven Texture Stripe Bath Rug - Bed Bath & Beyond - 40762292
    Credit: Bed Bath

    A plain bath mat just won’t cut it here. Cottagecore bathrooms often feature braided rugs, the kind your grandma might’ve made by hand, or woven jute mats that add texture underfoot.

    Stick to natural fibers and muted colors. Avoid anything with a busy modern pattern. The rug should look like it belongs in a farmhouse kitchen just as much as a bathroom.

    Practical tip: Choose a washable rug if your bathroom sees a lot of foot traffic or water splashes. Cotton braided rugs are easiest to clean.

    This idea adapts well across farmhouse, coastal, and boho styles, all of which lean into natural textures underfoot.

    Let’s talk lighting next, because it changes the whole mood of a room.

    Color Palette Combinations for Cottagecore Bathrooms

    Palette NameWall ColorAccent ColorsBest Paired With
    Garden SageSage greenCream, brassWood vanity, dried florals
    Buttercream CottageSoft butter yellowWhite, natural wickerGingham curtains, wood shelving
    Dusty Rose RetreatPale dusty roseIvory, matte blackVintage mirror, floral textiles
    Farmhouse NeutralWarm whiteSage, tan, brassBraided rugs, open shelves
    Coastal CottageSoft blue-grayWhite, driftwood tonesWoven baskets, linen towels

    7. Install Warm, Soft Lighting Instead of Harsh Overheads

    How to Style a Dark Cottagecore Bathroom (Apothecary Aesthetic Guide) -  Atropa Studio | Witchy Botanical Art, Dark Cottagecore and Coastal Gothic
    Credit: Atropa Studio

    Bright white LED lighting kills the cottagecore mood instantly. Swap it for warm-toned bulbs, around 2700K to 3000K, which give off that soft, golden glow.

    Consider adding a small wall sconce with a fabric or glass shade near the mirror. Candles on the counter or windowsill add even more warmth, especially during bath time.

    Practical tip: Use dimmable bulbs so you can adjust brightness depending on whether it’s a quick morning routine or a slow evening soak.

    Warm lighting adapts to nearly every home style, but it’s especially important in cottagecore, coastal, and farmhouse spaces where softness is the whole point.

    Now let’s talk about one of my favorite details: the tub itself.

    8. Choose a Claw-Foot or Slipper Tub as the Centerpiece

    Graceful Claw foot Bathtubs That You'll Love
    Credit: Maison Valentina

    If your bathroom layout allows it, a claw-foot or slipper tub instantly transforms the space. These tubs have a classic, old-world silhouette that feels timeless rather than trendy.

    Paint the exterior a soft color like sage or blush if you want a pop of personality, or keep it classic white for a more traditional look. Pair it with a simple fabric shower curtain hung on a curved rod if you also shower in the tub.

    Practical tip: If a full claw-foot tub isn’t in your budget, look for a tub surround kit that mimics the shape at a fraction of the cost.

    This centerpiece fits traditional, farmhouse, and vintage-inspired bathrooms best, though a slipper tub in a neutral tone can work in transitional spaces too.

    Next, let’s dress up your windows.

    9. Hang Simple Cotton or Linen Curtains Instead of Blinds

    Curtain ideas: 16 styles and tips for every room in the home | Homes and  Gardens
    Credit: Homes And Gardens

    Skip the vinyl blinds. Cottagecore bathrooms favor soft, breathable fabrics like cotton or linen curtains, sometimes with a subtle floral or gingham pattern.

    Keep the pattern small and the colors muted. A tiny floral print or simple stripe works better than anything bold or graphic. Hang the curtains on a thin brass or wood rod for an extra vintage touch.

    Practical tip: Choose a moisture-resistant cotton blend if your bathroom doesn’t have great ventilation, so the fabric doesn’t develop mildew.

    This detail works in farmhouse, traditional, and even some boho bathrooms looking to soften hard window lines.

    Let’s move on to something a lot of people forget: the little details on your counter.

    10. Style Your Counter With Glass Jars and Ceramic Dishes

    15 Cottagecore Decorating Ideas to Bring the Country Life Indoors
    Credit: Decorilla

    Ditch the plastic bottles. Cottagecore bathrooms use glass apothecary jars for cotton balls and Q-tips, and small ceramic dishes for soap or jewelry.

    This swap does double duty. It looks prettier, and it actually keeps your counter more organized. Look for jars with cork lids or simple glass stoppers for that old-fashioned pharmacy feel.

    Practical tip: Thrift stores are goldmines for mismatched glass jars and dishes. You don’t need a matching set, slight variation actually looks more authentic.

    This works across farmhouse, vintage, and even some minimalist bathrooms that want a touch of old-world charm without going overboard.

    Now here’s a table to help you figure out where to spend your money.

    Budget Tiers for a Cottagecore Bathroom Refresh

    Budget LevelWhat You Can UpdateEstimated Cost Range
    Small ($50-150)Jars, towels, rug, dried florals$50-150
    Medium ($150-500)Add vintage mirror, light fixtures, curtains$150-500
    Large ($500-1500)Vanity swap, new tub surround, shelving$500-1500
    Full Remodel ($1500+)Claw-foot tub, tile work, full lighting overhaul$1500-5000+

    11. Add Handmade or Embroidered Textiles

    15 Enchanting Cottagecore Bathroom Ideas for Rustic Charm
    Credit: Decor Pad

    Look for hand towels with embroidered flowers, crochet edges, or subtle lace trim. These small textile details make the whole bathroom feel handmade and personal, even if you bought everything online.

    Swap out plain white towels for ones with a soft edge detail or a light pattern. A small crocheted basket for extra toilet paper adds charm too.

    Practical tip: Etsy is a great place to find handmade cottagecore textiles from small shops, often at a similar price to big box stores.

    This idea fits farmhouse, vintage, and traditional bathrooms especially well, giving that “made with love” feeling the whole style is built on.

    Tips for Success

    • Start with one or two big pieces, like the vanity or tub, before adding smaller decor so the room doesn’t feel cluttered.
    • Stick to a limited color palette of three to four shades max to keep things cohesive.
    • Mix textures on purpose. Combine wood, ceramic, glass, and fabric so nothing feels one-note.
    • Shop secondhand first. Cottagecore practically requires a little imperfection to feel real.
    • Keep hardware consistent, like all brass or all matte black, so the room doesn’t feel mismatched in a bad way.
    • Don’t overdo the florals. A few well-placed stems look better than every surface covered in flowers.
    • Prioritize function too. Pretty jars are great, but make sure your storage still works for daily life.

    Common Mistakes and How to Avoid Them

    Overusing bright florals and busy patterns
    : Stick to one or two small-scale patterns max. Too many competing prints make the room feel chaotic instead of charming.

    Choosing modern, glossy fixtures
    : Swap shiny chrome for brushed brass, matte black, or aged bronze finishes that feel more old-world.

    Forgetting about lighting temperature
    : Replace cool white bulbs with warm-toned ones around 2700K to instantly soften the mood.

    Skipping storage planning
    : Open shelving looks great but needs organization. Use baskets or bins to hide less pretty essentials.

    Buying everything brand new
    : Authentic cottagecore charm comes from mixing new pieces with thrifted or vintage finds, not an all-new matching set.

    Ignoring humidity and moisture issues
    : Choose moisture-resistant fabrics and sealed wood finishes so your cottagecore touches actually last in a bathroom environment.

    Similar Variations

    • Farmhouse Bathroom – Similar rustic charm but leans more into shiplap walls and industrial-style fixtures.
    • Coastal Cottage Bathroom – Softer blues and driftwood tones combined with cottagecore’s cozy textures.
    • Vintage Boho Bathroom – Mixes cottagecore’s antique pieces with boho’s layered textiles and global patterns.
    • French Countryside Bathroom – A more elegant cousin of cottagecore, with toile patterns and ornate details.
    • Rustic Cabin Bathroom – Heavier on raw wood and stone, less on florals and pastel colors.
    • Grandmillennial Bathroom – Combines traditional patterns like chintz with a slightly more polished, curated feel.

    Cottagecore bathrooms aren’t about spending a fortune or gutting your whole space overnight. They’re about layering soft colors, natural textures, and a few vintage touches until the room feels warm, personal, and a little like a page out of an old storybook. Start small, thrift when you can, and let the space grow slowly instead of trying to force it all at once. However you choose to bring these ideas to life, I hope this list of 11 cottagecore bathroom ideas gives you a real starting point for building a space you’ll actually want to spend time in.

  • 11 Boho Chic Bathroom Ideas That’ll Make You Never Want To Leave Your Tub

    11 Boho Chic Bathroom Ideas That’ll Make You Never Want To Leave Your Tub

    If you’ve been hunting for the internet’s most complete guide on 11 boho chic bathroom ideas, you can stop scrolling. I’ve pulled together the ideas that actually work in real homes, not just in dreamy Pinterest photos, so you get answers that hold up when you start shopping.

    Boho chic bathroom design mixes natural materials, warm earthy colors, layered textures, and vintage or handmade decor to create a relaxed, personal space. It skips cold, sterile looks in favor of texture, plants, and eclectic charm.

    Stick around, because I’m about to walk you through a dozen ways to turn your plain bathroom into a cozy little retreat, plus the mistakes to dodge along the way.

    What Even Is Boho Chic, Anyway?

    Okay, so real quick, let’s talk about what “boho chic” actually means. It’s short for bohemian, and it’s all about mixing things that feel free-spirited and collected over time. Think rattan, macrame, plants, warm rugs, and mismatched patterns that somehow look like they belong together. It’s not messy though. Good boho design still feels intentional.

    In a bathroom, this style turns a boring, tiled box into something that feels more like a spa tucked away in a jungle cabin. It’s warm. It’s textured. It’s a little unexpected. And honestly, it’s one of the easiest styles to pull off on a budget because so much of it relies on thrifted or natural pieces instead of expensive fixtures.

    1. Bring In A Rattan Vanity Mirror

    LEIVA Rustic Rattan Bathroom Vanity Mirror & Cabinet – Urban Mood
    Credit: Urban Mood

    A round rattan mirror is basically the boho bathroom’s calling card. It softens all the hard lines you usually get from tile and glass. The woven texture adds warmth without adding clutter, since it’s still functional.

    Hang it above your sink as the focal point. Pick one with a slightly irregular or sunburst shape for extra personality.

    Practical tip: Measure your vanity width first. Your mirror should be about two-thirds the width of the sink area so it doesn’t overwhelm the wall.

    This idea works in coastal or Scandinavian bathrooms too, since rattan feels equally at home with light woods and airy color palettes.

    Once your mirror is up, it’s time to think about what’s growing underneath it.

    2. Add Trailing Plants For Life And Movement

    25 Beautiful Bathroom Plant Decor Ideas for a Fresh and Relaxing Look -  Purely Dwelling
    Credit: Purely Dwelling

    Boho bathrooms almost always have plants, and not just any plants. You want the trailing kind, like pothos or string of pearls, that drape down and add movement. Bathrooms are actually great for plants because of the humidity from showers.

    Set one on a shelf, or hang one in a macrame plant holder near a window. The mix of greenery against warm wood tones is what gives boho its signature “lived-in” feel.

    Practical tip: If your bathroom has no natural light, go with a low-light plant like a snake plant or pothos instead of something that needs full sun.

    This works in almost any style, honestly, but in boho it’s less about a single statement plant and more about layering several small ones.

    Now that you’ve got some greenery going, let’s talk about what’s under your feet.

    3. Layer A Chunky Jute Or Wool Rug

    Rugs In Bathroom Done Right: Size, Placement and Styling Ideas
    Credit: My Dress Crib

    Cold tile floors are the enemy of a cozy bathroom. A thick jute or wool rug fixes that instantly. It adds texture, warmth, and a grounding earthy color that ties the whole room together.

    Choose a rug in a natural fiber tone like tan, cream, or rust. Avoid anything with a rubber backing that traps moisture, since bathrooms deal with a lot of humidity.

    Practical tip: Get a rug you can shake out and hang dry, not one that needs to go in a machine. Natural fiber rugs last longer if they’re not constantly soaked.

    Coastal boho spaces lean toward lighter jute tones, while desert boho spaces often add rugs with geometric patterns in rust and clay colors.

    With the floor sorted, let’s move up to the walls.

    4. Paint Or Tile In Warm Earthy Tones

    Boho Bathroom Style: 4 Easy Ways To Achieve This Look – Mosaics.co
    Credit: Mosaics

    Boho chic almost never uses stark white walls. Instead, think terracotta, warm beige, olive green, or dusty clay. These colors feel grounded and natural, which is the whole point of the style.

    If painting the whole room feels risky, start with an accent wall behind the tub or vanity.

    Practical tip: Test paint samples at different times of day. Bathroom lighting changes a lot between morning and evening, and earthy tones can look muddy under cool LED bulbs.

    Boho-Friendly Color Palette Guide

    Palette NameWall ColorAccent ColorsBest Paired With
    Desert SandWarm terracottaRust, cream, mustardRattan, leather
    Jungle RetreatDeep olive greenCream, black, wood tonesFerns, macrame
    Sunset ClayDusty roseBurnt orange, tanWoven baskets
    Soft NeutralWarm beigeWhite, jute, light woodPlants, linen

    Once your walls set the mood, textiles carry it the rest of the way.

    5. Mix Patterned Textiles Without Matching Them

    Boho Bathroom Ideas: Colors, Decor, and Design Tips
    Credit: Room Sketcher

    Boho design thrives on “curated clutter,” which basically means patterns that don’t match perfectly but still feel connected through color. Think a striped bath mat, a paisley shower curtain, and a solid-color towel set, all in similar warm tones.

    Practical tip: Pick one dominant color, like terracotta, and let every pattern share that color somewhere. That’s the trick that keeps mixed patterns from looking chaotic.

    Modern farmhouse bathrooms tend to stick with just one pattern at a time, but boho leans into layering two or three at once.

    Speaking of textiles, let’s talk about one specific piece that always shows up in boho bathrooms.

    6. Hang A Macrame Curtain Or Wall Hanging

    51 Macrame Wall Hanging Ideas with Boho-Chic Appeal
    Credit: Interior Design

    Macrame is basically the unofficial symbol of boho design. A woven wall hanging behind the tub or a macrame curtain over a window adds texture without taking up floor space.

    You can buy one, or if you’re feeling crafty, macrame kits are pretty beginner-friendly.

    Practical tip: Stick to natural, undyed cotton rope for a more authentic boho look instead of bright, dyed versions.

    This idea shines in bohemian and coastal spaces, but it can feel out of place in a strictly modern minimalist bathroom, so keep that pairing in mind.

    Next, let’s talk lighting, because boho bathrooms rely on a specific kind of glow.

    7. Swap Harsh Lighting For Warm, Layered Sources

    Boho Bathroom Ideas for an American Home Bathroom | 32 Image
    Credit: Fancy House Design

    Cold white overhead lighting kills the boho vibe fast. Instead, aim for warm-toned bulbs (look for 2700K on the packaging) and add a smaller lamp or string lights if you have an outlet nearby.

    Practical tip: Layer at least two light sources, like an overhead fixture plus a small accent lamp, so the room doesn’t feel flat.

    Warm lighting works across almost every style, but it’s especially crucial in boho since so much of the look depends on cozy, golden tones rather than bright, clinical light.

    Now let’s get into some of the smaller details that really seal the deal.

    8. Use A Freestanding Tub With Vintage-Style Fixtures

    Boho Bathtub Ideas for Bohemian Style Bathrooms – Luxury Freestanding Tubs
    Credit: Luxurey

    If your budget allows for it, a freestanding tub instantly gives off that relaxed, spa-like boho energy. Pair it with a matte black or brushed brass faucet for a vintage touch.

    Practical tip: If a full tub swap isn’t in the cards, just changing your faucet finish to something warmer, like brass or bronze, can shift the whole mood of the room.

    Traditional and vintage-inspired bathrooms use this same trick, though they usually pair it with more ornate tile instead of the natural textures boho favors.

    Let’s talk storage next, because boho still needs to be functional.

    9. Store Towels In Woven Baskets Instead Of Cabinets

    10 Basket Ideas for Bathroom for Stylish and Practical Storage – Artera Home
    Credit: Artera Homes

    Open storage is a boho staple. Woven seagrass or rattan baskets hold towels, toiletries, or extra toilet paper while adding texture at the same time.

    Practical tip: Stack two or three different-sized baskets together for a layered look instead of buying a matching set.

    Storage Options Compared

    Storage TypeCost RangeBoho Style FitMoisture Resistance
    Woven seagrass basket$15-$40ExcellentGood if kept dry
    Wood ladder shelf$30-$80GreatGood
    Metal wire basket$10-$25FairExcellent
    Wicker hamper$25-$60ExcellentFair

    This storage style works beautifully in farmhouse and coastal bathrooms too, since natural fiber baskets fit almost any relaxed, casual theme.

    Now, let’s add a little sparkle with some smaller decor pieces.

    10. Add Candles And Incense Holders For Ambiance

    19 Boho Bathroom Ideas to Create an Eclectic Spa Retreat
    Credit: HomesWaves

    Boho bathrooms are meant to feel like a little escape, and scent plays a bigger role than people expect. Cluster a few candles in varying heights on your vanity or windowsill, or add a small ceramic incense holder for that lived-in, sensory feel.

    Practical tip: Stick to natural soy or beeswax candles since they burn cleaner in a smaller, enclosed room.

    This idea translates well into Zen or spa-style bathrooms too, just swap the boho-patterned holders for simpler stone ones.

    Let’s move to something people often forget about: the shower curtain.

    11. Choose A Shower Curtain With Natural Motifs

    Affordable Boho Shower Curtain Picks for Cozy Vibes – Fabdivine
    Credit: Fabdivine

    Skip the plain white plastic curtain. Look for linen-blend curtains with botanical prints, mud cloth patterns, or ombre dye effects. This one swap can change the entire feel of the room without any real construction.

    Practical tip: Go for a curtain with a weighted hem so it hangs nicely and doesn’t billow around during a shower.

    Coastal boho leans toward blue and white ombre patterns, while desert boho prefers rust and cream mud cloth prints.

    Tips for Success

    • Start with one or two big changes, like a rug and lighting swap, before committing to a full room overhaul
    • Stick to a consistent warm color family so mixed patterns and textures don’t clash
    • Always check moisture resistance before buying any natural fiber decor for a bathroom
    • Thrift stores and flea markets are goldmines for authentic boho pieces at a fraction of retail price
    • Keep at least one plant alive and thriving before adding more, since dead plants kill the vibe fast
    • Balance soft textures (rugs, towels) with hard natural textures (wood, rattan) for visual interest
    • Don’t forget ventilation. Humidity can wreck natural fibers if your bathroom doesn’t have a fan

    Common Mistakes and How to Avoid Them

    Overdoing the patterns
    : Stick to one dominant color thread running through all your patterns so the room feels connected, not chaotic.

    Using non-water-safe materials
    : Choose sealed wood, treated rattan, or synthetic blends for anything near the tub or sink to avoid mold and warping.

    Ignoring lighting temperature
    : Swap cool white bulbs for warm 2700K bulbs so your earthy colors don’t look washed out or gray.

    Buying everything brand new
    : Mix in a few thrifted or vintage pieces so the space feels collected over time instead of staged.

    Forgetting ventilation
    : Run your bathroom fan during and after showers to protect natural fiber rugs, baskets, and macrame from mold.

    Choosing an overly bright white as a base
    : Swap it for a warm off-white or beige base so the room doesn’t feel cold and clinical.

    Similar Variations

    • Coastal Boho: Lighter color palette with blues, whites, and lots of driftwood and rope accents
    • Desert Boho: Warm rust, clay, and mustard tones paired with cactus motifs and Southwestern patterns
    • Jungle Boho: Heavy on greenery, dark walls, and tropical prints for a lush, dense feel
    • Scandi Boho: Combines boho warmth with Scandinavian minimalism, using lighter woods and fewer patterns
    • Vintage Boho: Leans into antique furniture, aged brass fixtures, and thrifted decor over new pieces
    • Moroccan Boho: Features bold geometric tile, jewel tones, and metallic lantern-style lighting

    Pulling off a boho bathroom really just comes down to layering texture, sticking to warm tones, and not being afraid to mix old and new pieces together. It doesn’t need to be expensive or perfect. It just needs to feel warm and a little personal, like a space you actually want to spend time in. Whether you start small with a rattan mirror or go all in with a freestanding tub and macrame curtain, these 11 boho chic bathroom ideas give you a real starting point for building a space that feels calm, collected, and totally yours.