Author: Tayef

  • 13 Kitchen Table Ideas That’ll Make You Actually Want to Eat at Home

    13 Kitchen Table Ideas That’ll Make You Actually Want to Eat at Home

    I’ve spent way too many hours scrolling through kitchen photos, and I put together these 13 kitchen table ideas so you don’t have to do the same thing. Whether you’re starting from scratch or just tired of staring at the same old setup, I’ve got you covered here.

    Kitchen tables are the heart of the home. What’s the best kitchen table setup for your space? It depends on your room size, family needs, and style, but the right table balances function with a look you love, and this guide breaks down exactly how.

    Stick around, because I’m about to show you tricks that interior designers charge big money for. Some of these ideas might completely change how you think about your kitchen.

    What Makes a Kitchen Table Idea “Work”

    Before we jump into the list, let’s talk about what actually makes a kitchen table setup good. It’s not just about picking a pretty table and calling it done. A great kitchen table area mixes the right size, the right materials, and enough personality to make the space feel like yours.

    I think about three things every time: does it fit the room, does it fit how we actually eat and live, and does it look like something I’d want to sit at every morning with coffee. If you nail those three things, you’re basically golden. Now let’s get into the good stuff.

    1. Go Round for Small Kitchens

    45 Galley Kitchens That Are the Epitome of Shipshape
    Credit: Elle Decor

    Round tables are lifesavers in tight kitchens. There’s no sharp corners to bump into, and everyone can scoot in closer without fighting over leg room. A 42-inch round table usually fits four people comfortably without eating up your whole floor plan.

    I like pairing round tables with a pedestal base instead of four legs. It frees up space underneath and makes the whole area feel less cluttered.

    Practical tip: measure your kitchen and leave at least 36 inches of walking space around the table on all sides.

    This idea works in cottage, farmhouse, and modern kitchens alike since round shapes are pretty forgiving style-wise. Next up, let’s talk about what happens when you go the opposite direction with size.

    2. Build a Farmhouse-Style Long Table

    Farmhouse kitchen table decor ideas: 5 easy looks to try | Homes and Gardens
    Credit: Homesandgardens

    If you’ve got a big kitchen or an open floor plan, a long farmhouse table changes everything. These tables usually run 72 to 96 inches and seat six to eight people easily. Solid wood tops with a distressed or matte finish give that lived-in, welcoming feel.

    I love pairing these tables with a mix of chairs instead of a matching set. It looks collected over time instead of store-bought yesterday.

    Actionable tip: add a bench on one side to save space and squeeze in extra seating when guests show up.

    This idea shines in farmhouse and rustic kitchens, but it works in modern spaces too if you pick a table with clean lines and a lighter wood tone. Speaking of mixing seating, let’s dig deeper into that bench idea.

    3. Add a Bench for Flexible Seating

    Kitchen Island With Seating: Sizes, Ideas & Design Guide | Planet Furniture
    Credit: Planet Furniture

    Benches aren’t just for farmhouse tables. They work anywhere you need flexible seating that can squeeze in one more kid or guest without a fuss. Benches also tuck under the table when not in use, which frees up floor space.

    I’d go with a bench on one side and chairs on the other. This gives you the best of both worlds: easy sliding in for kids, plus proper chairs for grownups who want back support.

    Practical tip: pick a bench with a cushion or add throw pillows so people actually want to sit there for more than five minutes.

    This works great in coastal, modern, and traditional kitchens since benches come in so many styles now. Now let’s talk color, because that changes the whole vibe of your table area.

    Table Size Guide by Household Size

    Household SizeRecommended Table ShapeMinimum Table SizeSeating Capacity
    1-2 peopleRound or square30-36 inches2-4
    3-4 peopleRound or rectangular42-54 inches4-6
    5-6 peopleRectangular60-72 inches6-8
    7+ peopleRectangular or extendable84-108 inches8-12

    4. Choose a Two-Tone Table for Contrast

    Two-Tone Kitchen Cabinets: 22 Color Combinations for 2026
    Credit: NextDay

    Two-tone tables have a wood top and a painted or metal base, and they add instant character. I’ve seen black metal legs paired with a warm oak top, and it looks amazing in almost any kitchen style.

    The contrast keeps the table from feeling too heavy or too plain. It also lets you match the base color to your cabinet hardware or light fixtures for a pulled-together look.

    Practical tip: keep the top wood tone close to your flooring color so the table doesn’t feel disconnected from the rest of the room.

    This idea is a favorite in modern farmhouse and industrial kitchens, but it also softens up a strict traditional space. Now let’s talk about tables that do double duty.

    5. Pick a Table That Doubles as a Kitchen Island

    Top 10 Kitchen Islands that Double as Dining Tables - Dura Supreme Cabinetry
    Credit: Dura

    Small kitchens need furniture that works overtime. A table that acts as both your eating spot and your prep space saves a ton of square footage. Look for a sturdy table with a durable top, like butcher block or quartz, that can handle chopping and rolling dough.

    I’ve seen people add a small shelf or drawer underneath for extra storage too. That’s smart if your kitchen is short on cabinet space.

    Actionable tip: choose a table height around 36 inches so it lines up with standard counter height for easy food prep.

    This works especially well in small modern kitchens and studio apartments where every inch counts. Next, let’s look at how lighting changes your table game completely.

    6. Hang a Statement Light Above the Table
    How Far Should a Pendant Light Hang Above a Table? – City Lights SF
    Credit: Citylightssf

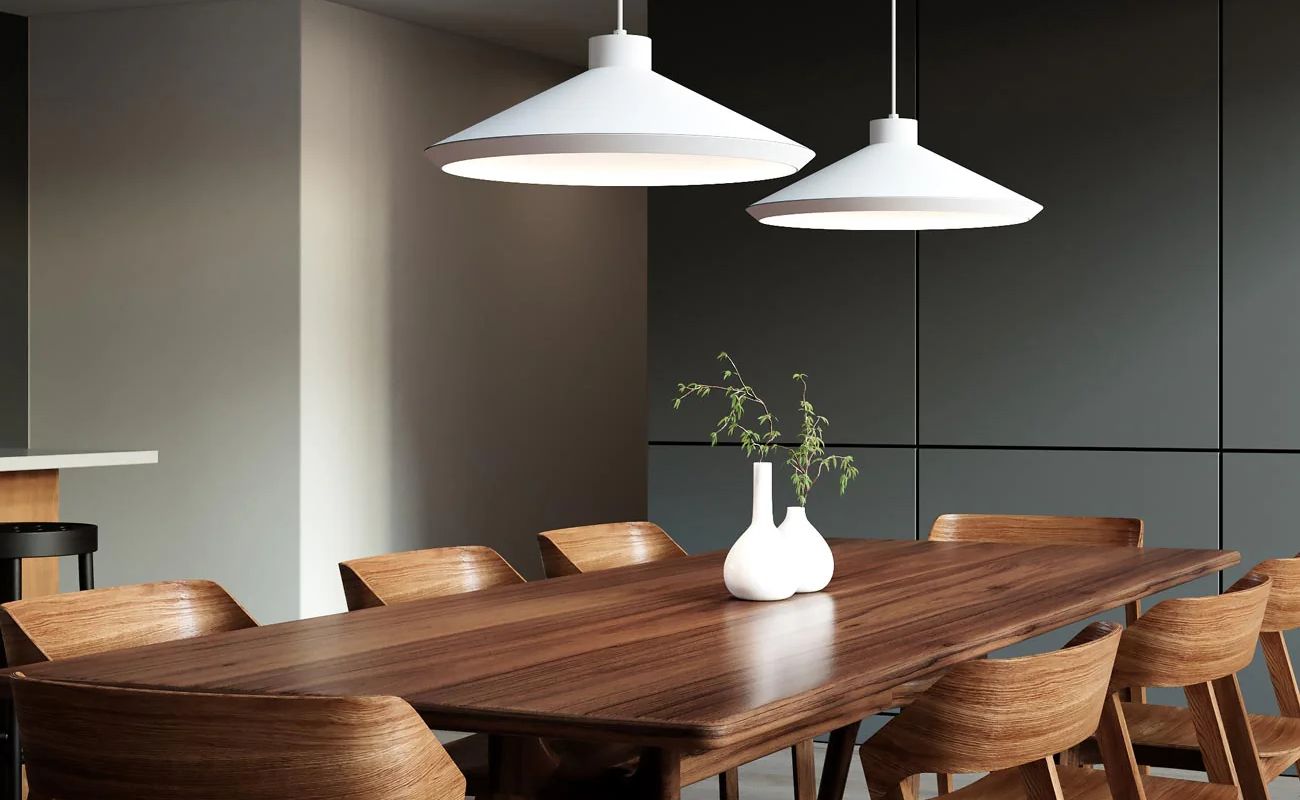
    The right light fixture turns a plain table into the star of the room. A single pendant light or a cluster of three small ones adds drama without taking up floor space. I always tell people to hang the fixture about 30 to 34 inches above the tabletop for the best look and enough headroom.

    Brass, black metal, and woven rattan pendants are big right now. They add texture without clashing with your table finish.

    Practical tip: use a dimmer switch so you can shift the mood from bright morning light to a cozy dinner glow.

    This idea works in literally every kitchen style since lighting is so easy to swap out. Now, let’s talk about what goes on top of that table.

    7. Style the Table With a Simple Centerpiece

    60 Wedding Centerpiece Ideas to Inspire Your Table Decorations
    Credit: The Knot

    An empty table looks unfinished, but a cluttered one feels stressful. I always go for one simple centerpiece, like a wood bowl of fruit or a low vase of greenery. Keep it under 12 inches tall so it doesn’t block conversation across the table.

    Rotating your centerpiece with the seasons keeps things fresh without much effort. A pumpkin in fall, some greenery in winter, wildflowers in spring.

    Practical tip: use a table runner instead of a full tablecloth for everyday use. It’s easier to wipe down and adds color without much fuss.

    This idea flexes easily across coastal, farmhouse, and modern styles depending on what centerpiece you pick. Let’s move on to materials now, because that decision matters a lot.

    Kitchen Table Material Comparison

    MaterialDurabilityPrice RangeBest For
    Solid WoodHigh$$$Long-term family use
    Engineered WoodMedium$Budget-friendly starter homes
    MetalHigh$$Industrial and modern kitchens
    Glass TopMedium$$Small spaces, visual openness
    Butcher BlockHigh$$$Kitchens needing extra prep space

    8. Use Mismatched Chairs for Personality

    10 Tips For Styling Mismatched Dining Chairs | Furniture & Choice
    Credit: Furniture and Choice

    Matching chair sets are fine, but mismatched chairs bring so much more life to a table. I mix wood chairs with a couple of woven or upholstered ones for texture. It looks curated, not chaotic, as long as you stick to a similar color family.

    This trick also saves money since you can shop secondhand for one-off finds instead of buying a whole matching set.

    Practical tip: keep the chair heights and seat depths similar so the table still feels balanced even with different styles.

    This works especially well in eclectic, farmhouse, and boho kitchens where personality matters more than perfect matching. Next, let’s talk about tables built for tiny spaces.

    9. Try a Drop-Leaf Table for Tiny Kitchens

    Drop Leaf Dining Table Industrial Breakfast Kitchen Small Rustic Metal  Folding - Unique Home Furniture
    Credit: Uniquehomefurniture

    If your kitchen barely fits a table at all, a drop-leaf design might save your life. These tables have hinged sides that fold down when you don’t need the extra space, then flip up for guests or big meals.

    I’ve used one in a small apartment kitchen, and it honestly worked better than I expected. You get a full-size table when you need it and a slim profile the rest of the time.

    Practical tip: push the table against a wall when the leaves are down to save even more floor space.

    This idea is perfect for modern and minimalist small kitchens where every square foot counts. Now let’s talk about adding warmth with texture.

    10. Layer in Natural Textures Like Rattan and Wood
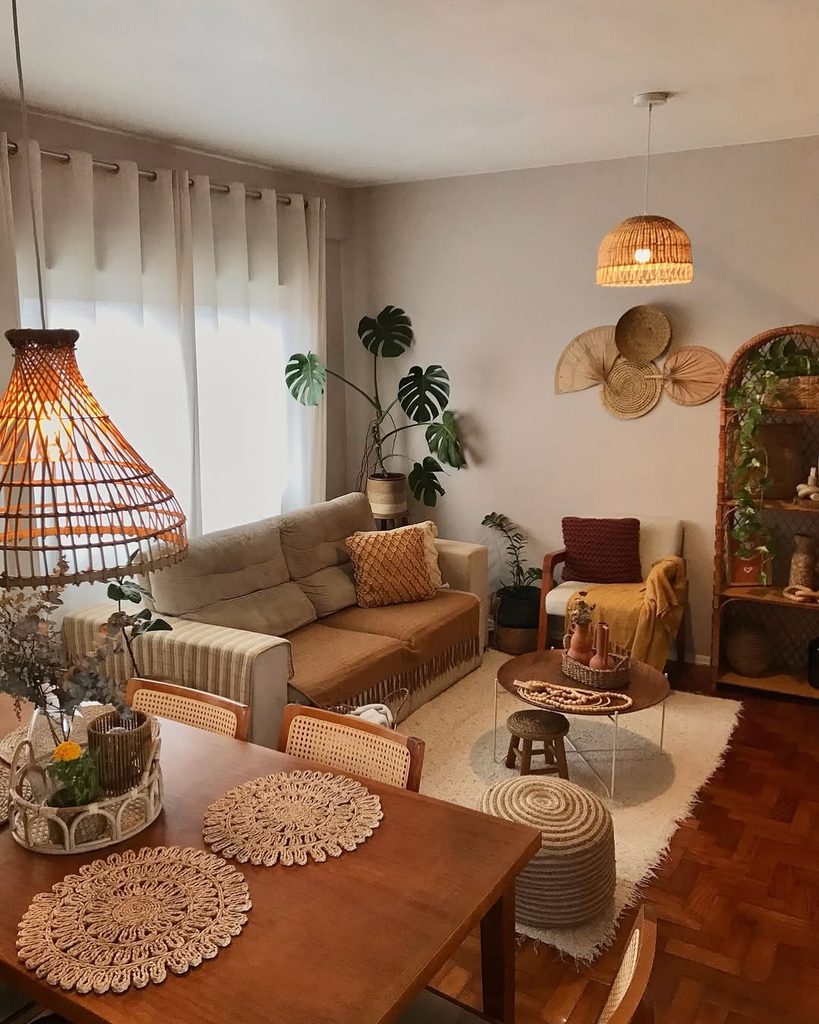
    Credit: thecreativeshour

    Natural materials make a kitchen table area feel warm and inviting instead of cold and sterile. Think rattan chairs, a wood table, and maybe a jute rug underneath if your kitchen has room for one.

    These textures pair beautifully with warm color palettes like cream, terracotta, and soft green. They also age well, unlike some trendier materials that look dated in a few years.

    Practical tip: mix at least two natural textures, like wood and rattan, for depth without overdoing it.

    This idea is a natural fit for coastal, boho, and Scandinavian kitchens, though it can soften a strict modern space too. Let’s talk color palettes next, since that ties everything together.

    Popular Kitchen Table Color Palettes

    Palette NameTable FinishWall ColorAccent Color
    Warm NeutralNatural oakSoft whiteTerracotta
    Coastal CalmWhitewashed woodLight blue-grayNavy
    Modern ContrastBlack or dark walnutBright whiteBrass
    Cozy FarmhouseDistressed woodWarm creamSage green

    11. Add a Built-In Banquette for Cozy Corners

    15 banquette seating ideas to transform your kitchen | Ideal Home
    Credit: Ideal Home

    Banquettes turn an awkward corner into the coziest spot in the house. These built-in bench seats hug the wall and pair with a table for a nook that feels like a little restaurant booth in your own home. I love adding storage underneath the seat too, since that space usually goes to waste otherwise.

    Cushions in a durable fabric like performance velvet or outdoor-grade cotton hold up well to spills and daily use.

    Practical tip: choose a round or oval table for a banquette so nobody gets stuck in a hard-to-reach corner seat.

    This works beautifully in traditional and cottage kitchens, though a sleek banquette with clean lines fits modern spaces too. Now let’s look at how extendable tables solve a common problem.

    12. Choose an Extendable Table for Entertaining

    Guide For Choosing the Best Extendable Dining Table Set | TT UK
    Credit: Transformertable.

    If you love hosting but don’t have space for a giant table year-round, an extendable table solves that problem completely. These tables have a leaf that slides out or stores separately, letting you grow the table only when you need it.

    I think this is one of the smartest buys for growing families too. Your table can literally grow with your needs instead of you buying a new one every few years.

    Practical tip: measure your storage space for the extra leaf before buying, since some leaves are surprisingly big and awkward to store.

    This idea works in almost any kitchen style since extendable tables come in everything from farmhouse to sleek modern designs. Last but not least, let’s talk about a detail people often skip.

    13. Ground the Space With the Right Rug

    How to choose the right rug for your space - Flooring Xtra
    Credit: Flooring

    A rug under your kitchen table adds warmth and helps define the eating area, especially in open floor plans. Go with a low-pile or flatweave rug since anything too fluffy traps crumbs and makes chair-scooting a pain.

    Size matters a lot here. Your rug should extend at least 24 inches beyond the table edge on all sides so chairs stay on the rug even when pulled out.

    Practical tip: choose a washable rug if you’ve got kids or pets, since kitchen spills are basically guaranteed.

    This idea works across every style, from jute rugs in coastal kitchens to bold patterned rugs in eclectic spaces. And with that, you’ve got all 13 ideas to start reshaping your kitchen table area.

    Tips for Success

    • Measure twice before buying anything. Kitchen tables are hard to return once they’re in your space.
    • Stick to a budget range before you start shopping, since table prices swing wildly based on material.
    • Test chair comfort in person if you can. A chair that looks great might feel terrible after 20 minutes.
    • Choose finishes that match your flooring undertone, not necessarily your cabinets.
    • Don’t skip the walking space rule. Cramped seating areas feel stressful, not cozy.
    • Buy slightly bigger than you think you need if you’re between two sizes. Growing families fill up table space fast.
    • Keep receipts and warranty info for wood tables, since natural materials sometimes need repairs down the line.

    Common Mistakes and How to Avoid Them

    Buying a table too big for the room
    : Measure your space first and leave at least 36 inches of clearance on every side.

    Ignoring chair height and table height match
    : Keep about 12 inches of space between the seat and the tabletop for comfortable dining.

    Choosing style over durability
    : Pick materials rated for daily use, especially if you have kids, pets, or a busy household.

    Overdecorating the table surface
    : Stick to one simple centerpiece under 12 inches tall so people can still see each other across the table.

    Skipping the rug size rule
    : Make sure your rug extends beyond the table edges so chairs don’t slide off when pulled out.

    Forgetting lighting placement
    : Hang pendant lights 30 to 34 inches above the table for the right glow without blocking sightlines.

    Similar Variations

    • Coastal Kitchen Nook: Light woods, blue accents, and woven textures for a beachy breakfast spot.
    • Industrial Dining Corner: Metal chairs, exposed bulbs, and dark wood tables for an urban loft feel.
    • Scandinavian Breakfast Table: Pale wood, clean lines, and minimal decor for a calm, airy vibe.
    • Farmhouse Family Table: Long wood tables, mismatched chairs, and warm lighting for big family meals.
    • Modern Minimalist Setup: Sleek materials, neutral colors, and simple shapes with zero clutter.
    • Boho Eclectic Dining Spot: Rattan chairs, layered textiles, and plants for a relaxed, collected look.

    Picking the right table setup really comes down to knowing your space and how your family actually lives day to day. Small changes, like swapping a rug or adding a bench, can make a bigger difference than you’d expect. I hope these 13 kitchen table ideas gave you a few sparks to try out in your own home.
  • 12 Kitchen Backsplash Ideas That Will Change How You See Your Kitchen

    12 Kitchen Backsplash Ideas That Will Change How You See Your Kitchen

    I’ve helped enough friends pick out kitchen finishes to know this: nobody feels confident about backsplash choices, and this list of 12 kitchen backsplash ideas is going to fix that for you.

    A kitchen backsplash is the wall covering behind your countertop and stove that protects walls from splashes and stains. The best backsplash choice depends on your budget, kitchen style, and how much maintenance you’re willing to do. Tile, stone, and metal are the three most common material categories.

    Stick around, because I’m going to walk you through everything from budget-friendly subway tile to bold statement pieces that’ll make your neighbors jealous.

    What Even Is a Kitchen Backsplash, Anyway?

    So here’s the deal. A backsplash is that strip of wall between your countertop and your cabinets. It used to be purely functional. Grease splatters, water spots, tomato sauce explosions. It caught all of it so your paint didn’t have to.

    But now? It’s basically the jewelry of your kitchen. It’s the thing people notice first when they walk in. You can go loud with pattern, go quiet with subtle stone, or go somewhere in between. I think that’s what makes this project so fun. It’s a small space that makes a big statement, and you don’t need a huge budget to pull it off.

    Let’s get into the good stuff.

    1. Classic White Subway Tile for Timeless Appeal

    10 fresh subway tile kitchen backsplash ideas that feel timeless
    Credit: Cle Tile

    I’ll start with the one you’ve probably seen a thousand times, because it works. White subway tile is the little black dress of kitchen backsplashes. It’s clean, it’s bright, and it makes your kitchen feel bigger even if it’s tiny.

    The magic is in the grout color. Go with white grout for a soft, blended look, or try dark gray grout to make each brick pop. Pair it with white or wood cabinets and brass hardware for a bakery-meets-farmhouse vibe.

    Practical tip: use a 3×6 inch tile size, since it’s the most affordable and easiest to find in a hurry if you need replacements later.

    This style flexes easily into modern, traditional, and coastal kitchens alike. Once you’ve got the classic covered, let’s look at something with a little more texture.

    2. Textured Zellige Tile for Handmade Character

    Credit: jmds

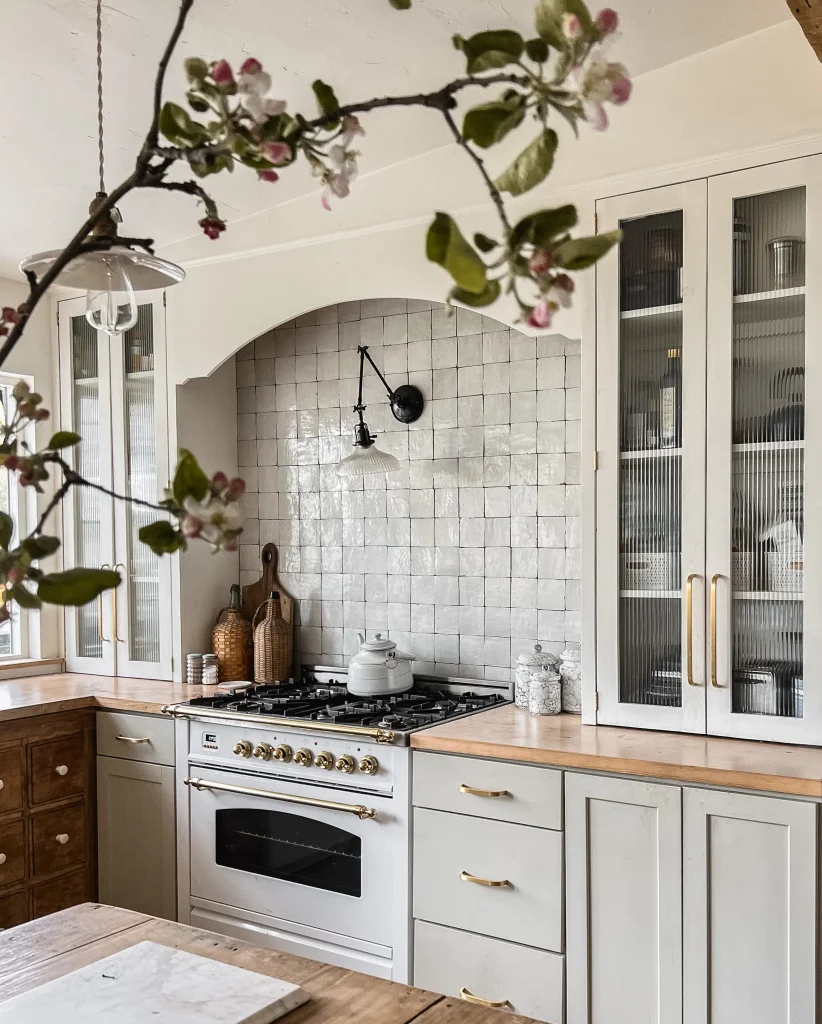
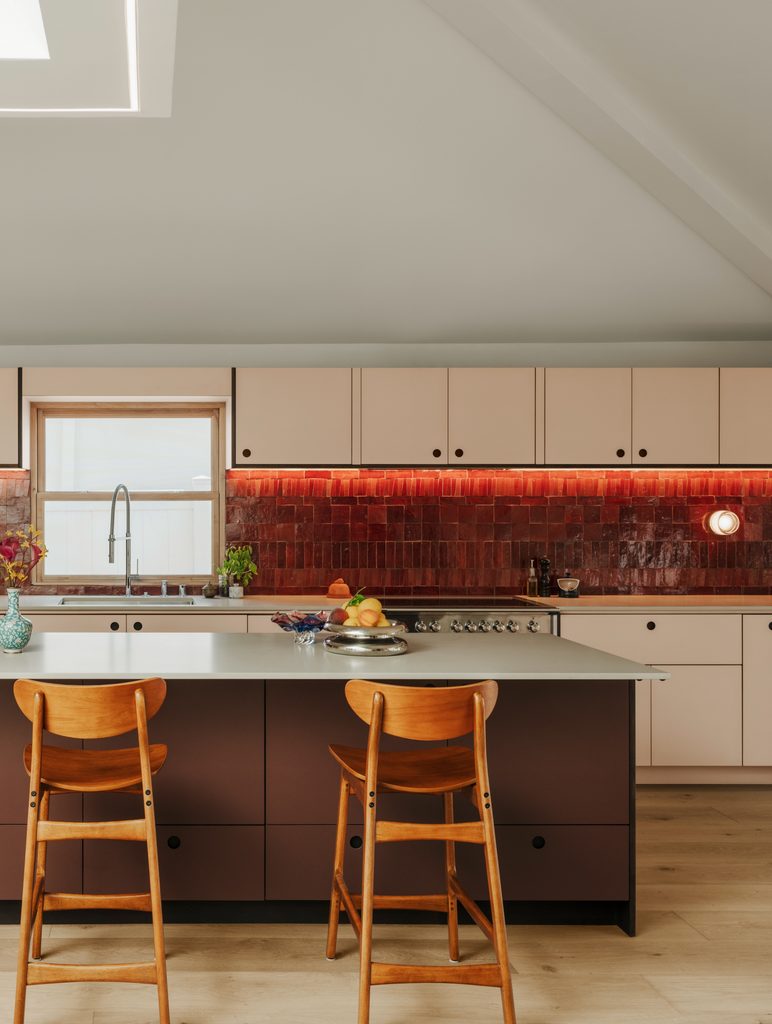
    Zellige tile comes from Morocco, and it’s got this uneven, glossy, handmade look that regular tile just can’t fake. Every piece reflects light a little differently, so your wall almost seems to shimmer as you move around the kitchen.

    I love this for kitchens that already have simple, quiet elements, like plain quartz counters or shaker cabinets. The tile does all the talking. Common colors include soft blues, warm terracottas, and creamy whites.

    Actionable tip: order 10% extra tile beyond your measurements, since color variation between batches is part of the charm but you want enough matching pieces on hand.

    This works beautifully in Mediterranean, bohemian, and modern farmhouse kitchens. Next, let’s talk about a material that brings serious drama.

    3. Bold Marble Slab for a Seamless Luxury Look

    10 Spectacular Marble Kitchens That Have the Wow-Factor | Livingetc
    Credit: Living Etc

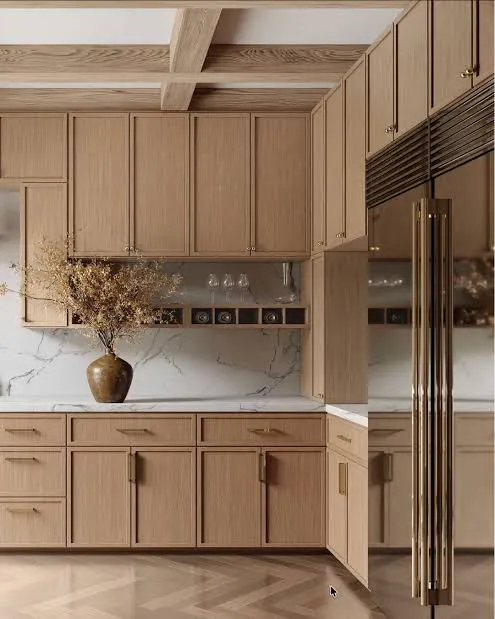
    Instead of small tiles, some people go with one giant slab of marble that runs from counter to cabinet with zero grout lines. It’s pricier, sure, but the payoff is a smooth, high-end look that feels like something out of a design magazine.

    Choose a marble with subtle veining if you want elegance without shouting for attention, or pick a bold-veined slab like Calacatta if you want your backsplash to be the star. Pair it with simple hardware so the stone gets the spotlight.

    Tip: ask your fabricator to “book match” the slab, meaning they cut it so the veining mirrors itself, creating a symmetrical pattern.

    This idea fits modern, transitional, and glam kitchens especially well. If marble feels out of budget, don’t worry, I’ve got a cheaper cousin coming up next.

    Backsplash Material Cost Comparison

    MaterialAverage Cost per Sq FtDurabilityMaintenance Level
    Ceramic Subway Tile$5 – $15HighLow
    Zellige Tile$20 – $40Medium-HighMedium
    Marble Slab$60 – $100MediumHigh
    Porcelain Slab$40 – $70Very HighLow
    Stainless Steel$30 – $60Very HighLow
    Peel-and-Stick Vinyl$2 – $8LowLow

    4. Budget-Friendly Peel-and-Stick Panels

    17 Cheap Backsplash Ideas That Only Look Expensive
    Credit: Bhg

    If marble made your wallet cry, let’s talk peel-and-stick. These panels mimic tile, stone, or even metal, and you just stick them right onto a clean wall. No grout, no contractor, no mess.

    They come in tons of patterns now, so you’re not stuck with the fake-looking versions from years ago. Some even have texture you can feel. Pair light colors with dark cabinets for contrast, or match tones for a quiet, blended look.

    Tip: clean your wall with rubbing alcohol before applying, since grease residue is the number one reason these panels peel off early.

    This works great in rentals, and it fits modern, minimalist, or transitional kitchens. Renters and homeowners alike love this shortcut, but if you want something more permanent with pattern, let’s move to hexagons.

    5. Playful Hexagon Tile for Geometric Charm

    Credit: Bromleytilers

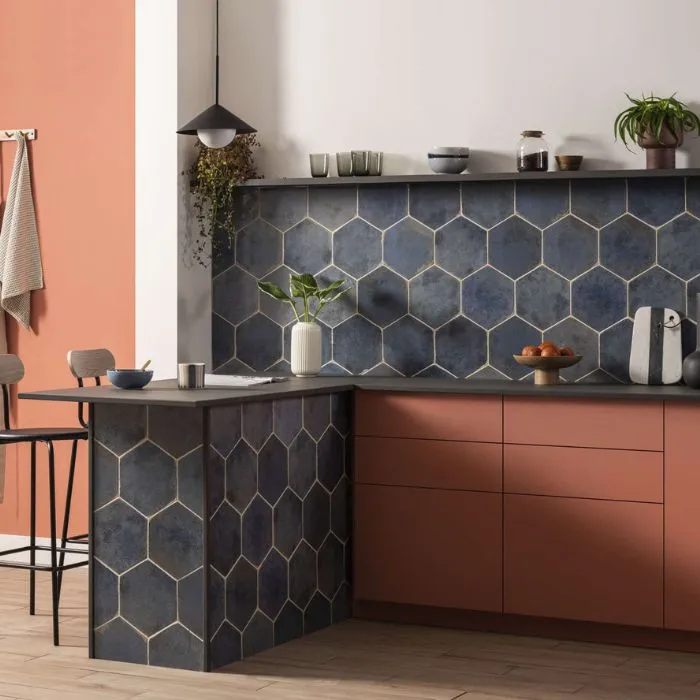
    Hexagon tiles bring a fun, honeycomb feel to your kitchen wall. They’re not new, but they’re having a real moment right now, especially in small mosaic sizes that create a subtle textured pattern.

    You can go monochrome with all-white hexagons for something quiet, or mix in a few colored tiles scattered through the pattern for a playful pop. Small hexagons work best on backsplashes since large ones can look clunky at eye level.

    Tip: use a matte finish hexagon tile instead of glossy if you want to hide water spots and fingerprints near the sink area.

    This idea suits mid-century, retro, and eclectic kitchens especially well. Speaking of eclectic, let’s talk about mixing materials entirely.

    6. Mixed-Material Backsplash for a Custom Feel

    Credit: Elle Decor

    Why pick one material when you can combine two or three? A popular combo is tile behind the stove paired with open shelving or wood paneling on the rest of the wall. It breaks up a large space and adds visual interest without overwhelming the room.

    Try pairing a bold tile behind the range as a focal point, then simpler subway tile or painted drywall along the rest of the counter. This keeps costs down since you’re only splurging in one small zone.

    Tip: measure your range hood width and extend the statement tile 3 to 6 inches beyond each side for a balanced, intentional look.

    This approach is a favorite in farmhouse, industrial, and transitional kitchens. Now let’s go from mixed materials to a single, shiny standout: metal.

    7. Sleek Stainless Steel for a Professional Kitchen Feel

    Credit: Jyf

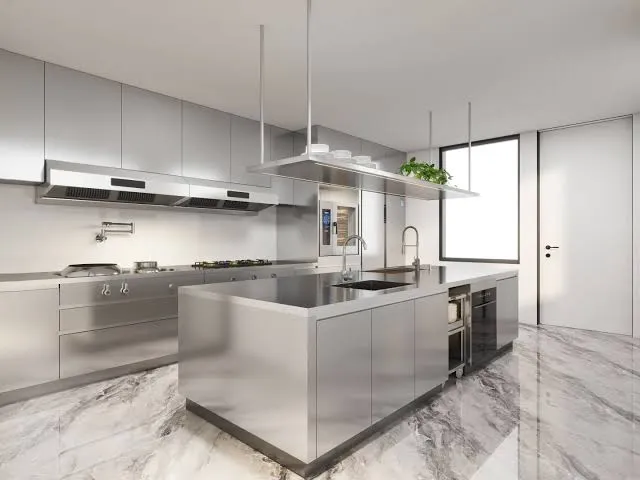
    If you love the look of a restaurant kitchen, stainless steel backsplash panels bring that same clean, industrial energy home. It’s tough, wipes clean in seconds, and never stains.

    Pair it with black or wood cabinets to soften the coldness of the metal. Some people add a stainless steel panel just behind the stove, then use tile elsewhere, which cuts down on cost while keeping the practical bonus where grease splatters happen most.

    Tip: choose a brushed finish instead of a mirror finish, since brushed steel hides fingerprints and smudges far better.

    This style shines in industrial, modern, and minimalist kitchens. Now, let’s slow things down with a material that feels warm instead of cold.

    8. Warm Wood Panels for a Natural, Cozy Touch

    Credit: The coolist

    Wood isn’t the most practical backsplash material near your sink or stove, but used correctly, it adds serious warmth. Think reclaimed wood planks or a smooth wood veneer sealed with a waterproof finish.

    I recommend keeping wood backsplashes away from the direct splash zone behind your sink, and instead using it along a dry stretch of counter, like behind an open shelf or coffee station. Pair with white or sage green cabinets for a Scandinavian feel.

    Tip: seal the wood with a polyurethane coating rated for kitchens, and reapply every couple of years to keep moisture out.

    This idea is perfect for farmhouse, Scandinavian, and coastal kitchens. Speaking of coastal, let’s dive into a color palette that feels like the ocean.

    9. Coastal Blue and White Patterned Tile

    29+ Backsplash for Blue and White Kitchens ( BEACHY ) - Tiles
    Credit: Backsplash

    Nothing says “beach house energy” like a blue and white patterned tile. Think Portuguese azulejo-style patterns or simple striped designs in soft ocean blues. It adds pattern without being too busy if you keep your cabinets and counters simple.

    Pair this with white shaker cabinets, brass or nickel hardware, and light wood floors for a bright, breezy feel. This works even if your kitchen isn’t near any water, since the palette itself creates that relaxed mood.

    Tip: use this pattern as a focal strip behind the stove only, then keep the rest of the wall in plain white tile to avoid visual overload.

    This idea naturally fits coastal, Mediterranean, and cottage-style kitchens. Next, let’s talk textures that catch the light in a totally different way.

    10. Glass Tile for Reflective Brightness

    Top Glass Tiles for Kitchen Backsplashes
    Credit: TileBar

    Glass tile backsplashes bounce light around the room, which makes small or dark kitchens feel bigger and brighter. It comes in subway shapes, mosaics, or larger sheets, so there’s flexibility for any style.

    Cool tones like sea green or pale blue glass pair beautifully with white or gray cabinets. Warmer amber or bronze glass tiles work well with wood tones and black hardware.

    Tip: glass tile shows smudges more than ceramic, so wipe it down with a microfiber cloth rather than paper towels, which can leave lint or scratch marks.

    This idea fits modern, glam, and contemporary kitchens especially well. Now, let’s look at a pattern-heavy option that’s having a huge comeback.

    11. Bold Encaustic-Style Patterned Tile

    Encaustic Tiles: Should You Embrace the Trend? - Maria Killam
    Credit: Maria

    Encaustic tiles have that old-world, hand-painted pattern look, often in terracotta, navy, or black and white combos. It’s a strong choice if you want your backsplash to feel like art, not just a wall covering.

    Keep your cabinets and counters neutral so the pattern doesn’t compete with anything else in the room. A plain white counter and simple cabinet hardware let the tile shine.

    Tip: order a sample tile before committing, since patterned tiles can look completely different in photos versus real lighting in your kitchen.

    This style pairs well with bohemian, Mediterranean, and eclectic kitchens. Last but not least, let’s cover a trend that skips tile altogether.

    12. Full-Height Slab Backsplash for a Minimalist Statement

    Kitchen Backsplash Height: Expert Guide for Manhattan
    Credit: KS

    This one skips the countertop-to-cabinet strip entirely and runs a single material, often quartz or porcelain, all the way up to the cabinets or even the ceiling. It’s a huge visual statement and it means zero grout lines to clean, ever.

    Choose a quartz slab with subtle movement if you want something calm, or a bold porcelain pattern that mimics stone if you want more drama. Pair with handleless cabinets for a truly minimalist finish.

    Tip: this option costs more upfront but saves money long-term since there’s no grout maintenance or resealing needed.

    This works best in modern, minimalist, and luxury kitchens. Now that you’ve got 12 solid ideas, let’s talk about how to actually pull this off without regret.

    Tips for Success

    • Order tile samples before buying in bulk. Lighting in stores is very different from your kitchen’s lighting.
    • Stick to a budget range before you fall in love with an expensive slab you can’t actually afford.
    • Choose grout color carefully. It changes the entire look of tile, sometimes more than the tile color itself.
    • Think about maintenance level based on how often you cook. Heavy cooks should avoid porous stone without sealing it well.
    • Match your backsplash finish (matte or glossy) to your countertop finish for a cohesive look.
    • Always buy 10% extra material to cover cuts, mistakes, and future repairs.
    • Consider hiring a professional installer for slab and glass tile, since these materials are harder to cut and place evenly.

    Common Mistakes and How to Avoid Them

    Choosing tile before choosing counters
    : Pick your countertop material first, since it’s more expensive and harder to change, then build your backsplash choice around it.

    Ignoring grout maintenance
    : Use a sealed grout or epoxy grout in high-splash zones, since regular grout stains and cracks faster near stoves and sinks.

    Going too matchy with cabinet color
    : Add contrast with your backsplash tone instead of matching cabinets exactly, since too much matching flattens the whole room visually.

    Skipping the sample stage
    : Always test a sample tile in your actual kitchen lighting before ordering the full amount, since colors shift dramatically under different light bulbs.

    Overcomplicating small kitchens
    : Stick to one bold element per small kitchen, whether that’s pattern or color, since too many statement pieces in a tight space feels cluttered.

    Forgetting about outlet placement
    : Plan tile layout around outlets and switches early, since awkward cuts around these spots look sloppy if not planned ahead of time.

    Similar Variations

    • Farmhouse Backsplash – Combines shiplap or beadboard with simple white subway tile for a cozy, rustic feel.
    • Industrial Loft Backsplash – Uses exposed brick or dark metal panels paired with black hardware and open shelving.
    • Modern Minimalist Backsplash – Relies on full slab quartz or porcelain with zero visible grout lines.
    • Bohemian Patterned Backsplash – Mixes colorful encaustic or Moroccan-style tile with mismatched, eclectic decor.
    • Coastal Cottage Backsplash – Leans on blue and white patterns, light wood tones, and airy, beach-inspired color palettes.
    • Traditional Classic Backsplash – Sticks with subway tile, neutral grout, and timeless white or cream cabinet pairings.

    Picking the right wall covering for your kitchen doesn’t have to feel overwhelming once you break it down material by material. Whether you go bold with marble, playful with hexagons, or practical with peel-and-stick panels, there’s a fit for every budget and style out there. I hope this list of 12 kitchen backsplash ideas gave you the confidence to finally start your own kitchen project.

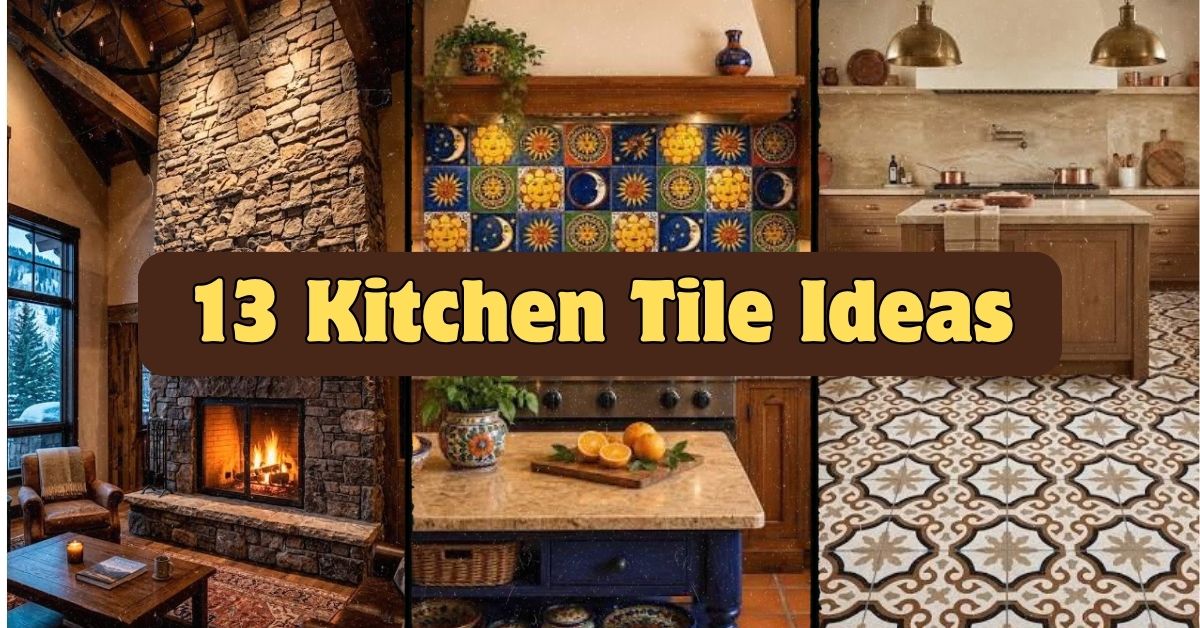
  • 13 Kitchen Tile Ideas That’ll Make You Rethink Your Whole Kitchen

    13 Kitchen Tile Ideas That’ll Make You Rethink Your Whole Kitchen

    I’ve spent way too many hours scrolling through kitchen photos, and I finally put together 13 kitchen tile ideas that actually work in real homes, not just magazine spreads. If you’ve ever stood in a tile store feeling completely overwhelmed by the wall of samples, I get it. That’s exactly why I wrote this.

    Kitchen tile refers to the ceramic, porcelain, glass, or stone material used on backsplashes, floors, or countertops in a kitchen space. The right tile choice affects durability, maintenance, and the overall visual style of the room, from color to pattern to texture.

    Stick around, because I’m about to walk you through everything from bold color choices to sneaky budget tricks that designers don’t always share.

    What Makes Kitchen Tile Such a Big Deal Anyway

    Here’s the thing about kitchen tile: it’s not just decoration. It’s the workhorse of your kitchen. Tile deals with grease splatters, water spills, and constant wiping down. So while it needs to look good, it also needs to survive real life.

    I think that’s why picking tile feels so stressful for people. You’re not just choosing a color. You’re choosing something that has to last for years and handle daily abuse. The good news? There are so many styles now that fit any budget and any taste. Whether you like clean and modern or cozy and traditional, there’s a tile combo out there for you. Let’s get into the ideas.

    1. Go Bold With a Colorful Zellige Backsplash

    15 Stunning Kitchen Backsplash Ideas: From Classic Zellige to Modern Trends
    Credit: Bing

    Zellige tile comes from Morocco, and it has this handmade look with slight color variations in every piece. No two tiles look exactly the same, which gives your kitchen a one-of-a-kind feel.

    I love this for people who want personality without going overboard. Pick a color like deep teal or warm terracotta for a statement wall behind your stove. Keep your cabinets simple and neutral so the tile gets to shine.

    Practical tip: order 10% extra tile since zellige has natural imperfections and you’ll want options when installing.

    This style works beautifully in Mediterranean, bohemian, or modern farmhouse kitchens. Now let’s talk about something a little more classic.

    2. Try Classic Subway Tile With a Twist

    26+ Stylish Backsplash Ideas for Your Kitchen
    Credit: Bing

    Subway tile is a kitchen staple for a reason. It’s affordable, timeless, and easy to clean. But the trick to making it feel fresh in 2024 is playing with the layout.

    Instead of the standard brick pattern, try a herringbone or vertical stack layout. This small change makes a huge difference without costing extra money.

    Pair white subway tile with black grout for contrast, or go monochrome with matching grout for a soft, seamless look. Add brass or black hardware nearby to tie the whole thing together.

    Actionable tip: if you’re renting or on a budget, peel-and-stick subway tile now looks incredibly realistic and can transform a space in a weekend.

    This idea adapts to almost any style, from coastal to industrial to traditional. Speaking of industrial vibes, let’s move into something with more texture.

    3. Add Texture With 3D Geometric Tile

    Bathroom Tile Idea - Install 3D Tiles To Add Texture To Your Bathroom
    Credit: Contemporist

    Flat tile is fine, but 3D tile adds depth and shadow play that catches your eye. Think hexagon shapes, scalloped edges, or raised geometric patterns.

    This works especially well as an accent wall behind open shelving or a stove. The shadows created by the tile’s texture change throughout the day as light hits it differently.

    Stick to one color family so the texture does the talking instead of competing with busy colors. White or soft gray 3D tile feels modern and clean.

    Quick tip: use a matte finish instead of glossy if you want the texture to really pop without glare from overhead lights.

    This style leans modern or contemporary, but soft neutral tones can work in transitional kitchens too. Next, let’s talk about a material that’s having a huge moment right now.

    4. Bring in Natural Stone for an Earthy Feel

    15 Natural Stone Elements for a Rugged Earthy Living Room - SpaceOfMuse
    Credit: Spaceofmuse

    Marble, travertine, and limestone tiles bring warmth and organic texture that manufactured tile just can’t copy. Every slab has unique veining, so your kitchen automatically feels custom.

    Natural stone works great on floors or as a backsplash, though I’d recommend sealing it regularly since stone is more porous than ceramic or porcelain.

    Pair stone with warm wood cabinets and brass fixtures for a cozy, high-end feel. If you want something more budget-friendly, look for porcelain tile that mimics stone. Honestly, some of them are nearly impossible to tell apart from the real thing.

    This idea fits beautifully into modern farmhouse, traditional, and Mediterranean-style kitchens.

    Material Comparison: Natural Stone vs Porcelain Look-Alike

    FeatureNatural StonePorcelain Look-Alike
    Average cost per sq ft$15-$40$5-$12
    MaintenanceNeeds sealing yearlyLow maintenance
    DurabilityProne to staining/chippingHighly durable
    Unique patternYes, every piece uniqueRepeating pattern
    Water resistanceModerate (needs sealant)High

    Now that we’ve covered stone, let’s jump into something a little more playful.

    5. Play With Color-Blocked Tile Sections

    Creating a Color-Blocked Kitchen – Board & Vellum
    Credit: Boardandvellum

    Color blocking means using two or more tile colors in defined sections rather than blending everything together. Think a lower third of the wall in navy tile, topped by white subway tile above it.

    This idea gives you the boldness of color without committing your whole kitchen to one loud choice. It also visually breaks up large wall spaces, making the kitchen feel more designed and less flat.

    Try pairing a deep color like forest green or burgundy with crisp white. Add a thin brass strip where the colors meet for a polished transition line.

    Tip: keep your color-blocked section under 40% of the total wall to avoid overwhelming the space.

    This trick works great in modern, eclectic, or art deco-inspired kitchens. Let’s move on to something a bit more understated but just as impactful.

    6. Choose Handpainted Talavera Tile for Character

    Unique Mexican Ceramic Tiles - Rustica House ®
    Credit: Myrustica

    Talavera tile comes from Mexico and features bright, handpainted patterns in blues, yellows, and reds. It’s bold, it’s colorful, and it instantly makes a kitchen feel warm and inviting.

    I’d suggest using this as a small accent, like a tile inset above your stove or as a border around a plain subway tile backsplash. A little goes a long way with patterns this vibrant.

    Balance the boldness with simple white cabinets and open wood shelving. Let the tile be the star of the show.

    Practical tip: order samples first since colors can vary between batches, and lighting drastically changes how the colors look in person.

    This style shines in bohemian, southwestern, and eclectic kitchens.

    7. Use Large Format Tile for a Seamless Look

    31+ Large Tile Backsplash ( SLEEK & CLEAN ) - Larger Tile Designs
    Credit: Backsplash

    Large format tile means tiles that are 12×24 inches or bigger. Fewer grout lines mean a cleaner, more streamlined appearance, which a lot of people are loving right now for modern kitchens.

    This works especially well on floors, where fewer seams mean less dirt buildup and easier mopping. It also makes small kitchens feel bigger since your eye doesn’t stop at grout lines every few inches.

    Stick with a light neutral color like warm gray or soft beige for the most spacious feel. Pair with minimalist cabinet hardware to keep the whole look cohesive.

    Tip: hire an experienced installer for large format tile since it requires a perfectly level subfloor to avoid cracking.

    This works wonderfully in modern, minimalist, and Scandinavian-style kitchens. Now let’s flip things around and talk ceilings.

    8. Take Tile All the Way to the Ceiling

    Going Up? Backsplash Tile That Goes to the Ceiling
    Credit: Normandyremodeling

    Most kitchens stop tile at the upper cabinet line, but taking it all the way up creates a dramatic, high-end look. This works especially well in kitchens with open shelving instead of upper cabinets.

    Full-height tile makes a small kitchen feel taller and more luxurious. It also means less painting and touch-up work over time since tile handles grease and moisture way better than paint.

    Pick a tile that’s not too busy since you’re covering a large surface area. Subtle texture or soft color variation works best here.

    Tip: budget extra for tile and labor since full-height installs use significantly more material than a standard backsplash.

    This dramatic approach fits modern, industrial, and high-end traditional kitchens perfectly. Next up, a fun way to add pattern without overwhelming the whole room.

    9. Frame Your Range With a Tile Focal Point

    30 Bold and Beautiful Range Backsplashes
    Credit: Houzz

    Instead of tiling your whole backsplash the same way, create a focal point tile design just behind your stove. This could be a diamond pattern, a contrasting color, or even a mini mosaic mural.

    It draws the eye to the cooking area and gives your kitchen a custom, designed feel without a huge budget. Think of it like a piece of art hung above your stove, except it’s permanent and way more durable.

    Keep the rest of your backsplash simple, like plain subway or square tile, so the focal point really stands out.

    Tip: measure your range hood width first so your tile focal point lines up symmetrically.

    This idea works in basically every kitchen style, from modern to traditional to coastal.

    Budget Tiers for Kitchen Tile Projects

    Budget TierCost Range (per sq ft)Best Tile OptionsTypical Kitchen Size Fit
    Budget-friendly$1-$5Ceramic subway, peel-and-stickSmall to medium
    Mid-range$6-$15Porcelain, glass mosaicMedium kitchens
    High-end$16-$40Natural stone, handmade zelligeAny size, statement focus
    Luxury$40+Custom Talavera, imported marbleLarger or remodel-focused

    With budgets sorted, let’s talk about a texture trend that’s been showing up everywhere lately.

    10. Incorporate Fluted or Ribbed Tile for Subtle Texture

    Why Fluted Granite is Trending in Stone Design | Stone Galleria™
    Credit: Stonegalleria

    Fluted tile has raised vertical or horizontal grooves that add dimension without being too loud. It’s a softer alternative to the bold 3D geometric tile we talked about earlier.

    This style pairs beautifully with curved cabinet edges and rounded hardware for a soft, organic kitchen feel. It photographs incredibly well because the grooves catch light in a subtle, elegant way.

    Stick to a single neutral color so the texture stays the focus rather than color contrast.

    Tip: use fluted tile sparingly, like on a kitchen island panel or a small backsplash section, since covering too much area can feel repetitive.

    This works great in modern, Japandi, and soft contemporary kitchen styles. Now let’s talk about a classic pattern making a huge comeback.

    11. Bring Back Checkerboard Floor Tile

    16 Inspiring Checkered Kitchen Floor Ideas to Give Your Space some Texture  - COCO LAPINE DESIGNCOCO LAPINE DESIGN
    Credit: Cocolapinedesign

    Checkerboard tile floors were huge decades ago, and they’re back in a big way. The classic black and white combo feels retro, but you can also do it in softer tones like cream and sage for a more updated look.

    This pattern instantly grounds a kitchen and adds visual interest to an otherwise plain floor. It pairs really well with simple, unfussy cabinetry since the floor is already doing a lot of visual work.

    Go with matte finish tile on floors to avoid slipping, especially in a kitchen where spills happen often.

    Tip: use a smaller tile size, like 6×6 inches, for a more delicate checkerboard look, or go bigger for a bolder statement.

    This style fits vintage, French country, and modern retro kitchens beautifully. Let’s finish up with a couple more ideas that tie everything together.

    12. Mix Metallic Tile for a Touch of Glam

    Expert Guide to Mixing Metals in Your Home - Decorilla
    Credit: Decorilla

    Metallic tile, whether it’s brushed brass, copper, or stainless steel finish, adds a subtle shine that catches light beautifully. It’s not about going full glitzy, just adding a hint of shimmer.

    Use metallic tile as a thin accent strip within your backsplash or as a border around your stove area. A little shine goes a long way, so don’t overdo it across a whole wall.

    Pair with matte black or white cabinets so the metallic pops instead of competing with other shiny finishes.

    Tip: keep metallic tile away from areas with heavy grease splatter since fingerprints and smudges show up more easily on shiny surfaces.

    This works great in glam, art deco, and modern luxury kitchens.

    13. Layer Patterns With Encaustic-Style Tile

    Encaustic Cement Tiles: Design Solutions for Bathrooms, Kitchens
    Credit: Studiocementtile

    Encaustic tile has intricate patterns baked right into the material, often inspired by Victorian or Mediterranean designs. Unlike printed tile, the pattern goes all the way through, so it holds up better over time.

    This style works as flooring or as a bold backsplash choice. The patterns are busy, so keep your cabinets and walls simple and neutral to balance things out.

    Tip: use encaustic tile in a smaller area, like a kitchen entryway or under a farmhouse sink, if you’re worried about it feeling too busy for the whole room.

    This idea shines in Mediterranean, vintage, and eclectic kitchen styles, wrapping up our list with a punch of pattern and history.

    Tips for Success

    • Always order 10-15% extra tile to account for cuts, breaks, and future repairs.
    • Get physical samples before buying anything online, since screen colors are never accurate.
    • Think about grout color as much as tile color, since it changes the entire look.
    • Test tile samples in your actual kitchen lighting, not just under store lights.
    • Balance bold tile choices with simple cabinetry so your kitchen doesn’t feel too busy.
    • Hire a professional for large format or natural stone tile since these require precise installation.
    • Consider maintenance needs before falling in love with a material, especially for busy households.

    Common Mistakes and How to Avoid Them

    Choosing tile before finalizing cabinet color
    : Pick your cabinet color first, then find tile that complements it, not the other way around.

    Ignoring grout line width
    : Thin grout lines create a sleek look, while thick lines feel more traditional, so choose based on your overall style goal.

    Going glossy on kitchen floors
    : Glossy floor tile gets slippery when wet, so stick to matte or textured finishes for safety.

    Overdoing bold patterns everywhere
    : Pick one focal point, like a backsplash or floor, and keep other surfaces simple so the space doesn’t feel chaotic.

    Skipping the sealant on natural stone
    : Unsealed stone stains easily from oil and wine, so seal it right after installation and reseal yearly.

    Underestimating installation costs
    : Labor can cost as much as the tile itself, especially for intricate patterns, so budget accordingly before falling in love with a design.

    Similar Variations

    • Moroccan Bohemian Kitchen: Combines zellige tile with warm wood tones and woven textiles for a globally-inspired feel.
    • Coastal Cottage Kitchen: Uses light blue and white tile combos with shiplap walls for a beachy, relaxed vibe.
    • Industrial Loft Kitchen: Pairs subway tile with exposed brick and black metal fixtures for an urban edge.
    • French Country Kitchen: Features encaustic or checkerboard floors with soft pastel cabinets and vintage hardware.
    • Modern Farmhouse Kitchen: Mixes natural stone or large format tile with shaker cabinets and matte black accents.
    • Art Deco Glam Kitchen: Uses metallic accent tile paired with bold geometric patterns and brass fixtures.

    Picking the right tile really comes down to knowing your style, your budget, and how much maintenance you’re willing to deal with. There’s no single “best” option here, just the one that fits your life and your kitchen the best.

    I hope this list gave you a clearer picture of what’s possible, whether you’re planning a full renovation or just want to swap out a small backsplash section. With these 13 kitchen tile ideas, you’ve got more than enough inspiration to start your next project with confidence.

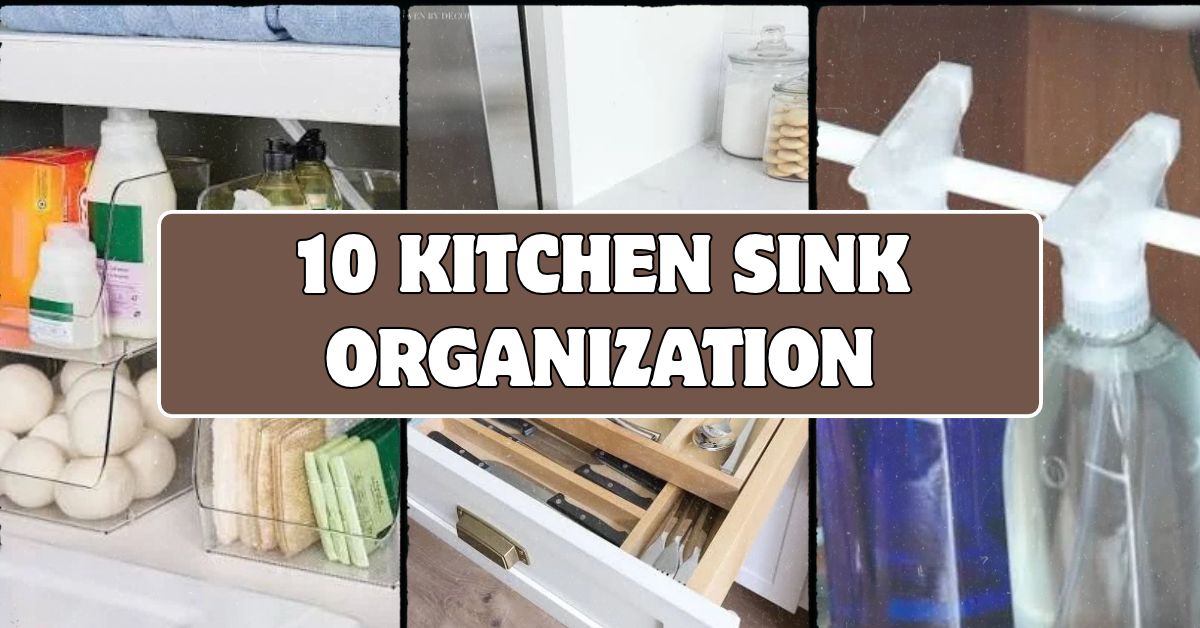
  • 10 Kitchen Sink Organization Ideas That Actually Work

    10 Kitchen Sink Organization Ideas That Actually Work

    I’ve tried almost every kitchen sink organization hack out there, and I’m going to walk you through the ones that actually earned a permanent spot under my sink. If you’ve ever opened your under-sink cabinet and had a bottle of dish soap roll out and hit your foot, you’re in the right place. This isn’t theory. This is what works.

    Kitchen sink organization refers to the systems and tools used to store cleaning supplies, sponges, trash bags, and other items in and around the sink area, typically inside the cabinet below it. The goal is to maximize limited space while keeping items accessible and dry.

    Stick around, because I’m about to show you a dozen ways to turn that chaotic cabinet into something you’re actually proud to open.

    What Kitchen Sink Organization Really Means

    Okay, so before we jump into the ideas, let’s talk about what we’re actually solving here. The area under your sink is weird. It’s got pipes running through it, it’s usually damp, and it’s often the smallest cabinet in your whole kitchen. Yet somehow we expect it to hold dish soap, trash bags, cleaning sprays, sponges, and sometimes even small appliances.

    Good organization here isn’t about buying the fanciest bins. It’s about working around the pipes, keeping moisture from ruining your stuff, and making things easy to grab without digging. Once you get that mindset, everything else clicks into place.

    1. Install a Two-Tier Sliding Organizer

    Kitchen Cabinet Storage Ideas - Driven by Decor
    Credit: Drivenbydecor

    A sliding two-tier organizer is basically a game changer for pipe-heavy cabinets. It fits around the plumbing and gives you two levels instead of one flat wasted space. You slide it out, grab what you need, slide it back in.

    Look for ones made of rust-resistant metal or heavy-duty plastic since moisture is always a factor under a sink. My tip: measure your cabinet width and pipe placement before buying, because a lot of these come in adjustable sizes but not all of them.

    This works in almost any kitchen style. Farmhouse kitchens can go with a matte black wire version, while modern kitchens might prefer a sleek white-coated one.

    Once your bottles have a home, it’s time to think about smaller loose items like sponges and scrub brushes.

    2. Add a Tension Rod for Spray Bottles

    5 clever ways to use a tension rod around the house | Ideal Home
    Credit: Ideal Home

    This one costs like five dollars and it’s shockingly effective. You install a tension rod horizontally near the top of the cabinet, then hang your spray bottles by their trigger handles. It clears the floor of your cabinet completely for taller items below.

    Actionable tip: use a rod with a rubberized grip so bottles don’t slide side to side every time you open the door.

    This trick works in literally every home style because it’s invisible once bottles are hanging. Nobody sees the rod, they just see a tidy cabinet.

    Now let’s talk about the sponge and scrubber situation, because that’s usually the messiest part.

    3. Use a Suction Caddy for Sponges and Scrubbers

    Back to School!Sponge Holder for Kitchen Sink Suction,Sponge Holder with Strong Suction Cup,Dish Sponge Caddy Inside Sink Removable,Rustproof Aluminum for Sponges,Brushes,Stoppers and Scrapers - Walmart.ca
    Credit: Walmart

    Wet sponges sitting in a pool of their own drippy mess is nobody’s favorite thing. A suction caddy sticks right to the inside wall of your sink cabinet or even on the sink basin itself, holding sponges up and letting them air dry.

    Pick one with drainage holes so water doesn’t just collect in a mini puddle. Stainless steel versions blend into modern kitchens, while a simple white silicone one disappears in coastal or cottage-style spaces.

    Once your sponges have a proper drying spot, you’ll notice your cabinet stays drier overall, which helps everything else last longer too.

    4. Bring In Stackable Clear Bins

    iDesign Stackable Open-Front Storage Bins for Kitchen and Pantry Organization - Set of 4 - Clear & Reviews | Wayfair
    Credit: Wayfair

    Clear bins are the unsung hero of under-sink storage. You can see exactly what’s inside without opening five containers to find the dish tabs. Stack them to use vertical space instead of letting items sprawl across the cabinet floor.

    Group similar items together, cleaning sprays in one bin, extra sponges in another, dishwasher pods in a third. Label them if you want to go the extra mile.

    This idea flexes easily. Farmhouse kitchens can use bins with wood-toned lids, while minimalist kitchens might stick to plain acrylic.

    Let’s compare a few bin materials so you can pick what actually fits your situation.

    Bin Material Comparison

    MaterialDurabilityPrice RangeBest For
    Clear AcrylicHigh$10-$25Long-term daily use
    Plastic (BPA-free)Medium$5-$15Budget-friendly setups
    Wire MeshMedium-High$15-$30Better airflow, less moisture buildup
    Bamboo/Wood-linedLow-Medium$20-$40Style-focused kitchens

    Once your bins are sorted, the next step is dealing with trash bags, because that’s a whole separate headache.

    5. Store Trash Bags in a Tissue Box

    DIY Plastic Shopping Bag Dispenser | Recycled Tissue Box - You Make It Simple
    Credit: Youmakeitsimple

    This one sounds silly but trust me on it. Roll your trash bags and stuff them into an empty tissue box. Pull one out just like a tissue whenever you need it. No more digging through a tangled plastic bag pile.

    Actionable tip: use a small label maker or marker to write the bag size on the box so you’re not guessing later.

    This trick fits any style since the box is tucked away and nobody’s judging your tissue box choice. Traditional or modern, it doesn’t matter.

    Now let’s zoom out a bit and think about the door itself, because that’s prime real estate most people ignore.

    6. Add Over-the-Door Storage Racks

    Best Behind the Door Storage Ideas
    Credit: Food52

    The back of your cabinet door is basically free square footage. Over-the-door racks hook right onto the door and hold spray bottles, gloves, scrub brushes, and small items you use daily.

    Buy one with adjustable rack heights so you can fit taller items like glass cleaner bottles without cramming everything sideways.

    Modern kitchens tend to like slim metal racks, while more traditional spaces might prefer a fabric pocket organizer that hides items from view when the door’s open.

    Once your door space is working for you, let’s talk about keeping everything dry with a simple mat trick.

    7. Line the Cabinet Floor With a Waterproof Mat

    Waterproof Mat Placement Under Kitchen Sink Made Simple
    Credit: Sinksavvyhub

    Sink cabinets deal with leaks, drips, and general dampness more than any other cabinet in your kitchen. A waterproof liner or rubber mat protects the wood underneath and makes cleanup way easier when something inevitably spills.

    Buy a mat that’s cut-to-size or trimmable so it fits your exact cabinet floor without gaps. My tip: pick one with raised edges so water doesn’t run off onto your cabinet floor.

    This works no matter your style since it’s completely hidden. Nobody’s cabinet floor is part of the design scheme.

    With the base protected, let’s talk vertical space again, this time above the sink itself.

    8. Mount a Small Shelf Above the Faucet

    Create More Kitchen Storage: Install Open Shelving Above The Sink - C'est Bien by Heather Bien
    Credit: Heatherbien

    If you’ve got any wall space above your sink, a small floating shelf can hold soap dispensers, a small plant, or a cup for sponges. It keeps countertop clutter down and gives your eyes something nice to look at while you’re doing dishes.

    Go with a shelf that matches your cabinet hardware finish for a cohesive look. Farmhouse kitchens might use a reclaimed wood shelf, while modern kitchens could go with a floating glass one.

    Actionable tip: keep it to two or three items max so it doesn’t turn into another cluttered surface.

    Speaking of countertop clutter, let’s tackle the sink caddy situation next.

    9. Use a Sink-Side Caddy for Daily Essentials

    Best Kitchen Sink Caddy — Tested, Compared & Reviewed 2026
    Credit: kitchen

    A sink-side caddy sits right next to your basin and holds the stuff you use constantly, dish soap, a scrub brush, maybe hand soap. It keeps these items from cluttering your counter while still being an arm’s length away.

    Pick a caddy with a drainage tray underneath so water doesn’t pool and stain your countertop. Stainless steel caddies look great in modern and industrial kitchens, while a woven rattan caddy fits coastal or boho spaces nicely.

    This is one of those small changes that makes a huge visual difference almost instantly.

    Let’s move from daily-use items to the stuff you only need occasionally.

    10. Create a Rotating Lazy Susan for Back-of-Cabinet Items

    What is a Lazy Susan? Plus 4 Ways to Use One
    Credit: Bhg

    The back corners of a sink cabinet are basically the Bermuda Triangle of your kitchen. Stuff goes in and never comes back out. A lazy Susan turntable solves this by letting you spin items forward instead of reaching into a black hole.

    Get one with a raised edge so bottles don’t slide off when you spin it. This works especially well for extra cleaning supplies you don’t use daily, like specialty stain removers or extra dish tabs.

    This idea works in any kitchen because it’s fully hidden inside the cabinet. Nobody sees it but you’ll feel the difference every time you reach for something in the back.

    Now let’s talk budget, because not every solution needs to cost the same amount.

    Budget Tiers for Sink Organization

    Budget TierPrice RangeWhat You Get
    Starter$0-$15Tension rod, tissue box hack, dollar store bins
    Mid-Range$15-$40Sliding organizer, suction caddy, over-door rack
    Upgrade$40-$80Lazy Susan, waterproof mat, floating shelf
    Full Overhaul$80-$150All of the above combined into one system

    With budget out of the way, let’s cover two more ideas that round out a complete system.

    Tips for Success

    • Measure your cabinet depth, width, and pipe placement before buying any organizer.
    • Group items by how often you use them, daily stuff up front, rare stuff in back.
    • Choose rust-resistant or waterproof materials since this area deals with moisture constantly.
    • Reassess your setup every few months since habits and product collections change.
    • Keep a small trash bin or bag inside the cabinet for expired products so cleanup is easy.
    • Don’t overfill bins, leave a little breathing room so items are easy to lift out.
    • Use vertical space before you use floor space, it’s almost always underused.

    Common Mistakes and How to Avoid Them

    Overpacking the cabinet
    : Fix this by removing duplicate products and only keeping one backup of each item.

    Ignoring pipe placement when buying organizers
    : Fix this by measuring around pipes first, then shopping for adjustable or modular units.

    Storing chemicals in unlabeled containers
    : Fix this by always keeping original labels or writing contents clearly on any container you transfer product into.

    Letting sponges sit in standing water
    : Fix this by using a caddy or holder with proper drainage instead of setting sponges flat on a surface.

    Skipping a cabinet liner
    : Fix this by adding a waterproof mat early on, before any leaks cause real damage to your cabinet wood.

    Forgetting to check expiration dates on cleaning products
    : Fix this by doing a quick sweep every few months and tossing anything old or separated.

    Similar Variations

    • Pantry Zone Organization: Applying the same bin and label system to pantry shelves for grouped food storage.
    • Bathroom Cabinet Organization: Using tension rods and caddies under bathroom sinks for similar plumbing challenges.
    • Garage Cleaning Station Setup: Extending sink-side caddy ideas to garage utility sinks for tools and solvents.
    • Laundry Room Sink Organization: Adapting stackable bins and shelves for detergent and stain-remover storage near laundry sinks.
    • Mudroom Utility Organization: Borrowing over-door racks and lazy Susans for shoe cleaning supplies and outdoor gear.

    Getting your cabinet in order doesn’t take a full weekend or a ton of money. Most of these ideas cost less than a takeout dinner and take twenty minutes to set up. Start with one or two that solve your biggest headache, then build from there.

    At the end of the day, a tidy cabinet just makes everything easier, less digging, less frustration, more time doing actual dishes instead of hunting for the dish soap. That’s really what good 10 kitchen sink organization is all about.

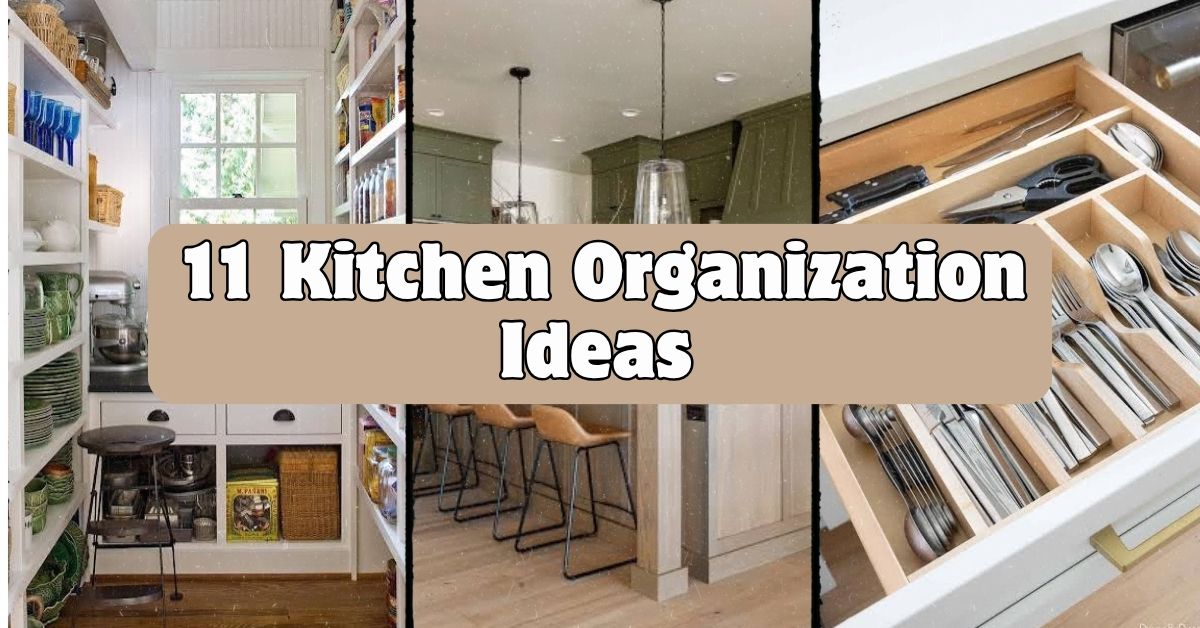
  • 11 Kitchen Organization Ideas That Actually Work in Real Homes

    11 Kitchen Organization Ideas That Actually Work in Real Homes

    I’ve tested more kitchen organization ideas than I can count, and this list of 11 Kitchen Organization Ideas is the one I wish someone had handed me years ago. If you’re staring at a cluttered counter right now wondering where to even start, you’re in the right place.

    Kitchen organization means arranging storage, tools, and food in a way that makes cooking and cleaning faster and less stressful. The most effective approach combines zone-based storage (grouping items by task), vertical space use, and clear containers so you always know what you have.

    Stick around, because I’m about to walk you through the exact ideas that turned my chaotic kitchen into a space I actually enjoy cooking in.

    What Makes a Kitchen Feel “Organized” Anyway?

    Here’s the thing nobody tells you: an organized kitchen isn’t about having zero clutter. It’s about having a system. I used to think I needed fancy bins and a Pinterest-perfect pantry. Turns out, I just needed everything to have a “home.” When your spatula always lives in the same drawer, you stop wasting time hunting for it. That’s really the whole goal here. A good system saves you time, cuts down on stress, and honestly makes cooking feel less like a chore. Let’s get into the ideas that make this happen.

    1. Group Items by “Zones” Instead of Categories

    Move Over, 3-Zone Kitchen. Meet the 5-Zone Kitchen
    Credit: Houzz

    This one changed everything for me. Instead of organizing by type (all pots together, all spices together), organize by how you use them. Put your coffee mugs, filters, and coffee maker in one spot near the outlet. Keep baking stuff like flour, sugar, and measuring cups in one cabinet near your mixing bowl.

    Practical tip: Stand in your kitchen and imagine making your three most common meals. Notice where you walk and reach. Put items there.

    This works in any kitchen style, from a tiny modern galley to a big traditional farmhouse layout, because it’s based on function, not looks.

    Once your zones are set, the next step is making sure every inch of vertical space pulls its weight too.

    2. Add a Pull-Out Pantry Shelf for Deep Cabinets

    33 Kitchen Pantry Ideas for All Your Storage Needs
    Credit: Bhg

    Deep cabinets are storage black holes. Stuff gets pushed to the back and forgotten until it expires. A pull-out shelf (also called a slide-out drawer) fixes this instantly. You install it inside your existing cabinet, and it glides out like a drawer, showing you everything at once.

    These come in wire or wood, and most home improvement stores sell adjustable kits you can install yourself in under an hour.

    Quick tip: Measure your cabinet depth before buying. Most pull-outs need at least 22 inches to work properly.

    For coastal or farmhouse kitchens, go with a light wood finish. Modern kitchens look sleeker with a matte wire or black metal version.

    Now that your pantry cabinet is sorted, let’s talk about the drawer that causes the most fights in every household: the junk drawer.

    3. Use Drawer Dividers for Everything, Not Just Silverware

    Maximize Your Storage Space: Kitchen Drawer Organizer Ideas That Work! - Driven by Decor
    Credit: Driven By Decor

    Everyone puts dividers in their silverware drawer. Almost nobody uses them anywhere else, and that’s a missed opportunity. Try dividers in your junk drawer for batteries, tape, and rubber bands. Use them in a “tool drawer” for measuring cups and can openers. Even spice drawers benefit from small dividers that keep jars upright.

    Adjustable bamboo or acrylic dividers work in almost any drawer size, so you don’t need custom-built inserts.

    Practical tip: Measure your drawer’s interior before shopping. Adjustable dividers are more forgiving if your measurements are slightly off.

    Traditional kitchens tend to favor wood dividers, while modern spaces lean toward clear acrylic that disappears visually.

    Speaking of things that disappear, let’s talk about what happens when you can’t see your food at all: the pantry.

    4. Store Pantry Staples in Clear, Labeled Containers

    How to Organize a Pantry (And Enjoy Doing It!) - Striped Spatula
    Credit: Stripedspatula

    I resisted this one for years because I thought it was just a trend for people with too much time. I was wrong. Clear containers let you see exactly how much pasta, rice, or flour you have left, so you stop buying duplicates. Labels (even simple masking tape and a marker) keep everyone in the house putting things back in the right spot.

    Practical tip: Buy containers in just two or three sizes. A mismatched shelf of random jars looks more cluttered, not less.

    Farmhouse and coastal kitchens often use glass jars with wood lids for a warmer look. Modern kitchens tend to go with uniform plastic bins in white or black.

    Container Size Guide for Common Pantry Items

    Container SizeBest ForApprox. Capacity
    Small (2 cups)Spices, nuts, seeds16 oz
    Medium (4 cups)Rice, oats, sugar32 oz
    Large (8 cups)Flour, pasta, cereal64 oz
    Extra Large (12+ cups)Dog food, bulk snacks96+ oz

    Once your dry goods are sorted, it’s time to tackle something that trips up almost everyone: cabinet doors that just sit there doing nothing.

    5. Install Racks or Hooks on the Inside of Cabinet Doors

    12 Clever Kitchen Cabinet Storage Ideas
    credit: Houzz

    The inside of a cabinet door is basically free real estate that most people ignore. Adding a small wire rack or a few hooks turns that flat space into storage for cutting boards, lids, or even cleaning sprays under the sink.

    Practical tip: Measure the door’s height and width, then leave at least an inch of clearance so the rack doesn’t hit shelves inside when you close the door.

    This idea barely changes your kitchen’s look since it’s hidden, so it works no matter your style, from minimalist to cottagecore.

    Now let’s move from doors to one of the most overlooked storage spots in the whole kitchen: the space above your cabinets.

    6. Use the Top of Your Cabinets for Rarely-Used Items

    These 15 Kitchen Cabinet Decor Ideas Are Above and Beyond
    Credit: Elle decor

    If there’s gap space above your cabinets, use it. This is prime real estate for things you only need a few times a year, like the big turkey roasting pan or the ice cream maker. I keep decorative baskets up there so it still looks tidy, not like storage overflow.

    Practical tip: Use uniform baskets or bins so the top looks intentional instead of like a pile of random stuff.

    In traditional and farmhouse kitchens, woven baskets look right at home. Modern kitchens do better with closed, matching bins in a single color.

    Let’s head back down to counter level, because your countertop needs its own strategy too.

    7. Keep Only Daily-Use Items on the Counter

    21 Smart Storage Ideas to Declutter Countertops Around Your House
    Credit: Bhg

    Counters get cluttered fast, and it’s usually because we leave everything we might use “someday” sitting out. I made a rule: only things I use every single day get counter space. That means my coffee maker stays out, but my stand mixer goes into a cabinet unless I’m baking that week.

    Practical tip: Do a two-week test. Anything you don’t touch in that time gets stored away.

    Minimalist and Scandinavian kitchens thrive on this rule especially, since open counters are a huge part of that look.

    Speaking of counters, let’s talk about the stuff that tends to pile up right next to the stove.

    8. Mount a Magnetic Strip for Knives and Metal Tools

    The 6 Best Magnetic Knife Holders, Tested & Reviewed
    Credit: Foodandwine

    A magnetic knife strip mounted on the wall or backsplash frees up drawer space and keeps your knives sharper, since they’re not banging around with other tools. You can also use one for metal spice tins or bottle openers.

    Practical tip: Mount it at least 18 inches above the counter so kids can’t easily reach the blades.

    Industrial and modern kitchens often use a raw steel strip as a design feature. Traditional kitchens can go with a wood-backed magnetic strip to soften the look.

    Storage Solution Cost Comparison

    SolutionDIY CostPre-Made CostInstall Difficulty
    Magnetic knife strip$10-15$20-40Easy
    Pull-out pantry shelf$25-40$60-150Moderate
    Drawer dividers$5-10$15-30Easy
    Under-cabinet lighting$20-30$50-100Moderate

    Now that your walls are working for you, let’s look at a spot most people totally forget: under the sink.

    9. Add Tiered Risers Under the Sink

    22 Under-Sink Storage Ideas to Bring Order to Your Cabinets
    Credit; Bhg

    The area under the sink is awkward because of pipes, but tiered risers (basically little shelf steps) let you stack cleaning supplies without digging through a jumbled pile. I use one tier for daily sprays and another for backup supplies like extra sponges and trash bags.

    Practical tip: Look for adjustable risers with rubber feet so they don’t slide when you’re grabbing something in a hurry.

    This works the same in every kitchen style since it’s hidden storage. Function matters more than looks here.

    Once under the sink is sorted, let’s go vertical again, this time above your counters with open shelving.

    10. Try Open Shelving for Everyday Dishes

    Tips for Open Shelving in the Kitchen | HGTV
    Credit: Hgtv

    Open shelves aren’t for everyone, but if you’re someone who actually uses your dishes daily, they can cut down clutter fast. You skip the step of opening cabinet doors, and it forces you to keep only what looks good and gets used often.

    Practical tip: Stick to one or two colors of dishware on open shelves. A mismatched jumble looks messy fast.

    Coastal and farmhouse kitchens use open shelving constantly with white dishes and wood shelves. Modern kitchens tend to use floating black or steel shelves with minimal items displayed.

    Let’s finish strong with two ideas that tie everything together: labeling and a rotation system.

    11. Create a “First In, First Out” Fridge and Pantry System

    How To Organize Kitchen Pantry:10 Easy Steps
    Credit: Stillnessdecor

    This is a habit, not a product, but it might be the most useful idea on this whole list. When you buy new groceries, push older items to the front and put new stuff in the back. This way you actually use what you already have instead of finding three expired jars of salsa hiding behind the new one.

    Practical tip: Do a five-minute fridge check every Sunday before grocery shopping. It stops food waste before it starts.

    This habit works no matter what your kitchen looks like because it’s about behavior, not decor.

    Tips for Success

    • Start with one zone at a time. Trying to reorganize the whole kitchen in a weekend usually backfires and leaves you with a bigger mess.
    • Measure everything before buying storage products. A bin that’s an inch too wide won’t fit, and returns are annoying.
    • Do a seasonal check-in every three months to remove things that snuck back into the wrong spot.
    • Involve everyone in the house in labeling decisions so the system actually gets used, not just admired.
    • Buy storage in sets, not one-off pieces, so your shelves look consistent instead of like a garage sale.
    • Keep a small notepad or app list of pantry staples so you restock before you run out completely.

    Common Mistakes and How to Avoid Them

    Buying storage before decluttering
    : Fix: Empty the space fully first. You’ll likely find you need less storage than you thought once expired or duplicate items are gone.

    Organizing by category instead of by use
    : Fix: Group items based on when and where you use them, not just what they technically are.

    Ignoring vertical space
    : Fix: Look up and down, not just straight ahead. Cabinet tops, door interiors, and under-sink space are all usable.

    Using too many container styles
    : Fix: Stick to two or three matching container types so shelves look calm instead of chaotic.

    Skipping regular maintenance
    : Fix: Set a recurring reminder every few months to reset any zone that’s drifted back into clutter.

    Forgetting who actually uses the kitchen
    : Fix: If kids or roommates cook too, keep labels simple and storage low enough for everyone to reach.

    Similar Variations

    • Minimalist Pantry System: Focuses on uniform white containers and hiding all packaging for a clean, calm look.
    • Farmhouse Open Storage: Leans into wood shelves, woven baskets, and visible mason jars for a cozy, lived-in feel.
    • Modern Hidden Storage: Prioritizes closed cabinets, pull-outs, and pocket doors so nothing is visible from the main living area.
    • Compact Apartment Kitchen Setup: Uses stackable bins and door-mounted racks to maximize tiny footprints.
    • Family Command Center Kitchen: Combines organization with a shared calendar, mail sorter, and charging station near the kitchen entrance.

    I know a cluttered kitchen can feel overwhelming, but small changes really do add up fast. Pick two or three ideas from this list, give them a couple weeks, and you’ll already notice cooking feels easier and less stressful. That’s really the whole point behind these 11 Kitchen Organization Ideas: less searching, less stress, and a kitchen that actually works for the way you live.

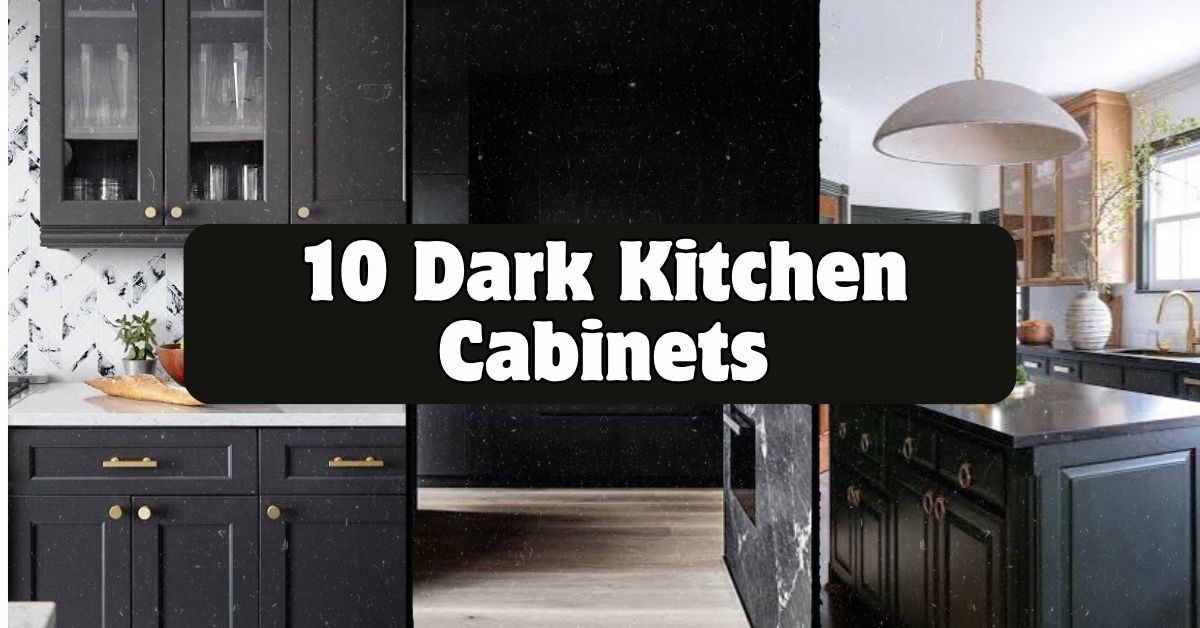
  • 10 Dark Kitchen Cabinets That Prove Moody Kitchens Are Having a Moment

    10 Dark Kitchen Cabinets That Prove Moody Kitchens Are Having a Moment

    I’ve spent way too many nights scrolling through kitchen photos, trying to figure out if dark cabinets would actually work in a real home (not just a magazine), so I put together this guide on 10 dark kitchen cabinets to save you the same rabbit hole. This isn’t a quick listicle thrown together in an hour. I dug into what actually works, what homeowners regret, and what designers keep coming back to.

    Dark kitchen cabinets are cabinetry finished in deep tones like black, charcoal, navy, forest green, or espresso brown, used as the main color for kitchen storage. They work by adding contrast, drama, and a grounded feel to a room that’s often flooded with light and white surfaces.

    Stick around, because I’m going to walk you through a dozen ways to use dark cabinets without turning your kitchen into a cave. Some of these ideas might surprise you.

    What Makes Dark Kitchen Cabinets Work So Well

    Dark cabinets get a bad rap. People think they’ll make a small kitchen feel like a closet. But that’s only true if you do it wrong. Done right, dark cabinets add depth, make your countertops pop, and give the whole room a grown-up, boutique-hotel kind of feel. I think the trick is balance. You pair dark lowers or uppers with enough light, texture, and reflective surfaces, and suddenly the room feels rich instead of heavy. It’s less about “going dark” and more about knowing where the dark should live and what it should bounce off of.

    1. Pair Black Lower Cabinets With White Upper Cabinets

    20 Black Kitchen Cabinet Ideas | HGTV
    Credit: Hgtv

    This combo is a classic for a reason. You keep your upper cabinets bright white or cream, and let the black lowers ground the room. It keeps the kitchen feeling open near the ceiling while adding weight where your eye naturally lands first.

    Practical tip: use a matte black finish on the lowers to hide fingerprints better than gloss.

    This works in almost any style. Farmhouse kitchens love it with shaker doors. Modern kitchens do it with flat-panel slabs. Even traditional kitchens can pull it off with raised-panel doors and brass hardware.

    Once you’ve nailed the two-tone balance, you might want to push the drama further with an all-dark approach, which brings us to the next idea.

    2. Go Full Charcoal for a Moody, Cohesive Look

    Black Kitchens: Bold Design Ideas to Transform Your Space
    Credit: Decorilla

    Sometimes half-measures don’t cut it. If you want serious drama, paint every cabinet, upper and lower, in a deep charcoal gray. It’s darker than gray but softer than pure black, so it won’t feel harsh.

    The key here is lighting. You need layered lighting: under-cabinet lights, pendant lights, and recessed ceiling lights working together. Without that, an all-charcoal kitchen can feel dim.

    Actionable tip: add a light-colored backsplash tile to break up the monochrome and bounce light around.

    This look shines in modern and industrial kitchens especially, but soften it with warm wood floors and it works in transitional spaces too.

    Now, if charcoal feels too neutral for your taste, green cabinets bring in color without losing that dark, cozy vibe.

    3. Try Deep Forest Green for a Nature-Inspired Feel

    This new color trend is perfect for earthy organic designs | Livingetc
    Credit: Living Etc

    Dark green cabinets have exploded in popularity, and I get why. They give you drama without feeling cold like black can. Forest green, hunter green, or even a deep olive tone pair beautifully with brass or gold hardware.

    I’d recommend keeping your countertops light, think white quartz or pale marble-look surfaces, so the green really gets to shine.

    Style note: this works especially well in traditional and cottage-style kitchens, but a matte green with sleek hardware also fits modern spaces.

    Green kitchens photograph incredibly well because the color reads differently depending on the light, giving your space a bit of personality throughout the day.

    Speaking of color depth, navy blue is another underrated option that deserves its own spot on this list.

    4. Use Navy Blue Cabinets for a Coastal or Nautical Vibe

    31 Best Blue Kitchen Cabinet Ideas for a Classic Look
    Credit: Countryliving

    Navy is dark enough to feel dramatic but still reads as a color instead of a “non-color” like black or gray. It pairs beautifully with white subway tile, brass fixtures, and butcher block counters.

    Practical tip: use navy only on an island or lower cabinets if you’re nervous about commitment, then keep the rest of the kitchen white.

    This idea fits coastal kitchens perfectly, but it also works in modern farmhouse spaces when paired with matte black hardware instead of brass.

    Now let’s talk about what happens when you mix dark cabinets with natural wood tones instead of paint.

    Dark Cabinet Color Comparisons

    ColorBest Paired WithStyle FitLight Requirement
    Matte BlackWhite marble, brass hardwareModern, industrialHigh (needs strong lighting)
    Charcoal GrayLight wood floors, white tileTransitional, modernMedium-high
    Forest GreenBrass hardware, cream countersTraditional, cottageMedium
    Navy BlueWhite subway tile, butcher blockCoastal, farmhouseMedium
    Espresso BrownStainless steel, warm lightingTraditional, rusticMedium-low

    5. Mix Dark Cabinets With Warm Wood Open Shelving

    19 Moody and Dramatic Dark Kitchen Cabinet Ideas
    Credit: Thespruce

    If an all-cabinet kitchen feels too closed off, swap a few upper cabinets for open wood shelving. The warm wood tone breaks up the dark paint and gives you a spot to show off dishes, plants, or cookbooks.

    Actionable tip: seal your shelves with a matte polyurethane so they’re easy to wipe down since open shelves collect dust and grease faster than closed cabinets.

    This idea is a favorite in Scandinavian and modern farmhouse kitchens, but it also works in boho kitchens where you want texture and visual interest.

    Once you’ve got some open shelving in the mix, it’s worth thinking about how your hardware choices tie everything together.

    6. Choose Brass or Gold Hardware to Warm Things Up

    13 Kitchen Cabinet Hardware Ideas Designers Want You to Try This Year | Architectural Digest
    Credit: architecturaldigest

    Dark cabinets paired with cool-toned silver hardware can feel a little sterile. Swap in brass, gold, or even aged bronze pulls and knobs, and suddenly the whole kitchen feels warmer and more intentional.

    I like unlacquered brass because it develops a soft patina over time, giving your kitchen a lived-in, collected look instead of something that came straight out of a box.

    This detail adapts easily. Go with slim brass bar pulls for modern kitchens, and switch to ornate brass knobs for traditional ones.

    Hardware is a small change, but it leads naturally into thinking about your countertop material, which honestly makes or breaks a dark kitchen.

    7. Pair Dark Cabinets With Light Quartz or Marble Countertops

    Dark Kitchen Cabinets with Light Countertops - a Modern Look - 405 Cabinets & Stone
    Credit: 405cs

    This is probably the single most important rule for dark cabinets. If your counters are also dark, the whole kitchen can feel closed in. Light countertops, think white, cream, or pale gray quartz, create the contrast that makes dark cabinets look intentional instead of overwhelming.

    Practical tip: ask for a countertop sample and hold it against your cabinet door sample in your actual kitchen lighting before you commit. Store lighting lies.

    This contrast rule holds true across every style, from modern minimalist to cozy traditional kitchens.

    Once your counters are sorted, let’s talk about what goes on the walls behind them.

    8. Add a Bold Backsplash to Break Up the Dark Palette

    21+ Modern Kitchen Backsplash for Dark Cabinets ( SLEEK ) - Tile
    Credit: Backsplash

    A plain white subway tile backsplash is safe, but you can do more. Try a textured white zellige tile, a pale green fish-scale tile, or even a light natural stone with visible veining. The goal is contrast and texture, not just color.

    Actionable tip: bring home three tile samples and look at them morning, afternoon, and evening. Tile color shifts a lot depending on the light.

    Coastal kitchens love a blue and white pattern here. Modern kitchens tend to keep it simple with large-format tile in a single light tone.

    Once the backsplash is settled, flooring is the next big decision that changes how your dark cabinets read in the room.

    9. Choose Light or Medium Wood Floors to Balance the Room

    Here's Why You'd Love Wood Cabinets With Wood Floors
    Credit: Decorcabinets

    Dark cabinets on top of dark floors can feel like a black hole. Medium or light wood floors, think white oak or natural maple, give your eye a place to rest and keep the room feeling grounded instead of cramped.

    If you already have dark floors and can’t change them, add a large light-colored rug in the kitchen to break up the visual weight.

    This flooring rule flexes across styles. Rustic kitchens do wide-plank light oak, while modern kitchens often go with a light gray-washed wood or even polished concrete.

    Floors handled, let’s move up to the island, because that’s often where kitchens get their real personality.

    10. Make the Island the Star With a Contrasting Dark Tone

    23 Contrasting Kitchen Island Ideas
    Credit: Bhg

    Sometimes you don’t want an entire dark kitchen. Instead, paint just the island in black, navy, or charcoal while keeping the surrounding cabinets white or cream. This gives you drama without commitment, and it makes the island feel like a piece of furniture instead of just more cabinetry.

    Practical tip: pair a dark island with a lighter countertop than the surrounding perimeter counters for extra visual separation.

    This two-tone approach is incredibly popular in transitional and modern farmhouse kitchens right now, but it also works beautifully in coastal designs with navy islands.

    Once your island has its own personality, lighting fixtures are the next detail worth getting right.

    With all ten of these ideas, you’ve got a real toolkit for building a dark kitchen that feels balanced instead of overwhelming.

    Tips for Success

    • Test paint and stain samples on an actual cabinet door, not just a small chip, since large surfaces show color differently than tiny swatches.
    • Keep at least one major surface light, whether that’s counters, floors, or walls, so the dark cabinets have something to contrast against.
    • Invest in layered lighting before you commit to dark cabinets. Under-cabinet lights especially make a huge difference.
    • Choose matte or satin finishes over high-gloss if you’re worried about fingerprints and smudges showing.
    • Don’t skip the hardware decision. Warm metals soften dark cabinets, while cool metals can make them feel more severe.
    • If you’re renting or unsure, start with a dark island or lower cabinets only, rather than committing the whole kitchen.
    • Live with your paint or stain sample for at least a week, checking it in morning and evening light before finalizing.

    Common Mistakes and How to Avoid Them

    Choosing dark cabinets and dark countertops together
    : This creates a cave-like feeling with almost no contrast. Always pair dark cabinets with a lighter counter surface.

    Skipping extra lighting
    : Dark surfaces absorb more light than white ones, so you need more fixtures than you’d think. Add under-cabinet and pendant lighting before you finish the design.

    Using high-gloss finishes in a busy kitchen
    : Gloss shows every fingerprint and water spot. Stick with matte or satin sheens for daily-use kitchens with kids or heavy cooking.

    Matching hardware finish to appliance finish
    : Stainless appliances don’t need matching stainless hardware. Mixing in warm brass or black hardware adds depth instead of looking flat.

    Painting every surface the same dark tone
    : Walls, cabinets, and floors all in dark tones erase all contrast in the room. Pick one or two dark elements and keep the rest light.

    Ignoring natural light direction
    : A north-facing kitchen with little natural light will feel darker with black cabinets than a south-facing one. Check your room’s natural light before committing to the darkest shades.

    Similar Variations

    • Two-Tone Kitchen Cabinets: Dark lowers paired with light uppers, giving contrast without a full commitment to dark.
    • Black and Brass Kitchen: Matte black cabinets paired specifically with warm brass fixtures and hardware for a glam, moody feel.
    • Dark Wood Kitchen Cabinets: Natural stained wood in deep espresso or walnut tones instead of painted finishes, for a warmer, more traditional look.
    • Moody Farmhouse Kitchen: Dark cabinets combined with shiplap, matte black fixtures, and vintage-style lighting for a rustic feel.
    • Coastal Navy Kitchen: Navy cabinets paired with white subway tile and natural rope or rattan accents for a beachy, relaxed vibe.
    • Industrial Dark Kitchen: Charcoal or black cabinets combined with exposed brick, concrete counters, and metal shelving.

    Dark cabinets aren’t about making your kitchen feel small or gloomy. They’re about adding depth, contrast, and a little bit of drama to a room you probably spend more time in than you realize. Whether you go all in with charcoal everywhere or just dip a toe with a navy island, the goal is balance between dark and light, matte and shine, warm and cool. If you’re still on the fence, just remember these 10 dark kitchen cabinets ideas the next time you’re standing in the paint aisle wondering if you’re brave enough to go dark.

  • 12 Maple Kitchen Cabinets Ideas That Actually Work in Real Homes

    12 Maple Kitchen Cabinets Ideas That Actually Work in Real Homes

    I’ve spent way too many hours scrolling through kitchen photos, and I can tell you that 12 maple kitchen cabinets ideas can completely change how you think about this classic wood. If you’ve been on the fence about maple, wondering if it’s too plain or too “builder grade,” I get it. That worry is real, and I used to think the same thing.

    Maple kitchen cabinets are cabinets made from maple wood, known for their smooth grain, light color, and durability. They work well with almost any paint color or stain, and they resist dents better than softer woods like pine.

    Stick with me here. I’m about to walk you through a dozen ways to make maple cabinets look like they belong in a magazine, not a rental unit.

    What Makes Maple Cabinets a Big Deal Anyway

    Maple wood has this tight, subtle grain pattern that doesn’t shout for attention. That’s actually its superpower. Unlike oak, which has bold lines running through it, maple gives you a clean canvas. You can paint it, stain it dark, leave it natural, whatever you want.

    It’s also tough. Maple is a hardwood, so it holds up to years of cabinet doors slamming and kids leaning on countertops. I’ve seen maple cabinets from the 90s that still look solid today, just maybe in need of a color refresh.

    The best part? Maple plays nice with almost every kitchen style. That’s why designers keep coming back to it.

    1. Go Natural With a Honey-Toned Maple Finish

    The Complete Guide to Maple Kitchen Cabinets | George Cabinetry
    Credit: Georgecabinetry

    There’s something warm and inviting about letting maple just be maple. A honey or golden stain brings out the wood’s natural glow without hiding the grain completely. This works especially well in kitchens that get a lot of natural light, since the warmth bounces around the room.

    Pair this look with brushed brass hardware and a white or cream backsplash to keep things from feeling too heavy. My tip: ask your cabinet maker for a sample board first, because maple can look totally different depending on the stain’s undertones.

    This style leans traditional or farmhouse, but it also works in a modern rustic kitchen if you keep the lines simple.

    Next up, let’s talk about what happens when you flip the whole look upside down with a darker finish.

    2. Try a Deep Espresso Stain for Drama

    Not a Black Kitchen — Espresso Is the Color Trend for Cabinetry | Livingetc
    Credit: livingetc

    Maple takes dark stains really well because its grain is so tight and even. An espresso or dark walnut stain on maple cabinets gives you that moody, upscale look without the higher price tag of actual walnut wood.

    This works best in kitchens with plenty of light, either from big windows or bright overhead fixtures, since dark cabinets can make a small room feel closed in. Balance the darkness with a light-colored countertop like white quartz or a pale marble look.

    Quick tip: use gold or matte black hardware to really make the dark stain pop.

    This style fits contemporary and transitional kitchens best. It can look a little harsh in a cottage-style space unless you soften it with warm lighting.

    Now let’s shift gears and look at how paint changes the maple game entirely.

    3. Paint Maple Cabinets a Soft Sage Green

    Paint Colors That Go With Maple Wood Cabinets: The 2026 Expert Guide - Hackrea
    Credit: Hackrea

    Maple takes paint beautifully because the surface is so smooth. Sage green has been popping up everywhere lately, and it looks especially good on maple because the wood’s tight grain means you get an ultra-smooth painted finish, almost like furniture.

    I’d suggest a satin or semi-gloss finish for easy cleaning, since kitchens get messy fast. Pair sage cabinets with brass or oil-rubbed bronze hardware and warm wood open shelving for contrast.

    This color works in coastal kitchens, farmhouse kitchens, and even modern ones if you keep the rest of the palette neutral.

    Once you’ve picked a paint color, the next big decision is what you put on top of those cabinets, and that’s where countertops come in.

    Popular Paint Colors for Maple Cabinets

    Paint ColorStyle VibeBest Paired CountertopHardware Match
    Sage GreenCoastal, FarmhouseWhite quartzBrass
    Navy BlueTraditional, NauticalWhite marble lookBrushed nickel
    Warm WhiteModern, MinimalistButcher blockMatte black
    Charcoal GrayContemporaryLight gray quartzChrome
    TerracottaBoho, SouthwesternCream quartzBronze

    4. Match Maple Cabinets With a Warm Quartz Countertop

    Designing a Bright, Modern Kitchen: Pairing Light Maple Cabinets With Quartz Countertops | Caesarstone US
    Credit: Caesarstoneus

    Since maple cabinets often lean warm in tone, quartz countertops with beige or cream veining tend to look the most natural next to them. Cold, blue-gray quartz can sometimes clash with maple’s warmth, making the kitchen feel a bit disjointed.

    If you’re not sure what to pick, bring a cabinet door sample to the stone yard. Seeing them side by side under real light beats guessing from a tiny swatch.

    My actionable tip: always look at countertop samples in your own kitchen lighting before deciding, since store lighting can be misleading.

    This warm pairing works great in traditional and farmhouse kitchens. Modern kitchens might prefer a cooler white quartz for more contrast.

    Countertops matter, but so does what you hang above them, which brings me to lighting.

    5. Add Warm Pendant Lighting to Highlight the Wood Grain

    22 Kitchen Lighting Ideas That Brighten Your Space - Decor with hazel
    Credit: Decorwithhazel

    Maple’s grain is subtle, so the right lighting can either bring it to life or wash it out completely. Warm-toned LED bulbs, around 2700 to 3000 kelvin, make maple glow instead of looking flat and yellow.

    I like pendant lights over an island because they create a focal point while also throwing light down onto the cabinet doors below. Try mixing metal finishes a little, like black pendants with brass cabinet pulls, for a layered look.

    This works in almost every style, though farmhouse and industrial kitchens often lean toward black metal pendants specifically.

    Lighting sets the mood, but hardware is what people actually touch every day, so let’s cover that next.

    6. Swap in Statement Hardware for an Instant Refresh

    Easy Kitchen Updates & Kitchen Refresh Ideas You'll Love
    Credit: Snyderdiamond

    If your maple cabinets feel dated, sometimes the fastest fix isn’t paint or stain at all. It’s the hardware. Old gold or brass pulls from the 90s can make even nice cabinets look tired.

    Switching to matte black bar pulls or brushed nickel knobs can modernize a kitchen in an afternoon. This is one of the cheapest upgrades you can do, and it’s totally reversible if you change your mind later.

    Practical tip: measure your existing hole spacing before ordering new hardware so you don’t end up drilling new holes.

    Traditional kitchens tend to favor oil-rubbed bronze, while modern ones go for matte black or brushed steel.

    Hardware changes the details, but the layout of your cabinets changes the whole feel of the room, which is our next stop.

    7. Mix Open Shelving With Maple Upper Cabinets

    Why I Combined Open Shelves and Cabinets in My Kitchen Remodel
    Credit: Houzz

    Full cabinet coverage can feel heavy, especially in smaller kitchens. Swapping a section of upper cabinets for open shelving breaks things up and gives you a spot to display dishes or plants.

    Maple shelving left natural or lightly stained adds warmth without adding visual bulk. This works particularly well in kitchens where the lower cabinets are painted a bold color, since the open shelves balance things out.

    Tip: keep open shelves a little less than half full so they don’t look cluttered or messy.

    This idea shines in farmhouse, coastal, and Scandinavian-style kitchens. It’s less common in strict traditional kitchens, which usually prefer full cabinet coverage.

    Now, let’s talk about how the cabinet doors themselves, not just the finish, can change the whole vibe.

    8. Choose Shaker-Style Doors for a Timeless Look

    Shaker Style Kitchen Doors: Elevate Your Cabinet Design
    Credit: Oliveandbarr

    Shaker doors have a simple frame with a flat center panel, and they’ve been popular for decades because they just work with everything. On maple, shaker doors let the wood’s clean lines shine without extra fuss.

    This style is a safe bet if you’re worried about trends changing before you’re ready to redo your kitchen again. Shaker doors also make it easy to switch up paint colors down the road since the simple shape works with almost anything.

    My tip: if you’re between shaker and raised panel doors, go shaker for a more timeless resale value.

    Shaker doors fit modern, farmhouse, traditional, and transitional kitchens equally well. That flexibility is honestly rare.

    While door style matters, so does how those cabinets are arranged around your island, so let’s get into that.

    9. Use a Contrasting Island Color to Break Up the Maple

    23 Contrasting Kitchen Island Ideas
    Credit: Bhg

    One trend that isn’t going anywhere is painting the kitchen island a different color than the rest of the cabinets. If your surrounding cabinets are natural or lightly stained maple, a navy or black island creates a nice anchor point in the room.

    This trick works especially well in open-concept kitchens where the island is visible from the living room. It gives the eye something to land on.

    Practical tip: keep the island countertop consistent with your main counters so the kitchen still feels connected, not choppy.

    This works across almost every style, though coastal kitchens often prefer a soft blue island instead of navy or black.

    Budget Tiers for Maple Cabinet Projects

    Budget LevelWhat’s IncludedEstimated Cost Range
    Basic RefreshNew hardware, paint touch-up$200 to $600
    Mid-Range UpdateRepaint or restain all cabinets$1,500 to $4,000
    Full RenovationNew maple cabinets, countertops, lighting$8,000 to $20,000+
    High-End CustomCustom maple cabinetry, premium stone, designer lighting$25,000 and up

    10. Add Glass-Front Panels to a Few Upper Cabinets

    8 Beautiful Ways to Work Glass Into Your Kitchen Cabinets
    Credit: Houzz

    Swapping solid maple doors for a few glass-front ones adds visual interest without a full renovation. It’s a nice middle ground between open shelving and closed cabinets, since you still get some storage privacy.

    I like this for displaying pretty dishware or colored glassware, since the glass creates little moments of interest around the kitchen. Frosted glass is a good option if you want the look without needing everything inside to be perfectly organized.

    Tip: pick two or three cabinets near eye level for glass fronts rather than doing the whole upper row, since it can get visually busy fast.

    This idea fits traditional, cottage, and transitional kitchens especially well.

    Speaking of visual interest, let’s talk backsplashes, because that’s another spot where maple cabinets really get to shine.

    11. Pair Maple Cabinets With a Simple Subway Tile Backsplash

    20 Backsplash and Countertop Pairing Ideas for a Stunning Kitchen
    Credit: Bhg

    Maple cabinets, especially in their natural warm tone, look great against a classic white subway tile backsplash. It’s a combo that never really goes out of style, and it keeps the kitchen feeling bright and clean.

    If you want a little more personality, try a herringbone pattern instead of the standard brick layout. Same tile, different energy.

    My tip: use a light gray grout instead of stark white, since it hides dirt better and still looks clean.

    This backsplash pairing works in farmhouse, coastal, traditional, and even modern kitchens depending on the tile size and layout you choose.

    Last but not least, let’s cover flooring, since it ties the whole room together.

    12. Ground the Kitchen With Warm Wood-Look Flooring

    30 Kitchen Flooring Options and Design Ideas | HGTV
    Credit: Hgtv

    Maple cabinets tend to look best with flooring that either matches their warmth or contrasts with a cooler gray tone, depending on the vibe you’re after. Warm wood-look tile or engineered hardwood in a medium brown tone creates a cohesive, cozy feel.

    If your cabinets are painted a bold color, you have more freedom with flooring since the cabinets already provide contrast. Natural maple cabinets pair beautifully with flooring in a slightly darker tone than the cabinets themselves, so the room doesn’t feel too monochromatic.

    Practical tip: bring a flooring sample home and look at it next to your cabinet door before committing.

    This grounding trick works in nearly every kitchen style, from modern farmhouse to coastal to traditional.

    Tips for Success

    • Always test paint or stain samples on an actual cabinet door, not just a piece of scrap wood, since maple can absorb color differently depending on the batch.
    • Keep hardware finishes consistent throughout the kitchen unless you’re intentionally mixing metals for a layered look.
    • Don’t skip the primer step if you’re painting maple, since skipping it can lead to peeling within a year or two.
    • Live with a paint or stain sample for at least three days before committing, since lighting changes throughout the day.
    • Balance warm maple tones with at least one cool element, like gray countertops or matte black fixtures, so the kitchen doesn’t feel one-note.
    • Ask your cabinet installer about maple’s tendency to show blotching with certain stains, and request a pre-conditioner if needed.
    • Budget an extra 10 percent on any cabinet project for surprises, since older kitchens often have hidden issues behind the cabinets.

    Common Mistakes and How to Avoid Them

    Skipping the sanding step before staining
    : Maple is dense and doesn’t absorb stain evenly without proper sanding first. Always sand with the grain using fine-grit sandpaper before applying any stain.

    Choosing a countertop without checking it under real lighting
    : Store lighting can make a countertop look totally different than it will in your kitchen. Bring a sample home and check it morning and night before deciding.

    Overloading open shelves
    : Too many items on open maple shelving looks cluttered fast. Keep displays simple and leave breathing room between items.

    Ignoring hardware hole spacing when upgrading pulls
    : Buying new hardware without checking existing hole spacing can mean extra drilling and filling. Always measure first and shop with those numbers in hand.

    Painting over dirty or greasy cabinets
    : Kitchen grease builds up fast and prevents paint from sticking properly. Clean cabinets thoroughly with a degreaser before any paint job.

    Using cool white bulbs over warm maple tones
    : Cool lighting can make maple look washed out or slightly green. Stick with warm white bulbs in the 2700 to 3000 kelvin range for the best look.

    Similar Variations

    • Painted Shaker Maple – Maple cabinets in shaker style, fully painted in a solid color for a clean, modern farmhouse feel.
    • Two-Tone Maple Kitchen – Upper cabinets in one finish, lower cabinets in a contrasting color or stain.
    • Rustic Natural Maple – Minimal finish work, letting the wood’s natural warmth and grain lead the design.
    • Modern Slab Maple – Flat, handle-less maple doors for a sleek, minimalist European look.
    • Coastal White-Washed Maple – A light whitewash technique that keeps some grain visible while brightening the wood.
    • Transitional Maple With Glass Accents – A mix of solid and glass-front maple cabinets for a softer, more open feel.

    Maple kitchen cabinets give you way more flexibility than people usually give them credit for. Whether you paint them, stain them dark, or leave them natural and warm, the wood itself is a solid foundation to build almost any kitchen style on top of. I’ve walked you through a dozen ways to make these cabinets feel fresh, personal, and far from boring. At the end of the day, the right combination of finish, hardware, and lighting can turn 12 maple kitchen cabinets ideas into the exact kitchen you’ve been picturing in your head.

  • 11 White Kitchen Cabinets

    11 White Kitchen Cabinets

    I’ve spent hours scrolling through kitchen photos trying to find real inspiration, and I put together these 11 white kitchen cabinets ideas so you don’t have to do that same digging. This isn’t just another list thrown together for clicks. I checked what actually works in real homes, not just staged photos, so you get ideas you can actually use.

    White kitchen cabinets refer to cabinetry finished in white paint or laminate, ranging from bright cool white to warm creamy tones. They remain the most popular kitchen cabinet choice because they brighten spaces, pair with nearly any countertop or backsplash, and hold resale value better than trendy colors.

    Stick around and I’ll walk you through specific styles, real cost comparisons, and mistakes that trip up almost everyone who tries this look.

    What Makes White Kitchen Cabinets So Popular

    Here’s the thing about white cabinets. They just work. I’ve noticed that no matter what house I walk into, a white kitchen never looks dated the way a lime green one from 2005 does. White bounces light around a room, which matters a ton if your kitchen doesn’t get a lot of natural sun. It also acts like a blank canvas. You can throw in black hardware, gold fixtures, wood floors, or colorful tile, and it all just fits. That flexibility is exactly why white kitchens have stuck around for decades instead of fading out like other trends.

    1. Classic Shaker Style White Cabinets

    White shaker kitchen ideas: 7 classic looks that experts love | Homes and Gardens
    Credit: Homes And Gardens

    Shaker cabinets are the safe bet that never feels boring. They’ve got that simple recessed panel door with clean lines, no fuss, no carving. I like them because they look at home in a farmhouse kitchen just as much as a modern city apartment. Pair them with brushed nickel or matte black pulls depending on how bold you want to go.

    Practical tip: if you’re on a budget, shaker style is usually cheaper than ornate raised-panel doors because they’re simpler to manufacture.

    This style adapts to almost anything, from coastal cottages to minimalist lofts. Next up, let’s look at a style that adds a little more texture to the mix.

    2. Beadboard Cabinet Fronts For Cottage Charm

    63 Rustic Farmhouse Kitchen Ideas to Inspire Your Next Remodel
    Credit: Countryliving

    Beadboard adds these small vertical grooves to cabinet doors, giving a cozy, cottage-like feel. It’s a step up from flat panel doors without going overboard on detail. I think this works really well if your home already has some traditional bones, like crown molding or a farmhouse sink.

    Try pairing beadboard white cabinets with butcher block counters for a warm, lived-in look.

    This style leans traditional and coastal, but skip it if your home is ultra-modern since the texture can feel out of place.

    Now let’s talk about a bolder cabinet shape that’s been trending hard lately.

    3. Arched Cabinet Doors For A Soft Vintage Look

    Arched kitchen cabinets are trending – this is why they're the perfect addition to a transitional kitchen | Homes and Gardens
    Credit :Homes And Gardens

    Arched top cabinet doors bring a curved detail at the top instead of a straight line. It’s subtle, but it changes the whole vibe of a kitchen. I’ve seen this used a lot in kitchens going for a French country or old-world European feel.

    Actionable tip: use arched doors only on upper cabinets to avoid overwhelming the space, and keep lowers simple and flat.

    This works beautifully in traditional and transitional kitchens but can clash with strict modern or industrial designs.

    Speaking of mixing styles, let’s check out how two-tone kitchens use white as the anchor color.

    4. Two-Tone Kitchens With White On Top

    30 Stylish Two-Toned Kitchen Ideas (From an Expert)
    Credit: My Domaine

    A lot of homeowners are pairing white upper cabinets with a darker or bolder color on the bottom, like navy, forest green, or charcoal. This keeps the kitchen bright near eye level while adding depth and personality down low. I really like this because it feels custom without costing custom cabinet prices.

    Tip: keep your island a third color or matching the lowers to tie the whole room together.

    This look adapts across almost every style, from modern farmhouse to contemporary city kitchens.

    Cabinet Color Pairing Ideas

    Upper Cabinet ColorLower Cabinet ColorBest Style Match
    WhiteNavy BlueCoastal, Traditional
    WhiteSage GreenFarmhouse, Cottage
    WhiteCharcoal GrayModern, Industrial
    WhiteWarm Wood ToneScandinavian, Minimalist
    WhiteBlackContemporary, Transitional

    Now that you’ve got some color pairing ideas, let’s look at hardware, because it changes the whole feel of white cabinets.

    5. Brass Or Gold Hardware For Warmth

    35 Beautiful White Kitchen Cabinets with Brass Hardware - Nikki's Plate
    Credit: Nikkisplate

    White cabinets can feel a little cold or clinical if you’re not careful. Adding brass or gold hardware warms things up instantly. It’s a small change but it makes a huge visual difference. I always tell people this is the cheapest upgrade you can make to a white kitchen.

    Practical tip: choose brushed brass over shiny polished brass if you want a more updated, less “builder grade” look.

    This pairing works in almost every design style, but it shines especially in transitional and glam kitchens.

    Let’s move from hardware to something bigger, the backsplash, because that’s where white cabinets really get to show off.

    6. Subway Tile Backsplash For Timeless Contrast

    30 Green Backsplash Ideas for the Most Gorgeous Kitchen Ever
    Credit: Bhg

    White subway tile with white cabinets sounds like it might be too much white, but it actually creates this soft, layered look because of the grout lines and slight texture. If you want more contrast, go with a dark grout line or a colored tile instead.

    Tip: use a herringbone pattern instead of the standard brick layout to add visual interest without adding more colors.

    This idea fits basically any style, though the pattern and grout color you choose will shift it more traditional or more modern.

    7. Open Shelving Mixed With White Cabinets

    Why I Combined Open Shelves and Cabinets in My Kitchen Remodel
    Credit: Houzz

    Open shelves break up a wall of solid white cabinet doors. They also give you a spot to show off dishes, plants, or cookbooks. I like doing this above a stove or next to a window where natural light hits the shelf.

    Actionable tip: paint the inside back wall of open shelving a soft color to make dishes pop instead of blending into the white.

    This works great in farmhouse, coastal, and Scandinavian kitchens, but skip it if you’re not great about keeping things tidy since open shelves show clutter fast.

    Let’s talk countertops next, since they change how “warm” or “cool” your white cabinets feel.

    8. Warm Toned Countertops To Balance Cool White

    59 White Kitchens That Are Anything But Vanilla | HGTV
    Credit: Hgtv

    Bright white cabinets paired with a stark white quartz counter can feel a little sterile. I like balancing that out with a warmer countertop, like a beige quartz, a butcher block, or even a soapstone with warm undertones.

    Tip: bring a cabinet door sample to the countertop store so you can see them side by side in real lighting before deciding.

    This balancing trick works in every design style since warmth is about temperature, not aesthetic.

    Countertop Options With White Cabinets

    Countertop MaterialPrice Range (per sq ft)Best For
    Laminate$20-$50Budget kitchens
    Butcher Block$40-$100Farmhouse, cottage
    Quartz$60-$150Modern, transitional
    Granite$50-$200Traditional, classic
    Marble$100-$250Glam, luxury

    With countertops covered, let’s talk about how flooring choice plays into your white cabinet kitchen.

    9. Wood Flooring To Ground A White Kitchen

    10 wooden kitchen floor ideas that are classic and demure | Ideal Home
    Credit: Ideal home

    All that white can float away visually without something to anchor it. Wood floors, especially medium or warm tones, ground the space and stop it from feeling too clinical. I’ve noticed light gray floors can work too, but wood adds more coziness.

    Practical tip: if you have wood floors already, match your cabinet white to a warm white rather than a stark cool white to avoid clashing undertones.

    This works across farmhouse, traditional, coastal, and even modern kitchens depending on the wood tone you pick.

    Next, let’s talk about a detail people often skip: the toe kick and cabinet base.

    10. Furniture Style Legs Instead Of Standard Toe Kicks

    Toe Kicks by Kitchen Style | Ergonomics in Modern Kitchens
    Credit: Cliqstudios

    Adding decorative furniture legs to your island or lower cabinets makes white cabinetry feel less like a big box store kitchen and more custom. It’s a small detail but it reads as high-end.

    Tip: use this trick specifically on a kitchen island to make it feel more like a furniture piece than built-in storage.

    This detail leans traditional and vintage but can work in transitional kitchens too if kept simple.

    Let’s finish the main ideas with a look at glass front cabinets, a favorite for breaking up all that solid white.

    11. Glass Front Upper Cabinets For Visual Break

    A look into Glass Fronted Cabinets on a Handmade Kitchen - Nicholas Bridger
    Credit; Nicholasbridge

    Swapping a few upper cabinet doors for glass fronts breaks up a long row of white and gives you a spot to display dishes or glassware. It keeps things from feeling like one giant white block.

    Actionable tip: only do this on two or three doors max, otherwise it can look busy or require too much tidying inside the cabinets.

    This works in cottage, coastal, and traditional kitchens especially well, giving a lighter, airier feel.

    Tips for Success

    • Test paint swatches on your actual cabinets under both daytime and nighttime lighting before committing to a shade.
    • Choose a white with warm undertones if your kitchen doesn’t get much natural light.
    • Mix textures like wood, stone, and metal so the kitchen doesn’t feel flat or one-dimensional.
    • Keep hardware finishes consistent throughout the kitchen for a pulled-together look.
    • Don’t skip the backsplash. It’s a small area that makes a big visual impact.
    • Budget extra for maintenance since white shows dirt and grease faster than darker colors.
    • Add at least one contrasting element, like a dark floor or colored island, so the kitchen doesn’t feel washed out.

    Common Mistakes and How to Avoid Them

    Choosing stark white without checking undertones
    : Bring samples home and view them in your actual kitchen lighting, not just under store lights.

    Matching all white finishes exactly
    : Slight variation in white shades between cabinets, walls, and trim actually looks more intentional than a perfect match.

    Skipping ventilation planning
    : White cabinets near the stove show grease splatters fast, so invest in a good range hood to cut down on buildup.

    Ignoring hardware scale
    : Oversized or undersized pulls throw off the whole look, so measure your cabinet doors before ordering hardware.

    Going all white with no contrast
    : Add a colored island, dark floor, or patterned backsplash so the kitchen has depth instead of looking flat.

    Forgetting about resale value trends
    : Stick with classic white shades like off-white or warm white instead of trendy blue-whites that might date quickly.

    Similar Variations

    • Modern Farmhouse White Kitchens – combines white shaker cabinets with black hardware and open shelving for a cozy but current look.
    • Coastal White Kitchens – lighter blues, natural textures, and white cabinets create a beachy, relaxed feel.
    • Scandinavian White Kitchens – minimalist white cabinets paired with light wood and simple hardware for a clean, airy look.
    • Traditional White Kitchens – raised panel or arched white cabinets with ornate hardware and crown molding for a classic feel.
    • Industrial White Kitchens – white cabinets mixed with exposed brick, black metal accents, and concrete countertops.
    • French Country White Kitchens – white cabinets paired with soft blue or sage accents, curved details, and vintage-inspired fixtures.

    White kitchen cabinets aren’t just a passing trend. They’re a smart, flexible choice that works no matter what style you’re going for or how your taste changes down the road. Whether you go bold with two-tone lowers or keep it simple with shaker doors and brass hardware, the right combo of finishes, textures, and small details makes all the difference. I hope these 11 white kitchen cabinets ideas gave you a clear starting point for your own kitchen project.