Author: Tayef

  • 14 Modern Bathroom Ideas That Will Totally Transform Your Space

    14 Modern Bathroom Ideas That Will Totally Transform Your Space

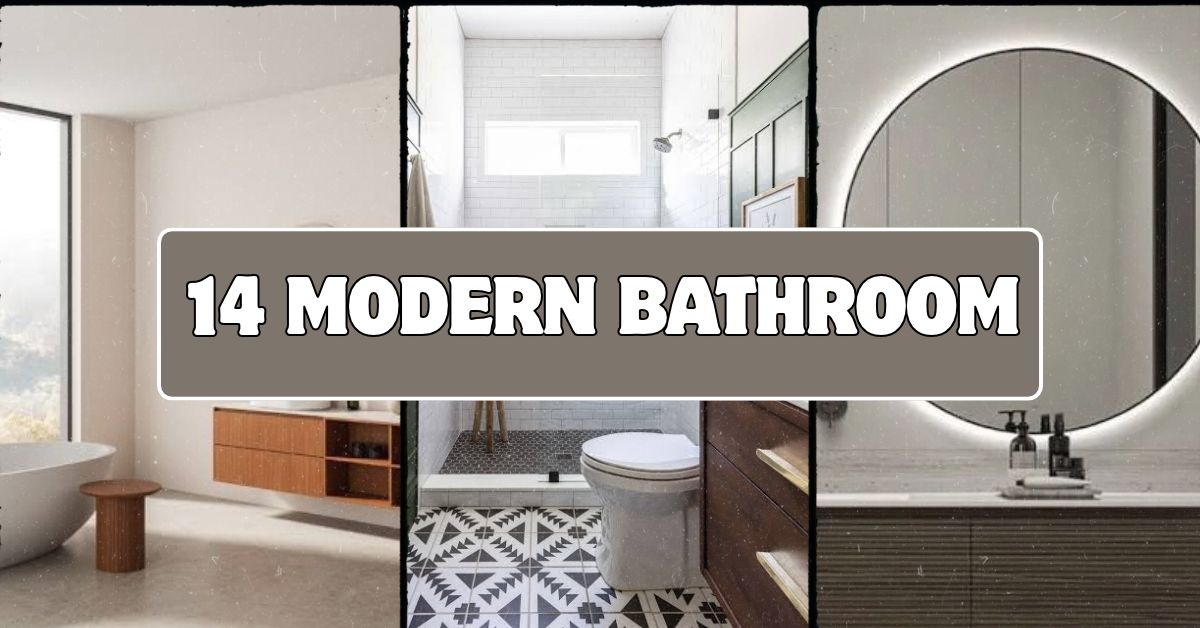
    I’ve spent way too many hours scrolling through bathroom photos, and I think I finally cracked the code on what makes a 14 Modern Bathroom design actually work. This isn’t just another list of pretty pictures pulled from nowhere. I’ve dug through what actually holds up in real homes, not just staged photo shoots.

    A modern bathroom is a space designed with clean lines, minimal clutter, and functional fixtures that prioritize simplicity over ornamentation. It typically features neutral color palettes, sleek hardware, and a mix of natural and industrial materials like stone, wood, and matte metals.

    Stick around, because I’m about to walk you through 14 ideas that range from simple weekend fixes to bigger renovation projects. Some of these might surprise you.

    What Even Is a Modern Bathroom Anyway?

    Okay so before we jump into the list, let’s talk about what “modern” actually means here. It’s not just white walls and glass everywhere. Modern bathroom design is about function first. Every item earns its spot. Think smooth surfaces, hidden storage, and colors that don’t scream for attention.

    I like to think of it as the opposite of grandma’s floral wallpaper bathroom. No offense to grandma. Modern spaces breathe. They feel calm. And honestly, they’re easier to clean too, which is a huge win in my book. Let’s get into the actual ideas now.

    1. Go Big With a Floating Vanity

    The 8 Floating Bathroom Vanity Ideas Homeowners Are Loving
    Credit: Northernbuildingsupply

    Floating vanities are basically the poster child of modern bathrooms. They attach to the wall and hover a few inches above the floor, which makes the whole room feel lighter and bigger.

    I love this idea because it also makes cleaning the floor so much easier. No more scrubbing around vanity legs.

    Pick a vanity in matte white, warm oak, or charcoal gray for that clean modern look. Add a single-handle faucet in matte black or brushed gold for contrast.

    Practical tip: Measure your bathroom width before buying. Floating vanities need proper wall support, so check with a contractor if you’re unsure about your wall type.

    This idea shifts easily too. In a coastal bathroom, use a whitewashed wood vanity instead. In a traditional space, skip it entirely and go with a furniture-style piece instead.

    Next up, let’s talk about something that changes the entire mood of a room: lighting.

    2. Layer Your Lighting Like a Pro

    How to Create Layered Lighting in a Bathroom | Houzz UK
    Credit: Houzz

    Most bathrooms have one overhead light and call it done. That’s a mistake. Modern bathrooms use layered lighting, meaning multiple light sources at different heights and brightness levels.

    You want ambient light from the ceiling, task lighting near the mirror, and maybe even a small accent light near a shower niche or tub.

    This matters because harsh single-source lighting creates shadows on your face when you’re doing makeup or shaving. Nobody wants that.

    Practical tip: Install LED strip lights behind your mirror for soft, shadow-free lighting when you’re getting ready.

    For a farmhouse twist, swap sleek LED fixtures for black metal cage lights. For coastal vibes, go with brushed nickel fixtures that mimic driftwood tones.

    Speaking of mirrors, let’s dive deeper into that next.

    3. Install a Backlit LED Mirror

    How to Install an LED Bathroom Mirror
    Credit: Rbrohant

    A backlit mirror isn’t just a trend, it’s genuinely useful. These mirrors have LED lights built right into the edges or behind the glass, giving off a soft glow that eliminates harsh shadows.

    Some models even come with anti-fog features and adjustable color temperature, so you can switch between warm and cool light depending on your mood or the time of day.

    They instantly make a bathroom feel high-end, even if the rest of your fixtures are budget-friendly.

    Practical tip: Choose a mirror with a dimmer function so you can adjust brightness for morning versus nighttime routines.

    This works in almost any style. Just pick a frame shape that matches your vibe, round for softer spaces, rectangular for sharp modern looks.

    Now let’s talk flooring, because what’s underfoot matters just as much as what’s on the walls.

    4. Choose Large-Format Tile for a Seamless Look

    How Large-Format Tile Creates a Luxury Look - Tile Store in Irvine and Laguna Niguel
    Credit: Trendysurfacesinc

    Small tiles with tons of grout lines feel busy and dated. Modern bathrooms favor large-format tiles, usually 12×24 inches or bigger, because fewer grout lines mean a cleaner, more streamlined appearance.

    Large tiles also make small bathrooms look bigger since your eye isn’t interrupted by constant lines.

    Go with porcelain or ceramic in soft gray, warm beige, or matte black for that modern finish.

    Practical tip: Ask your tile installer about rectified tiles. They have straighter edges, which allows for thinner grout lines and a more polished result.

    Tile Size Comparison Guide

    Tile SizeBest ForGrout LinesApprox. Cost per Sq Ft
    4×4 inchesSmall accents, backsplashesMany$3 – $8
    12×12 inchesStandard bathroom floorsModerate$4 – $10
    12×24 inchesModern floors and showersFewer$5 – $12
    24×48 inchesStatement walls, luxury showersMinimal$8 – $20

    This idea flexes well too. Traditional homes might use smaller hexagon tiles with a similar neutral palette. Coastal styles often use larger tiles in sandy, sun-bleached tones.

    Now let’s move from the floor to something you touch every single day: your faucet.

    5. Swap in Matte Black or Brushed Gold Fixtures

    Luxurious Black and Gold Bathroom Ideas for a Bold Statement
    Credit: Homedesigns

    Chrome used to be the default, but modern bathrooms have moved toward matte finishes. Matte black, brushed gold, and brushed nickel all give a more sophisticated, less shiny look.

    These finishes also hide water spots and fingerprints way better than polished chrome, which is a nice bonus if you’ve got kids or roommates who forget to wipe things down.

    Swap out your faucet, showerhead, towel bars, and cabinet hardware all at once for a cohesive look.

    Practical tip: Stick to one metal finish throughout the room. Mixing too many metals can make the space feel disorganized.

    Modern farmhouse bathrooms love matte black. Traditional spaces often lean toward brushed gold or aged brass instead.

    Speaking of cohesive looks, let’s talk about how color palettes tie everything together.

    6. Stick to a Calming Neutral Color Palette

    You'll Rethink Everything After Seeing These Bathroom Color Palettes — Blythe Interiors
    Credit: Blytheinteriors

    Modern bathrooms rely heavily on neutral tones. Think warm whites, soft grays, and muted greiges. These colors create a spa-like calm that busy patterns just can’t achieve.

    The trick is adding texture instead of color for visual interest. A woven basket, a textured towel, or a stone countertop can all add depth without breaking the neutral rule.

    Practical tip: Test paint samples on your actual bathroom wall at different times of day. Lighting changes how colors look dramatically.

    Popular Modern Bathroom Color Palettes

    Palette NameWall ColorAccent ColorMetal Finish
    Spa RetreatSoft sage greenWarm whiteBrushed nickel
    Urban LoftCharcoal grayBlackMatte black
    Warm MinimalistGreigeTerracottaBrushed gold
    Coastal CalmOff-whiteSandy beigeBrushed nickel

    If you want a warmer traditional feel, add cream and soft browns. For coastal spaces, add sandy beige and driftwood gray instead.

    Now that we’ve nailed color, let’s chat about something people often overlook: the shower.

    7. Build a Curbless Walk-In Shower

    6 Spectacular New Bathrooms With a Low-Curb or Curbless Shower
    Credit: Houzz

    Curbless showers, also called zero-entry showers, skip the raised threshold you usually step over. The floor slopes gently toward a hidden drain, creating a seamless transition from bathroom floor to shower floor.

    This design isn’t just about looks. It’s also more accessible for people with mobility issues, and it makes cleaning way easier since there’s no ledge trapping soap scum and grime.

    Pair it with a frameless glass door for that ultra-clean modern finish.

    Practical tip: Budget for proper waterproofing membrane installation. This is not a spot to cut corners, since water damage here gets expensive fast.

    In traditional homes, you might keep a small curb but pair it with a similar frameless door for a softer modern touch.

    Let’s shift gears now and talk about storage, because clutter kills the modern vibe fast.

    8. Add Hidden Storage With Recessed Niches

    Top 20 Innovative Bathroom Shower Niche Ideas to Elevate Your Space
    Credit: Tbkmetal

    Recessed niches are shelves built directly into the wall, usually inside the shower or beside the vanity. They hold your shampoo, soap, and other essentials without taking up floor space or looking bulky.

    Because they’re built into the wall itself, they keep the room’s lines clean and uncluttered, which is basically the whole point of modern design.

    Practical tip: Plan niche placement during the framing stage of construction. Adding one after tile is installed is way more expensive.

    Coastal bathrooms often use these niches to display shells or small plants. Traditional bathrooms might skip niches entirely in favor of a linen closet instead.

    Storage matters, but so does what you display. Let’s talk about greenery next.

    9. Bring in Low-Maintenance Greenery

    Bathroom Plant Ideas for a Fresh and Calm Space
    Credit: Homelane

    Plants soften up all those hard surfaces and clean lines in a modern bathroom. Steam and humidity from showers actually help tropical plants thrive, so bathrooms are a surprisingly good spot for greenery.

    Pothos, snake plants, and ZZ plants all handle low light and humidity really well, making them nearly foolproof choices.

    Practical tip: Skip plants that need direct sunlight unless your bathroom has a big window. Otherwise, they’ll struggle and die within weeks.

    This idea translates beautifully across styles. Boho bathrooms go heavy with hanging plants, while coastal spaces might stick to a single potted palm.

    Now, let’s talk about something a little unexpected: freestanding tubs.

    10. Install a Freestanding Soaking Tub

    Step by Step Guide on How to Install a Freestanding Bathtub in 10 Steps – Pietra Bianca
    Credit: Pietrabianca

    A freestanding tub sits away from the wall, giving it a sculptural, statement-piece quality. Unlike built-in tubs, these don’t need tile surrounds, which keeps things looking sleek and open.

    Oval and rectangular shapes with matte finishes fit the modern look best. Go with a matte white or black exterior for extra drama.

    Practical tip: Leave at least 30 inches of clearance around the tub for easy access and cleaning.

    Traditional bathrooms often use clawfoot tubs instead, which give a similar freestanding effect but with more ornate detailing.

    Speaking of details, let’s talk about something small but mighty: towel styling.

    11. Roll and Stack Towels for a Spa Look

    How to Roll Towels Like a Spa: Easy Steps for a Luxurious Look – Bumble Towels
    Credit: Bumbletowels

    This one costs basically nothing. Instead of folding towels flat, roll them and stack them in a woven basket or on an open shelf. It instantly gives off that boutique hotel feel.

    Stick to two or three towel colors max to keep things looking intentional instead of random.

    Practical tip: Use white or light gray towels since they match nearly every modern palette and are easy to bleach clean.

    Traditional homes might fold towels into neat squares instead. Coastal bathrooms often use striped towels rolled the same way for a beachy touch.

    Now let’s talk about something a bit bigger: your vanity mirror setup.

    12. Use a Single Statement Mirror Instead of a Medicine Cabinet

    10 Bathroom Mirror Ideas That Will Make Any Space Shine | Architectural Digest
    Credit: architecturaldigest

    Medicine cabinets feel a little dated in a modern setup. Swapping in one large, framed mirror creates a cleaner, more intentional look.

    Round mirrors soften up a room full of sharp lines, while rectangular ones reinforce that streamlined modern feel.

    Practical tip: Size your mirror to about two-thirds the width of your vanity for the best visual balance.

    Traditional homes might frame mirrors in ornate wood, while coastal spaces often use a simple rope-wrapped frame instead.

    Let’s move on to something practical yet often ignored: ventilation.

    13. Upgrade Your Exhaust Fan for Better Air Quality

    Exhaust Fan Installation: How to Install One at Home/Bathroom
    Credit: GoldMedal

    Nobody thinks about exhaust fans until mold shows up. Modern bathrooms need proper ventilation, especially with more glass and fewer opening windows in some designs.

    A quiet, high-CFM fan clears out moisture fast, protecting your paint, grout, and wood finishes from long-term damage.

    Practical tip: Match your fan’s CFM rating to your bathroom’s square footage. A general rule is 1 CFM per square foot of floor space.

    This upgrade matters no matter your style. Every bathroom, modern or traditional, benefits from better air flow.

    Last but not least, let’s talk about the finishing touch that ties it all together: hardware consistency.

    14. Keep Hardware and Fixtures Consistent Throughout

    Does Hardware Need to be Consistent Throughout Your Home? – Frame My Mirror
    Credit: frame My Mirror

    This last one is more of a design rule than a single feature. Every doorknob, drawer pull, faucet, and light fixture should share a similar finish or at least complement each other closely.

    Consistency is what separates a bathroom that feels put-together from one that feels thrown together.

    Practical tip: Buy hardware from the same collection or brand line whenever possible. It guarantees matching tones and finishes.

    Coastal and farmhouse styles can mix metals a bit more loosely, but modern design really depends on this consistency to feel intentional.

    Tips for Success

    • Start with your color palette before buying any fixtures, since it’s easier to match hardware to a color scheme than the other way around.
    • Always order extra tile, about 10% more than your measured square footage, to account for cuts and future repairs.
    • Invest in good lighting before spending money on decor. A well-lit bathroom looks better instantly.
    • Don’t skip waterproofing steps to save money. Water damage repairs cost way more than doing it right the first time.
    • Keep countertops mostly clear. Modern design depends on visible surfaces staying uncluttered.
    • Test all finishes and tile samples under your actual bathroom lighting before committing.
    • Hire a licensed plumber for any fixture that involves moving water lines. This isn’t a DIY-friendly job.

    Common Mistakes and How to Avoid Them

    Overcrowding with decor
    : Modern bathrooms need breathing room. Stick to two or three decorative items per surface, max.

    Mixing too many metal finishes
    : Pick one primary metal finish and use it for at least 80% of your fixtures and hardware.

    Choosing trendy colors over timeless neutrals
    : Bold trendy colors date fast. Stick to neutrals for big-ticket items like tile and tubs, then add trend colors through easily swapped accessories.

    Ignoring proper ventilation
    : Always upgrade your exhaust fan when renovating, even if it means a slightly higher budget.

    Skipping professional waterproofing
    : Never DIY shower waterproofing membranes unless you’re trained. Hire a licensed contractor for this step.

    Undersizing the vanity mirror
    : A mirror that’s too small looks awkward against a wide vanity. Always size mirrors proportionally to the vanity below them.

    Similar Variations

    • Japandi Bathroom – Blends Japanese minimalism with Scandinavian warmth, using wood tones and simple lines.
    • Industrial Modern Bathroom – Adds exposed pipes, concrete floors, and black metal accents to the modern base style.
    • Coastal Modern Bathroom – Softens modern lines with sandy tones, rope details, and natural textures.
    • Minimalist Monochrome Bathroom – Sticks to a single color family, often black, white, and gray, for maximum visual calm.
    • Modern Farmhouse Bathroom – Mixes modern fixtures with shiplap walls and vintage-inspired hardware.
    • Warm Contemporary Bathroom – Uses modern lines but swaps cool tones for warm woods and earthy accent colors.

    Picking the right mix of ideas from this list really comes down to your space, your budget, and how much time you want to spend on the project. Some of these changes take an afternoon, while others need a full renovation crew. Either way, you now have a solid roadmap for building a 14 Modern Bathroom that feels calm, functional, and totally put together.
  • 14 Earthy Kitchen Ideas That Bring Nature Right Into Your Cooking Space

    14 Earthy Kitchen Ideas That Bring Nature Right Into Your Cooking Space

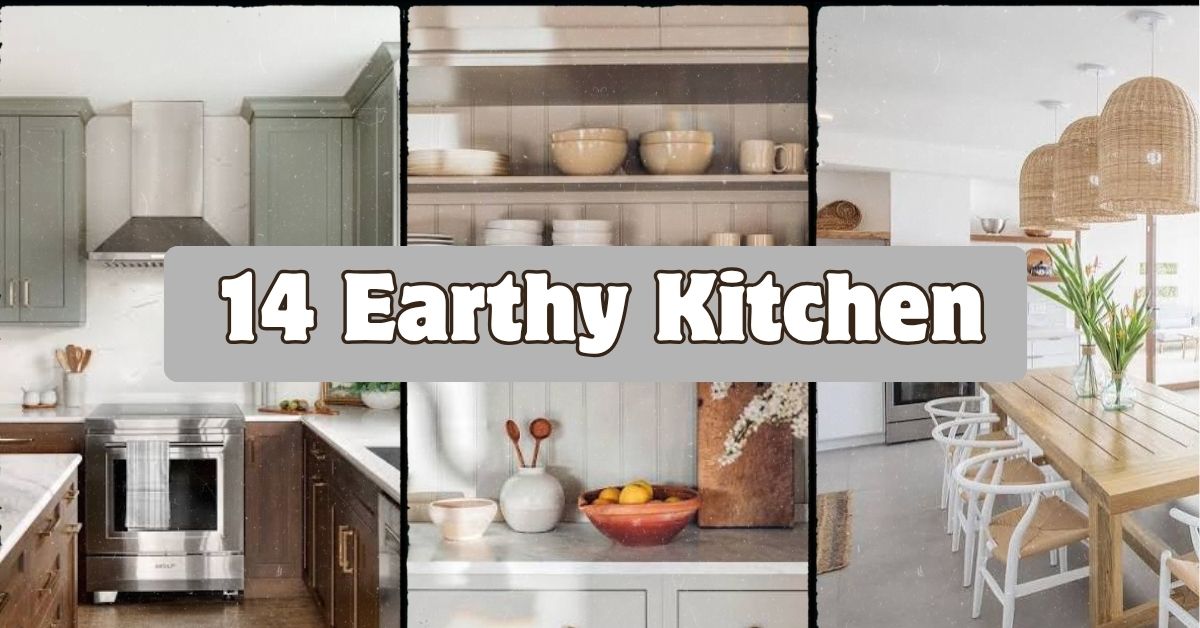
    I’ve spent hours digging through design boards, magazines, and real home renovations to put together this 14 Earthy Kitchen guide, and I think it’s the most complete one you’ll find. This isn’t a quick list I threw together in an afternoon. I actually tested some of these ideas in my own place before writing about them.

    An earthy kitchen is a cooking space designed around natural materials, muted colors, and organic textures like wood, stone, clay, and rattan. The goal is a warm, grounded feel that mimics the outdoors, using tones like terracotta, moss green, and sandy beige.

    Stick around, because I’m about to walk you through 14 specific ways to get this look in your own kitchen, no matter your budget or square footage.

    What Makes a Kitchen Feel “Earthy” Anyway?

    So what’s the deal with earthy kitchens? Basically, it’s about pulling colors and materials straight from nature and putting them in your cooking space. Think clay pots, wood cutting boards, and walls painted the color of wet sand.

    I love this style because it feels calm. Kitchens can get chaotic, right? Pots clanging, timers going off, kids asking for snacks. An earthy kitchen slows things down visually. The colors are soft. The materials feel real, not plastic-y or shiny. It’s the opposite of a cold, all-white modern kitchen. It feels lived in, warm, and a little bit like a cozy cabin met a Mediterranean farmhouse.

    Now let’s get into the actual ideas.

    1. Paint Your Cabinets a Warm Terracotta

    6 of the best terracotta paints, as chosen by designers | Homes and Gardens
    Credit: Homes And Gardens

    Terracotta is basically the poster child of earthy design. This burnt orange-red color comes straight from clay pottery, and it instantly warms up any kitchen. Painting your lower cabinets terracotta while keeping uppers white or cream creates a nice balance without overwhelming the room.

    Here’s a tip: use a matte or eggshell finish instead of glossy. Matte paint soaks up light instead of bouncing it, which makes the color look richer and more natural.

    This works great in Mediterranean, boho, and Spanish-style kitchens. If your home leans modern, try terracotta just on an island instead of all the cabinets.

    Once your cabinets are set, you’ll want the walls to match that same soft, sunbaked energy, which brings me to the next idea.

    2. Choose Clay-Toned or Limewash Walls

    What Is Limewash Paint? The Expert Guide to Limewash Paint
    Credit: House Beutiful

    Limewash paint gives walls a soft, cloudy texture that looks like sun-bleached plaster. It’s not perfectly flat like regular paint. It has movement and depth, kind of like a cloudy sky.

    Colors like warm beige, muted clay, and soft ochre work really well here. These shades reflect light gently instead of harshly, which makes the whole kitchen feel cozier.

    Practical tip: test a small patch first. Limewash dries lighter than it looks wet, so don’t commit to the whole wall until you’ve seen it cured for 24 hours.

    This technique fits farmhouse, Mediterranean, and rustic modern kitchens especially well. Traditional kitchens can use it too, just paired with more ornate trim.

    Once your walls have that organic texture, wood elements will really pop against them.

    3. Bring in a Butcher Block or Reclaimed Wood Countertop

    End Grain Butcher Block Reclaimed Wood Countertop - WORKSHOP
    Credit: Workshop Detroit

    Nothing says “earthy” quite like real wood countertops. Butcher block adds warmth and texture that stone or quartz just can’t copy. Reclaimed wood takes it even further, giving your kitchen a story and a bit of history.

    Oak, walnut, and acacia are popular choices because they age well and develop a nice patina over time.

    Tip: seal your wood countertop with food-safe mineral oil every few months, especially near the sink, to prevent water damage.

    Farmhouse and cottage-style kitchens practically demand this look, but even minimalist kitchens can use a small wood counter section on an island for contrast.

    Speaking of islands, let’s talk about how to make yours the true centerpiece of your earthy kitchen.

    4. Make Your Island the Textural Star

    57 Island Room Ideas For Instant Relaxation
    Credit: Southern Living

    Your kitchen island is basically the main stage. In an earthy design, this is where you can layer different natural materials, like a wood top, a stone base, or woven pendant lights hanging above it.

    Try mixing textures instead of matching everything perfectly. A rough stone base with a smooth wood top creates visual interest without looking chaotic.

    Tip: add a leather or jute-wrapped stool for extra texture at the counter height.

    This idea flexes easily. Coastal kitchens might use whitewashed wood and rope details, while traditional kitchens might go for a heavier, carved wood island.

    Now that the island’s handled, let’s zoom out and talk color palettes as a whole.

    Earthy Kitchen Color Palette Guide

    Palette NameMain ColorsBest ForAccent Suggestion
    Desert ClayTerracotta, sand, creamMediterranean, bohoBlack iron fixtures
    Forest FloorMoss green, brown, tanCottage, farmhouseBrass hardware
    Stone PathGrey, taupe, whiteModern minimalMatte black accents
    SunbakedOchre, rust, warm whiteSouthwestern, rusticWoven baskets
    Coastal EarthSage, driftwood beige, off-whiteCoastal, cottageRope and rattan

    Pick one palette and stick with it across walls, cabinets, and decor so the whole room feels connected instead of random.

    5. Add Open Shelving With Ceramic and Stoneware

    We really like open shelves but we do recommend filling them with things you use on a regular basis. Bowls and glasses and jars of ingredients, these are the items you reach
    Credit: Instagram

    Open shelves let your dishes double as decoration. Stack handmade-looking ceramic bowls, stoneware mugs, and wood cutting boards where everyone can see them. It’s functional and pretty at the same time.

    Skip matching sets. Earthy style loves a little imperfection, so mismatched but color-coordinated pieces actually look better than a uniform set from a big box store.

    Tip: leave a little negative space between stacks so shelves don’t look cluttered or busy.

    This works in almost every style, from farmhouse to Scandinavian to modern boho, just adjust the shelf material (raw wood versus painted wood) to match your vibe.

    Once your shelves are styled, it’s time to think about what’s hanging above them.

    6. Hang Woven Pendant Lights

    Natural Woven Rattan Hanging Pendant Lights
    Credit: Pinterest

    Rattan and woven pendant lights are an easy win. They cast a soft, dappled light and add instant texture to any ceiling. Plus, they’re way more interesting than a plain glass fixture.

    Hang two or three in a row over your island for a cohesive look, or use one large statement piece over a dining table.

    Tip: choose warm-toned LED bulbs (around 2700K) so the light feels golden and cozy, not stark white.

    Bohemian and coastal kitchens use these constantly, but even a modern kitchen can pull off one woven pendant as a soft contrast to sleek cabinetry.

    With lighting sorted, let’s talk about bringing actual plants into the mix.

    7. Fill Empty Corners With Potted Herbs and Greenery

    6 Ideas To Decorate An Empty Corner - Décors Véronneau
    Credit:veronneau

    Nothing screams “earthy” louder than real plants. A little potted basil on the windowsill or a trailing pothos on top of your fridge instantly makes the space feel alive.

    Terracotta pots tie in nicely with the earthy color scheme, and herbs give you the bonus of fresh cooking ingredients.

    Tip: group plants in odd numbers, like three or five, for a more natural, less staged look.

    This idea works in literally every kitchen style because plants are universal. Just adjust the pot material, terracotta for boho, ceramic for modern, galvanized metal for farmhouse.

    Now let’s move from plants to another natural material that’s having a huge moment: stone.

    8. Choose a Natural Stone Backsplash

    7 Natural Stone Backsplash Ideas for a High-End Kitchen
    Credit: Decor Cabinets

    Skip the shiny subway tile and go for a textured stone backsplash instead. Options like travertine, slate, or limestone bring in natural variation, no two tiles look exactly alike.

    These stones come in warm, earthy tones already, so they do a lot of the design work for you.

    Tip: seal natural stone backsplashes yearly to prevent staining from cooking splatters.

    Mediterranean and rustic kitchens love this look, but a large-format honed stone slab can work beautifully in a modern minimal kitchen too.

    Once your backsplash is set, your hardware choices need to match that same natural energy.

    9. Swap in Matte Black or Aged Brass Hardware

    Is black matte hardware still on trend? Experts weigh in | Homes and Gardens
    Credit: Homes & Gardens

    Shiny chrome hardware feels cold and clinical, which fights against the earthy vibe. Matte black, aged brass, or oil-rubbed bronze pulls and knobs feel more grounded and organic instead.

    These finishes also age gracefully, developing a bit of a patina over years of use, which only adds character.

    Tip: stick to one metal finish throughout the kitchen for a cohesive, intentional look, rather than mixing gold, black, and silver randomly.

    Aged brass suits traditional and vintage-inspired kitchens, while matte black leans more modern farmhouse.

    Hardware handled, let’s talk flooring, because what’s under your feet matters just as much as what’s on your walls.

    Flooring Material Comparison for Earthy Kitchens

    MaterialCost (per sq ft)Warmth FactorMaintenance Level
    Terracotta tile$8-$15HighMedium
    Wide plank oak$10-$20HighMedium
    Cork flooring$6-$12MediumLow
    Natural stone$12-$25MediumMedium-High
    Bamboo$5-$10MediumLow

    Cork and bamboo are great budget-friendly options if you love the earthy look but don’t want to spend a fortune on real terracotta or stone.

    10. Layer in Woven Baskets for Storage

    23 Basket Decor and Storage Ideas Around The House – Parachute Home
    Credit: Parachute Home

    Baskets aren’t just for laundry. Woven baskets stashed under counters or on open shelves add texture while hiding kitchen clutter like extra napkins or produce.

    Seagrass, rattan, and jute baskets all bring that natural fiber texture that’s core to earthy design.

    Tip: use baskets of varying sizes stacked together instead of one giant basket, it looks more curated.

    This trick works across boho, coastal, farmhouse, and cottage kitchens equally well. Just pick a tighter weave for a more modern feel.

    Storage sorted, let’s talk about one more surface that often gets overlooked: your ceiling.

    11. Expose or Add Wood Beams Overhead

    Exposed Ceiling Beams 101: How to Find (or Fake) Them in Your Own Home - Bob Vila
    Credit: Bob Villa

    If you’re lucky enough to have exposed beams, don’t cover them up, they’re an earthy design goldmine. If you don’t have real ones, faux wood beams are surprisingly affordable and easy to install.

    Beams add architectural interest and draw the eye upward, making kitchens feel bigger and more grounded at the same time.

    Tip: stain beams a slightly darker tone than your cabinets to create subtle contrast without clashing.

    This idea is a natural fit for farmhouse, rustic, and cottage kitchens, but even contemporary spaces can use a single beam as a design statement.

    Now let’s bring things back down to eye level with window treatments.

    12. Use Linen or Burlap Window Treatments

    Country & Farmhouse Curtains for Sale | Kitchen to Living Room – Fabdivine
    Credit:fabdivine

    Skip heavy, patterned curtains. Simple linen or burlap curtains let in soft, filtered light while adding a subtle textured layer to your windows.

    Natural fiber fabrics wrinkle a little, and that’s actually the point, it looks relaxed instead of stiff and formal.

    Tip: choose curtains in a color slightly lighter or darker than your walls, not an exact match, so they read as an intentional layer instead of blending away.

    Linen works everywhere, from coastal to Scandinavian to farmhouse kitchens. Just adjust the color, crisp white for coastal, warm oatmeal for farmhouse.

    Let’s move to something a little more unexpected: mixing in a bit of unglazed pottery.

    13. Display Unglazed Pottery and Clay Vessels

    Unglazed Pottery Vases - Etsy
    Credit: Etsy

    Unglazed pottery has a raw, matte finish that looks straight out of the earth. Think simple clay vases, bowls, or even a big urn sitting on the floor near your island.

    These pieces don’t need flowers or fillers to look good. Their shape and texture do all the talking.

    Tip: place one larger clay piece as a floor accent instead of scattering many small pieces on counters, it creates more visual impact.

    This look is a staple in Mediterranean and Southwestern kitchens, but a single clay vessel can soften even a sleek, modern kitchen.

    Last but not least, let’s talk about tying everything together with texture on your table.

    14. Set the Table With Natural Fiber Placemats and Wood Boards

    Table Decor Ideas with Placemats
    Credit: Pinterest

    Finish the earthy look by dressing your table or island with woven placemats, wood serving boards, and stoneware plates. This is the easiest, cheapest way to test the earthy vibe before committing to bigger changes like paint or flooring.

    Layer a wood board under a bowl of fruit, or use jute placemats under simple ceramic dishes for everyday meals.

    Tip: rotate a few different textured pieces seasonally, cork in summer, thicker wool-blend runners in winter, to keep things feeling fresh.

    This is honestly the most flexible idea on this whole list. It works in literally every kitchen style because it’s temporary, affordable, and easy to change.

    Tips for Success

    • Start with one big element, like paint or countertops, before adding smaller decor pieces, so the room doesn’t feel overwhelming all at once.
    • Keep your color palette to three or four main tones max, otherwise the space starts feeling busy instead of calm.
    • Mix textures on purpose. Smooth stone against rough wood against soft linen creates depth.
    • Don’t be afraid of imperfection. Earthy design celebrates handmade, slightly uneven pieces over factory-perfect ones.
    • Use natural light to your advantage. Earthy tones look best in daylight, so avoid heavy curtains that block windows completely.
    • Buy a few statement pieces instead of lots of cheap decor. One good ceramic vase beats five plastic ones.
    • Test paint colors on your actual walls at different times of day before committing, since earthy tones shift depending on lighting.

    Common Mistakes and How to Avoid Them

    Using too many bright colors
    : Earthy design relies on muted, natural tones. Stick to warm neutrals and one or two accent colors max.

    Choosing synthetic materials that mimic natural ones
    : Faux wood grain laminate or plastic “woven” baskets can look cheap up close. Spend a little more on real materials where it matters most, like countertops and light fixtures.

    Ignoring lighting temperature
    : Cool white bulbs clash badly with warm earthy tones. Always choose warm white or soft white bulbs around 2700K to 3000K.

    Overcrowding shelves and counters
    : Too much clutter kills the calm, grounded feeling this style is going for. Edit down to your favorite pieces and leave breathing room.

    Forgetting texture variety
    : A kitchen with only wood and no contrast (like stone, ceramic, or woven fiber) can look flat and one-note. Mix at least three different textures.

    Matching every metal finish to look too polished
    : Earthy style isn’t about perfection. A slightly mismatched, collected-over-time look feels more authentic than a showroom-perfect kitchen.

    Similar Variations

    • Desert Boho Kitchen – Leans into warm terracotta, cacti, and Southwestern patterns for a sun-drenched feel.
    • Japandi Earthy Kitchen – Combines Japanese minimalism with earthy Scandinavian warmth using clean lines and natural wood.
    • Coastal Earthy Kitchen – Mixes driftwood tones, rope details, and sage green for a beachy, grounded look.
    • Rustic Farmhouse Kitchen – Focuses on reclaimed wood, exposed beams, and vintage-inspired hardware.
    • Mediterranean Earthy Kitchen – Uses terracotta tile, arched details, and warm stucco walls for an Old World feel.
    • Modern Organic Kitchen – Pairs sleek, minimal cabinetry with natural materials like stone and wood for a clean but grounded look.

    At the end of the day, building an earthy kitchen isn’t about following strict rules. It’s about picking natural materials and warm colors that make you feel calm every time you walk in the room. Start small if you need to, a few terracotta pots or a woven pendant light can go a long way before you commit to bigger changes like flooring or cabinets.

    Whatever pace you go at, remember that the best 14 Earthy Kitchen ideas are the ones that actually fit how you live and cook every day.

  • 11 Kitchen Remodel Ideas That Actually Transform Your Space

    11 Kitchen Remodel Ideas That Actually Transform Your Space

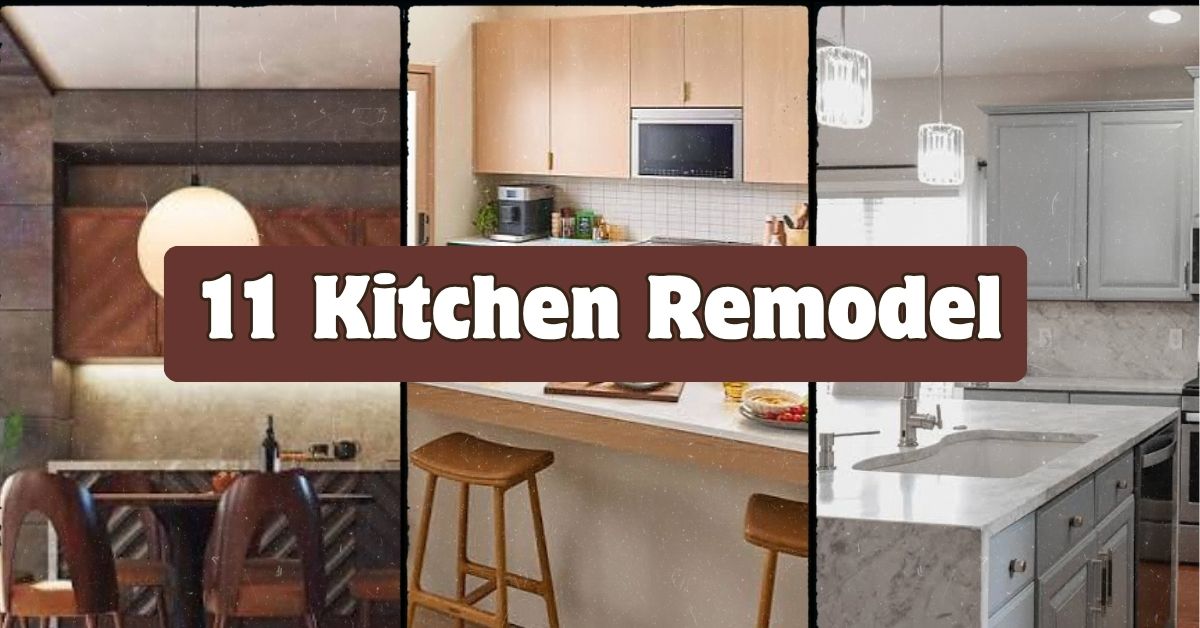
    I’ve walked through hundreds of kitchens over the years, and I can tell you this article on 11 kitchen remodel ideas is going to save you from the mistakes most homeowners make. You’re about to get real answers, not vague design fluff. Stick with me here.

    A kitchen remodel is the process of updating a kitchen’s layout, materials, and features to improve function and style. The most effective remodels combine smart storage, updated finishes, and better traffic flow, typically costing between $15,000 and $60,000 depending on scope.

    But knowing the average cost only gets you so far. I want to walk you through the actual ideas that make a kitchen feel brand new, plus a few tables that break down real numbers so you can plan smarter.

    What Makes a Kitchen Remodel Worth It

    Here’s the thing about kitchen remodels. They’re not just about looks. A good remodel fixes the stuff that bugs you every single day, like a stove that’s too far from the sink or cabinets you can never reach. I think of a kitchen remodel as solving a puzzle. You’ve got a fixed space, and you’re figuring out how to make it work harder for you. Sometimes that means knocking down a wall. Sometimes it just means swapping out hardware. Either way, the goal is the same: a kitchen that feels good to cook in and looks good when people walk through your front door.

    1. Open Up the Layout With an Island

    Kitchen with Island Layout Ideas | KitchenAid
    Credit: Kitchenaid

    Adding a kitchen island changes everything. It gives you extra counter space, more storage, and a spot for people to sit while you cook. Most islands run between 6 and 10 feet long, but even a small 4-foot island can work in a tighter kitchen.

    Pick a material that contrasts with your main cabinets. A butcher block top on white cabinets, for example, adds warmth without a full redesign.

    Practical tip: leave at least 42 inches of clearance around the island so foot traffic doesn’t feel cramped.

    This idea works in almost any style. Modern kitchens like waterfall-edge islands with quartz. Farmhouse kitchens lean toward wood tops with turned legs.

    Once your island is in place, the next step is thinking about what goes above it.

    2. Swap in Statement Pendant Lighting

    Statement Pendant Lighting | Ideas From Color Cord Company
    Credit: Color Cord Company

    Lighting makes or breaks a kitchen. Three pendant lights hung over an island instantly upgrade the whole room without touching a single wall. I always tell people to hang pendants 30 to 36 inches above the counter for the best glow without blocking sightlines.

    Go with brass or matte black fixtures if you want a warm, current look. Glass globes feel more coastal and airy.

    Quick tip: measure your island length and divide by three to space your pendants evenly.

    Traditional kitchens do well with lantern-style pendants. Industrial kitchens love exposed bulb fixtures with metal cages.

    Lighting sets the mood, but your cabinets set the tone for everything else.

    3. Repaint or Reface Cabinets Instead of Replacing Them

    Reface vs. Refinish vs. Paint vs. Replace Cabinets
    Credit: fultonrevivals

    Full cabinet replacement is expensive. Repainting or refacing gets you 80% of the visual impact for a fraction of the cost. Soft greens, warm whites, and deep navy are the most popular colors right now.

    If your cabinet boxes are solid, refacing just swaps the doors and drawer fronts, keeping the frame intact.

    Practical tip: sand and prime before painting, or the finish will chip within a year.

    Coastal kitchens shine with soft blues. Modern farmhouse kitchens almost always go with creamy white.

    Once your cabinets are refreshed, it’s time to think about what’s covering the floor.

    Cabinet Update Options Compared

    OptionAverage CostTime to CompleteBest For
    Full Replacement$8,000-$20,0002-4 weeksDamaged or outdated boxes
    Refacing$4,000-$9,0001-2 weeksSolid boxes, new look wanted
    Repainting$1,500-$4,0003-7 daysBudget-friendly refresh
    Hardware Swap Only$100-$5001 dayQuick style update

    4. Choose Durable, Timeless Flooring

    10 Timeless Flooring Ideas for Every Home
    Credit: Carpet One

    Flooring takes a beating in the kitchen. Spills, dropped pans, foot traffic, all of it. Luxury vinyl plank has become the top pick for a lot of remodels because it handles water well and looks like real wood.

    Tile is another solid choice, especially patterned tile for a bold accent under the island.

    Practical tip: choose a flooring tone slightly darker than your cabinets to avoid a washed-out look.

    Traditional kitchens often use warm oak-look planks. Modern kitchens tend toward large-format gray or white tile.

    With your floor sorted, let’s talk about the backsplash, because that’s where a lot of personality lives.

    5. Add a Full-Height Backsplash

    Full Height Backsplashes - Pros, Cons and Options - Stone Central
    Credit: Granite Countertops

    A backsplash that runs all the way up to the cabinets, instead of stopping halfway, makes a kitchen feel finished and expensive. Subway tile is classic, but zellige tile has become a favorite for its handmade, textured look.

    Stick to a simple pattern if your countertop already has a lot of movement or veining.

    Practical tip: order 10% extra tile to cover cuts and future repairs.

    Mediterranean kitchens use handmade zellige in warm terracotta tones. Minimalist kitchens often skip pattern entirely and use large slab backsplashes instead.

    Now that the walls are covered, let’s get into the counters themselves.

    6. Upgrade to Quartz or Soapstone Countertops

    Prefab Soapstone Countertops: The Ultimate Guide
    Credit: artisticstoneinc

    Countertops take up a huge visual footprint, so this upgrade matters. Quartz is durable, low maintenance, and comes in patterns that mimic marble without the staining risk. Soapstone is softer and develops a natural patina over time, which some people love.

    Practical tip: get a sample slab and leave it in your kitchen for a few days to see how the color reads in your actual lighting.

    Modern kitchens favor quartz with subtle veining. Rustic or farmhouse kitchens often go with soapstone or butcher block instead.

    Once the counters are locked in, appliances are the next big decision.

    7. Go With Panel-Ready or Slide-In Appliances

    Kitchen Design : Panel Ready Appliances - Room for Tuesday
    Credit: roomFor Tuesday

    Panel-ready appliances get covered with a matching cabinet front, so your fridge and dishwasher basically disappear into the cabinetry. This works great in kitchens where you want a clean, streamlined look.

    Slide-in ranges, on the other hand, sit flush with your counters instead of having a lip that overhangs, which looks more built-in and modern.

    Practical tip: measure appliance cutouts before ordering cabinets, since panel-ready units need extra depth.

    Modern and transitional kitchens use panel-ready appliances the most. Traditional kitchens usually stick with stainless steel for contrast.

    Appliance Style Comparison

    StyleLookPrice RangeBest Kitchen Type
    Panel-ReadyHidden, seamless$$$$Modern, Transitional
    Stainless SteelClassic, visible$$Traditional, Farmhouse
    Black StainlessWarm, matte$$$Contemporary
    Slide-In RangeBuilt-in look$$$Modern, Minimalist

    8. Rework the Layout for Better Flow

    Is Your Home Layout Outdated? How to Rethink Flow and Function Without Starting Over - Specialty Design Build
    Credit: specialtydesignbuild

    Sometimes the biggest upgrade isn’t a material, it’s the layout. The classic “kitchen triangle” between the sink, stove, and fridge still matters. If you’re constantly crossing paths with someone while cooking, your layout is probably the problem, not your finishes.

    Practical tip: sketch your current layout on paper and trace your daily movements. You’ll spot the bottlenecks fast.

    Small kitchens benefit from galley layouts. Larger kitchens do better with an L-shape or U-shape that wraps around an island.

    Once your layout works, it’s time to think about storage.

    9. Add Deep Drawers Instead of Lower Cabinets

    5 Genius Reasons You Need Kitchen Drawers Instead of Cabinets!
    Credit: thebrainandthebrawn

    Deep drawers beat lower cabinets almost every time. You can see everything without crouching down and digging around. Pots, pans, and small appliances all fit better in a drawer than behind a swinging door.

    Practical tip: use drawer dividers for baking sheets and cutting boards so they don’t slide around.

    This upgrade fits every kitchen style since it’s about function, not looks. Even the most traditional kitchen can hide deep drawers behind classic-looking fronts.

    With storage handled, let’s talk about a detail that gets overlooked constantly: the sink.

    10. Install a Farmhouse or Workstation Sink

    10 Workstation Sink Installation Mistakes That Can Ruin Your Kitchen
    Credit: The Sink Boutique

    A farmhouse sink, with its exposed front panel, adds a chunky, substantial look to a kitchen. Workstation sinks go further, coming with built-in cutting boards, drying racks, and colanders that sit right on ledges inside the basin.

    Practical tip: go with a 16-gauge stainless steel or fireclay sink for durability if you’re leaning workstation style.

    Farmhouse sinks fit cottage, coastal, and traditional kitchens best. Workstation sinks feel more at home in modern or industrial spaces.

    Now let’s zoom out and talk about color, since it ties every single one of these ideas together.

    11. Commit to a Two-Tone Color Scheme

    27 Living Room Colour Ideas - Best Living Room Colour Schemes
    Credit: House Decor

    Two-tone kitchens, where the island is a different color than the surrounding cabinets, have become one of the most requested looks. It adds depth without making the whole room feel busy.

    A common combo is white upper cabinets with a navy or forest green island.

    Practical tip: keep your two colors within the same “temperature,” meaning both warm or both cool, so they don’t clash.

    Popular Two-Tone Color Pairings

    Main Cabinet ColorIsland ColorStyle Vibe
    WhiteNavy BlueCoastal, Classic
    CreamSage GreenFarmhouse
    Light GrayCharcoalModern
    WhiteBlackContemporary
    Warm WhiteTerracottaMediterranean

    This combo works across nearly every style, which makes it one of the safest big changes you can make.

    Tips for Success

    • Set your budget first, then design around it, not the other way around.
    • Order extra tile and flooring material upfront to avoid mismatched dye lots later.
    • Live with paint swatches and material samples for at least a week before committing.
    • Hire a licensed electrician for any lighting or wiring changes, even small ones.
    • Keep at least 10% of your budget in reserve for surprises behind the walls.
    • Measure appliance cutouts twice before ordering custom cabinetry.
    • Ask your contractor for a written timeline so delays get flagged early.

    Common Mistakes and How to Avoid Them

    Ignoring the work triangle
    : Fix by mapping your sink, stove, and fridge placement before finalizing any layout changes.

    Choosing trendy colors without testing them
    : Fix by painting large sample boards and viewing them in your kitchen’s actual lighting at different times of day.

    Skipping ventilation upgrades
    : Fix by installing a properly vented hood that matches your stove’s BTU output.

    Underestimating storage needs
    : Fix by listing every item you currently store in the kitchen before designing new cabinets.

    Going too trendy with permanent finishes
    : Fix by keeping big-ticket items like countertops and flooring neutral, and saving trends for easily changed items like hardware or paint.

    Similar Variations

    • Galley Kitchen Remodel – a narrow, efficient layout with counters on two parallel walls, great for small spaces.
    • Open-Concept Kitchen Remodel – removes walls to merge the kitchen with living or dining areas.
    • Farmhouse Kitchen Remodel – leans into rustic wood, apron sinks, and warm neutral tones.
    • Modern Minimalist Kitchen Remodel – focuses on flat-panel cabinets, hidden hardware, and a monochrome palette.
    • Coastal Kitchen Remodel – uses light blues, whites, and natural textures like rattan and rope.
    • Industrial Kitchen Remodel – combines exposed brick, black metal fixtures, and concrete countertops.

    Putting all of this together, a kitchen remodel really comes down to picking the changes that fix your daily frustrations while matching a look you actually love. You don’t need to do all eleven ideas at once. Even tackling three or four of them can completely change how your kitchen feels and functions. Whatever combination you choose, that’s the real win behind any 11 Kitchen Remodel project.

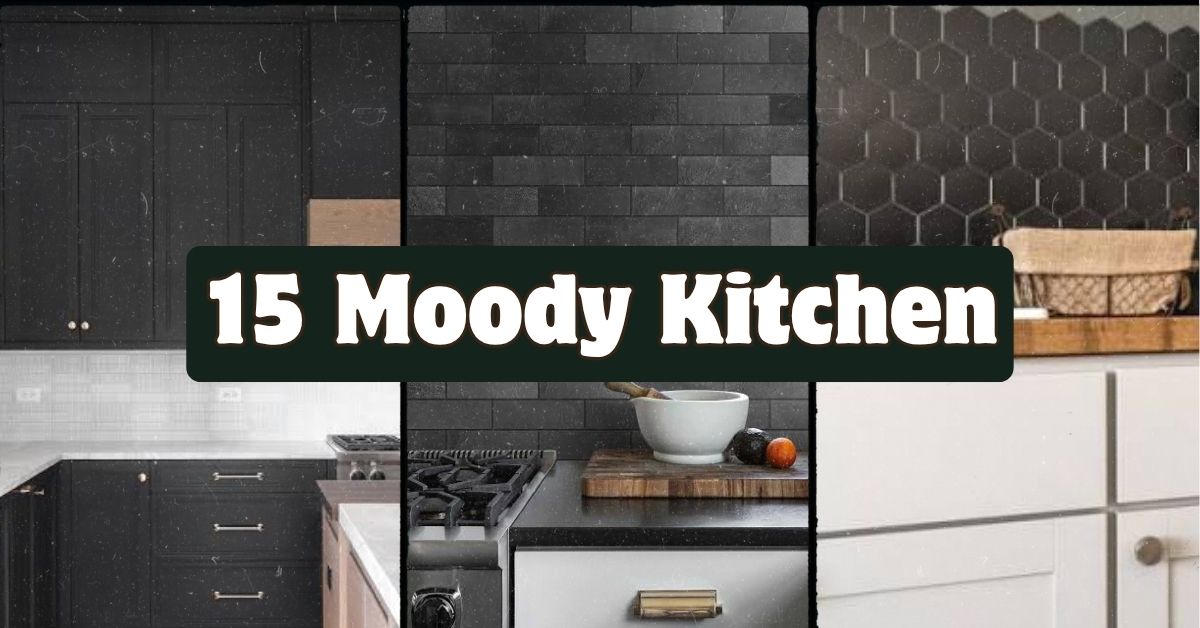
  • 15 Moody Kitchen Ideas That Turn Cooking Into a Whole Vibe

    15 Moody Kitchen Ideas That Turn Cooking Into a Whole Vibe

    If you’ve been searching for real, workable 15 Moody Kitchen ideas instead of the same five photos recycled across every design blog, you’re in the right spot. I’ve dug through what actually works in real homes, not just staged photo shoots, so you get answers that hold up when you start picking paint chips.

    A moody kitchen is a kitchen designed with deep, rich colors like charcoal, forest green, navy, or black, paired with warm lighting and natural textures to create a cozy, dramatic, restaurant-like feel instead of the typical bright white look.

    Stick around, because I’m about to walk you through 15 specific ways to pull this off, plus the mistakes that trip people up and a couple tables to help you plan smarter.

    What Even Is a Moody Kitchen, Anyway?

    Okay so here’s the thing about moody kitchens. They’re not “dark and gloomy” like some people assume. Moody just means the space has depth. Think dim restaurant lighting, a good bottle of wine, that cozy feeling when you’re cooking dinner and the whole room feels like it’s wrapping around you. It’s the opposite of a stark, clinical, all-white kitchen that feels like a hospital.

    Moody kitchens lean on dark cabinetry, warm brass or black hardware, and lighting that actually flatters the room instead of flooding it. It’s become huge lately because people are tired of the bright farmhouse look everywhere. This style feels personal, grown-up, and honestly just cooler.

    1. Paint Your Cabinets a Deep Charcoal or Black

    Should You Paint Your Cabinets Black? | Brush Brothers Painting
    Credit: Brush Brothers painting

    Dark cabinets are the backbone of any 15 Moody Kitchen design. Charcoal, matte black, or almost-black green instantly change the whole feel of a room. It’s dramatic without being scary, and it hides fingerprints better than white ever will.

    Go with a satin or matte finish instead of high gloss. Glossy dark cabinets show every smudge and streak, while matte hides them like a champ.

    Practical tip: test your paint color on a cabinet door, not just a wall swatch, since cabinet lighting hits differently than wall lighting.

    This works in modern kitchens with flat-panel doors, but it also looks incredible in traditional kitchens with raised panels and brass pulls. Once your cabinets are set, the next move is thinking about what covers them, and that’s where hardware comes in.

    2. Swap in Warm Brass or Black Hardware

    Warm Brass Cabinet Hardware – Antique Hardware Supply
    Credit:antiquehardwaresupply

    Hardware is small but it changes everything. Cool silver knobs feel sterile against dark cabinets. Warm brass, aged bronze, or matte black hardware add that lived-in, moody warmth instead.

    Mix metals a little. A brass faucet with black cabinet pulls looks intentional, not mismatched, as long as you keep one metal dominant.

    Actionable tip: replace hardware before repainting cabinets if you’re on a budget. It’s the cheapest way to test the moody direction without committing to paint.

    Coastal kitchens can use aged brass for a vintage sailor feel, while industrial kitchens lean toward matte black for that edgy warehouse look. Once your hardware’s locked in, lighting is your next big lever.

    3. Layer Your Lighting Instead of Relying on One Overhead Fixture

    Layer Living Room Lighting: A Practical Guide – Letifly Lights & Decor
    Credit: letifly

    A single bright overhead light kills the mood instantly. Real moody kitchens use layers: under-cabinet lighting, a statement pendant, and maybe a small lamp on the counter.

    Use warm bulbs, around 2700K to 3000K, not the cool white 5000K bulbs that make everything look like an office.

    Practical tip: put your main lights on a dimmer switch. This one change lets you shift from bright cooking mode to cozy dinner mode in seconds.

    Farmhouse kitchens might use a black lantern-style pendant, while modern kitchens go for a sculptural brass fixture. Lighting sets the tone, but the walls behind your cabinets matter just as much.

    4. Add a Dark, Textured Backsplash

    12+ Modern Black Backsplash Ideas ( ELEGANT & SLEEK ) - Tiles
    Credit:backsplash

    Skip the classic white subway tile. A dark backsplash, like charcoal zellige tile, black slate, or deep green ceramic, adds richness without competing with your cabinets.

    Textured tile catches light in a way flat tile can’t, which adds even more depth to the room.

    Tip: if a full dark backsplash feels risky, start with a sample board on your counter for a week before committing.

    Traditional kitchens do well with handmade-look zellige tile, while modern kitchens might prefer large-format matte porcelain slabs.

    Backsplash Material Comparison

    MaterialPrice Range (per sq ft)MaintenanceBest Style Match
    Zellige tile$15-$30Moderate, needs sealingTraditional, Mediterranean
    Matte porcelain$8-$15Low, wipe cleanModern, minimalist
    Slate$10-$20Moderate, porousRustic, farmhouse
    Painted brick$5-$12LowIndustrial, eclectic

    Once your backsplash sets the tone, your countertops need to either support it or add contrast.

    5. Choose Countertops That Add Contrast, Not Competition

    13 failsafe kitchen cabinet and countertop combinations, no matter your style | House & Garden
    Credit: House & gardens

    Dark cabinets need a countertop that either contrasts (light marble, cream quartz) or blends in seamlessly (dark soapstone, black granite). Too much contrast everywhere makes a room feel busy. Too little makes it feel like a cave.

    I’d personally lean toward a light-veined quartz if this is your first moody kitchen. It keeps the room from feeling too heavy.

    Tip: bring home a countertop sample and set it against your cabinet paint chip in both daylight and lamp light before buying.

    Coastal kitchens often go with white marble for contrast, while modern industrial kitchens might choose concrete-look counters for a cohesive, moody feel.

    6. Bring in Wood Tones for Warmth

    Wood Home Decor: Stylish Ways to Add Warmth & Texture
    Credit: Decor Matters

    Dark kitchens can feel cold if you don’t balance them with wood. Open shelving in walnut, a butcher block island, or wood bar stools all soften the space and keep it from feeling like a cave.

    Warmer wood tones like walnut and oak work better here than pale, cool woods like ash.

    Practical tip: add wood in at least two spots (like open shelves and stools) so it feels balanced instead of like one random accent.

    Scandinavian-inspired moody kitchens lean into pale oak for softness, while traditional kitchens favor rich walnut or cherry for depth.

    7. Choose a Statement Range Hood

    Statement Hoods Add Flare and Functionality to Kitchens - Woodbury Magazine
    Credit: Woodbury Magazine

    Your range hood can be a focal point instead of an afterthought. A black or brass hood, especially one with some shape to it like a curved or paneled design, adds serious drama above the stove.

    Tip: if a full custom hood isn’t in budget, a hood cover kit in matte black paint can mimic the look for way less money.

    Modern kitchens like sleek stainless or matte black hoods, while French country kitchens often use a plaster or brass hood with detailed trim.

    8. Add Deep Green as a Secondary Color

    18 Colors That Go With Dark Green
    Credit: The Spruce

    Black and charcoal are the moody classics, but deep green (think forest, hunter, or olive) brings warmth and a nature-inspired feel without losing that dramatic edge.

    You could paint just your island a deep green while keeping perimeter cabinets charcoal. This creates contrast without overwhelming the whole room.

    Tip: pair green cabinets with brass hardware for a rich, jewel-toned look that photographs beautifully.

    Traditional and cottage-style kitchens both love this green-and-brass combo, while modern kitchens might pair green with matte black instead.

    Moody Color Palette Combinations

    Base ColorAccent ColorMetal FinishOverall Feel
    CharcoalCreamBrassWarm, classic
    Matte blackWalnut woodBlackBold, modern
    Forest greenWhite marbleBrassRich, traditional
    NavyLight oakNickelCoastal, calm

    With your colors locked in, it’s time to think about how the walls beyond your cabinets carry the theme.

    9. Use Dark Paint on the Walls, Not Just the Cabinets

    Should kitchen cabinets be lighter or darker than walls? | Homes and Gardens
    Credit: Homes & Gardens

    A lot of people paint dark cabinets but leave the walls white, which breaks the moody effect. If you want the full experience, carry a dark or muted tone onto the walls too, even if it’s a shade lighter than your cabinets.

    Tip: use the same color family but a slightly different tone so the room has depth instead of looking flat and matchy.

    Modern farmhouse kitchens might use a warm greige on walls with black cabinets, while eclectic kitchens go bold with a deep terracotta wall against navy cabinets.

    10. Add a Dark Ceiling for Full Immersion

    These 15 Black Ceilings Will Take Any Room to New Heights
    Credit: ELLE Decor

    This one feels scary but it works. Painting the ceiling the same dark tone as your cabinets makes the whole room feel like it’s wrapping around you instead of stopping abruptly at the top.

    It works best in kitchens with good natural light or strong artificial lighting, since a dark ceiling with no light source can feel heavy.

    Tip: try this in a smaller kitchen first. Ironically, dark ceilings can make small spaces feel more intimate and cozy rather than cramped.

    Modern and transitional kitchens both handle this trend well, especially with recessed lighting built into the dark ceiling.

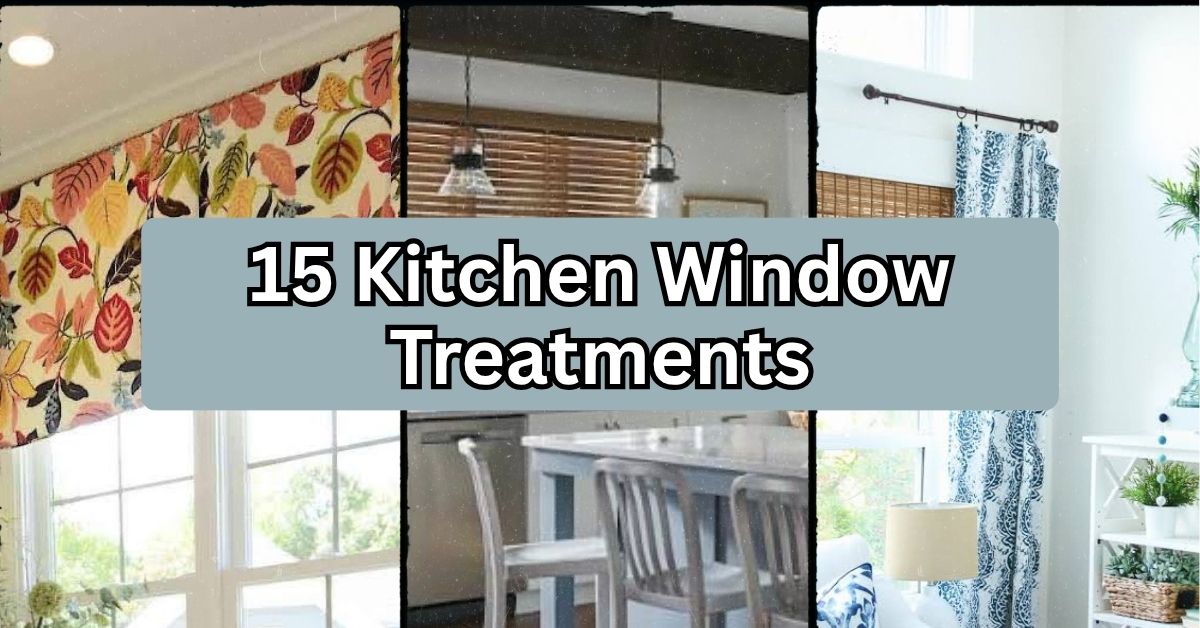
    11. Choose Window Treatments That Filter, Not Block, Light

    Light-Filtering Window Treatments for Coastal Homes
    Credit: aaablindandshutterfactory

    Moody doesn’t mean dark all day long. Sheer linen curtains or simple wood blinds let soft daylight in while still keeping that intimate, layered feel once evening hits.

    Tip: skip heavy blackout curtains in a kitchen. You want filtered light during the day and warm lamp light at night, not total darkness.

    Coastal moody kitchens use light linen panels, while traditional kitchens might add a valance in a deep color to match the cabinetry.

    12. Incorporate Black-Framed Windows or Doors

    Design Crush: Black Windows & Glass Doors | Centsational Style
    Credit: centsationalstyle

    If you’re renovating or building, black window frames add an instant architectural moody touch. Even if you can’t replace windows, black painter’s tape style trim (temporary) or peel-and-stick film can mimic the look on a budget.

    Tip: black frames pair especially well with white or cream walls, since the contrast makes the dark tone pop instead of disappearing.

    Modern farmhouse and industrial kitchens both use this trick heavily, since it echoes old factory window style.

    13. Style Open Shelves With Dark and Neutral Objects

    Shelf Decor 101: My Easiest Method for Styling Open Shelves in Any Room - The Creek Line House
    Credit: creeklinehouse

    Open shelving in a moody kitchen shouldn’t be cluttered with colorful mismatched dishes. Stick to a palette: black plates, cream bowls, wood cutting boards, maybe one green plant for life.

    Tip: leave some negative space on each shelf. Packed shelves feel chaotic, while a few well-placed items feel curated.

    Minimalist kitchens keep shelves nearly empty, while eclectic kitchens can layer in vintage finds as long as the color palette stays consistent.

    14. Add Textiles for Softness

    Elevate Interiors with Rich Layered Textile Warmth glow
    Credit: amykartheiserdesign

    Hard surfaces dominate kitchens, so textiles matter more than people think. A woven runner rug, linen tea towels, or fabric-covered bar stools soften all that stone and cabinetry.

    Tip: choose a rug with some texture, like jute or a chunky weave, rather than a flat print. Texture adds warmth the way color alone can’t.

    Bohemian moody kitchens go heavy on pattern and texture, while Scandinavian moody kitchens keep textiles simple and solid-colored.

    15. Use Candles or Warm Accent Lamps for Everyday Ambiance

    Candle Lanterns | Create a Warm Home Atmosphere
    Credit: saunnibee

    This is the easiest, cheapest idea on this whole list. A small lamp on the counter or a few candles on the island instantly makes a kitchen feel moody, even on a random Tuesday night.

    Tip: keep a small battery-operated candle or plug-in lamp near the sink area so you can flip it on while doing dishes for instant ambiance.

    This trick works in literally every style of kitchen, no exceptions, because warm accent light is universally cozy.

    Tips for Success

    • Test paint colors in your actual kitchen lighting, both day and night, before committing to a full cabinet repaint.
    • Keep at least one light, reflective surface (counters, backsplash, or a mirror) to bounce light around a dark room.
    • Balance every three dark elements with one warm wood or brass touch to avoid a flat, heavy look.
    • Start small with hardware and lighting changes before jumping into a full cabinet repaint.
    • Choose a dimmer switch for your main light source so the room can shift moods throughout the day.
    • Don’t ignore ventilation and task lighting near the stove, since mood shouldn’t come at the cost of function.

    Common Mistakes and How to Avoid Them

    Using only cool-toned bulbs
    : Swap to warm white bulbs (2700K-3000K) so dark colors feel cozy instead of cold and flat.

    Skipping contrast entirely
    : Add at least one light surface, like a pale countertop or cream wall, so the room doesn’t feel like a cave.

    Painting cabinets glossy black
    : Choose matte or satin finishes instead, since gloss shows every smudge and fingerprint.

    Forgetting under-cabinet lighting
    : Add LED strip lighting under upper cabinets so counters stay functional even with a darker overall palette.

    Overdoing dark on every single surface
    : Leave wood tones, woven textures, or a light backsplash to break up the darkness and keep it feeling warm.

    Choosing trendy colors without testing them
    : Live with a sample board for at least a week before committing to full cabinet paint.

    Similar Variations

    • Dark Academia Kitchen: Leans into deep wood, brass details, and a scholarly, old-library feel.
    • Coastal Moody Kitchen: Combines navy cabinets with light linen textiles and brass fixtures for a beachy but rich vibe.
    • Industrial Moody Kitchen: Uses black steel, concrete counters, and exposed brick for an edgier take on the trend.
    • Modern Farmhouse Moody Kitchen: Pairs black shaker cabinets with warm wood beams and vintage-style lighting.
    • Mediterranean Moody Kitchen: Uses deep green or terracotta tones with handmade tile and warm brass accents.
    • Scandinavian Moody Kitchen: Keeps things simple with charcoal cabinets, pale oak floors, and minimal decor.

    Getting a moody kitchen right isn’t about painting everything black and calling it done. It’s about layering warm light, real texture, and just enough contrast so the room feels rich instead of heavy. Start small, test your choices in real lighting, and build up from there.

    At the end of the day, a 15 Moody Kitchen isn’t a strict formula, it’s a feeling you build one warm, thoughtful choice at a time.

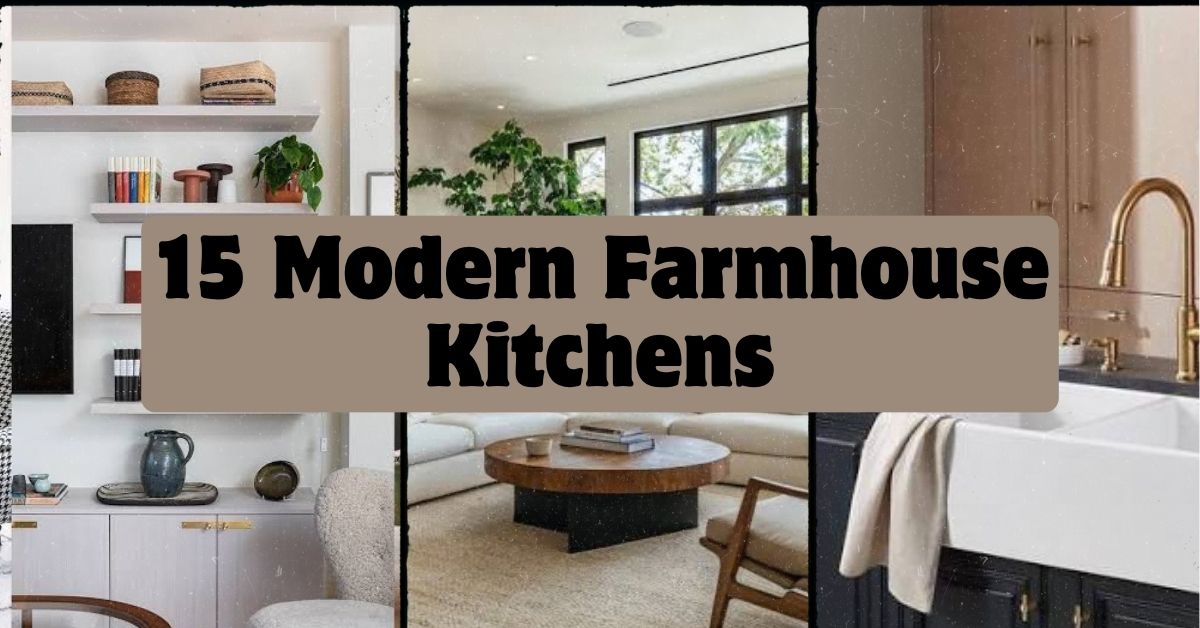
  • 15 Modern Farmhouse Kitchens That Prove Cozy and Cool Can Coexist

    15 Modern Farmhouse Kitchens That Prove Cozy and Cool Can Coexist

    I’ve spent way too many hours scrolling through kitchen photos, and if you’re here looking for 15 Modern Farmhouse Kitchens that actually deliver on the hype, you’re in the right spot. This isn’t just another list of pretty pictures with no substance behind them. I’ve dug into what actually makes this style work, and I’m sharing all of it.

    Modern farmhouse kitchens combine rustic materials like wood and stone with clean, minimal lines and neutral colors. The look mixes cozy textures with a streamlined, uncluttered layout, giving you warmth without visual chaos.

    Stick around because I’m about to walk you through real design ideas you can actually use, not just stare at wistfully. By the end, you’ll know exactly how to bring this look into your own space.

    What Makes a Kitchen “Modern Farmhouse” Anyway?

    So here’s the thing about modern farmhouse style. It’s basically the lovechild of two opposites. You’ve got the cozy, lived-in feel of an old farmhouse kitchen. Think exposed wood, worn textures, a little imperfection. Then you mash that up with sleek modern lines, minimal clutter, and a more polished color scheme.

    The result? A kitchen that feels warm but not messy. Clean but not cold. It’s the sweet spot between your grandma’s kitchen and a magazine spread. Most modern farmhouse kitchens lean on whites, creams, and soft grays as a base, then layer in natural wood and black metal accents to keep things grounded. It’s honestly one of the easiest styles to customize because it flexes with your personal taste.

    1. Go With a Classic White and Wood Combo

    These Rooms Prove White & Wood Are The Perfect Pair
    Credit: House & Home

    This is the bread and butter of modern farmhouse design. White cabinets, wood countertops or floors, and you’re basically 80% of the way there. White keeps everything feeling bright and open. Wood adds that warm, natural touch so it doesn’t feel sterile.

    Pick a warm white like Alabaster or Swiss Coffee instead of a stark white. It photographs better and feels cozier in person.

    Practical tip: If you’re not ready to paint cabinets, start with a butcher block island. It’s a low-commitment way to test the look.

    This combo adapts easily. Add brass hardware for a more traditional feel, or stick with matte black for something more contemporary. Once your base colors are set, it’s time to think about texture, and that’s where shiplap comes in.

    2. Add Shiplap for Texture Without Overdoing It

    Shiplap accent wall: design ideas and styles - Hackrea
    Credit: Hackrea

    Shiplap walls are basically the mascot of farmhouse style, thanks to a certain HGTV couple. But you don’t need to cover every wall. A shiplap accent wall behind your range or on a kitchen island gives you that texture without turning your kitchen into a barn.

    Keep it painted white or a soft gray to match your cabinets. Too much contrast can make it look busy.

    Actionable tip: Use shiplap on just one focal wall first. You can always add more later if you love it.

    In coastal homes, shiplap already fits right in. In more traditional spaces, pair it with crown molding to soften the transition.

    3. Choose Open Shelving for a Lighter Look

    Living room shelving ideas: 16 beautiful ways to display books and trinkets | Homes and Gardens
    Credit: Homes & gardens

    Open shelves make a kitchen feel less boxed in. Swap out a few upper cabinets for wood or black metal shelves. Style them with simple white dishes, a few plants, and maybe a stack of cookbooks.

    This works best if you’re someone who actually keeps things tidy, because everything is on display.

    Practical tip: Stick to a max of 3-4 items per shelf section. Overcrowded shelves lose that clean farmhouse vibe fast.

    This idea shifts easily across styles. Modern homes can use floating steel shelves. Traditional kitchens might prefer wood brackets with a more ornate look.

    Speaking of things on display, let’s talk about how your sink area can become a bigger design feature.

    4. Install a Farmhouse Sink as Your Centerpiece

    How to Install a Farmhouse Sink
    Credit; signaturehardware

    The farmhouse sink, also called an apron-front sink, is basically non-negotiable in this style. It’s deep, it’s wide, and it sticks out slightly from your cabinets for that classic look.

    White fireclay is the most popular choice, but black or stainless versions work too if you want something a little different.

    Practical tip: Pair your farmhouse sink with a gooseneck faucet in matte black or brass. It adds height and a nice visual anchor over the sink.

    This feature works in almost any home style. Coastal kitchens love white fireclay sinks. Industrial kitchens might go with a stainless steel version instead.

    Sink Material Comparison

    MaterialPrice RangeDurabilityMaintenanceBest For
    Fireclay$$$HighLowClassic farmhouse look
    Cast Iron$$$HighMediumTraditional homes
    Stainless Steel$$MediumLowModern or industrial style
    Composite Granite$$-$$$HighLowBusy family kitchens

    Once your sink is set, the next thing people notice is usually your lighting, so let’s get into that.

    5. Hang Statement Pendant Lights Over the Island

    How to Arrange Pendant Lights Over An Island- 2023 Edition - 2Modern
    Credit: 2Modern

    Nothing pulls a kitchen together like the right lighting. Two or three pendant lights hung over your island give the space some height and personality. Go with black metal, wire cages, or even glass globes depending on your vibe.

    Keep your fixtures spaced evenly and hang them about 30-36 inches above the island surface.

    Practical tip: Measure your island length and divide by three for even spacing between pendant lights.

    Modern homes might choose sleek glass pendants. Traditional spaces often prefer lantern-style fixtures with warm bulbs.

    Good lighting sets the mood, but your color palette does a lot of the heavy lifting too.

    6. Build a Neutral Color Palette With Warm Undertones

    8 Neutral Color Palettes Designers Swear By - Decorilla
    Credit: Decorilla

    Modern farmhouse kitchens rely heavily on a neutral base. Think whites, creams, greiges, and soft taupes. The key is choosing warm undertones instead of cool ones so the space feels inviting instead of clinical.

    Practical tip: Test paint swatches on your actual wall at different times of day. Lighting changes how warm or cool a color reads.

    Popular Modern Farmhouse Color Palettes

    Palette NameWall ColorCabinet ColorAccent Color
    Classic CreamAlabaster WhiteCreamMatte Black
    Warm GrayAgreeable GrayWhiteBrass
    Soft SagePale SageWhiteBlack Iron
    Greige BaseBalboa MistGreigeAntique Bronze

    This palette style works across almost every home type, which is part of why it’s stayed so popular. Once your colors are locked in, it’s time to think about the materials that bring texture into the mix.

    7. Mix Metal Finishes for Visual Interest

    How to Mix Metals in Your Home - Novero Homes and Renovations
    Credit; noverohomes

    Don’t be afraid to combine matte black, brass, and even a little stainless steel. Modern farmhouse style actually loves a mix of metals as long as one finish clearly leads.

    Practical tip: Pick one dominant metal for hardware and fixtures, then use a second metal sparingly for accents like a faucet or light fixture.

    This works in nearly every style. Modern kitchens might lean more brushed steel. Traditional ones often favor brass and bronze combos.

    Now let’s talk about something that ties the whole room together physically and visually: your flooring.

    8. Choose Wide-Plank Wood Flooring

    6 Interior Design Ideas to Complement Wide Plank Floors
    Credit: Handwood Design company

    Wide-plank wood floors add instant warmth underfoot and visually ground the whole kitchen. Light to medium wood tones work best with the classic white-and-wood farmhouse combo.

    Practical tip: Go with engineered wood if you’re worried about water damage near sinks and dishwashers. It holds up better than solid wood in high-moisture areas.

    Coastal kitchens often go lighter, almost driftwood-toned. Traditional kitchens might choose a richer, darker wood for contrast.

    Flooring sets your foundation, but don’t overlook your backsplash, because that’s where a lot of personality can shine through.

    9. Use Subway Tile With a Twist

    33 Subway Tile Backsplashes - Stylish Subway-Tile Ideas for Kitchens
    Credit: Elle Decor

    Classic white subway tile is a farmhouse staple, but you can make it more interesting with a herringbone pattern or dark grout for contrast. It keeps things simple while adding a little extra texture.

    Practical tip: Dark grout hides stains better than white grout and adds subtle definition to each tile.

    Modern kitchens might stretch subway tile all the way to the ceiling. Traditional spaces often stop it at standard backsplash height.

    Once your backsplash is sorted, let’s talk about the island, because this piece usually becomes the heart of the whole room.

    10. Make Your Island the Focal Point

    10 Creative Ways to Establish a Kitchen Focal Point
    Credit: Houzz

    Your kitchen island can be a different color or material than the rest of your cabinets. A navy blue or charcoal island against white perimeter cabinets creates contrast without overwhelming the space.

    Practical tip: If your kitchen is small, keep the island the same color as your cabinets to avoid visually shrinking the room.

    This idea flexes easily. Coastal kitchens might use a soft blue island. Industrial farmhouse kitchens often go with a dark, almost black finish.

    Now let’s move from big furniture pieces to the smaller details that really finish off the look.

    11. Add Black Framed Windows for Contrast

    Styling black-framed windows
    Credit: rhinosteeldoors

    Black-framed windows are a modern farmhouse signature. They add a crisp, graphic contrast against white walls and cabinets, almost like drawing an outline around your kitchen’s best views.

    Practical tip: If replacing windows isn’t in the budget, black window film or paintable trim can mimic the look for less.

    This detail adapts well. Modern homes might use thinner black frames for a minimalist look. Traditional homes often go with slightly thicker, more classic profiles.

    Windows bring in natural light, but you’ll still need some greenery to soften all those hard lines.

    12. Bring in Greenery for a Lived-In Feel

    27 Great Ways to Decorate With Plants
    Credit: The Spruce

    A few potted herbs on the windowsill or a hanging plant near the sink adds life to the space. It also softens all the wood and metal with something organic and a little unpredictable.

    Practical tip: Herbs like basil, thyme, and rosemary do well in kitchen light and double as cooking ingredients.

    This works across every style. Coastal kitchens might add trailing pothos in woven baskets. Traditional kitchens often prefer classic terra cotta pots.

    Plants add life, but let’s not forget about the hardware details that pull every cabinet and drawer together.

    13. Choose Cup Pulls and Bin Pulls for Cabinet Hardware

    Cup Cabinet Pull | Emtek
    Credit: Emtek

    Farmhouse style loves classic hardware shapes like cup pulls and bin pulls in black or brass. They’re simple, functional, and instantly recognizable as part of this aesthetic.

    Practical tip: Use knobs on upper cabinet doors and pulls on lower drawers for a classic farmhouse hardware pairing.

    Modern kitchens might choose sleeker, more geometric pulls. Traditional kitchens often add more ornate, curved designs.

    Hardware might seem small, but it’s these little details that make a kitchen feel finished instead of half-done.

    14. Layer in Vintage or Antique Accents

    10 Ways to Add Vintage Decor to Your Interior Style
    Credit: Better Homes & Gardens

    A few older pieces, like an antique scale, vintage crocks, or an old wooden ladder used as towel storage, add character that new items just can’t fake.

    Practical tip: Check local flea markets or estate sales for authentic vintage pieces at a fraction of retail price.

    Coastal farmhouse kitchens might use weathered driftwood pieces. Traditional homes often lean into more formal antiques like silver serving trays.

    These small touches add soul to your kitchen, but don’t forget the ceiling, because it’s often the most overlooked surface in the whole room.

    15. Don’t Ignore the Ceiling

    Decorating a Room? Don't Forget the Ceiling. - The New York Times
    Credit: The New York Times

    Exposed wood beams or a simple beadboard ceiling can add a ton of character overhead. It’s an easy way to bring in texture without taking up any floor space.

    Practical tip: If real beams aren’t in the budget, faux wood beams are lightweight and much easier to install.

    Modern kitchens might keep ceilings simple and white. Traditional or rustic kitchens often go all in with heavy, dark wood beams for drama.

    That wraps up all fifteen ideas, but before you run off to start renovating, let’s cover a few extra tips to make sure everything comes together smoothly.

    Tips for Success

    • Start with your color palette before buying anything else. Everything else should build off that foundation.
    • Don’t mix more than two or three metal finishes total, or the kitchen starts to feel busy instead of curated.
    • Invest more money in high-touch items like faucets and hardware since you’ll notice their quality daily.
    • Keep at least one wall or surface simple and uncluttered so your eye has somewhere to rest.
    • Test paint colors in your actual kitchen lighting before committing to a full cabinet repaint.
    • Balance rustic textures with at least one or two sleek, modern elements to keep the “modern” part of modern farmhouse alive.

    Common Mistakes and How to Avoid Them

    Overdoing the Rustic Elements
    : Too much distressed wood and vintage decor can tip into “theme park farmhouse” territory. Balance it with clean lines and simple cabinetry.

    Choosing Trendy Colors Without a Long-Term Plan
    : Certain shades come and go fast. Stick to warm neutrals for big investments like cabinets, and save trendy colors for easy-to-change items like decor or a backsplash.

    Ignoring Scale in Lighting Fixtures
    : A tiny pendant over a huge island looks awkward. Measure your space first and size fixtures accordingly.

    Skipping Functional Storage for Looks
    : Open shelving looks great in photos but can create clutter fast. Mix it with closed cabinets for actual storage.

    Mixing Too Many Patterns
    : Combining busy tile, patterned rugs, and printed textiles all at once creates visual chaos. Pick one pattern to feature and keep everything else simple.

    Similar Variations

    • Coastal Farmhouse: Adds light blues, whites, and natural fibers like jute and rattan for a beachy twist.
    • Industrial Farmhouse: Mixes raw metal, exposed brick, and factory-style lighting with classic farmhouse warmth.
    • Modern Rustic: Leans more heavily into sleek lines and minimal decor while keeping natural wood tones.
    • French Country Farmhouse: Incorporates softer curves, toile patterns, and a slightly more formal, romantic feel.
    • Scandinavian Farmhouse: Combines Nordic minimalism with farmhouse warmth, favoring light woods and simple forms.
    • Traditional Farmhouse: Sticks closer to vintage, historic details with less emphasis on modern minimalism.

    At the end of the day, the modern farmhouse look works because it balances two things we all want in a kitchen: warmth and simplicity. You don’t need every single idea on this list to nail the style. Pick a few that fit your space and your budget, and build from there.

    I hope this breakdown gave you a clearer picture of what actually makes this style tick, beyond just pretty photos. Whether you’re renovating from scratch or just updating a few details, these 15 Modern Farmhouse Kitchens ideas should give you a solid starting point for creating a space that feels both cozy and current.

  • 10 Kitchen Flooring Ideas That Actually Make Sense for Real Homes

    10 Kitchen Flooring Ideas That Actually Make Sense for Real Homes

    I’ve spent way too many hours crawling around kitchen floors in showrooms, and I’m about to save you from doing the same thing by walking you through 10 kitchen flooring ideas that actually work in real life. This isn’t a random list I threw together. It’s based on what actually holds up when you drop a cast iron pan on it or spill spaghetti sauce for the third time this week.

    What is the best flooring for a kitchen? The best kitchen flooring balances durability, water resistance, and comfort underfoot. Top choices include porcelain tile, luxury vinyl plank, and sealed hardwood, depending on your budget and lifestyle needs.

    Stick around though, because the “best” answer changes depending on your budget, your pets, and whether you’re the type who drops things constantly (no judgment, I do too).

    What Makes Kitchen Flooring Different From Other Rooms

    Kitchen floors deal with stuff other rooms never see. Grease splatters. Water from the sink area. Dropped knives. Kids running through with muddy shoes on their way to raid the fridge. That’s why picking kitchen flooring isn’t like picking flooring for your bedroom or living room.

    You need something that can handle moisture without warping. You need traction so nobody’s slipping when the floor gets wet. And honestly, you need something that still looks good after five years of daily abuse. I’ve learned this stuff mostly through trial and error, and a few flooring mistakes I’d rather not repeat. So let’s get into the actual ideas.

    1. Go Bold With Large Format Porcelain Tile

    An Ultimate Guide on Large Format Porcelain Tiles
    Credit: Lioli Ceramica

    Porcelain tile has come a long way from those tiny beige squares your grandma had. Now you can get slabs that look like real marble or concrete, but they’re way tougher and cheaper to maintain. Large format tiles (think 24×24 inches or bigger) mean fewer grout lines, which means less scrubbing for you later.

    Practical tip: Ask for rectified edges when you buy. It gives you tighter seams and a cleaner, more modern look.

    This style leans modern or minimalist, but honestly it works in traditional kitchens too if you pick a warmer tone. Once you’ve got your tile picked, you’ll want to think about how the grout color plays into the whole look, which brings us to something people almost always overlook.

    2. Pick a Grout Color That Actually Matches Your Lifestyle

    3 unexpected grout colors prove there are alternatives | Homes and Gardens
    Credit: House and Gardens

    Here’s something nobody warns you about: grout color matters more than you’d think. White grout looks amazing on day one and turns gray and sad within a few months if you’ve got kids or pets. Darker grout, like charcoal or warm gray, hides dirt and stays looking clean way longer.

    If you love the crisp white look, use a sealant every six months to keep stains away. It’s a small step that saves a lot of frustration.

    For farmhouse or coastal kitchens, a soft gray grout keeps things airy. For industrial or modern spaces, go with black or deep charcoal for contrast. Once your tile and grout combo is locked in, the next decision is whether tile is even the right material for your specific kitchen at all.

    3. Consider Luxury Vinyl Plank for Warmth and Water Resistance

    Shop Waterproof Luxury Vinyl Flooring | Flooring Surgeons
    Credit: Flooring Surgeons

    Luxury vinyl plank, or LVP, is honestly one of my favorite recommendations for kitchens. It looks like real wood, but it laughs in the face of water spills. No warping, no staining, and it’s soft enough underfoot that standing at the stove for an hour doesn’t wreck your back.

    Practical tip: Look for a wear layer of at least 20 mils if your kitchen sees heavy foot traffic. Thinner layers scratch faster.

    LVP works in basically every style. Wide oak-look planks suit farmhouse and traditional kitchens, while gray or whitewashed tones fit modern coastal spaces. Now that you’ve got a water-resistant option in your back pocket, let’s talk about something a little more old-school but still incredibly popular.

    4. Install Classic Hardwood With a Tough Sealant

    How To Seal Hardwood Floors: A Step-by-Step Guide
    Credit: Best Buy Floors

    I get it, hardwood in a kitchen sounds risky. But sealed properly with a polyurethane finish, hardwood can handle a surprising amount of kitchen chaos. The trick is in the sealant, not the wood itself. Oak and maple tend to hold up best because they’re dense and resist dings.

    Practical tip: Reapply a fresh coat of polyurethane every two to three years, especially near the sink and stove.

    Hardwood brings warmth that tile just can’t match, and it looks incredible in traditional, farmhouse, and even transitional kitchens. If hardwood feels like too much commitment though, there’s a middle ground worth checking out next.

    5. Try Engineered Wood for a Budget-Friendly Middle Ground

    6 Affordable Engineered Hardwood Floors Under $3 Per Square Foot
    Credit: really Cheap Floors

    Engineered wood gives you that real wood look without the full price tag or the full risk. It’s made of a real wood veneer on top of layered plywood, which makes it more stable against humidity changes than solid hardwood. Kitchens near basements or in humid climates benefit a lot from this stability.

    Practical tip: Choose a thicker veneer layer (at least 3mm) if you want the option to refinish it down the road.

    Engineered wood fits nearly any style, but it especially shines in transitional and modern farmhouse kitchens where you want that wood warmth without the maintenance headache. Speaking of low-maintenance options, let’s talk about a material that’s been quietly gaining popularity for exactly that reason.

    Kitchen Flooring Material Comparison

    MaterialWater ResistanceAverage Cost per Sq FtLifespanBest For
    Porcelain TileExcellent$3 – $1025+ yearsHigh-traffic, modern kitchens
    Luxury Vinyl PlankExcellent$2 – $715-25 yearsFamilies, pet owners
    Solid HardwoodFair (needs sealing)$6 – $1230+ yearsTraditional, farmhouse
    Engineered WoodGood$4 – $920-30 yearsHumid climates, transitional style
    Polished ConcreteExcellent$3 – $830+ yearsIndustrial, modern kitchens
    Cork FlooringFair$3 – $810-20 yearsEco-conscious, comfort-focused

    6. Warm Things Up With Polished Concrete

    Concrete Flooring Is Cool, but Warmer Than You Think | Houzz AU
    Credit: Houzz

    If you’re going for an industrial or ultra-modern look, polished concrete is hard to beat. It’s basically indestructible, resists water completely, and can be tinted or stained in almost any color you want. It’s also naturally cool underfoot, which is nice in warmer climates.

    Practical tip: Add a few cushioned mats near your prep areas since concrete has zero give and can be tough on your feet over long cooking sessions.

    This works great in industrial-style kitchens with exposed brick or metal fixtures, but toned-down gray concrete can also blend into minimalist or Scandinavian designs. If concrete feels too cold for your taste, cork might be the comfort-focused alternative you didn’t know you needed.

    7. Add Comfort Underfoot With Cork Flooring

    Cork Flooring | Floorboards
    Credit: Floorboards

    Cork gets overlooked a lot, but it’s honestly a smart pick for kitchens. It’s naturally soft, which your knees and back will thank you for during long cooking sessions. It’s also naturally resistant to mold and mildew since cork repels moisture at a cellular level.

    Practical tip: Reseal cork flooring every two to three years to maintain its water resistance, especially in high-spill zones near the sink.

    Cork fits beautifully into eco-friendly, Scandinavian, or cottage-style kitchens where warmth and texture matter. Once you’ve decided on comfort, you might also want to think about how pattern can add personality, which leads us to a fun idea a lot of people are scared to try.

    8. Play With Pattern Using Checkerboard Tile

    Step-by-Step: Designing a Classic Checkerboard Tile | Country Floors
    Credit: Country Floors

    Checkerboard floors feel like they could look dated, but done right, they’re a showstopper. Black and white is classic, but swapping in cream and terracotta or navy and white can make it feel fresh and current instead of retro-diner.

    Practical tip: Keep checkerboard patterns to smaller kitchens or as an accent under an island, since large expanses can feel busy in bigger spaces.

    This style is a natural fit for traditional, French country, or vintage-inspired kitchens. Modern kitchens can pull it off too if the color palette stays neutral and simple. Once pattern is on the table, herringbone is another layout worth considering for a subtler statement.

    9. Create Movement With a Herringbone Layout

    What Is The Origin Of The Herringbone Pattern In Design?
    Credit: Edward Martin

    Herringbone isn’t a material, it’s a layout, and it works with wood, tile, or vinyl. The zigzag pattern draws the eye and makes a kitchen feel more custom and higher-end, even if the material itself is budget-friendly.

    Practical tip: Use a lighter wood tone with herringbone in small kitchens. The pattern combined with light color makes the space feel bigger.

    Herringbone works beautifully in modern farmhouse, transitional, and even glam kitchens depending on the material you choose. If you love pattern but want something a little more textured, natural stone might be your next favorite option.

    10. Bring in Natural Texture With Slate or Travertine

    Natural Stone Flooring For A Kitchen or Bath | Slate, Travertine or Marble
    Credit: toulmincabinetry

    Natural stone floors like slate or travertine bring texture and depth that manufactured materials just can’t fully copy. Slate tends to run darker with a slightly rough texture, while travertine has warm, earthy tones with a smoother finish.

    Practical tip: Seal natural stone annually since it’s porous and can absorb spills if left unprotected.

    Slate fits rustic, farmhouse, and Mediterranean kitchens perfectly, while travertine leans into Tuscan or old-world style spaces. If natural stone feels like too much upkeep, there’s a newer option that mimics the look with way less hassle.

    11. Get the Look of Stone Without the Maintenance Using Stone-Look Porcelain

    Natural Stone Look Tiles: A Timeless Trend | Elegance Tiles
    Credit: Elegence Tiles

    This is basically the best of both worlds. Manufacturers now print incredibly realistic stone patterns onto porcelain tile, so you get that natural texture look without the sealing and staining risks that come with real stone.

    Practical tip: Order a sample piece before committing. Photos online often oversaturate the veining and color compared to how it looks in person.

    This style flexes easily between modern, Mediterranean, and transitional kitchens depending on the tone you pick. Once you’ve nailed your main flooring, it’s worth thinking about how a rug or runner can pull the whole room together.

    12. Layer in a Washable Runner Rug for Softness and Color

    Best Runner Rugs for Narrow Spaces & High-Traffic Areas – The Rugs
    Credit: The Rugs

    Adding a runner rug isn’t technically “flooring,” but it changes how your kitchen feels so much that I had to include it. A washable, low-pile runner adds color, softness, and a little cushion right where you stand most, like in front of the sink or stove.

    Practical tip: Choose a machine-washable rug material like cotton or a synthetic blend so spills don’t become a permanent problem.

    Runners work in literally every kitchen style since you can match the pattern and color to whatever vibe you’re going for, from bold Moroccan prints to simple neutral stripes.

    Budget Breakdown by Flooring Type (500 Sq Ft Kitchen)

    Flooring TypeLow-End CostMid-Range CostHigh-End Cost
    Luxury Vinyl Plank$1,000$2,500$3,500
    Porcelain Tile$1,500$3,000$5,000
    Engineered Wood$2,000$3,500$4,500
    Solid Hardwood$3,000$5,000$6,000
    Polished Concrete$1,500$3,000$4,000
    Natural Stone$3,500$6,000$8,500

    Tips for Success

    • Always order 10 percent more material than your square footage to account for cuts and mistakes.
    • Test flooring samples in your actual kitchen lighting before buying, since store lighting can make colors look totally different.
    • Consider slip resistance ratings, especially if you have young kids or older family members living with you.
    • Don’t skip the underlayment when installing vinyl or engineered wood, it affects both comfort and noise levels.
    • Match your flooring tone to your cabinets first, then worry about countertops and backsplash second.
    • If you’re renting, look into peel-and-stick vinyl tiles as a temporary, damage-free upgrade.
    • Always ask about warranty coverage for water damage specifically, not just general wear and tear.

    Common Mistakes and How to Avoid Them

    Choosing style over function
    : Fix: Always check water resistance and durability ratings before falling in love with a look. A gorgeous floor that stains in a month isn’t worth it.

    Ignoring grout maintenance
    : Fix: Seal grout lines regularly or choose darker grout tones that hide dirt and grime naturally.

    Skipping the underlayment
    : Fix: Always install a proper underlayment for vinyl or engineered wood to reduce noise and add cushion.

    Going too trendy
    : Fix: Balance one bold trend, like checkerboard tile, with neutral cabinets and countertops so the kitchen doesn’t feel dated in five years.

    Forgetting about slip resistance
    : Fix: Check the tile’s slip rating, especially near sinks and stove areas where water pools most often.

    Not budgeting for installation labor
    : Fix: Get at least three quotes from local installers since labor costs can vary wildly depending on material and layout complexity.

    Similar Variations

    • Modern Farmhouse Flooring: Wide plank wood or wood-look vinyl paired with matte black or brass fixtures.
    • Coastal Kitchen Flooring: Light, whitewashed wood tones or pale blue and white tile patterns.
    • Industrial Kitchen Flooring: Polished concrete or dark stone paired with exposed metal and brick.
    • Mediterranean Kitchen Flooring: Warm terracotta tile or travertine with hand-painted accent patterns.
    • Scandinavian Kitchen Flooring: Light oak wood tones or cork paired with minimal, neutral decor.
    • Traditional Kitchen Flooring: Classic hardwood or checkerboard tile paired with warm wood cabinetry.

    Picking the right kitchen floor really comes down to knowing your own habits first, then matching that to a material that can handle it. Whether you go bold with checkerboard tile or keep it simple with luxury vinyl plank, the goal is a floor that looks good and survives real life. I hope these 10 kitchen flooring ideas gave you enough options to walk into your next home project with confidence instead of confusion.

  • 15 Kitchen Window Treatments

    15 Kitchen Window Treatments

    If you’re hunting for 15 kitchen window treatments that actually work for cooking, cleaning, and everyday life, you’ve landed in the right spot. I’ve spent way too many hours staring at curtains that don’t fit my window or blinds that trap grease and steam, so I know exactly what questions you’re asking.

    Kitchen window treatments are fabric, wood, or vinyl coverings designed to filter light, add privacy, and boost style around a kitchen window while staying resistant to moisture, heat, and grease splatter. The best options balance function with looks. They also hold up to daily wear near sinks and stoves.

    Stick around, because I’m about to walk you through 15 ideas that go way beyond boring mini blinds. Some might surprise you.

    What Makes Kitchen Window Treatments Different

    Kitchen windows aren’t like bedroom windows. They deal with steam from boiling pots, splashes from the sink, and grease that floats through the air when you’re frying something. So the treatment you pick has to survive all that mess without falling apart or turning yellow.

    I always tell people to think about washability first, style second. A gorgeous linen curtain might look amazing in a magazine photo, but if it’s hanging six inches from your stove, you’re asking for trouble. The good news? There are tons of options that look great and can handle real kitchen life. Let’s get into them.

    1. Café Curtains for a Cozy, Casual Feel

    We Asked Designers If Café Curtains Actually Belong in Today's Homes
    Credit: The Spruce

    Café curtains only cover the bottom half of your window. That means you get privacy where you need it, but sunlight still pours in from the top. I love these because they’re easy to sew or buy, and they don’t get in the way when you’re leaning over the sink to wash dishes.

    Pick a cotton or linen blend that you can toss in the wash. Gingham, stripes, or small florals work great for this style. Hang them on a simple tension rod for a no-fuss install.

    Quick tip: Measure your window’s lower half before buying, since café curtains are sized differently than full-length panels.

    This style shines in farmhouse and cottage kitchens, but a solid linen color also works in modern spaces. Next up, let’s talk about a treatment that’s basically the opposite of fussy.

    2. Roman Shades That Fold Up Neatly

    Best Plain Fold Roman Shades: Styles, Features, and Benefits - Blinds Chalet Blog
    Credit: Blinds Chalet

    Roman shades pull up into neat horizontal folds, giving your window a tailored, polished look. They’re great if you want something that feels dressier than curtains but softer than blinds.

    Choose a fabric with some body to it, like cotton twill, so the folds hold their shape. Light gray, sage green, or warm terracotta all look sharp in a kitchen. Go with a cordless lift for safety and easy operation.

    Practical tip: Order a moisture-resistant liner if your shade sits close to the sink or stove.

    Roman shades adapt beautifully to traditional and transitional kitchens, and a bold pattern can even push them into eclectic territory. Speaking of patterns, let’s look at how prints can transform a plain window.

    3. Bold Printed Valances for a Pop of Personality

    Multi-Colored Valances - 16 Colorful Valance Ideas to Try Today
    Credit:indigoandluxe

    A valance is a short curtain that hangs across the top of your window, usually paired with blinds or left on its own if privacy isn’t a big concern. It’s a small piece of fabric that makes a big visual difference.

    Go bold here. A busy floral, a geometric print, or even a fun fruit pattern (think lemons or cherries) can turn a plain window into a focal point. Keep the rest of your kitchen decor simple so the valance doesn’t compete with anything else.

    Tip: Use a swing-arm rod so you can angle the valance out of the way when you’re deep cleaning the window.

    Valances work in almost any style, but they’re especially fun in retro or coastal kitchens.

    Fabric Comparison for Kitchen Window Treatments

    Fabric TypeMoisture ResistanceBest UseAverage Cost (per panel)
    CottonMediumCafé curtains, valances$15-30
    LinenLowLight-filtering panels$25-50
    Polyester BlendHighRoman shades, roller shades$20-40
    Vinyl-Coated FabricVery HighGrease-prone areas near stove$30-55
    Faux SilkLowFormal dining nook windows$35-60

    Now that you’ve got a feel for fabric choices, let’s move into something a little more structured.

    4. Wood Blinds for a Warm, Natural Look

    Warm Oak & Tan Faux Wood Blind - 50mm Slat
    Credit: blinds2go

    Wood blinds bring texture and warmth that fabric just can’t match. They’re sturdy, they last a long time, and they give you full control over light and privacy with a simple tilt of the wand.

    Stick with a lighter wood tone if your kitchen leans modern or Scandinavian. Darker stained wood pairs nicely with traditional cabinetry. Keep the slats around two inches wide for the best light control without blocking your view outside.

    Tip: Wipe wood blinds with a dry cloth weekly since moisture can warp real wood over time.

    If you’re worried about humidity near your sink, faux wood blinds mimic the look but resist warping. This brings us to another practical option that’s great for renters.

    5. Faux Wood Blinds for Budget-Friendly Durability

    Faux Wood Blinds
    Credit: enlightenedstyle

    Faux wood blinds look almost identical to real wood but they’re made from a composite material that shrugs off moisture and heat. This makes them a smart pick for kitchens where steam is a regular thing.

    They come in white, cream, and wood-tone finishes, so they fit almost any color scheme. Because they’re heavier than real wood, they hang nice and flat too.

    Actionable tip: Choose a cordless version if you have little kids running around your kitchen for safety reasons.

    Faux wood blinds fit modern, farmhouse, and even industrial kitchens without any trouble. Now let’s talk about a treatment that plays well with tricky window shapes.

    6. Roller Shades for a Clean, Minimal Look

    Minimalist Window Treatments: Tips & Ideas | The Shade Store
    Credit: The Shade Store

    Roller shades are about as simple as it gets. One flat piece of fabric rolls up and down on a tube, giving your kitchen a streamlined, uncluttered look. I like these for small windows above sinks where bulky curtains would just get in the way.

    Solid colors keep things minimal, but you can also find printed or textured roller shades if you want a little more personality. Choose a light-filtering fabric if you still want daylight during the day.

    Tip: Add a decorative pull like a wood or leather tassel to dress up an otherwise plain shade.

    Roller shades are a natural fit for modern and minimalist kitchens, though a fun print can work in an eclectic space too. Let’s shift gears now to something with a softer touch.

    7. Sheer Curtains for Soft, Filtered Light

    Soft Light Curtains for Bedroom & Living Room | DWCN Home – DWCN Official
    Credit: DWCN Official

    Sheer curtains let light pour in while still softening the view from outside. They’re not great for full privacy, but if your kitchen window faces a backyard or a quiet side yard, sheers can be all you need.

    White or off-white sheers keep things bright and airy. Pair them with a simple rod pocket top for an easy hang. Because sheers are lightweight, they’re also easy to wash by hand or on a gentle cycle.

    Tip: Layer sheers behind a café curtain for both privacy and soft light control.

    This combo works especially well in coastal and cottage-style kitchens where a breezy, light feel is the whole point. Next, let’s cover a treatment that’s perfect for renters who can’t drill holes.

    8. Tension Rod Curtains for Renters and Quick Fixes

    Curtains for Renters: Stylish No-Drill Ideas – NICETOWN
    Credit: Nicetown

    Tension rods wedge into your window frame without any hardware, which makes them perfect if you’re renting or just don’t want to commit to drilling holes. You can hang almost any lightweight curtain panel on one.

    Measure your window opening carefully so the rod fits snugly without slipping. A simple cotton panel in a solid color or subtle print works great here.

    Tip: Add rubber grips or a small piece of felt at each end of the rod so it doesn’t scratch your window frame.

    This approach works in literally any kitchen style since it’s more about function than looks. From temporary fixes, let’s move to something more permanent and architectural.

    9. Plantation Shutters for a Timeless, Built-In Look

    Living Room Shutters | Plantation Shutters for Lounges
    Credit: The Shutter Store

    Plantation shutters are wide-slat wooden or vinyl panels that mount directly into your window frame. They give a kitchen a polished, almost custom-built look, and they last for years without needing to be replaced.

    White or cream shutters brighten a kitchen instantly. If you’ve got dark cabinets, a matching stained wood shutter can look really striking too.

    Tip: Choose vinyl shutters over real wood if your kitchen window sits directly above the sink, since vinyl won’t warp from splashes.

    Plantation shutters fit traditional, coastal, and farmhouse kitchens especially well. Now let’s talk about layering treatments for even more control.

    10. Layered Curtains and Blinds for Maximum Control

    Layering Curtains Over Blinds: 7 Designer Combos That Actua…
    Credit: Blinds Concept

    Sometimes one treatment just isn’t enough. Layering a curtain panel over blinds gives you the best of both worlds: precise light control from the blinds and softness from the fabric.

    Pick a neutral blind as your base, then add a curtain in a color that matches your kitchen’s accent tones. This combo also helps insulate the window a bit during colder months.

    Tip: Mount your curtain rod higher than the window frame to make the ceiling feel taller.

    This layered approach works in nearly every design style, from traditional to modern farmhouse. Let’s look at another practical, unexpected option next.

    11. Frosted or Textured Window Film for Privacy Without Fabric

    5 Tasteful Bathroom Window Film Styles That Work
    Credit: Window Film Depot

    If your kitchen window looks straight into a neighbor’s yard, window film might be your answer. It’s a static-cling or adhesive film that frosts the glass, blocking the view while still letting light through.

    This option skips fabric altogether, which means zero grease absorption and zero washing. Choose a subtle geometric or textured pattern if you want something more decorative than plain frosted glass.

    Tip: Order a trim-to-fit roll so you can customize it to oddly shaped kitchen windows.

    Window film works great in modern and minimalist kitchens where clean lines matter most. Now, for something a little more decorative, let’s talk about valance alternatives.

    12. Bamboo or Woven Wood Shades for Texture

    Bamboo Shades vs Woven Wood Shades | Key Differences
    Credit: Blinds Chalet

    Woven wood shades bring in natural texture without feeling heavy or formal. They’re made from bamboo, jute, or reed, and they roll up or fold similarly to Roman shades.

    These work especially well in kitchens that already lean toward natural materials, like wood countertops or rattan light fixtures. Light filtering versions let in a warm, dappled glow.

    Tip: Add a blackout liner if your kitchen window faces direct afternoon sun and things get too bright to see your stove clock.

    Woven wood shades are a staple in coastal, boho, and organic modern kitchens. Let’s check out a size and budget breakdown before moving to the last few ideas.

    Budget Tiers for Kitchen Window Treatments

    Budget LevelTreatment TypePrice RangeBest For
    LowTension rod curtains, roller shades$10-40Renters, quick updates
    MidRoman shades, faux wood blinds$40-100Most homeowners
    HighReal wood blinds, plantation shutters$100-300+Long-term investment
    CustomMade-to-measure shutters or shades$300-600+Odd-shaped or oversized windows

    With budgets in mind, let’s finish strong with a few more creative ideas.

    13. No-Sew Fabric Panels for a Custom Look on a Budget

    Quick & Easy DIY No-Sew Drapery Panels {designer look for less!} | The Happy Housie
    Credit: thehappyhousie

    If sewing isn’t your thing but you still want a custom fabric look, no-sew panels are a lifesaver. You can use fabric tape or fusible hem tape to create clean edges without ever touching a needle.

    Pick a mid-weight cotton so the fabric hangs nicely without curling at the edges. This is a great weekend project if you want something unique without a big price tag.

    Tip: Iron your fabric before hemming so the fusible tape adheres evenly.

    This DIY approach fits almost any style since you’re choosing the fabric yourself, from bold prints for eclectic kitchens to solid neutrals for modern ones. Next, let’s look at a treatment that’s great for kitchens with a view worth keeping.

    14. Top-Down Bottom-Up Cellular Shades for Flexible Privacy

    Motorized Top Down Bottom Up Cellular Shades | Blackout – Yoolax
    Credit: Yoolax

    These shades can be pulled up from the bottom or down from the top, giving you total control over privacy and light. You can block the lower half of the window for privacy while still letting light in from the top, which is perfect for kitchen windows facing a street or driveway.

    Light-filtering fabric is the most popular choice for kitchens since it keeps things bright without an overly stark, blackout feel. Cellular shades also add a bit of insulation, which helps in kitchens near drafty windows.

    Tip: Go cordless for a cleaner look and safer operation around kids and pets.

    This treatment works especially well in modern and transitional kitchens where flexibility matters most. For our final idea, let’s talk about something a little unexpected.

    15. Stained Glass Panels for a Statement Window

    Modern Geometric Arched Stained Glass Window – Custom Architectural Statement Panel – Contemporary Entry or Hallway Feature W-134 - Terraza Stained Glass
    Credit; terrazastainedglass

    Stained glass panels are a splurge, but they turn a plain kitchen window into an art piece. You can find pre-made panels online in various patterns, or commission a custom one if you’ve got a specific vision.

    These work best on windows that don’t need full privacy control, like a window over a sink facing a backyard. Choose colors that echo your kitchen’s backsplash or cabinet hardware for a cohesive feel.

    Tip: Hang the panel a few inches away from the actual window glass so air can circulate and prevent condensation buildup.

    Stained glass fits vintage, cottage, and eclectic kitchens beautifully, adding color and charm without needing any fabric at all.

    Tips for Success

    • Always measure your window twice before ordering any treatment, since kitchen windows are often oddly sized compared to other rooms.
    • Choose washable or wipeable materials near the stove and sink to save yourself future headaches.
    • Match your treatment’s color to one existing element in the kitchen, like cabinet hardware or a backsplash tile, so it feels intentional.
    • Consider cordless options if you have kids or pets running through the kitchen often.
    • Don’t be afraid to mix treatments, like pairing a valance with blinds, for more layered style.
    • Test a fabric swatch near your stove for a week to see how it holds up to grease and steam before committing.
    • Leave a little breathing room between the treatment and any heat source to avoid scorching or melting.

    Common Mistakes and How to Avoid Them

    Buying curtains that are too short
    : Kitchen curtains should either hit right at the sill or stop a few inches below it. Anything awkwardly in between looks unfinished.

    Ignoring moisture resistance
    : Pick materials rated for humidity if your window is close to the sink or stove, otherwise you’ll deal with mildew or warping sooner than you’d like.

    Choosing dark, heavy fabric for a small kitchen
    : This can make the room feel cramped. Stick with lighter colors or sheers if your kitchen is on the smaller side.

    Overlooking hardware finish
    : A cheap-looking rod can undercut an otherwise nice curtain. Match your rod finish to your cabinet hardware or faucet for a pulled-together look.

    Skipping the trim-to-fit step on window film
    : Applying film without trimming it first often leads to bubbling or a sloppy edge. Always measure and cut carefully.

    Forgetting about cleaning access
    : Some treatments make it hard to actually open and clean the window. Choose designs that can be pushed aside or lifted fully out of the way.

    Similar Variations

    • Farmhouse Kitchen Curtains – Simple cotton panels, often with subtle stripes or checks, paired with rustic wood hardware.
    • Coastal Kitchen Shades – Light, breezy fabrics in white, blue, or sandy tones, often woven wood or sheer linen.
    • Industrial Kitchen Blinds – Metal or matte black hardware paired with minimal roller shades for a clean, urban feel.
    • Boho Kitchen Window Layers – Mixed textures like macrame trim, woven wood shades, and warm earthy curtain colors.
    • Traditional Kitchen Shutters – Classic plantation shutters in white or cream, often paired with formal drapery panels.
    • Scandinavian Kitchen Roller Shades – Neutral, light-filtering fabric with clean lines and minimal hardware.

    Picking the right window treatment really comes down to knowing your kitchen’s daily habits, how much light you want, and how much privacy you actually need. Once you match those needs to a material that can handle steam, splashes, and grease, the style part becomes the fun bit. I hope this list gave you a clearer picture of what’s out there, because there’s truly something for every kitchen among these 15 kitchen window treatments.

  • 15 Kitchen Gallery Wall Ideas That Turn Blank Space Into Your Favorite Room Feature

    15 Kitchen Gallery Wall Ideas That Turn Blank Space Into Your Favorite Room Feature

    I’ve helped so many friends figure out their kitchen walls that I decided to put everything I know into one place, and this guide on 15 kitchen gallery wall ideas is the most complete breakdown you’ll find. I’m not going to give you vague tips and leave you guessing. You’re getting real layouts, real numbers, and real advice that actually works in a kitchen.

    A kitchen gallery wall is a curated group of framed art, photos, or objects arranged together on one wall in a kitchen space. It typically mixes sizes, frames, and subjects like botanical prints, family photos, or vintage kitchen tools to create a personal, layered look.

    Stick around, because I’m about to walk you through fifteen specific ideas, plus the mistakes that trip up almost everyone who tries this.

    What Exactly Is a Kitchen Gallery Wall, Anyway?

    Okay so here’s the thing. A gallery wall isn’t just “some frames on a wall.” It’s a whole little art collection, hung together like a story. In a kitchen, this usually means smaller pieces, because let’s be honest, kitchen walls are cut up by cabinets, windows, and appliances. You’re working with awkward strips of space, not one giant blank canvas.

    I love kitchen gallery walls because they turn a purely functional room into something that feels like you. Your dining room can have a big statement painting. Your kitchen gets to have personality in small doses, spread across a dozen little frames. That’s the charm of it.

    1. Mix Vintage Cookware With Framed Prints

    Vintage Pyrex Painting - Etsy
    Credit: Etsy

    Grab a few old wooden spoons, a rustic sieve, or a small copper pot and hang them right alongside your framed art. This creates texture and tells a story about how you actually use your kitchen, not just how it looks in photos.

    The trick is balance. Don’t let the cookware overpower the frames. Aim for about 70% art and 30% objects.

    Practical tip: use small nails or picture hooks rated for at least 10 pounds so heavier pans don’t rip out of the drywall later.

    This idea works beautifully in farmhouse and rustic kitchens, but you can tone it down for modern spaces by choosing sleek stainless tools instead of rusty vintage ones.

    Next up, let’s talk about color, because that’s where a lot of gallery walls go wrong.

    2. Stick to a Three-Color Palette

    Three-Colour Combinations for Any Room
    Credit: Birla Opus

    One of the fastest ways to make a gallery wall look messy is using too many colors. I always tell people to pick three colors max and repeat them across every frame, mat, and piece of art.

    This doesn’t mean everything matches perfectly. It means there’s a thread tying it all together, so your eye doesn’t bounce around confused.

    Practical tip: pull your three colors from something already in the kitchen, like your backsplash tile or cabinet hardware.

    Traditional kitchens tend to lean toward warm neutrals and gold accents, while coastal kitchens do well with navy, white, and sandy beige.

    Color Palette Combinations for Kitchen Gallery Walls

    Kitchen StylePrimary ColorSecondary ColorAccent Color
    FarmhouseCreamSage GreenBlack
    CoastalWhiteNavy BlueSandy Tan
    ModernWhiteCharcoal GrayBrass
    TraditionalWarm BeigeDeep RedGold
    ScandinavianOff-WhiteLight GrayMuted Blush

    Once your colors are locked in, the next step is figuring out how big your actual wall space really is.

    3. Measure Your Wall Before You Buy a Single Frame

    Frame Size Guide: How to Choose the Right Size
    Credit: About wall Art

    I know this sounds boring, but skipping this step is the number one reason gallery walls fail. Kitchens have weird wall shapes because of windows, cabinets, and doorways. You need actual measurements before you fall in love with frames online.

    Grab painter’s tape and outline your available space directly on the wall. This gives you a visual “box” to work inside.

    Practical tip: leave at least 3 inches of breathing room between your gallery wall and any cabinet edge or window frame so it doesn’t feel cramped.

    Small galley kitchens might only fit a 2×3 foot cluster, while open-concept kitchens can handle a much bigger spread, sometimes 6 feet wide or more.

    Now that you know your space, let’s talk frames themselves.

    4. Combine Different Frame Finishes on Purpose

    Mix and Match: How to Create a Stunning Gallery Wall with Mismatched Frames
    Credit: Home Knot

    A lot of people think every frame needs to match. Honestly, mismatched frames look more interesting and less like a furniture store display. Mixing black, wood, and brass frames together adds depth.

    The key is consistency in style, not color. If you’re doing thin modern frames, keep them thin throughout. Don’t throw in one chunky ornate frame unless it’s your intentional statement piece.

    Practical tip: buy 2 or 3 frames in each finish so no single color feels random or out of place.

    This mixed-frame approach fits modern farmhouse and eclectic kitchens especially well, while traditional kitchens often look better with matching frame families in gold or dark wood.

    Speaking of layout, let’s get into actual arrangement styles next.

    5. Try the Grid Layout for a Clean, Organized Look

    How To Make Your Home Look Better in 10 Minutes or Less | Apartment Therapy
    Credit: Apartment Therapy

    If you like things neat and orderly, a grid layout is your best friend. This means every frame is the same size, spaced evenly, in perfect rows and columns.

    Grids work really well above a small breakfast nook or beside a pantry door where space is narrow and tall.

    Practical tip: keep spacing between frames consistent at 2 to 3 inches, no more, no less. Uneven spacing ruins the clean grid effect instantly.

    Modern and minimalist kitchens love this layout because it feels intentional and calm. Traditional kitchens can use it too, just with ornate frames instead of simple ones.

    But if grids feel too stiff for your taste, there’s a looser option coming up next.

    6. Go Salon-Style With an Organic Cluster

    bright green walls and organic shapes form 'space age' style hair salon in beijing
    Credit: Designboom

    Salon-style walls are the opposite of grids. Frames of all shapes and sizes get grouped together in a loose, flowing cluster that fills odd-shaped wall space really well.

    This style is forgiving. You don’t need perfect measurements, just a good eye and patience.

    Practical tip: lay your frames out on the floor first, arrange them until it feels balanced, then trace and transfer that layout to the wall using paper templates.

    Coastal, bohemian, and eclectic kitchens shine with this loose style, since it feels relaxed and collected over time rather than store-bought.

    Now let’s talk about what actually goes inside those frames.

    7. Feature Botanical and Herb Prints

    Herb Wall Art - Etsy UK
    Credit: Etsy

    Kitchens are all about food and growth, so botanical prints just make sense here. Think simple line drawings of herbs, fruit illustrations, or pressed leaf art.

    These prints add color without being loud, and they tie into the “kitchen garden” feeling a lot of people want.

    Practical tip: choose prints with white or cream backgrounds so they don’t compete visually with busy tile or wallpaper.

    This idea flexes easily. Farmhouse kitchens like watercolor herb prints, while modern kitchens prefer bold graphic botanical shapes in black and white.

    Let’s move from plants to something even more personal now.

    8. Add Real Family Photos in Black and White

    26 Family Picture Wall Ideas You'll Want to Try at Home
    Credit: The Spruce

    Color photos can clash with your kitchen palette fast. Converting family photos to black and white instantly makes them blend into almost any gallery wall style.

    This adds warmth and personality that printed art alone can’t give you.

    Practical tip: use a consistent frame color for all photos, even if sizes vary, so the photo section reads as one connected group.

    Traditional and farmhouse kitchens especially benefit from this nostalgic touch, though modern kitchens can pull it off too with thin black frames and lots of white matting.

    Next, let’s bring in something with actual dimension.

    9. Hang a Few Woven or Wooden Wall Objects

    What is a Woven Wall Hanging and how is it made? | Revolution Fibers
    Credit: revolutionfibers

    Not everything needs to be flat. Small woven baskets, wooden cutting boards, or a mini wall-mounted plate rack add texture and a three-dimensional feel among your flat frames.

    This breaks up the monotony of “frame, frame, frame” and gives your eye something new to land on.

    Practical tip: hang dimensional objects at eye level or slightly above, since they carry more visual weight than flat art.

    This works great in farmhouse, coastal, and boho kitchens. Modern kitchens can use one sleek wooden object as a minimalist accent instead of several.

    Budget Tiers for a 15-Piece Kitchen Gallery Wall

    Budget LevelFrame SourceArt SourceEstimated Total Cost
    LowDollar store, thrift shopsFree printables, old photos$30–$60
    MidBig box retailer framesEtsy prints, small local art$100–$180
    HighCustom framing shopOriginal art, signed prints$300–$600+

    With your budget in mind, let’s talk about a smart way to save money and still look polished.

    10. Use Matching Mats for a Pulled-Together Look

    Best Ways to Coordinate Two Rugs in One Room - Expert Tips – The Rugs
    Credit: The Rugs

    If your frames are all different sizes and colors, matching mats inside each frame can create instant unity. A white or cream mat around every piece makes the whole wall feel curated, even if the art itself is totally random.

    This trick is a designer secret because it’s cheap and incredibly effective.

    Practical tip: buy pre-cut mats in bulk from a craft store rather than paying for custom cuts at a frame shop.

    Every kitchen style benefits from this one, honestly. It’s basically a universal fix for a messy-looking wall.

    Now let’s think vertically instead of just horizontally.

    11. Build a Narrow Vertical Strip Between Cabinets

    Vertical Panelling: The Coolest Take From Country Kitchens | Houzz AU
    Credit: Houzz

    Kitchens often have those skinny leftover wall strips between the fridge and a cabinet, or beside a window. Instead of ignoring that space, stack 3 to 5 small frames vertically in a single column.

    This turns dead space into a feature instead of an afterthought.

    Practical tip: keep vertical strip frames under 8 inches wide so they don’t feel squeezed into the space.

    Narrow vertical galleries work in literally every kitchen style since they’re more about smart space use than a specific aesthetic.

    Let’s zoom out now and talk about a totally different approach using shelves instead of nails.

    12. Install Floating Ledge Shelves Instead of Hanging Everything

    Modern DIY Floating Shelves
    Credit: Woodshop Diaries

    If you hate committing to nail holes, floating shelves let you lean framed art against the wall instead. You can rearrange whenever you want, which is huge if your taste changes often.

    Shelves also let you layer pieces in front of each other for extra depth.

    Practical tip: install shelves at slightly staggered heights, about 10 to 12 inches apart, rather than one straight line, for a more dynamic display.

    Modern and Scandinavian kitchens especially love this flexible, low-commitment option.

    Let’s talk next about tying your gallery wall into your kitchen’s function, not just its looks.

    13. Include a Small Chalkboard or Cork Board Piece

    24" x 24" Modern Chalkboard | Small Chalkboards For Sale – Corkboard.com
    Credit: Corkboard

    A gallery wall doesn’t have to be 100% decorative. Adding one small chalkboard for grocery lists or a cork board for recipe cards makes the space functional too.

    This little touch keeps the wall from feeling like a museum and more like a living part of your kitchen routine.

    Practical tip: keep the functional piece the same size as your smallest frame so it blends in rather than sticking out.

    Farmhouse and cottage-style kitchens love this practical charm, while modern kitchens might swap the chalkboard for a sleek magnetic memo board instead.

    14. Anchor the Wall With One Larger Statement Piece

    If you've been looking for one piece to anchor a room — this is it. A large-scale wall hanging — built thread by thread. A statement piece, without being loud. Made to
    Credit: Instagram

    Even in a gallery wall full of small frames, one bigger piece in the center or off to one side gives the eye a place to rest. Without it, a wall of all-small frames can start to feel busy and unfocused.

    This anchor piece could be a larger print, a mirror, or even a small piece of furniture like a wall-mounted shelf.

    Practical tip: your anchor piece should be roughly 2 to 3 times larger than your average small frame for the scale to feel right.

    Eclectic and traditional kitchens especially benefit from this focal point trick, since it keeps busier layouts from feeling chaotic.

    15. Leave Room to Grow Your Collection Over Time

    Living Room Decor Ideas: 6 steps for an ideal living space
    Credit: Velux

    The best kitchen gallery walls aren’t finished in one weekend. Leave a little extra blank space when you first hang everything, so you can add pieces as you find them at flea markets, on trips, or as gifts.

    This keeps the wall feeling alive instead of static and store-bought.

    Practical tip: start with about 80% of your planned frames, leaving room for 2 to 3 more pieces to be added later.

    This slow-build approach fits every style, but it feels especially natural in boho, farmhouse, and eclectic kitchens where a collected-over-time look is part of the charm.

    Tips for Success

    • Always dry-fit your layout using paper cutouts taped to the wall before hammering a single nail
    • Use picture hanging strips instead of nails if you’re renting or unsure about final placement
    • Photograph your layout from a distance before committing, since phone photos reveal spacing issues your eyes might miss
    • Keep your largest frame no more than one-third the width of your total wall space
    • Clean glass and frames every few weeks since kitchens collect grease and dust faster than other rooms
    • Light your gallery wall with a small picture light or nearby under-cabinet lighting so it doesn’t disappear at night
    • Step back every few frames while hanging to check balance, rather than hanging everything before evaluating

    Common Mistakes and How to Avoid Them

    Hanging everything too high
    : Kitchen gallery walls should sit lower than living room art, usually with the center around 57 to 60 inches from the floor, since you’re often viewing it while seated or standing close.

    Using frames that aren’t kitchen-safe
    : Regular paper art can warp from grease and humidity. Choose frames with sealed glass or acrylic fronts to protect the art inside.

    Ignoring the surrounding cabinet colors
    : A gallery wall that clashes with cabinet or backsplash tones will always look off. Pull at least one color from your existing kitchen into the wall.

    Overcrowding without any negative space
    : Packing frames edge to edge overwhelms the eye. Leave consistent gaps, generally 2 to 3 inches, so the wall can breathe.

    Forgetting wall material before drilling
    : Tile backsplashes and brick walls need different anchors than drywall. Check your wall type before buying hanging hardware.

    Choosing all one size frame
    : This looks flat and boring fast. Mix at least three different frame sizes for visual interest.

    Similar Variations

    • Hallway Gallery Wall – the same layered frame concept, but stretched down a long, narrow hallway space
    • Staircase Gallery Wall – frames arranged in a rising diagonal line that follows the slope of your stairs
    • Bedroom Headboard Gallery Wall – a softer, more personal version centered above the bed instead of kitchen counters
    • Bookshelf Gallery Wall – frames leaned and layered among books and small objects on open shelving
    • Single-Color Gallery Wall – every frame and mat in one consistent color family for a bold, unified statement

    Building a gallery wall in your kitchen really comes down to planning, patience, and picking pieces that actually mean something to you. Start small, measure twice, and let the wall grow naturally over time instead of forcing it to look perfect on day one. Whatever style you land on, a well planned 15 kitchen gallery wall can turn one of the most overlooked spots in your home into the wall everyone stops to look at.

  • 12 Kitchen Window Ideas That’ll Change How You See Your Sink

    12 Kitchen Window Ideas That’ll Change How You See Your Sink

    I’ve spent way too many hours staring out my kitchen window while washing dishes, and that’s exactly why I put together these 12 kitchen window ideas that actually work in real homes, not just magazine spreads. This isn’t a quick Pinterest scroll list either. I dug into what actually holds up over time, what fits different budgets, and what won’t leave you regretting your choice six months later.

    What are the best kitchen window ideas? The best kitchen window ideas balance natural light, function, and style. Popular options include open shelving instead of curtains, café-style shutters, garden windows for herbs, bold color trim, and swapping standard glass for a bay or picture window to widen your view and brighten the room.

    Stick around though, because I’m going to walk you through specific window treatments, layout swaps, and small tweaks that make a bigger difference than you’d think. Some of these cost almost nothing. Others are weekend projects. A few might make you want to call a contractor.

    Why Your Kitchen Window Matters More Than You Think

    Here’s the thing nobody tells you: your kitchen window is basically the face of the room. It’s where the light comes in, where you probably stand the most (hello, dishwashing duty), and it sets the tone for everything else in the space. A dark, cluttered window makes the whole kitchen feel smaller and gloomier. A well-planned one? It can make a tiny galley kitchen feel twice as open.

    I’ve noticed most people either over-decorate their kitchen window with heavy curtains that block light, or they ignore it completely and slap up some plain blinds. Neither approach does the window justice. The ideas below split the difference between pretty and practical.

    1. Skip Curtains and Go With Café-Style Shutters

    16 Kitchen Curtain Ideas That'll Add Immediate Charm to Your Space
    credit: ELLE Decor

    Café shutters cover just the bottom half of your window. That means you keep privacy where you need it but still get sunlight pouring in through the top. I love these because they don’t collect grease and steam the way fabric curtains do, which is a real problem in kitchens.

    They work with wood, vinyl, or painted finishes, so you can match your cabinet color or go for contrast with a crisp white against darker walls.

    Practical tip: Choose PVC shutters if your window sits close to the stove. They wipe clean in seconds and won’t warp from heat.

    This style fits farmhouse and cottage kitchens best, but a matte black version also works surprisingly well in modern spaces. Now let’s talk about what happens when you ditch window coverings altogether.

    2. Ditch Coverings Entirely for a Clean, Open Look

    How to Ditch the Drapes and Let Your Windows Shine
    Credit: Houzz

    Some windows don’t need anything on them at all. If your kitchen window doesn’t face a street or nosy neighbor, going bare can make the whole room feel airier. No fabric, no shutters, just glass and a view.

    This works especially well over a sink where you want an unobstructed sightline to your backyard or garden. Pair it with a simple wood or stone windowsill to keep the look intentional rather than unfinished.

    Practical tip: Add a thin strip of trim paint in a contrasting color to frame the window nicely even without curtains.

    Coastal and Scandinavian-style kitchens practically demand this bare-window approach, since both styles lean on natural light as a design feature. Speaking of using the space smart, let’s look at turning that windowsill into something useful.

    3. Turn the Windowsill Into a Mini Herb Garden

    Windowsill Herb Garden – The Artful Roost
    Credit: The Artful Roost

    This one’s a favorite of mine because it’s both decorative and genuinely useful. A row of small pots with basil, thyme, or mint sitting right on your windowsill gives you fresh herbs at arm’s reach and adds a pop of green that most kitchens lack.

    Pick pots that match your kitchen’s color palette. Terracotta feels rustic, white ceramic feels modern, and galvanized metal leans industrial.

    Practical tip: Make sure your window gets at least four hours of direct sunlight, or your herbs will struggle no matter how cute the pots are.

    Traditional and farmhouse kitchens especially benefit from this since it reinforces that lived-in, homey feel. If your sill is too narrow for pots, a garden window might solve that problem entirely.

    4. Install a Garden Window for Extra Growing Space

    Installing a Garden Window - Extreme How To
    Credit: Extreme How To

    A garden window bumps out from your wall, creating a mini greenhouse shelf with glass on three sides. It’s a bigger investment, but it solves the “not enough sill space” problem completely and floods your kitchen with light from multiple angles.

    These work great over sinks since you’re already standing there daily and can keep an eye on your plants. You get shelves for pots, extra natural light, and a little architectural interest on the outside of your house too.

    Practical tip: Budget for professional installation. This isn’t a DIY swap since it involves cutting into your existing wall structure.

    Garden windows suit traditional, cottage, and farmhouse homes best, though I’ve seen sleek versions in modern builds too. Next, let’s talk about color, because paint changes everything.

    Window Treatment Comparison by Budget

    Treatment TypeAverage CostLight ControlMaintenanceBest For
    Café shutters$80-200HighLowFarmhouse, cottage
    Bare window$0-50NoneVery lowCoastal, modern
    Roman shades$40-150MediumMediumTraditional, transitional
    Garden window$800-2500HighMediumTraditional, farmhouse
    Bay window$1500-4000HighMediumAny style
    Frosted film$20-60MediumLowModern, minimalist

    5. Paint the Window Trim a Bold Contrasting Color

    The Correct Trim Color Can Totally Transform Your Home. Here's How to Get It Right
    Credit: Elle Decor

    If your walls are white or neutral, painting your window trim a bold color instantly makes the window a focal point. Navy, forest green, or even black trim against white walls looks sharp and intentional.

    This costs almost nothing compared to replacing the window itself, and you can do it in an afternoon.

    Practical tip: Use a semi-gloss or satin finish paint since it holds up better against humidity and grease than flat paint.

    Modern and transitional kitchens look fantastic with this trick, and it also works in traditional spaces if you pick a color that complements existing wood tones. Once your trim looks sharp, you might want to rethink the glass itself.

    6. Use Frosted or Textured Glass for Privacy Without Blocking Light

    Frosted Glass Film for Bathrooms | Privacy Window Film Guide – Creative Windows
    Credit: Creative Windows

    If your kitchen window faces a neighbor’s wall or a busy sidewalk, frosted glass solves the privacy issue without forcing you to hang heavy curtains. You still get natural light streaming through, just diffused a bit.

    This works especially well in city apartments or homes with tight lot lines.

    Practical tip: You can buy frosted window film for under $30 and apply it yourself in about 15 minutes, no permanent glass replacement needed.

    Modern and minimalist kitchens benefit most from this clean, glare-free light. Traditional homes can use frosted glass with a decorative pattern etched in for a more classic look. Now, let’s expand the window itself.

    7. Widen Your View With a Bay Window Over the Sink

    Bay window above sink - yay or nay? | Houzz Forum
    Credit: Houzz

    A bay window juts outward and usually includes three panels instead of one flat pane. This gives you a much wider view and way more natural light than a standard window.

    It also creates a little extra counter or seating space depending on how deep the bump-out is.

    Practical tip: If you’re not ready for a full bay window install, ask a contractor about a smaller “bow window” version, which costs less but gives a similar wide-view effect.

    This idea shines in traditional and farmhouse kitchens, though modern builds sometimes use a flat-paneled version for a more geometric look. Let’s talk about what goes above the window next.

    8. Add a Wood Valance Instead of Curtains

    How to Make Your Own Wood Window Valence with Curtains
    Credit: abbikirstencollections

    A wood valance is basically a decorative header that sits above your window. It adds warmth and texture without blocking any light or requiring fabric maintenance.

    You can stain it to match your cabinets or paint it to match your trim color.

    Practical tip: Keep the valance depth under 6 inches so it doesn’t feel bulky or cast unwanted shadows on your countertop.

    Farmhouse and rustic kitchens love this detail, but a slim, painted valance also works in transitional spaces. Speaking of texture, let’s talk about open shelving near the window.

    9. Build Open Shelves Around the Window Frame

    A Symmetrical Bookshelf Designed To Fill The Wall Around A Window Completes One End Of This Home Office
    Credit: Contemporist

    Instead of cabinets crowding your window, open shelves on either side keep things airy while giving you storage for dishes, glasses, or plants. This works particularly well in smaller kitchens where every inch of wall space matters.

    Wood shelves add warmth, while floating metal or glass shelves feel more modern.

    Practical tip: Keep shelf depth around 8-10 inches so items don’t block window light.

    Coastal and Scandinavian kitchens practically define themselves by this open, breezy shelf-and-window combo. Once you’ve got shelving sorted, think about what’s sitting right below the glass.

    Popular Color Pairings for Window Trim and Walls

    Wall ColorTrim ColorOverall Style Vibe
    WhiteNavy blueCoastal, classic
    Sage greenCream whiteCottage, farmhouse
    Charcoal grayBlackModern, industrial
    Soft beigeForest greenTraditional, cozy
    Pale blueWarm whiteScandinavian, airy

    10. Install a Deep Windowsill for Extra Counter Space

    6 Best Windowsill Shelf Ideas - How to Enlarge a Windowsill | Apartment Therapy
    Credit: apartment Therapy

    If your kitchen is tight on prep room, a deeper windowsill can double as a mini counter. Stone or butcher block sills add durability and a bit of visual weight to an otherwise plain window frame.

    This works great for setting down a cutting board, a coffee mug, or a stack of mail temporarily.

    Practical tip: Seal wood sills with a food-safe finish if you plan to use the space for actual food prep.

    Farmhouse and traditional kitchens use this trick often, though a concrete or quartz sill fits right into a modern design too. Next up, let’s think vertically instead of horizontally.

    11. Hang a Pot Rack Near the Window for Function and Style

    The Pot Storage in This Kitchen Is So Unexpected and Clever | Apartment Therapy
    Credit: Apartment Therapy

    If your window sits above your stove or a prep area, a hanging pot rack nearby keeps cookware within reach without cluttering cabinets. It also draws the eye upward, making the ceiling feel higher.

    Choose matte black or brushed brass depending on your kitchen’s hardware finish.

    Practical tip: Keep the rack at least 12 inches to the side of the window frame so it doesn’t block natural light from hitting your sink area.

    Industrial and farmhouse kitchens use this look most often, though a slim brass version can work in a more polished traditional space too. Last but not least, let’s talk about window seats.

    12. Build a Small Bench Seat Below a Larger Window

    Build a Bay Window Bench With Storage for Your Home | Lowe's
    Credit: Lowe’s

    If your kitchen window is wide enough, a built-in bench seat underneath turns it into a cozy little nook. Add a cushion and a couple of throw pillows, and suddenly you’ve got a spot for morning coffee or quick homework help.

    This works best in eat-in kitchens or breakfast nooks with a bit of extra floor space.

    Practical tip: Build storage into the bench base if you can. Hinged tops give you extra space for linens or pantry overflow.

    Cottage and farmhouse kitchens use this constantly, but a streamlined bench with hidden storage fits modern homes just as well. With all these ideas on the table, here’s how to actually pull off the one that fits your space.

    Tips for Success

    • Measure your window’s sun exposure before committing to plants or fabric treatments, since too much direct light can fade curtains fast
    • Choose easy-to-clean materials near the stove, since grease and steam build up faster than you’d expect
    • Match your window trim color to at least one other element in the room, like your faucet or cabinet hardware
    • Don’t skip the caulking step if you’re adding a garden window or bay window, gaps lead to drafts and higher energy bills
    • Test paint colors on your actual trim before committing, since lighting changes how a color looks throughout the day
    • Keep window treatments at least 4 inches away from any heat source like a stove or oven vent
    • Ask about tempered glass options if your window sits low near a countertop, it’s safer if something ever cracks

    Common Mistakes and How to Avoid Them

    Overcrowding the sill with too many decorative items
    : Keep it to 3-5 objects max so the window still feels open and light can pass through freely.

    Choosing fabric curtains for a window near the stove
    : Swap to shutters, frosted film, or a bare window instead since fabric absorbs grease and odors quickly.

    Ignoring the window’s sun direction before planting herbs
    : Check if your window faces south or west for the most reliable sunlight, then choose plants that match that light level.

    Picking a bay or garden window without checking structural support
    : Always consult a contractor first, since these installs often require adjustments to wall framing.

    Painting trim without priming over old wood or metal
    : Use a bonding primer first so the paint doesn’t peel or chip within the first year.

    Skipping window treatments entirely in a high-privacy-need home
    : Consider frosted film or café shutters as a middle ground that still lets light in.

    Similar Variations

    • Cottage Kitchen Windows – Smaller panes, floral curtains, and lots of greenery on the sill for a soft, homey feel
    • Industrial Kitchen Windows – Black steel frames, exposed brick surrounds, and minimal window coverings
    • Coastal Kitchen Windows – Sheer white curtains, weathered wood sills, and views that lean into natural light
    • Scandinavian Kitchen Windows – Bare glass, pale wood trim, and a focus on maximizing daylight hours
    • Rustic Farmhouse Windows – Wood valances, deep sills, and warm color trim like sage or terracotta

    I’ve walked you through a lot of ground here, from cheap paint swaps to bigger structural changes like garden and bay windows. The truth is, you don’t need to do all twelve at once. Pick one or two that fit your budget and your kitchen’s natural light, and build from there. Whether you’re after a quick weekend refresh or planning a bigger renovation, these 12 kitchen window ideas give you a solid starting point to make that window work as hard as the rest of your kitchen does.

  • 15 Kitchen Island Ideas That Will Change How You Cook and Gather

    15 Kitchen Island Ideas That Will Change How You Cook and Gather

    If you’ve been scrolling through photos trying to picture what might work in your own kitchen, this list of 15 kitchen island ideas is going to save you a ton of guesswork. I’ve pulled together the most practical, good-looking options out there, and I’ll walk you through exactly how each one works.

    A kitchen island is a standalone counter or cabinet unit placed in the middle of a kitchen. It adds prep space, storage, and often seating, and it works in almost any kitchen size or style when planned correctly.

    Stick around, because I’m also going to show you the mistakes people make when picking an island, plus some size and budget numbers you’ll actually find useful.

    What Makes a Kitchen Island Work So Well

    I’ll be honest, a kitchen island isn’t just a trend. It’s basically the command center of the whole room. You cook there, you eat there, your kids do homework there, and somehow it becomes the place everyone gathers during a party even when there’s a perfectly good living room ten feet away. That’s the magic of it. A good island mixes function with style, giving you extra counter space and storage while also becoming a visual anchor for the whole kitchen. Once you start looking at island ideas, you’ll notice they range from tiny rolling carts to massive stone slabs with seating for six. There’s a fit for every home, budget, and cooking style, and that’s exactly what we’re getting into.

    1. Waterfall Quartz Countertop Island

    These Gorgeous Waterfall Countertops Redefine Luxury
    Credit: Elledecor

    A waterfall countertop is when the stone slab wraps down the sides of the island instead of stopping at the edge. It gives a smooth, seamless look that instantly feels high-end. Quartz works great here because it resists stains and doesn’t need sealing like natural stone does.

    Pick a light gray or warm white quartz if you want the island to feel bright and open. Darker veined stone gives a bolder, more dramatic statement.

    Tip: Ask your fabricator for a mitered edge so the seam is nearly invisible.

    This style fits modern and contemporary kitchens best, though a soft-veined quartz can also soften a transitional space.

    Next up is a look that plays with contrast instead of seamless flow.

    2. Two-Toned Cabinet Island

    Two-Toned Kitchen Cabinets: Endless Combinations - Bertch Cabinet, LLC
    Credit: Bertch

    Painting your island a different color than your surrounding cabinets makes it pop without a full remodel. Navy blue, forest green, and matte black are popular choices against white or light wood cabinetry.

    This is one of the cheapest ways to update a kitchen. You’re just repainting one section instead of everything.

    Tip: Stick to one accent color max. Two contrasting colors on top of your existing cabinets can look busy fast.

    Coastal kitchens love soft blues here, while farmhouse styles lean toward sage green or black.

    Color contrast is fun, but sometimes the material itself can do all the talking.

    3. Butcher Block Wood Top Island

    50 Wonderful Wood-Topped Kitchen Islands
    Credit: Houzz

    A butcher block top brings warmth into a kitchen that might feel too cold or clinical otherwise. It’s real wood, usually maple or walnut, sealed for durability, and it’s fantastic for actual food prep since you can chop right on it.

    Pair it with white or cream cabinets for a farmhouse feel, or dark cabinets for a more rustic, cabin-style look.

    Tip: Reseal the wood every 6 to 12 months with food-safe mineral oil to keep it from drying out or cracking.

    This works beautifully in farmhouse, cottage, and traditional kitchens.

    Speaking of size and budget, let’s compare a few island types so you can see where your project might land.

    Kitchen Island Size and Budget Comparison

    Island TypeTypical SizeSeating CapacityEstimated Cost Range
    Rolling cart island24″ x 18″None$150 – $600
    Standard fixed island6ft x 3ft2-3 people$2,000 – $6,000
    Waterfall stone island7ft x 4ft3-4 people$5,000 – $12,000
    Multi-level island8ft x 4ft4-6 people$6,500 – $15,000

    4. Island with Built-In Seating Bench

    10 Kitchen Islands That Feature Banquette Seating
    Credit: Houzz

    Instead of stools, some islands have a bench built right into one end. It’s a comfy option for families with little kids who might not sit steady on a stool.

    Add cushions in a durable fabric like performance velvet or outdoor-grade canvas so spills wipe off easy.

    Tip: Keep the bench height a few inches lower than the counter for comfortable knee clearance.

    This idea shines in family-style traditional or cottage kitchens where comfort matters more than sleek lines.

    If built-in seating feels too permanent, a smaller movable option might be the better fit.

    5. Rolling Kitchen Cart as a Mini Island

    DIY Upcycled Beverage Cart Design Inspiration | Reinvented Delaware
    Credit: Reinventeddelaware

    Not every kitchen has room for a full island, and that’s fine. A rolling cart gives you extra counter space and storage that you can push out of the way when you need floor room.

    Look for one with a butcher block or marble top and a lower shelf or drawer for kitchen tools.

    Tip: Measure your walking path before buying. You want at least 36 inches of clearance around it when it’s parked.

    This works in nearly every style, but a metal-frame cart looks especially sharp in industrial or modern farmhouse kitchens.

    Now let’s talk about what hangs above the island, because lighting changes everything.

    6. Pendant Light Trio Above the Island

    3 Pendant Lights Over Island: Perfect Balance of Style and Function
    Credit: Vietshopdesign

    Three matching pendant lights spaced evenly over an island create a clean, intentional look. It’s one of the easiest upgrades that makes a huge visual difference.

    Choose glass globes for a modern feel, woven rattan shades for coastal or boho spaces, or bronze and black metal fixtures for traditional kitchens.

    Tip: Hang pendants 30 to 36 inches above the counter surface for the right proportion.

    Adjust the finish and shape of the pendants to match your kitchen’s overall style, and the whole room ties together instantly.

    Lighting sets the mood, but what’s under those lights matters just as much.

    7. Open Shelving Instead of Lower Cabinets

    Open Shelving vs. Cabinets: Which Is Better? - Laurysen Kitchen Design
    Credit: laurysenkitchens

    Swapping solid cabinet doors for open shelves on one side of the island gives you a spot to display dishes, cookbooks, or woven baskets. It also breaks up a big block of cabinetry so the island feels lighter.

    Keep the shelf styling simple. Stack a few bowls, add a plant, done. Overloading the shelves makes the kitchen look cluttered instead of curated.

    Tip: Paint the inside of the shelving a contrasting color to make displayed items pop.

    This idea fits coastal, farmhouse, and Scandinavian kitchens especially well since those styles love a lived-in, open feel.

    Material Comparison for Island Countertops

    MaterialDurabilityMaintenance LevelPrice per Sq Ft
    QuartzVery highLow$50 – $100
    GraniteHighMedium (needs sealing)$40 – $90
    Butcher block woodMediumHigh (needs oiling)$35 – $70
    MarbleMediumHigh (stains easily)$60 – $120
    LaminateLow-mediumLow$15 – $40

    With materials sorted out, let’s look at a feature that changes how the island functions day to day.

    8. Island with a Prep Sink

    5 Reasons to Love Kitchen Prep Sinks - Native Trails
    Credit: Nativetrailshome

    Adding a second, smaller sink to your island means you can wash veggies or fill a pot without crowding the main sink. It’s a genuinely useful upgrade if more than one person cooks at a time.

    Pick a compact stainless or fireclay sink so it doesn’t eat up too much counter space.

    Tip: Plan plumbing early in your renovation since running new lines to the island can get pricey if it’s an afterthought.

    This feature works in any style kitchen, but it’s especially popular in larger modern and transitional homes where entertaining happens often.

    If plumbing feels like too much of a project, a simpler shape change might scratch that upgrade itch.

    9. Curved or Rounded Island Edge

    Corner Renovation
    Credit: Cornerrenovation

    A curved island softens the whole room. Sharp corners can be tough on hips and toddlers alike, so rounding one or two edges makes the space feel friendlier and more open.

    This works especially well in smaller kitchens since curves help traffic flow around the island more naturally.

    Tip: Curved cabinetry costs more to build, so budget an extra 15 to 20 percent over a standard rectangular island.

    Modern and Mediterranean-style kitchens both lean into curves right now, giving the whole room a softer, sculptural feel.

    Now let’s go back to something a little more rugged and full of character.

    10. Reclaimed Wood Island for Farmhouse Style

    Rustic Kitchen Island with Seating and Storage - Rocky Hedge Farm
    Credit:Rockyhedgefarm

    Reclaimed wood brings texture and history into a kitchen. Every knot and nail hole tells a story, and no two islands look exactly alike.

    Pair it with iron hardware and a soapstone or butcher block top for an authentic farmhouse feel.

    Tip: Buy from a reputable reclaimed lumber supplier who kiln-dries the wood, which kills pests and stabilizes the moisture content.

    This idea is basically made for farmhouse and rustic cabin kitchens, though a single reclaimed wood island can also warm up an otherwise sleek modern space.

    Storage-wise, there’s one more upgrade worth considering if you love wine.

    11. Island with Built-In Wine Storage

    Wine Storage | Designer Kitchens | Harvey Jones
    Credit: Harveyjones

    A wine rack or small wine fridge built into the island side is a great use of otherwise wasted space. It keeps bottles handy for cooking or entertaining without cluttering your counters.

    Go with open horizontal racks for a casual look or a glass-front wine fridge for a more polished, built-in feel.

    Tip: Keep wine storage away from the dishwasher or oven side of the island since heat and vibration can affect the wine over time.

    This feature fits transitional and modern kitchens especially well, since it reads as a subtle luxury touch rather than a flashy one.

    Popular Island Color Palette Combinations

    Cabinet ColorIsland Accent ColorCountertop PairingStyle Vibe
    WhiteNavy blueWhite quartzCoastal, classic
    CreamSage greenButcher blockFarmhouse
    Light grayCharcoal blackGray veined marbleModern
    White oakTerracottaHoned graniteMediterranean
    Warm whiteBlackConcreteIndustrial

    Color pairing is one thing, but the overall shape of the island can also solve real layout problems.

    12. Matching Island and Backsplash Color

    75 Kitchen Backsplash Ideas That Will Cater to All Aesthetics
    Credit: Elle Decor

    Instead of contrasting colors, some kitchens tie the island color directly into the backsplash tile or paint. It creates a cohesive, calm feeling since your eye isn’t jumping between competing tones.

    Try a soft green island with matching green subway tile, or a warm terracotta island echoed in the backsplash grout color.

    Tip: Bring a paint swatch or tile sample to the countertop store so you can match tones under real lighting before committing.

    This works great in Mediterranean, coastal, and Scandinavian kitchens where a calm, unified palette is the whole point.

    Speaking of function, some islands do double duty by changing height across their surface.

    13. Multi-Level Island with Raised Bar Top

    10 split-level kitchen island ideas that are pretty and practical | Ideal  Home
    Credit: Ideal Home

    A multi-level island has a lower prep counter on one side and a raised bar-height counter on the other. It’s a smart way to hide kitchen mess from anyone sitting at the bar while cooking.

    Use a durable, easy-clean material like quartz on the prep side since that’s where the real work happens.

    Tip: Keep at least 24 inches of counter space per bar stool so guests aren’t bumping elbows.

    This layout is popular in modern and transitional kitchens where entertaining and cooking need to happen at the same time.

    The seating itself can also become a design statement on its own.

    14. Statement Barstools for Contrast

    Credit: @lush__interiors

    Sometimes the island stays simple and the stools do all the visual work. Think bold color, an interesting shape, or a mixed-material design like woven rattan seats with black metal legs.

    Choose stools that are slightly different from your dining chairs so the kitchen feels intentional, not matchy.

    Tip: Measure counter height first. Standard counters need 24 to 26 inch stools, while bar height needs 28 to 30 inch stools.

    This idea works in literally every style since stools are easy to swap out later if your taste changes.

    Last but not least, let’s talk about islands for kitchens that don’t have a ton of extra square footage.

    15. Compact Island for Small Kitchens

    35 Small Kitchen Island Ideas to Maximize Space
    Credit: House Beautiful

    You don’t need a huge kitchen to have an island. A slim island, sometimes just 24 inches wide, can still give you extra storage and a small prep zone without blocking traffic flow.

    Stick to lighter colors and open shelving underneath to keep the space feeling airy instead of cramped.

    Tip: Leave at least 42 inches of clearance on all sides so the kitchen still feels walkable.

    This idea is a lifesaver in small modern apartments, cottage kitchens, and older homes with tighter layouts.

    Tips for Success

    • Measure your kitchen’s total walkway space before choosing island size. You need at least 36 inches of clearance on every side.
    • Match your island’s material durability to how you actually cook. Heavy daily use needs quartz or granite, not soft marble.
    • Plan electrical and plumbing needs early if you want outlets, a sink, or a cooktop built into the island.
    • Choose lighting that matches the island’s function. Task lighting for prep zones, softer ambient light for seating areas.
    • Don’t skip storage planning. Deep drawers work better than cabinets for pots, pans, and small appliances.
    • Test stool height and spacing in person before buying, since online measurements can be misleading.
    • Keep the island’s style connected to the rest of the kitchen, even if the color or material contrasts.

    Common Mistakes and How to Avoid Them

    Choosing an island too big for the room
    : Measure your kitchen’s total footprint first, then leave at least 36 inches of clearance on all sides before finalizing island size.

    Ignoring workflow between the sink, stove, and island
    : Keep the classic kitchen work triangle in mind so you’re not walking in circles while cooking.

    Picking a material that doesn’t match your cooking habits
    : Choose durable, low-maintenance materials like quartz if you cook often, and save soft stone or unsealed wood for lighter use kitchens.

    Overcrowding the island with too many features
    : Pick one or two functions, like seating and storage, instead of cramming in a sink, wine fridge, and bar top all at once.

    Skipping proper lighting planning
    : Install pendant lights or overhead fixtures sized and spaced to the island’s length, not just centered without measuring.

    Forgetting outlet access for small appliances
    : Add outlets during the planning stage since retrofitting them later is far more expensive.

    Similar Variations

    • Peninsula Kitchen Layout: A connected counter extension instead of a freestanding island, great for smaller kitchens.
    • Butler’s Pantry Island: A secondary prep island tucked into an adjoining pantry space for extra storage.
    • Outdoor Kitchen Island: A weatherproof version built for patios and outdoor cooking setups.
    • Mobile Kitchen Cart: A lightweight, wheeled alternative that offers flexibility without permanent installation.
    • Farmhouse Harvest Table Island: A long wooden table style island that doubles as informal dining space.
    • Two-Island Kitchen: Larger kitchens sometimes split prep and seating functions across two separate islands.

    Picking the right island really comes down to how you live in your kitchen day to day, not just what looks good in photos. Whether you go bold with a waterfall quartz countertop or keep things simple with a rolling cart, the goal is the same: more function, more style, and a kitchen that actually works for your life. I hope these 15 Kitchen Island Ideas gave you a clear starting point for your own space.