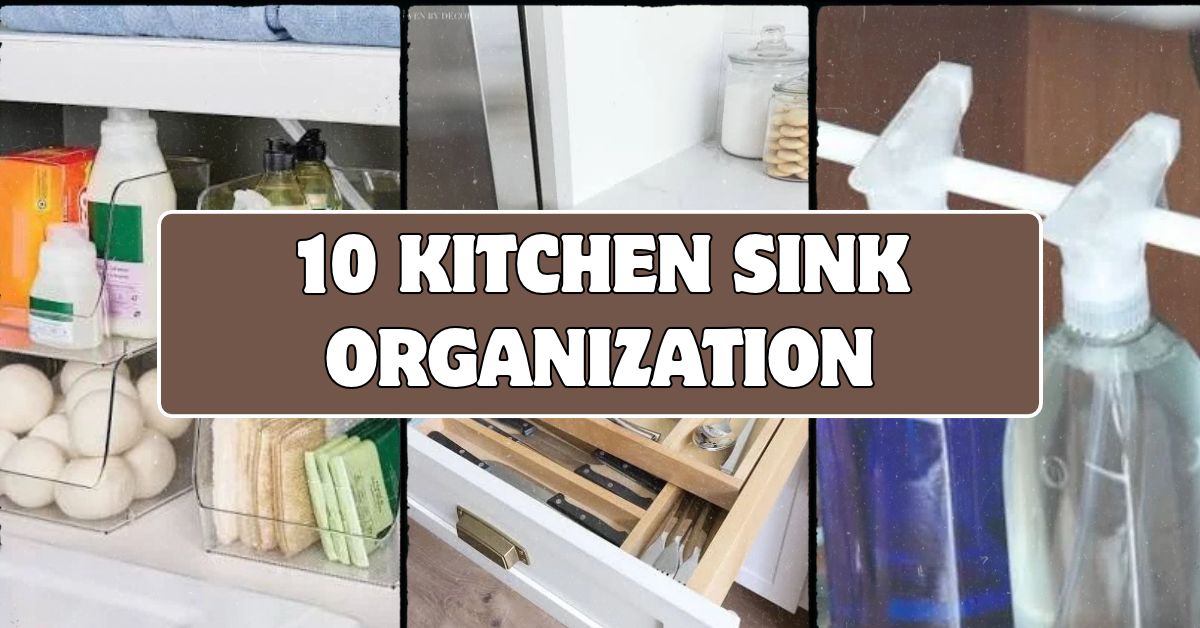
I’ve tried almost every kitchen sink organization hack out there, and I’m going to walk you through the ones that actually earned a permanent spot under my sink. If you’ve ever opened your under-sink cabinet and had a bottle of dish soap roll out and hit your foot, you’re in the right place. This isn’t theory. This is what works.
Kitchen sink organization refers to the systems and tools used to store cleaning supplies, sponges, trash bags, and other items in and around the sink area, typically inside the cabinet below it. The goal is to maximize limited space while keeping items accessible and dry.
Stick around, because I’m about to show you a dozen ways to turn that chaotic cabinet into something you’re actually proud to open.
What Kitchen Sink Organization Really Means
Okay, so before we jump into the ideas, let’s talk about what we’re actually solving here. The area under your sink is weird. It’s got pipes running through it, it’s usually damp, and it’s often the smallest cabinet in your whole kitchen. Yet somehow we expect it to hold dish soap, trash bags, cleaning sprays, sponges, and sometimes even small appliances.
Good organization here isn’t about buying the fanciest bins. It’s about working around the pipes, keeping moisture from ruining your stuff, and making things easy to grab without digging. Once you get that mindset, everything else clicks into place.
1. Install a Two-Tier Sliding Organizer
A sliding two-tier organizer is basically a game changer for pipe-heavy cabinets. It fits around the plumbing and gives you two levels instead of one flat wasted space. You slide it out, grab what you need, slide it back in.
Look for ones made of rust-resistant metal or heavy-duty plastic since moisture is always a factor under a sink. My tip: measure your cabinet width and pipe placement before buying, because a lot of these come in adjustable sizes but not all of them.
This works in almost any kitchen style. Farmhouse kitchens can go with a matte black wire version, while modern kitchens might prefer a sleek white-coated one.
Once your bottles have a home, it’s time to think about smaller loose items like sponges and scrub brushes.
2. Add a Tension Rod for Spray Bottles
This one costs like five dollars and it’s shockingly effective. You install a tension rod horizontally near the top of the cabinet, then hang your spray bottles by their trigger handles. It clears the floor of your cabinet completely for taller items below.
Actionable tip: use a rod with a rubberized grip so bottles don’t slide side to side every time you open the door.
This trick works in literally every home style because it’s invisible once bottles are hanging. Nobody sees the rod, they just see a tidy cabinet.
Now let’s talk about the sponge and scrubber situation, because that’s usually the messiest part.
3. Use a Suction Caddy for Sponges and Scrubbers
Wet sponges sitting in a pool of their own drippy mess is nobody’s favorite thing. A suction caddy sticks right to the inside wall of your sink cabinet or even on the sink basin itself, holding sponges up and letting them air dry.
Pick one with drainage holes so water doesn’t just collect in a mini puddle. Stainless steel versions blend into modern kitchens, while a simple white silicone one disappears in coastal or cottage-style spaces.
Once your sponges have a proper drying spot, you’ll notice your cabinet stays drier overall, which helps everything else last longer too.
4. Bring In Stackable Clear Bins
Clear bins are the unsung hero of under-sink storage. You can see exactly what’s inside without opening five containers to find the dish tabs. Stack them to use vertical space instead of letting items sprawl across the cabinet floor.
Group similar items together, cleaning sprays in one bin, extra sponges in another, dishwasher pods in a third. Label them if you want to go the extra mile.
This idea flexes easily. Farmhouse kitchens can use bins with wood-toned lids, while minimalist kitchens might stick to plain acrylic.
Let’s compare a few bin materials so you can pick what actually fits your situation.
Bin Material Comparison
| Material | Durability | Price Range | Best For |
|---|---|---|---|
| Clear Acrylic | High | $10-$25 | Long-term daily use |
| Plastic (BPA-free) | Medium | $5-$15 | Budget-friendly setups |
| Wire Mesh | Medium-High | $15-$30 | Better airflow, less moisture buildup |
| Bamboo/Wood-lined | Low-Medium | $20-$40 | Style-focused kitchens |
Once your bins are sorted, the next step is dealing with trash bags, because that’s a whole separate headache.
5. Store Trash Bags in a Tissue Box
This one sounds silly but trust me on it. Roll your trash bags and stuff them into an empty tissue box. Pull one out just like a tissue whenever you need it. No more digging through a tangled plastic bag pile.
Actionable tip: use a small label maker or marker to write the bag size on the box so you’re not guessing later.
This trick fits any style since the box is tucked away and nobody’s judging your tissue box choice. Traditional or modern, it doesn’t matter.
Now let’s zoom out a bit and think about the door itself, because that’s prime real estate most people ignore.
6. Add Over-the-Door Storage Racks
The back of your cabinet door is basically free square footage. Over-the-door racks hook right onto the door and hold spray bottles, gloves, scrub brushes, and small items you use daily.
Buy one with adjustable rack heights so you can fit taller items like glass cleaner bottles without cramming everything sideways.
Modern kitchens tend to like slim metal racks, while more traditional spaces might prefer a fabric pocket organizer that hides items from view when the door’s open.
Once your door space is working for you, let’s talk about keeping everything dry with a simple mat trick.
7. Line the Cabinet Floor With a Waterproof Mat
Sink cabinets deal with leaks, drips, and general dampness more than any other cabinet in your kitchen. A waterproof liner or rubber mat protects the wood underneath and makes cleanup way easier when something inevitably spills.
Buy a mat that’s cut-to-size or trimmable so it fits your exact cabinet floor without gaps. My tip: pick one with raised edges so water doesn’t run off onto your cabinet floor.
This works no matter your style since it’s completely hidden. Nobody’s cabinet floor is part of the design scheme.
With the base protected, let’s talk vertical space again, this time above the sink itself.
8. Mount a Small Shelf Above the Faucet
If you’ve got any wall space above your sink, a small floating shelf can hold soap dispensers, a small plant, or a cup for sponges. It keeps countertop clutter down and gives your eyes something nice to look at while you’re doing dishes.
Go with a shelf that matches your cabinet hardware finish for a cohesive look. Farmhouse kitchens might use a reclaimed wood shelf, while modern kitchens could go with a floating glass one.
Actionable tip: keep it to two or three items max so it doesn’t turn into another cluttered surface.
Speaking of countertop clutter, let’s tackle the sink caddy situation next.
9. Use a Sink-Side Caddy for Daily Essentials
A sink-side caddy sits right next to your basin and holds the stuff you use constantly, dish soap, a scrub brush, maybe hand soap. It keeps these items from cluttering your counter while still being an arm’s length away.
Pick a caddy with a drainage tray underneath so water doesn’t pool and stain your countertop. Stainless steel caddies look great in modern and industrial kitchens, while a woven rattan caddy fits coastal or boho spaces nicely.
This is one of those small changes that makes a huge visual difference almost instantly.
Let’s move from daily-use items to the stuff you only need occasionally.
10. Create a Rotating Lazy Susan for Back-of-Cabinet Items
The back corners of a sink cabinet are basically the Bermuda Triangle of your kitchen. Stuff goes in and never comes back out. A lazy Susan turntable solves this by letting you spin items forward instead of reaching into a black hole.
Get one with a raised edge so bottles don’t slide off when you spin it. This works especially well for extra cleaning supplies you don’t use daily, like specialty stain removers or extra dish tabs.
This idea works in any kitchen because it’s fully hidden inside the cabinet. Nobody sees it but you’ll feel the difference every time you reach for something in the back.
Now let’s talk budget, because not every solution needs to cost the same amount.
Budget Tiers for Sink Organization
| Budget Tier | Price Range | What You Get |
|---|---|---|
| Starter | $0-$15 | Tension rod, tissue box hack, dollar store bins |
| Mid-Range | $15-$40 | Sliding organizer, suction caddy, over-door rack |
| Upgrade | $40-$80 | Lazy Susan, waterproof mat, floating shelf |
| Full Overhaul | $80-$150 | All of the above combined into one system |
With budget out of the way, let’s cover two more ideas that round out a complete system.
Tips for Success
- Measure your cabinet depth, width, and pipe placement before buying any organizer.
- Group items by how often you use them, daily stuff up front, rare stuff in back.
- Choose rust-resistant or waterproof materials since this area deals with moisture constantly.
- Reassess your setup every few months since habits and product collections change.
- Keep a small trash bin or bag inside the cabinet for expired products so cleanup is easy.
- Don’t overfill bins, leave a little breathing room so items are easy to lift out.
- Use vertical space before you use floor space, it’s almost always underused.
Common Mistakes and How to Avoid Them
Overpacking the cabinet
: Fix this by removing duplicate products and only keeping one backup of each item.
Ignoring pipe placement when buying organizers
: Fix this by measuring around pipes first, then shopping for adjustable or modular units.
Storing chemicals in unlabeled containers
: Fix this by always keeping original labels or writing contents clearly on any container you transfer product into.
Letting sponges sit in standing water
: Fix this by using a caddy or holder with proper drainage instead of setting sponges flat on a surface.
Skipping a cabinet liner
: Fix this by adding a waterproof mat early on, before any leaks cause real damage to your cabinet wood.
Forgetting to check expiration dates on cleaning products
: Fix this by doing a quick sweep every few months and tossing anything old or separated.
Similar Variations
- Pantry Zone Organization: Applying the same bin and label system to pantry shelves for grouped food storage.
- Bathroom Cabinet Organization: Using tension rods and caddies under bathroom sinks for similar plumbing challenges.
- Garage Cleaning Station Setup: Extending sink-side caddy ideas to garage utility sinks for tools and solvents.
- Laundry Room Sink Organization: Adapting stackable bins and shelves for detergent and stain-remover storage near laundry sinks.
- Mudroom Utility Organization: Borrowing over-door racks and lazy Susans for shoe cleaning supplies and outdoor gear.
Getting your cabinet in order doesn’t take a full weekend or a ton of money. Most of these ideas cost less than a takeout dinner and take twenty minutes to set up. Start with one or two that solve your biggest headache, then build from there.
At the end of the day, a tidy cabinet just makes everything easier, less digging, less frustration, more time doing actual dishes instead of hunting for the dish soap. That’s really what good 10 kitchen sink organization is all about.
Leave a Reply