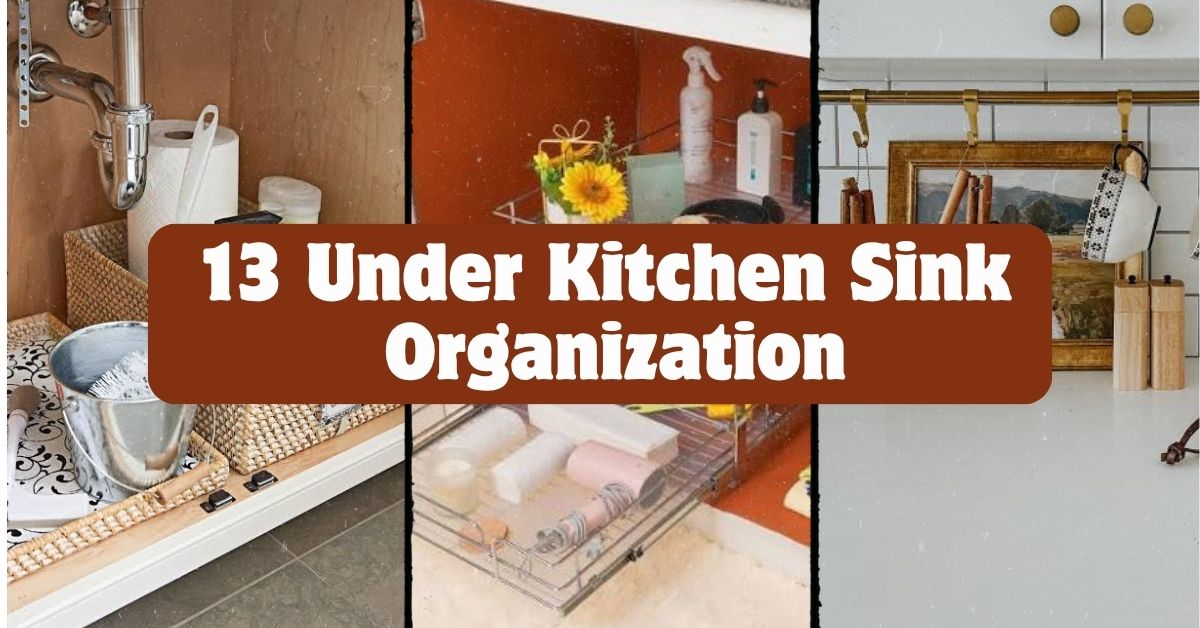
If you’ve ever yanked open your cabinet doors looking for dish soap and nearly gotten hit in the face with a tumbling bottle of drain cleaner, you need these 13 under kitchen sink organization ideas. I’ve tested a bunch of these myself, and I’m sharing the ones that actually hold up over time, not just the pretty ones that fall apart after a week.
Under kitchen sink organization refers to the methods and products used to store cleaning supplies, trash bags, and tools in the cabinet beneath a kitchen sink. Common solutions include tiered shelves, pull-out drawers, tension rods, and labeled bins that work around plumbing pipes.
Stick around, because I’m going to walk you through every trick I know, plus a few mistakes that cost me time and money so you don’t have to repeat them.
What Makes Under Sink Storage So Tricky
Here’s the thing nobody tells you: the space under your sink is basically a weird obstacle course. You’ve got pipes running through the middle, a garbage disposal hogging one side, and sometimes a water filter system taking up the other corner. It’s not a clean rectangle like your other cabinets.
That’s why regular shelves or bins usually don’t cut it. You need stuff made to work around plumbing, not against it. Once I understood that, everything clicked. I stopped trying to force big storage bins in there and started thinking in layers, zones, and flexible pieces instead. That mindset shift is really the whole secret.
1. Install a Two-Tier Sliding Shelf
A two-tier sliding shelf is probably the single best upgrade you can make under your sink. These shelves pull out like a drawer, so you’re not on your knees digging through the back row anymore. Most versions adjust in width, which helps them fit around pipes without a fight.
Pick a shelf with a rust-resistant coating since moisture down there is common. A tip that saved me: measure the width at the narrowest point of your cabinet, not the widest, before you buy anything.
This idea works in almost any kitchen style. Farmhouse kitchens can go with a raw metal finish, while modern kitchens might prefer a sleek matte black version.
Once your shelf is in, you’ll want something to keep loose items from tipping over on it, which brings us to bins.
2. Use Clear Bins to Group Cleaning Supplies
Clear bins are a game changer because you can see what’s inside without opening every single one. Group items by task like “dish stuff,” “surface cleaners,” and “trash supplies.” This keeps you from buying triple the sponges because you forgot you already had some.
Actionable tip: use bins with handles so you can lift the whole group out at once instead of digging around.
Color-wise, clear plastic works with literally every kitchen style since it’s basically invisible. If you want more personality, swatch in some woven baskets instead for a coastal or farmhouse look.
Now that your supplies are grouped, let’s talk about keeping your trash bags from becoming a tangled mess.
3. Mount a Trash Bag Dispenser Inside the Door
Nothing is more annoying than digging through a drawer for a trash bag that’s stuck to twenty other bags. A simple dispenser mounted on the inside of your cabinet door solves this instantly. Just tuck a roll of bags in, thread one end through the opening, and pull as needed.
I like adhesive-mounted dispensers because they don’t require drilling. If you rent your place, this is a big deal.
This trick fits any style since it’s hidden behind a closed door. Nobody sees it but you, so function wins over form here every time.
Speaking of doors, let’s put that empty space to even better use.
4. Add a Door-Mounted Rack for Sprays and Gloves
The back of your cabinet door is wasted space if you’re not using it. A wire or fabric rack mounted there can hold spray bottles, rubber gloves, and scrub brushes upright and out of the way.
Actionable tip: measure your door’s depth before buying a rack, since a rack that’s too deep will hit your pipes or bins when you close the door.
Traditional kitchens tend to like wire racks with a slight vintage look, while modern kitchens often go for smooth white or black plastic versions. Either way, this move frees up a surprising amount of floor space below.
Once the door space is handled, it’s time to tackle the pipes themselves.
5. Use a Pipe-Friendly Caddy System
Regular bins often don’t fit around plumbing, but pipe-friendly caddies are built with cutouts or adjustable panels specifically for this problem. They basically wrap around the pipe instead of forcing you to work around it.
This is one of those under kitchen sink organization ideas that feels like a small thing but honestly changes everything. You get back nearly all the space that pipes used to eat up.
Modern farmhouse kitchens tend to like these in a warm wood-tone finish, while industrial kitchens do well with raw steel versions.
Now let’s compare a few storage options so you can see what fits your setup and budget.
Under Sink Storage Options Compared
| Storage Type | Best For | Average Price | Fits Around Pipes? |
|---|---|---|---|
| Two-Tier Sliding Shelf | Deep cabinets | $25–$45 | Yes, adjustable width |
| Clear Stackable Bins | Grouping supplies | $10–$20 each | Sometimes, depends on size |
| Pipe-Friendly Caddy | Cabinets with center pipes | $20–$35 | Yes, built for it |
| Door-Mounted Rack | Extra vertical space | $12–$25 | N/A (mounts on door) |
| Tension Rod Divider | Flat items like trays | $8–$15 | Yes, mounts above pipes |
6. Add a Tension Rod for Flat Item Storage
A tension rod is a cheap little trick that a lot of people overlook. Install one horizontally a few inches above your cabinet floor, and you’ve got a spot to slide in cutting boards, baking sheets, or spray bottles standing upright.
This works especially well in narrow cabinets where bins don’t fit well. Actionable tip: use rubber-gripped tension rods so they don’t slip when you’re sliding items in and out.
This idea is basically invisible once installed, so it works with any kitchen style, from coastal blue cabinets to sleek matte gray ones.
Next, let’s talk about a common problem: forgetting what you already own.
7. Label Everything with Waterproof Tags
Labels sound basic, but they make a real difference. Waterproof tags on bins and bottles mean you’re not guessing what’s inside, especially with cleaning products that come in similar-looking containers.
I like using a simple label maker with clear waterproof tape. It holds up fine even with occasional splashes from the sink above.
Farmhouse kitchens often go with handwritten chalkboard-style labels for a warm, personal touch. Modern kitchens might prefer minimalist printed white labels instead.
Once everything is labeled, you’ll want a system for the small stuff, which is where turntables come in handy.
8. Use a Lazy Susan for Bottles and Sprays
A turntable, also called a lazy susan, works great in the corners of your under-sink cabinet where reaching is hardest. Instead of leaning in and shuffling bottles around, you just spin it to grab what you need.
Actionable tip: pick a turntable with a raised lip edge so bottles don’t slide off when you spin it too fast.
This works in basically any kitchen since it’s a functional piece hidden from view. It’s especially helpful in small galley kitchens where cabinet depth is limited.
Now, let’s think about moisture control, because that’s a problem many people forget about entirely.
9. Add a Moisture-Absorbing Tray or Liner
Under sink cabinets deal with humidity, occasional leaks, and condensation. A moisture-absorbing liner or tray at the bottom of the cabinet protects your cabinet floor from water damage and mildew.
I personally use a rubber tray with raised edges, since it catches small drips before they spread. Actionable tip: check and replace liners every few months, especially in humid climates.
This isn’t really a style choice so much as a protective layer, but you can find liners in wood-look or patterned designs if you want it to look a little nicer when the cabinet’s open.
Once your cabinet floor is protected, let’s talk about vertical space again with hooks.
10. Install Small Hooks for Hanging Tools
Hooks are super underrated. Stick a few adhesive or screw-in hooks on the cabinet walls to hang small scrub brushes, dust pans, or even small spray bottles by their trigger handles.
Actionable tip: use hooks with a weight limit label so you don’t overload them and have them pop off the wall.
Coastal and cottage-style kitchens often like woven rope hooks, while modern kitchens tend to go with slim metal ones. Either way, hooks free up shelf and floor space fast.
Speaking of freeing up space, let’s look at stackable drawer organizers next.
11. Add Stackable Drawer Organizers for Small Items
Small items like sponges, extra gloves, and scrub pads tend to get lost in a big empty cabinet. Stackable drawer organizers, even simple plastic ones, create mini sections so everything has its own spot.
I like organizers with adjustable dividers since they flex as your supplies change over time. Actionable tip: measure twice before buying, since under-sink depth varies a lot between kitchens.
This idea works in any style since organizers are usually tucked out of sight. It’s especially helpful in small apartment kitchens where every inch counts.
Now let’s talk about something people rarely think about: expiration dates.
12. Rotate and Purge Expired Products Regularly
This isn’t a product you buy, it’s a habit you build. Cleaning products and even some kitchen tools have shelf lives. Old bleach loses effectiveness. Expired sprays can even smell weird or separate.
Actionable tip: set a reminder every three months to do a quick sweep and toss anything old or unused.
This habit fits every kitchen style because it’s about maintenance, not decor. Still, it’s one of the most overlooked under kitchen sink organization ideas out there.
Last but not least, let’s talk about a solution for renters and small spaces alike.
13. Use a Portable Caddy for Easy Access Cleaning Supplies
A portable caddy with a handle holds your most-used cleaning items so you can carry them around the house instead of making multiple trips back to the kitchen. Keep it under the sink when not in use, and grab it whenever it’s cleaning day.
Actionable tip: pick a caddy that’s slightly smaller than your cabinet opening so it slides in and out smoothly.
This works great in any kitchen style and is especially handy in multi-story homes. It’s a small trick that saves a surprising amount of time each week.
Tips for Success
- Measure your cabinet space, including pipe locations, before buying any organizer.
- Group items by how often you use them, keeping daily items toward the front.
- Choose water-resistant materials since under-sink cabinets deal with moisture regularly.
- Do a supply check every few months to toss expired or unused products.
- Use vertical space with hooks and door racks before adding more floor bins.
- Keep heavy items on lower shelves and lighter items on adjustable tiers above.
- Test drawer slides and turntables in the store if possible, since cheap ones can jam quickly.
Common Mistakes and How to Avoid Them
Buying bins before measuring the cabinet
Always measure width, depth, and pipe placement first, then shop for organizers that fit those exact numbers.
Stacking heavy bottles on flimsy shelves
Choose shelves rated for the weight of full cleaning bottles, usually at least 15 to 20 pounds per tier.
Ignoring moisture damage until it’s serious
Add a rubber or silicone liner early, and check it regularly instead of waiting for a leak to cause damage.
Storing chemicals next to food storage bags
Keep cleaning chemicals in a separate zone or bin, away from anything food-related, to avoid cross-contamination.
Overpacking the cabinet with too many bins
Stick to a few well-planned zones instead of cramming in every organizer you can find.
Forgetting to label containers
Use waterproof labels so you’re not guessing what’s inside similar-looking bottles or bins.
Similar Variations
- Under Bathroom Sink Organization – similar tiered shelves and bins, adapted for smaller cabinets and beauty products.
- Pantry Zone Organization – grouping food items by category using bins and labels, much like under-sink zones.
- Garage Cleaning Station Setup – portable caddies and hooks used for lawn and car care supplies instead of kitchen items.
- Laundry Room Cabinet Organization – tiered shelving and moisture liners adapted for detergent and dryer sheets.
- Small Apartment Kitchen Storage – stackable organizers and door racks scaled down for tighter cabinet spaces.
Getting your cabinet in order doesn’t take a fancy renovation or a big budget. It just takes a little planning, the right bins, and a habit of checking in every few months. Once you try even a few of these 13 under kitchen sink organization ideas, you’ll wonder why you put up with the mess for so long.
Leave a Reply